
The Art of the Evening: Backyard Fire Pit Designs We Love
There is something inherently primal and deeply comforting about the flicker of an open flame as the sun dips below the horizon. It’s that magical hour when the air turns crisp, the cicadas begin their rhythmic song, and the stresses of the day seem to evaporate into the rising woodsmoke. For me, the backyard fire pit isn’t just a home improvement project; it’s a dedicated space for connection, a sanctuary where stories are shared over the crackle of cedar and the sweet aroma of roasting marshmallows.
In this guide, we are exploring the art of the evening—transforming your outdoor space into a destination that rivals any five-star resort. Whether you have a sprawling estate or a tiny urban patch of grass, there is a design here that will call you outside night after night. Let’s dive into the textures, the light, and the structural secrets that make these fire pit designs truly unforgettable.
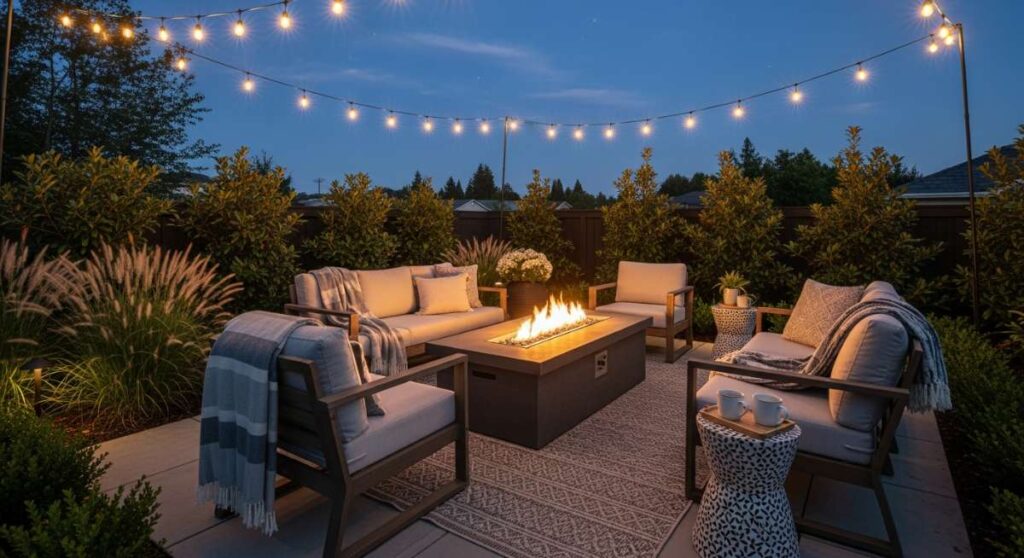
How to Create a Cozy Fire Pit Sanctuary for Endless Summer Evenings
Why we love this
This sanctuary design is all about the embrace of softness against the rugged elements of the outdoors. We love the way it blends the tactile crunch of pea gravel underfoot with the plush, weather-resistant textiles that invite you to sink in and stay a while. The air here smells of lavender planted nearby and the deep, resinous scent of pine logs. It feels like a secret garden hidden away from the world, where the golden glow of the fire reflects off glass lanterns, creating a warm, amber cocoon that makes every summer night feel like it could last forever.
Essential Elements:
- Sunken pea gravel foundation for drainage and texture.
- Weatherproof floor pillows and thick-knit outdoor throws.
- Low-profile metal fire bowl for 360-degree heat.
- Perimeter string lighting on dimmers.
- Potted aromatic herbs like rosemary and lavender.
How to make it
- Begin by marking a circular area at least 10 feet in diameter to ensure safety and movement; use a stake and string to trace a perfect radius.
- Excavate the soil to a depth of 4 inches, ensuring the base is compacted and slightly sloped away from any structures to prevent water pooling.
- Lay down a heavy-duty weed barrier fabric, securing it with landscape staples to keep the area maintenance-free.
- Fill the excavated area with 3 inches of washed pea gravel; use a garden rake to level the surface until it feels firm and even under your weight.
- Place your fire bowl in the center, ensuring it sits on a heat-resistant paver or stone if the bowl doesn’t have elevated legs.
- Arrange your seating in a circular formation, leaving at least 3 feet of clearance between the chairs and the fire source for safety.
- Incorporate soft elements: layer outdoor rugs over the gravel for a ‘living room’ feel, and add lanterns of varying heights to the perimeter for layered lighting.
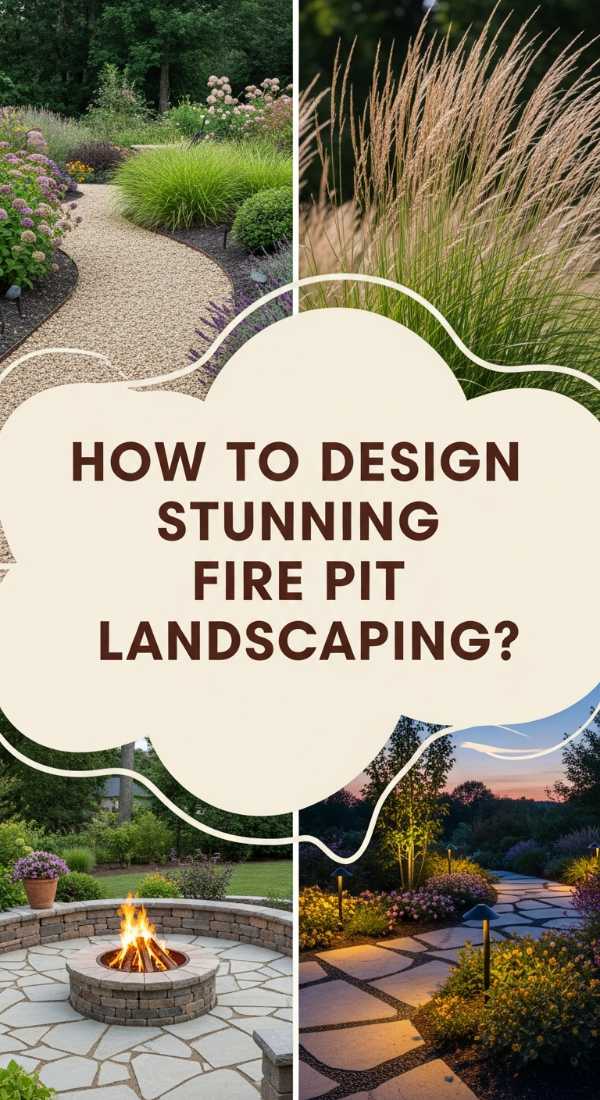
How to Design Stunning Fire Pit Landscaping for an Elegant Garden Oasis
Why we love this
There is a sophisticated elegance in a fire pit that feels like it grew out of the earth itself. We adore the contrast between structured masonry and the wild, flowing movement of ornamental grasses that catch the evening breeze. The scent of damp earth and blooming jasmine fills the air as the fire provides a flickering spotlight on the textures of limestone and slate. It’s a sensory masterpiece where the heat of the flames is balanced by the cool, refreshing greenery surrounding you, making your backyard feel like a curated botanical retreat.
Essential Elements:
- Built-in stone fire pit with matching masonry.
- Curated plant palette including Miscanthus and Boxwoods.
- Flagstone paving with creeping thyme in the joints.
- Uplighting on specimen trees to create depth.
- Hidden drainage system to protect root zones.
How to make it
- Consult a landscape plan to identify ‘zones’; place the fire pit at a natural focal point where the sightlines from the house are most dramatic.
- Install a flagstone patio base using a 2-inch bed of sand over 4 inches of crushed stone, fitting the stones like a puzzle for a high-end look.
- Construct the fire pit using kiln-fired bricks for the interior liner to withstand high heat, and veneer the exterior with natural fieldstone.
- Plant tall, airy grasses like ‘Karl Foerster’ around the back half of the seating area to create a sense of enclosure without blocking the view.
- Install low-voltage LED uplights behind the plantings to create a silhouette effect when the fire is low.
- Mulch all surrounding garden beds with dark hemlock or cedar mulch to provide a clean, professional finish that retains moisture for the plants.
- Test the ‘flow’ of the space by walking through the garden paths leading to the pit, ensuring there are no trip hazards or narrow bottlenecks.
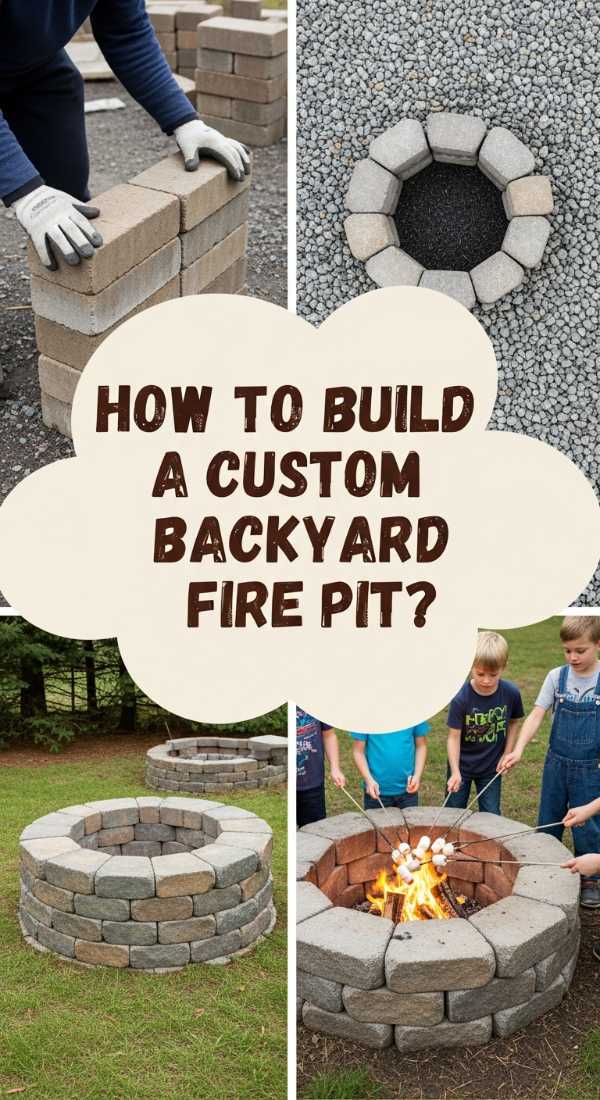
How to Build a Custom Backyard Fire Pit for Memorable Family Gatherings
Why we love this
This design is the heartbeat of the home, built specifically for the chaos and joy of family life. We love the wide, flat ‘ledge’ of the fire pit wall that serves as a perfect spot for resting a mug of cocoa or a plate of hot dogs. The aroma here is pure nostalgia—charred oak and the sweetness of melting sugar. The texture is solid and reassuring, using heavy concrete pavers that can withstand years of kids climbing and boots kicking back. It’s a space that feels permanent, sturdy, and ready to host decades of birthdays and reunions.
Essential Elements:
- Extra-wide coping stones for peripheral seating/table space.
- Double-walled steel fire ring insert.
- Deep-seated Adirondack chairs for lumbar support.
- Side tables for snacks and drinks.
- Safety screen and poker set.
How to make it
- Clear a level 12-foot circle and dig a trench 6 inches deep for the fire pit wall foundation.
- Fill the trench with 3 inches of crushed gravel and tamp it down until it is rock-hard and perfectly level.
- Lay the first course of heavy-duty landscape blocks; use a level on every single block to ensure the foundation is flawless.
- Apply high-heat landscape adhesive between each subsequent layer of blocks, staggering the joints like a brick wall for maximum structural integrity.
- Insert the steel fire ring—this is crucial as it protects the stone from direct heat and prevents cracking over time.
- Top the wall with flat ‘capstones’ or coping; ensure they are secured firmly so they can double as extra seating for large groups.
- Backfill the center of the pit (around the ring) with lava rock or fire-glass to provide a professional finish and help radiate heat evenly.
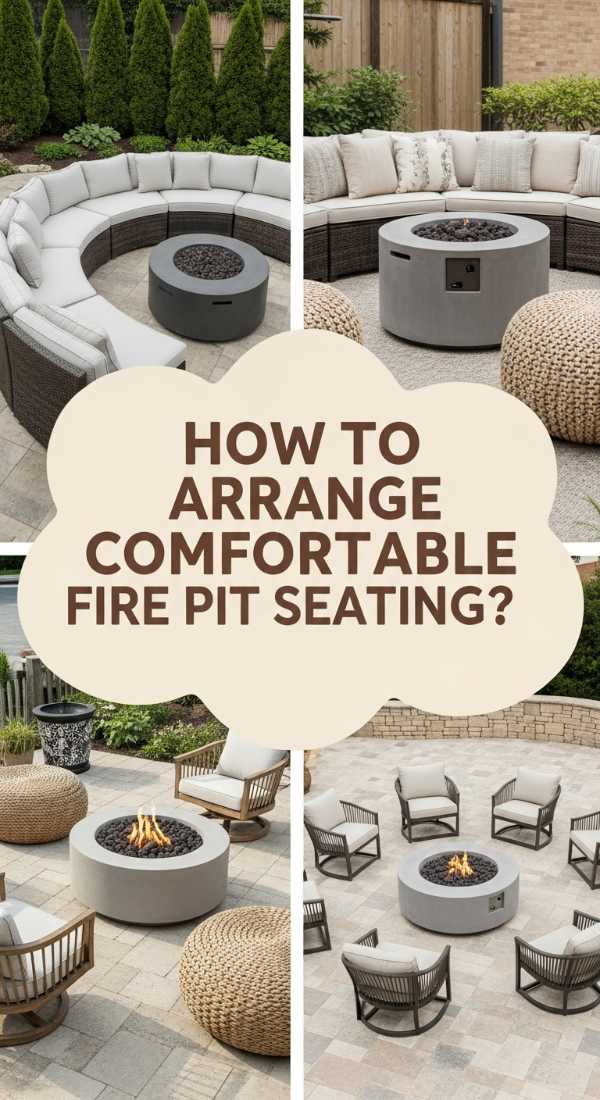
How to Arrange Comfortable Fire Pit Seating for the Ultimate Outdoor Lounge

Why we love this
The magic of this design lies in the ‘long-stay’ comfort it provides. We love the transition from standard outdoor furniture to a dedicated lounge vibe where the seats are angled just right to catch the warmth on your shins while supporting your back. The texture is all about linen-blend fabrics and smooth wood grains. It smells of outdoor-friendly eucalyptus oil and woodsmoke, creating an atmosphere where hours disappear in conversation. It turns a simple fire into a luxury lounge experience that rivals any indoor living room.
Essential Elements:
- Deep-seated sectional or oversized armchairs.
- Outdoor-rated rugs to define the ‘floor’.
- Coordinating ottomans to serve as footrests or tables.
- Sunbrella fabric cushions for durability.
- Strategic placement of wind-breaks like privacy screens.
How to make it
- Identify the prevailing wind direction in your yard and position the seating so guests aren’t constantly in the path of the smoke.
- Choose furniture with a ‘recline’ of 15 to 20 degrees; this encourages relaxation and prevents the stiff feeling of upright dining chairs.
- Place the main seating group between 18 and 24 inches from the edge of the fire pit—this is the ‘sweet spot’ for warmth without singeing.
- Incorporate ‘swing’ seating or hammocks on the periphery for a whimsical, low-pressure lounge option.
- Add side tables between every two chairs so that no one has to hold their drink or plate for the entire evening.
- Layer in ‘comfort kits’ for each seat: a basket containing a rolled throw blanket and a small lumbar pillow.
- Check for ‘social distance’—ensure chairs are close enough for intimate whispers but far enough apart for easy movement.
How to Level a Fire Pit on Sloped Yard Spaces for a Balanced Retreat
Why we love this
There is a unique architectural beauty in conquering a slope to create a flat, serene retreat. We love the ‘carved out’ feeling this design provides, looking like a secret amphitheater nestled into the hillside. The texture is dominated by rugged retaining walls and the smooth, level plane of the fire area. It smells like the fresh, earthy scent of the forest floor and the sharp tang of the evening air. It’s a design that feels adventurous yet perfectly grounded, offering a sense of privacy and seclusion that flat yards simply can’t match.
Essential Elements:
- Semi-circular retaining wall (tiered for aesthetics).
- Integrated stone steps for access.
- Proper drainage pipes (French drains) behind the wall.
- Sturdy, heavy-duty paving stones.
- Native plantings to stabilize the remaining slope.
How to make it
- Survey the slope to determine the ‘cut and fill’—you will be taking earth from the high side to level the low side.
- Build a retaining wall on the high side of the slope using gravity-lock wall blocks; ensure the base course is buried at least 2 inches deep.
- Install a perforated drain pipe behind the wall, covered in gravel, to divert water around the fire pit area rather than through it.
- Level the central area using a mixture of ‘crush and run’ gravel, tamping it in 2-inch lifts until you have a solid, flat plate.
- Finish the floor with pavers or flagstone, ensuring a 1% slope away from the retaining wall to prevent water buildup.
- Construct the fire pit in the center of the new level ‘terrace’, keeping it at least 5 feet away from the retaining wall for safety.
- Plant the slope above the wall with deep-rooted groundcovers like creeping juniper to prevent erosion and add a lush green backdrop.
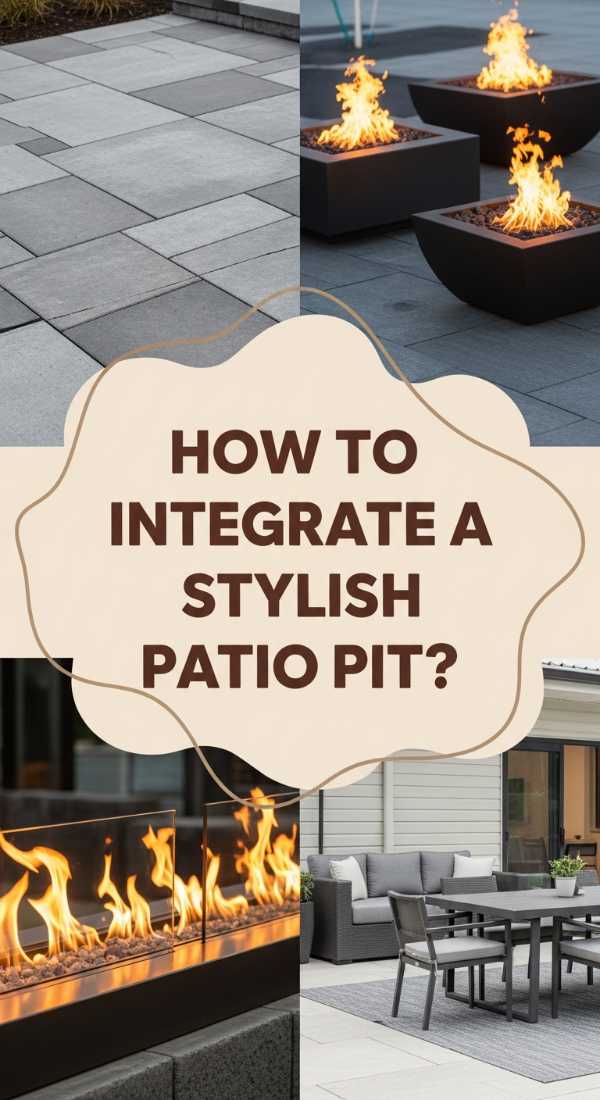
How to Integrate a Stylish Patio Fire Pit for Chic Entertainment Vibes
Why we love this
This design is for the modern entertainer who loves a seamless flow from the kitchen to the outdoors. We love the clean lines, the polished concrete surfaces, and the way the fire pit becomes a piece of functional art. The scent is often cleaner here—perhaps the light aroma of a gas-fueled fire or a hint of citronella from stylish candles. It feels high-fashion and sophisticated, with textures like smooth metal, glass fire beads, and sleek porcelain tiles. It’s the ultimate setting for a cocktail party under the city lights or a chic suburban evening.
Essential Elements:
- Linear or square gas fire table for smoke-free heat.
- Modern porcelain or composite decking foundation.
- Integrated bench seating with hidden LED strips.
- Minimalist aesthetic with a neutral color palette.
- Gas line installation for ‘instant-on’ convenience.
How to make it
- Select a fire table that matches the height of your existing patio furniture—usually 18 to 24 inches for ‘coffee table’ style.
- If using gas, hire a certified plumber to run a dedicated natural gas line under the patio surface for a seamless look without propane tanks.
- Frame the area using a ‘rug’ pattern of different colored pavers to visually separate the lounge area from the dining area.
- Install the fire table, ensuring it is perfectly level so the flame pattern remains even and aesthetically pleasing.
- Use tempered fire glass in a color that complements your home’s exterior—cobalt blue or reflective black are classic chic choices.
- Add ‘mood’ lighting using recessed deck lights or under-bench LEDs that can change color depending on the party’s theme.
- Furnish with modular outdoor sofas that can be reconfigured for different group sizes and social dynamics.
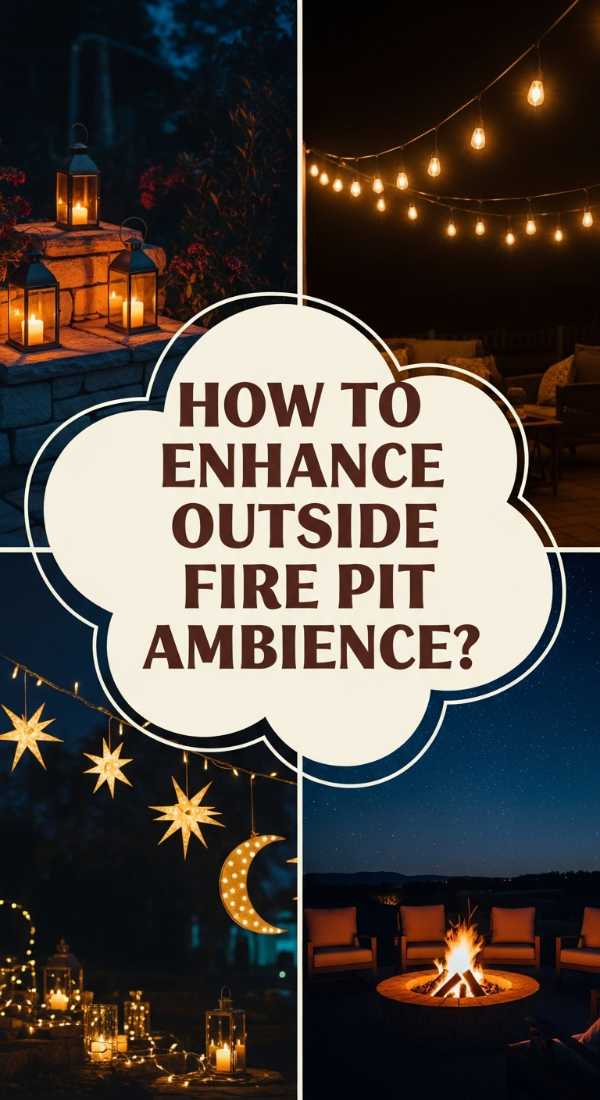
How to Enhance Outside Fire Pit Ideas for Magical Starlit Nights

Why we love this
This design is pure whimsy, focusing on the interplay between the fire below and the stars above. We love the use of reflective surfaces and ‘twinkle’ elements that make the entire backyard feel like a dreamscape. The texture is light and airy—think sheer outdoor curtains and delicate ironwork. It smells of night-blooming jasmine and the faint, sweet smoke of applewood. Sitting here feels like floating in a galaxy, where every spark from the fire seems to join the stars in the sky, creating a truly magical, otherworldly experience.
Essential Elements:
- Overhead ‘Edison’ style string lights.
- Reflective fire-glass in the pit to bounce light.
- White-flowering ‘moon garden’ plants that glow in the dark.
- Mirror-finish garden orbs or reflective wind chimes.
- A telescope station nearby for stargazing.
How to make it
- Set up 8-foot wooden posts or metal poles around the fire pit perimeter to hang overhead string lights in a ‘maypole’ or ‘zigzag’ pattern.
- Choose ‘warm white’ LED bulbs (2700K) to mimic the natural glow of the fire rather than harsh, cool-toned lights.
- Fill your fire pit with reflective glass beads—this doubles the visual impact of the flames by creating thousands of tiny reflections.
- Surround the area with white gravel or light-colored stones that catch and hold the moonlight.
- Plant a ‘moon garden’ around the seating area using white petunias, silver dusty miller, and night-blooming cereus.
- Install a small water feature nearby; the sound of trickling water combined with the flicker of fire creates a multi-sensory ‘zen’ environment.
- Place a decorative basket nearby filled with stargazing guides and binoculars to encourage guests to look up.
How to Curate Small Backyard Fire Pit Areas for Minimalist Outdoor Living

Why we love this
Proof that you don’t need a massive footprint to have a massive impact, we love the cleverness and intimacy of a small-scale fire pit. The texture is focused on ‘less is more’—clean metal edges and smooth river stones. It smells of concentrated warmth and perhaps a single high-quality cedar log. It feels like a private sanctuary, a cozy nook where you can truly unplug. The scale makes everything feel more personal, turning a tiny corner of the yard into the most coveted seat in the house.
Essential Elements:
- Compact, vertical fire chimney (Chimineas).
- Foldable or stackable high-quality seating.
- Multi-functional furniture (stools that are also tables).
- Vertical gardening on fences to save ground space.
- Warm-toned pea gravel for a small, defined base.
How to make it
- Select a ‘focal point’ corner—using a corner actually makes a small space feel larger by drawing the eye to the furthest point.
- Use a Chiminea rather than an open pit; the vertical vent draws smoke up and away, which is essential in tight quarters or near fences.
- Lay a circular base of thin slate tiles or a small ‘circle kit’ of pavers to define the zone without overwhelming the lawn.
- Opt for ‘slim-profile’ chairs, such as metal bistro chairs with cushions, which provide comfort without the bulk of traditional lounge furniture.
- Utilize the vertical plane: hang lanterns or plants on the fence or wall behind the fire pit to add depth.
- Keep the color palette monochromatic—using different shades of one color (like grey or beige) makes a small area feel cohesive and expansive.
- Ensure a minimum 10-foot clearance from the house or any overhanging branches, as heat can dissipate slowly in small, enclosed yards.
How to Style a High End Fire Pit Lounge Area for Gourmet Smores Parties
Why we love this
This is where luxury meets playfulness. We love the ‘tasting room’ vibe of this design, where every detail is curated for the ultimate culinary experience. The texture is rich—leather-bound chairs, marble-topped side tables, and heavy copper roasting sticks. The aroma is intoxicating: artisan chocolate, toasted brioche, and premium Madagascar vanilla. It feels like an exclusive event every single night, turning the humble s’more into a gourmet ritual that delights guests of all ages. It’s the peak of sophisticated outdoor hosting.
Essential Elements:
- Large-diameter fire pit with a flat, wide rim.
- Dedicated ‘s’mores bar’ cart with marble or slate tops.
- Professional-grade long-handled roasting forks.
- Plush, deep-cushion seating for lingering.
- Outdoor heater or heated blankets for chilly nights.
How to make it
- Build or buy a fire pit with a rim at least 8 inches wide to act as a staging area for plates and ingredients.
- Set up a ‘condiment station’ using a weather-resistant bar cart; stock it with high-end ingredients like dark chocolate, salted caramel, and gourmet marshmallows.
- Provide each guest with a ‘roasting kit’—a personalized tray with their sticks, napkins, and a wet-wipe for sticky fingers.
- Ensure the seating is arranged in a full circle to encourage a ‘communal’ feeling, where everyone can see each other’s roasting progress.
- Install high-output infrared heaters nearby to keep the ‘chef’ warm even when they aren’t right next to the flames.
- Use high-quality wood like hickory or cherry, which provides a clean, delicious-smelling smoke that enhances the flavor of the food.
- Keep a ‘cleanup’ zone discreetly nearby with a stylish lidded trash can and a basket of hand towels.
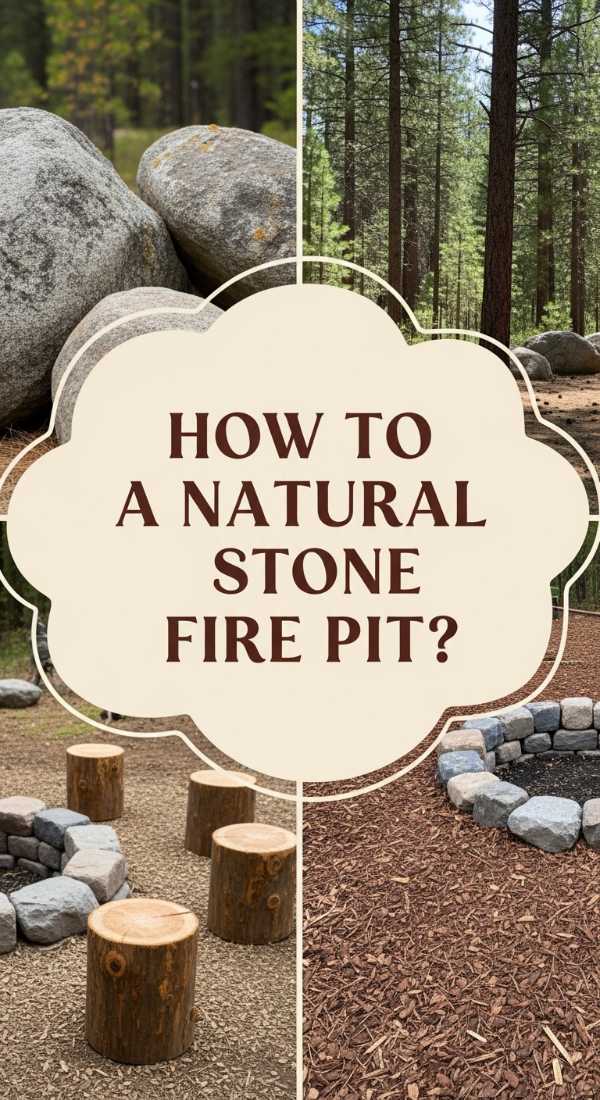
How to Craft a Natural Stone Fire Pit for a Wild Woodsy Aesthetic
[IMAGE_10]
Why we love this
This design is for the soul that craves the deep woods and the raw beauty of nature. We love the ‘found’ quality of the stones—irregular, lichen-covered, and mossy. The texture is rugged and honest, like something you’d find at a high-end mountain lodge. It smells of damp pine needles, wild earth, and the heavy, sweet scent of a campfire. Sitting here feels like a true escape from the digital world, a place where you can watch the sparks fly up into the dark canopy of trees and feel perfectly at home in the wild.
Essential Elements:
- Large, irregular fieldstones or boulders for the pit.
- Tree stump stools or hand-hewn timber benches.
- Forest-floor mulch (pine straw or wood chips).
- Native woodland plantings like ferns and hostas.
- Naturalistic ‘path’ of stepping stones leading to the area.
How to make it
- Source ‘local’ stone if possible—using rocks found on your property or from a nearby quarry ensures the pit looks like it belongs in your specific landscape.
- Dig a deep pit (12 inches) and line it with heavy gravel; this ‘deep’ design keeps the fire low and protected from forest breezes.
- Arrange the largest ‘anchor’ stones first, burying the bottom third of each stone to ensure they won’t shift or roll.
- Fill the gaps between large stones with smaller river rocks or fire-rated mortar to prevent embers from escaping.
- Instead of traditional chairs, use large cedar logs or flat-topped boulders as seating; sand the surfaces smooth to prevent splinters.
- Surround the pit with a thick layer of wood chips or pine needles to blend the ‘floor’ into the surrounding woods.
- Keep the lighting minimal—use a few solar-powered ‘rock’ lights to subtly illuminate the path without ruining the ‘wild’ ambiance.
Conclusion
Creating the perfect fire pit area is about more than just laying stones and lighting a match; it’s about intentionality. It’s about deciding what kind of memories you want to make—whether they are quiet nights of reflection under the stars or boisterous gatherings filled with laughter and burnt marshmallows. Each of these designs offers a different way to experience the magic of the evening. So, grab a blanket, find your favorite spot, and let the fire lead the way to your new favorite outdoor sanctuary.