

The Art of Slow Living: Transforming Your Routine and Space
We live in a world that constantly demands our attention, pulling us in a thousand directions before we’ve even had our first sip of morning coffee. There is a profound, quiet magic in reclaiming our pace, turning away from the frantic rush and toward the deliberate, the intentional, and the beautiful. Slow living isn’t about doing everything at a snail’s pace; it is about doing things at the right pace—cultivating a life where your home and your habits reflect a soul at rest rather than a mind in chaos.
Imagine walking through a front door that greets you with peace, or sitting at a desk that inspires focus rather than fatigue. By curating our physical environments and the small rituals of our days, we create a sanctuary that shields us from the noise of the outside world. This blog post is a journey through those transformations, from the soil of your garden to the pixels on your screen, designed to help you build a lifestyle that feels as good as it looks.
In the following sections, we will explore practical yet soul-stirring ways to elevate your surroundings. Whether you are seeking a whimsical escape in your apartment or a high-energy workspace that fuels your passion, these ideas serve as a blueprint for a life lived with more beauty and less burden.
How to Design Simple Landscaping Front Yard for Instant Curb Appeal
Why we love this
A well-designed front yard is like a warm, tactile hug for your home. We love the way the scent of fresh mulch mingles with the crisp air of a new season, creating a sensory threshold between the world and your private haven. There is a deep satisfaction in seeing structured greenery against the soft textures of flowering perennials, providing a visual rhythm that instantly calms the nerves as you pull into the driveway. It’s about creating a first impression that feels curated yet effortless, inviting onlookers to pause and appreciate the greenery.
Essential Elements:
- Low-maintenance evergreen shrubs (like Boxwoods)
- Organic mulch or pea gravel
- Hardy perennial flowers (Lavender or Salvia)
- Solar-powered path lighting
- Decorative boulders or stone edging
How to make it
- Begin by sketching a simple semi-circle or kidney-shaped bed to break up the harsh lines of the house foundation. Use a garden hose to lay out the curve on the grass to visualize the flow before digging.
- Remove the grass within your outlined area using a sharp spade, ensuring you dig at least 3 inches deep to clear out roots. Once cleared, till the soil and mix in organic compost to provide a nutrient-rich base for your new plants.
- Place your tallest shrubs at the back, closest to the house, ensuring they are spaced far enough apart to account for their full-grown width. This prevents future overcrowding and ensures air circulation.
- Layer in your perennials in front of the shrubs. Dig holes twice as wide as the root ball and just as deep. Tease the roots gently before placing them in the ground to encourage outward growth.
- Apply a 2-inch layer of hardwood mulch over the entire bed, keeping it an inch away from the stems of the plants to prevent rot. This step is crucial for moisture retention and preventing weeds, giving the bed a finished, professional look.
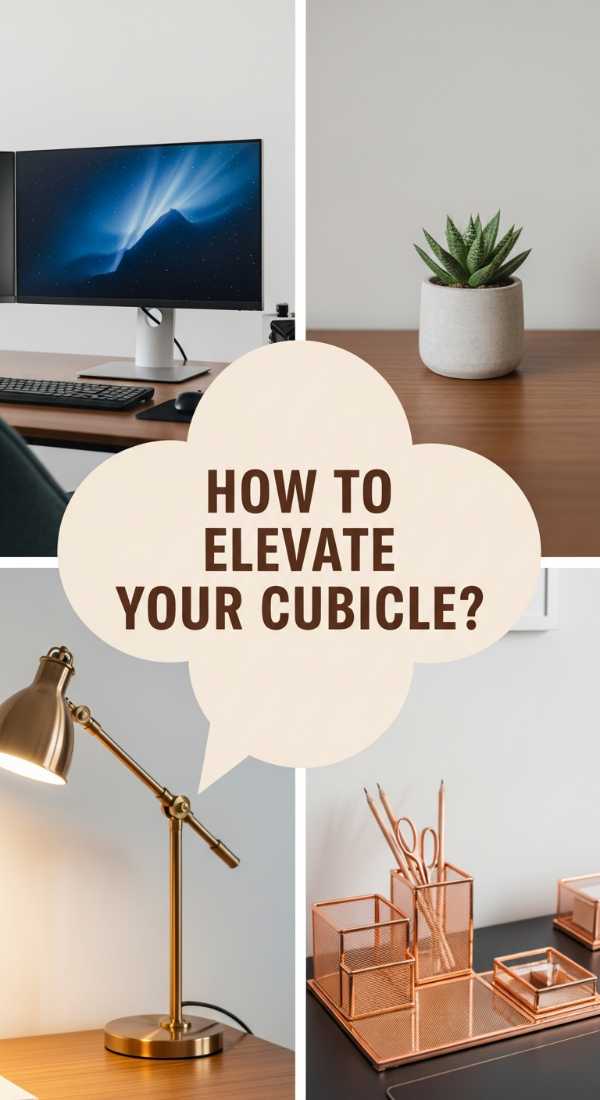
How to Elevate Office Desk Setup Ideas Work Cubicle for Maximum Productivity

Why we love this
There is a specific, crisp energy that comes from a workspace tailored to your exact needs. We love the feeling of smooth wood under our wrists and the subtle, earthy aroma of a beeswax candle flickering nearby while we work. An elevated cubicle isn’t just about aesthetics; it’s about the tactile joy of high-quality materials—the click of a mechanical keyboard, the softness of a felt desk mat—that turn the daily grind into a ritual of focus and achievement. It transforms a sterile box into a powerhouse of personal creativity.
Essential Elements:
- Ergonomic monitor stand
- Large felt or leather desk mat
- Integrated cable management clips
- Task lighting with adjustable color temperature
- A small, hardy indoor plant (like a Pothos or Snake Plant)
How to make it
- Start by clearing everything off your desk. Wipe down the surface with a microfiber cloth to remove dust and static. A clean slate is essential for mental clarity and physical organization.
- Position your monitor at eye level using a stand. This reduces neck strain and creates a dedicated space underneath the stand for your keyboard or notebook when not in use. Ensure the screen is about an arm’s length away.
- Lay down a large desk mat. This defines your primary work zone and provides a soft, warm surface for your hands, which is far more comfortable during long typing sessions than a cold desk surface.
- Route all cables through a single channel or use adhesive clips under the desk. Visual clutter leads to mental clutter, so hiding the ‘octopus’ of wires is a priority for a high-level setup.
- Incorporate a task lamp with a warm white bulb (3000K). Position it to the side of your non-dominant hand to reduce shadows on your work surface, providing a focused glow that signals to your brain it’s time to produce.
How to Source JBL Speakers Wallpapers for a High Energy Vibe

Why we love this
For those of us who live life to a soundtrack, the visual representation of sound can be incredibly motivating. We love the vibrant, neon-soaked aesthetics of JBL-inspired wallpapers because they pulse with a digital energy that mimics the bass of our favorite tracks. The sight of those iconic silhouettes against high-contrast backgrounds feels like a shot of adrenaline for your desktop or phone, bridging the gap between your love for high-fidelity audio and your digital workspace’s visual identity.
Essential Elements:
- High-resolution image search engines (Unsplash, Pexels, or specialized wallpaper sites)
- Keywords: ‘Neon Speakers’, ‘Audio Visualizer’, ‘JBL Aesthetic’
- Image editing software (Canva or Photoshop) for resizing
- A high-definition monitor or OLED phone screen
How to make it
- Navigate to a high-quality stock photo site or a community-driven wallpaper platform. Use specific Boolean searches like “JBL + Neon + 4K” to find images with the correct color depth and resolution to prevent pixelation.
- Select images that have a ‘dark mode’ aesthetic, with deep blacks and vibrant pops of orange or blue. This makes your icons stand out and reduces eye strain during late-night sessions.
- Download the image in the highest possible resolution (at least 3840 x 2160 for desktop). If the image is for a phone, ensure it is in a vertical 9:16 aspect ratio.
- Use a basic photo editor to adjust the ‘Vibrance’ and ‘Contrast’. Increasing these slightly will make the speaker’s textures look more tactile and the colors feel more ‘electric’ on your screen.
- Apply the wallpaper and set your system’s accent colors to match the primary hue in the image. This creates a cohesive, high-energy UI that feels professionally designed.
How to Master Cheap Pool Deck Ideas for an Affordable Oasis

Why we love this
The sound of splashing water and the warmth of sun-baked wood evoke the ultimate feeling of summer freedom. We love the challenge of turning a basic pool surround into a luxury retreat without the luxury price tag. There’s something deeply satisfying about feeling the textured grain of a freshly stained deck or the coolness of outdoor rugs underfoot. It’s about creating that ‘vacation at home’ feeling where you can smell the sunscreen and the charcoal grill, all within a budget that keeps you stress-free.
Essential Elements:
- Deck stain or specialized deck paint
- Outdoor area rugs
- String lights (Edison style)
- Inexpensive oversized planters
- DIY pallet furniture or refreshed thrifted loungers
How to make it
- Pressure wash your existing deck thoroughly. Removing years of grime and old, flaking paint is the most critical step for a professional finish. Let the wood dry for at least 48 hours until it’s bone-dry to the touch.
- Apply a high-quality semi-transparent stain using a long-handled roller. The stain protects the wood while letting the natural beauty of the grain show through. Work in small sections, back-brushing to ensure the stain penetrates the cracks.
- Define different ‘zones’ using outdoor rugs. Place a large, patterned rug under your seating area to hide any imperfections in the wood and provide a soft walking surface that doesn’t get hot in the sun.
- Install 4×4 posts in large buckets of concrete at the corners of the deck to hang heavy-duty string lights. This adds vertical interest and a magical, high-end glow for evening swims.
- Group large, inexpensive plastic planters filled with tall grasses or palms. This adds lushness and privacy. Painting the planters a uniform matte black instantly makes them look like expensive ceramic.
How to Install Vinyl Lattice Panels for Elegant Outdoor Privacy

Why we love this
Privacy is the ultimate luxury in a slow-living lifestyle. We love vinyl lattice because it provides a delicate, filtered light that reminds us of a traditional English garden, yet it’s incredibly durable and easy to maintain. The way the shadows of climbing vines play across the white or cedar-toned lattice during the golden hour is purely poetic. It creates a secluded ‘room’ outdoors where you can sip tea or read a book, shielded from the eyes of the neighborhood in a way that feels intentional and beautiful.
Essential Elements:
- Vinyl lattice panels (diagonal or square pattern)
- Vinyl U-channel molding
- Stainless steel screws
- Pressure-treated wood frame or existing porch posts
- Power drill and circular saw
How to make it
- Measure the height and width of the area you want to screen. Subtract 1/4 inch from all sides to allow for the vinyl to expand and contract during temperature changes; this prevents warping and buckling.
- Cut the vinyl panels using a circular saw with a fine-toothed blade. To prevent chipping, run the saw at a high speed and move slowly through the material.
- Attach the U-channel molding to your wooden frame first. This molding acts as a track that hides the raw edges of the lattice and gives it a high-end, framed-in look.
- Slide the lattice panel into the U-channels. If you are attaching the lattice directly to a surface without molding, pre-drill holes that are slightly larger than your screws to allow for that necessary thermal expansion.
- Secure the lattice using stainless steel screws with decorative caps. Once installed, plant a fast-growing climber like Clematis or Star Jasmine at the base to weave through the holes for a living wall effect.
How to Create Summer Table Centerpieces for the Perfect Seasonal Brunch

Why we love this
A summer brunch is a celebration of abundance, and the centerpiece is the heart of that joy. We love the mix of fresh, fragrant herbs and bright citrus that fills the air with a zesty, uplifting aroma. There’s a tactile pleasure in layering textures—the smoothness of glass, the roughness of linen, and the delicate petals of seasonal blooms. It turns a simple meal into an event, encouraging guests to linger over their mimosas and soak in the warmth of the afternoon.
Essential Elements:
- Clear glass vessels or rustic wooden crates
- Fresh citrus fruits (lemons, limes, oranges)
- Seasonal flowers (Sunflowers, Peonies, or Zinnias)
- Fresh herbs like Eucalyptus or Mint
- Taper candles or unscented votives
How to make it
- Select a long, low vessel to ensure that the centerpiece doesn’t block the line of sight between guests. Conversation is the priority at a brunch.
- Slice lemons or limes into thin rounds and line the inside of a glass vase, filling the center with a smaller glass to hold the water and flowers. This creates a stunning ‘citrus wall’ effect that looks incredibly fresh.
- Arrange your ‘thriller’ flowers—the biggest, brightest blooms—in the center of the arrangement. Trim the stems at a 45-degree angle under water to ensure maximum hydration and longevity.
- Tuck in ‘filler’ greenery and herbs like Mint. The scent of crushed mint adds a refreshing olfactory layer to the dining experience that complements summer dishes perfectly.
- Scatter smaller elements, like loose cherries or individual eucalyptus leaves, directly onto the tablecloth around the base of the centerpiece to create a ‘runway’ effect that leads the eye down the entire table.
How to Decorate a Patriotic Front Porch for a Festive Welcome

Why we love this
There is a classic, nostalgic charm to a patriotic porch that feels like a slice of Americana. We love the bold, crisp contrast of navy blue, bright white, and deep red against the natural textures of a front entry. It’s the feeling of a parade coming to your doorstep—the sight of a flag waving gently in the breeze and the comfort of traditional rocking chairs. It evokes a sense of community and celebration that is both proud and incredibly welcoming to every guest who walks up the steps.
Essential Elements:
- A high-quality embroidered American flag
- Red and white striped outdoor pillows
- Navy blue ceramic planters
- White hydrangeas or red geraniums
- Bunting for the railings
How to make it
- Start with your largest anchor: the flag. Mount the bracket at a 45-degree angle on a sturdy pillar, ensuring the flag has enough clearance to flow freely without hitting the roof or bushes.
- Layer your textiles. Place a large navy-and-white striped rug under a smaller ‘Welcome’ mat to create a trendy, layered look. Add red throw pillows to your porch seating for a pop of saturated color.
- Use symmetry to create a formal, festive look. Place two large navy planters on either side of the door. Fill them with bright red Geraniums for height and white Alyssum to spill over the edges like froth.
- Hang tea-stained or traditional bunting along the porch railing. Secure it with zip ties hidden behind the pleats to ensure it stays taut and survives summer thunderstorms.
- Finish the look with a wreath made of dried grapevine and small silk stars. This adds a rustic, handmade touch that softens the bold colors of the patriotic theme.
How to Curate a Whimsical Apartment Aesthetic for a Dreamy Living Space

Why we love this
Whimsical decor is an invitation to play and dream within your own four walls. We love the soft, ethereal glow of fairy lights caught in sheer curtains and the eclectic mix of vintage finds that tell a story. This aesthetic is all about softness—velvet pillows that beg to be touched, the scent of lavender sachets, and a color palette that feels like a sunset. It’s a rebellion against the ‘beige and boring,’ turning a standard apartment into a magical realm where your imagination can roam free.
Essential Elements:
- Sheer, flowy curtains (voile or chiffon)
- Vintage brass mirrors and frames
- Pastel-colored velvet furniture
- String lights or ‘mushroom’ lamps
- Eclectic gallery wall with botanical prints
How to make it
- Replace standard blinds with floor-to-ceiling sheer curtains. Hang them higher and wider than the window frame to create an airy, oversized feel that catches every breeze and softens the sunlight.
- Create a ‘dream nook’ by layering a soft faux-fur rug over your carpet and piling it high with mismatched velvet cushions in shades of dusty rose, sage, and gold.
- Incorporate ‘living’ decor by hanging glass terrariums at varying heights near a window. The sight of tiny ferns suspended in air adds to the floating, magical atmosphere of the room.
- Source vintage brass mirrors from thrift stores. The aged patina adds warmth and history. Group them together on one wall to bounce light around and make the apartment feel like a hidden garden pavilion.
- Use warm-toned LED string lights. Instead of hanging them in straight lines, drape them loosely over headboards, bookshelves, or inside large glass jars to create a soft, diffused ‘glow’ rather than harsh overhead lighting.
How to Style Aquarium Setup Ideas for a Serene Underwater World
Why we love this
An aquarium is a living piece of art, a window into a silent, rhythmic world that slows your heart rate just by looking at it. We love the mesmerizing dance of bright fish through lush, green aquatic plants and the gentle, bubbling sound of the filter. The texture of the smooth river stones and the vibrant, neon-glow of certain species create a focal point in a room that is both grounding and fascinating. It is the ultimate expression of slow living—watching a tiny ecosystem thrive under your care.
Essential Elements:
- Rimless glass aquarium for a modern look
- Live aquatic plants (Anubias or Java Fern)
- Natural driftwood and dragon stone
- High-quality LED lighting with a ‘sunset’ mode
- Nutrient-rich substrate
How to make it
- Layer your substrate with a slight slope, higher at the back than the front. This creates ‘forced perspective,’ making the tank appear much deeper and more expansive than it actually is.
- Position your ‘hardscape’—the driftwood and stones—using the ‘Rule of Thirds’. Avoid placing the main piece directly in the center; instead, offset it to create a more natural, flowing composition.
- Attach ‘epiphyte’ plants like Anubias to the driftwood using clear fishing line or aquarium-safe glue. These plants don’t need to be buried in soil; they pull nutrients directly from the water, making them easy to maintain.
- Fill the tank slowly by pouring water over a plate to avoid disturbing your carefully placed substrate. Add a water conditioner immediately to neutralize chlorine and heavy metals.
- Run your lights on a timer for 8 hours a day. Visual cues are important for fish; use a light that slowly dims in the evening to mimic a natural sunset, which prevents stress for the inhabitants and creates a calming evening vibe in your room.
How to Organize Office Desk Setup Ideas Work Cubicle for Calmness
[IMAGE_10]
Why we love this
A calm desk is a calm mind. We love the ‘zen’ feeling of a workspace where every object has a home and there is ample ‘white space’ to breathe. The tactile smoothness of a tidy desk and the absence of visual noise allow your thoughts to flow without interruption. It’s the difference between feeling overwhelmed by your to-do list and feeling empowered to tackle it. This setup is about stripping away the non-essential to leave room for clarity, peace, and purposeful work.
Essential Elements:
- Desktop organizers in natural materials (bamboo or ceramic)
- A single high-quality notebook and pen
- Minimalist desk clock
- Concealed storage for loose papers
- Essential oil diffuser with calming scents (Lavender or Cedarwood)
How to make it
- Implement the ‘One-Touch Rule’: if you pick up a piece of paper or an object, you must put it in its final home rather than setting it back down on the desk. This prevents ‘piles’ from ever forming.
- Use bamboo or acrylic drawer dividers to categorize your supplies. Seeing pens, paperclips, and sticky notes perfectly aligned inside a drawer provides a micro-dose of satisfaction every time you open it.
- Limit your desktop to only three ‘non-work’ items. Perhaps a small plant, a framed photo, and a ceramic tray for your keys. This maintains a human touch without letting the space become a cluttered shelf.
- Utilize an under-desk ‘tech tray’ for external hard drives and docking stations. By moving these bulky items off the surface, you reclaim valuable real estate for your arms and your thoughts.
- Set up a small essential oil diffuser. Use a ‘Calm’ blend. The subtle scent acts as an olfactory anchor, training your brain to enter a state of focused relaxation the moment you sit down to work.
Cultivating Your Own Sanctuary
Transforming your routine and your space isn’t a weekend project; it’s a lifelong practice of checking in with yourself and your environment. Whether you’ve added a splash of patriotic pride to your porch or carved out a whimsical corner in your apartment, each change is a step toward a more intentional life. Remember that slow living is about the joy found in the details—the texture of a leaf, the glow of a lamp, the order of a drawer. As you move forward, let your home be a reflection of the peace you wish to carry within you.