

We have all been there—scrolling through our feeds at 10 PM, mesmerized by those perfectly curated grazing boards that look like they belong in a high-end editorial. There is something so deeply comforting about a spread that invites you to pick, peel, and savor every bite. This isn’t just about food; it’s about the ritual of gathering, the clinking of glasses, and the shared laughter that happens over a board filled with crispy textures and decadent sauces.
Today, I’m showing you how to build the ‘Ultimate Viral Board.’ We are moving beyond just cheese and crackers. We’re talking about a symphony of warm, homemade delights that will make your guests (or just yourself on a cozy Friday night) feel truly pampered. From the crunch of golden potatoes to the velvet pull of fresh pasta, these ten elements are the secret to a board that breaks the internet.
How to make crispy potatoes?

Why we love this
There is nothing quite like the audible ‘crunch’ of a perfectly roasted potato yielding to a fluffy, cloud-like center. As they roast, the kitchen fills with the earthy, savory aroma of rosemary and garlic-infused olive oil. Each golden nugget carries a shattered-glass texture on the outside that catches coarse sea salt perfectly, making them the ultimate addictive snack for any board. They represent the height of comfort food, providing a warm, starchy base that balances the brighter, more acidic elements of your spread.
Ingredients
- 2 lbs Yukon Gold potatoes, peeled and cubed
- 1/2 cup extra virgin olive oil
- 1 tsp baking soda
- 4 cloves garlic, smashed
- Fresh rosemary and thyme
- Flaky sea salt and cracked black pepper
How to make it
- Start by parboiling your cubed potatoes in a large pot of heavily salted water with 1 tsp of baking soda; the soda breaks down the exterior starch, creating more surface area for maximum crunch. Boil for about 10 minutes until the edges are soft but the centers are still firm.
- Drain the potatoes and let them steam-dry in the colander for 2 minutes—removing excess moisture is critical for crisping. Give them a vigorous shake in the pot to ‘rough up’ the edges until a starchy paste forms on the surface.
- In a small pan, heat your olive oil with smashed garlic and herbs over medium heat until fragrant, then strain the infused oil over the potatoes on a large, pre-heated rimmed baking sheet.
- Spread the potatoes in a single layer, ensuring they aren’t crowded, and roast at 450°F (230°C) for 20 minutes. Flip them individually with a metal spatula to ensure even browning.
- Continue roasting for another 20-30 minutes, turning occasionally, until they reach a deep mahogany gold and sound hollow when tapped. Toss with the fried herbs and flaky salt immediately before serving.
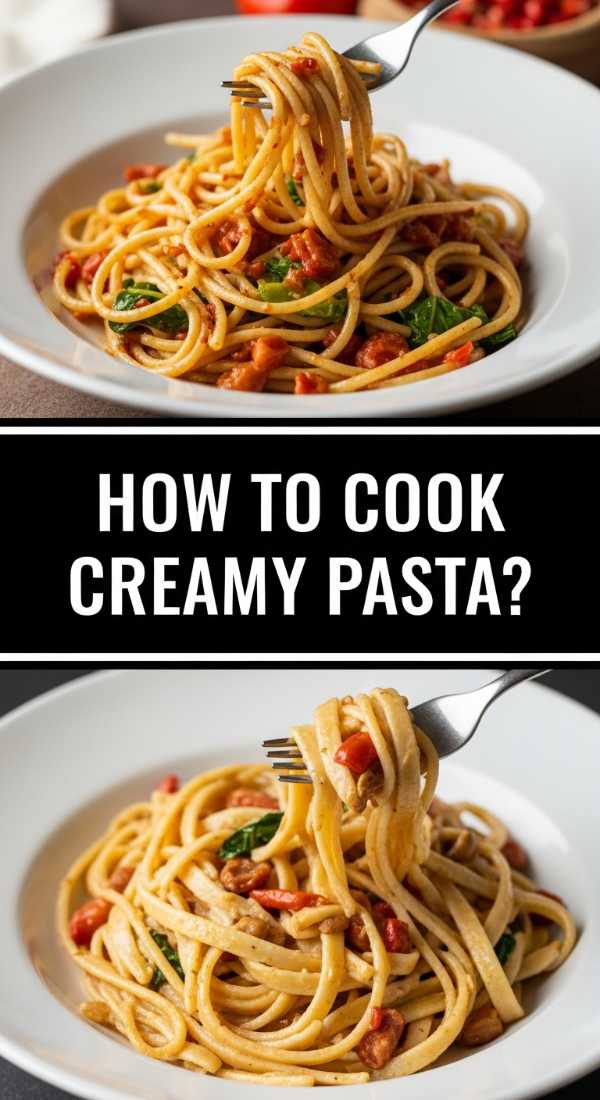
How to cook creamy pasta?
Why we love this
Creamy pasta is the literal definition of a warm hug in a bowl. Imagine a glossy, silken sauce that coats every single strand of noodles perfectly, shimmering under the light with a dusting of aged Parmigiano-Reggiano. The aroma of butter melting into starchy pasta water creates a nutty, inviting scent that promises indulgence. It’s the kind of dish that makes time slow down, encouraging you to twirl your fork and savor the rich, velvety mouthfeel and the subtle kick of freshly cracked black pepper.
Ingredients
- 1 lb Fettuccine or Rigatoni
- 1 cup heavy cream
- 4 tbsp unsalted butter
- 1.5 cups freshly grated Parmesan cheese
- 2 cloves garlic, minced
- Fresh parsley and lemon zest for garnish
How to make it
- Bring a large pot of water to a rolling boil and add enough salt so it ‘tastes like the sea.’ Add your pasta and cook until it is about 2 minutes shy of al dente; it will finish cooking in the sauce.
- While the pasta boils, melt the butter in a large skillet over medium-low heat. Add the minced garlic and sauté gently for 1 minute—do not let it brown, as we want a sweet, mellow garlic flavor.
- Whisk in the heavy cream and bring to a very gentle simmer. Let it reduce slightly for 3-4 minutes until it begins to thicken and coat the back of a wooden spoon.
- Reserve 1 cup of the starchy pasta water before draining the noodles. Add the noodles directly to the skillet with the cream mixture.
- Turn the heat to low and add the grated Parmesan in small handfuls, tossing constantly with tongs. Add splashes of the reserved pasta water as needed to emulsify the cheese into a smooth, glossy sauce. Garnish with lemon zest to cut through the richness.
How to bake fudgy brownies?

Why we love this
A truly fudgy brownie is a sensory masterpiece, featuring a thin, crackly ‘paper’ crust that shatters when you bite into a dense, truffle-like interior. The smell of high-quality dark chocolate melting into browned butter is intoxicating, filling the home with a sense of celebration. These are not cakey; they are intensely rich, lingering on the palate with a sophisticated bitterness from the cocoa that is perfectly balanced by a hint of vanilla and salt. Every bite feels like an elegant dessert concentrated into a humble square.
Ingredients
- 1 cup unsalted butter, melted and browned
- 2 cups granulated sugar
- 3 large eggs, room temperature
- 1 cup Dutch-process cocoa powder
- 1/2 cup all-purpose flour
- 1 cup dark chocolate chunks
- 1 tsp espresso powder
How to make it
- Preheat your oven to 350°F (175°C) and line an 8×8 inch baking pan with parchment paper, leaving an overhang for easy removal. Brown your butter in a saucepan over medium heat until it smells nutty and golden bits appear at the bottom.
- In a large bowl, whisk the browned butter and sugar vigorously for at least 2 minutes. Add the eggs one at a time, whisking for another 3 minutes until the batter becomes pale and voluminous—this creates the iconic crinkle top.
- Sift in the cocoa powder, flour, espresso powder, and a pinch of salt. Use a rubber spatula to gently fold the dry ingredients into the wet until *just* combined; overmixing will lead to a cakey texture rather than a fudgy one.
- Fold in the dark chocolate chunks. Pour the thick batter into the prepared pan and smooth the top with your spatula.
- Bake for 25-30 minutes. The key is the ‘toothpick test’—it should come out with a few moist crumbs attached, not clean. Let them cool completely in the pan to allow the fudgy structure to set before slicing.
How to roast juicy chicken?

Why we love this
There is a profound rustic beauty in a perfectly roasted chicken, with its skin rendered to a crisp, salty parchment and the meat underneath dripping with herb-infused juices. As it roasts, the skin turns a magnificent sunset orange, and the aroma of thyme and lemon zest fills the air, signaling a meal made with love. It provides the protein-packed heart of our viral board, offering tender, succulent slices that pair beautifully with everything from honey to spicy mustard. It’s the ultimate centerpiece for a communal feast.
Ingredients
- 1 whole chicken (approx. 4 lbs)
- 1/4 cup softened butter
- 1 lemon, halved
- 1 head of garlic, sliced crosswise
- Fresh thyme, rosemary, and sage
- Kosher salt and black pepper
How to make it
- Remove the chicken from the fridge 45 minutes before cooking to bring it to room temperature; this ensures even roasting. Pat the skin extremely dry with paper towels—moisture is the enemy of crispy skin.
- Generously season the cavity with salt and pepper, then stuff with lemon halves, garlic, and a bundle of fresh herbs. Truss the legs with kitchen twine to keep the bird compact, which helps retain moisture in the breast.
- Rub the softened butter all over the exterior, especially under the skin of the breast. Season the outside liberally with kosher salt and pepper.
- Place the chicken on a rack in a roasting pan. Roast at 425°F (220°C) for the first 15 minutes to blast the skin with heat, then reduce the temperature to 375°F (190°C).
- Cook until an instant-read thermometer reaches 165°F (74°C) in the thickest part of the thigh (usually about 1 hour and 15 minutes). Crucially, let the chicken rest for 20 minutes before carving to allow the juices to redistribute back into the meat.
How to make fluffy pancakes?

Why we love this
Picture a stack of pancakes so airy and light they practically melt the moment they hit your tongue. These are the golden, pillowy clouds of our dreams, boasting a gentle tang from buttermilk and a hint of sweet vanilla. Watching a pat of butter slowly slide down the warm, honey-colored surface while maple syrup pools in the tiny craters is pure breakfast magic. They bring a nostalgic, soft texture to the board that appeals to the child in everyone, turning a simple meal into an event.
Ingredients
- 2 cups all-purpose flour
- 2 tbsp sugar
- 1 tbsp baking powder
- 1/2 tsp baking soda
- 2 cups buttermilk
- 2 large eggs
- 4 tbsp melted butter
How to make it
- In a large bowl, whisk together the flour, sugar, baking powder, baking soda, and a pinch of salt. In a separate jug, whisk the buttermilk, eggs, and melted butter.
- Make a well in the center of the dry ingredients and pour in the wet mixture. Use a fork to fold everything together until *just* combined. The golden rule: leave the lumps! Over-mixing develops gluten, which makes pancakes tough instead of fluffy.
- Let the batter rest for 10 minutes. This allows the leavening agents to activate and the flour to hydrate, resulting in a better rise.
- Heat a non-stick griddle or cast-iron skillet over medium-low heat. Lightly grease with a small amount of butter. Pour 1/3 cup of batter for each pancake.
- Cook until bubbles form on the surface and the edges look set and matte (about 2-3 minutes). Flip carefully and cook for another 1-2 minutes until golden brown. Keep them warm in a low oven until the whole stack is ready.
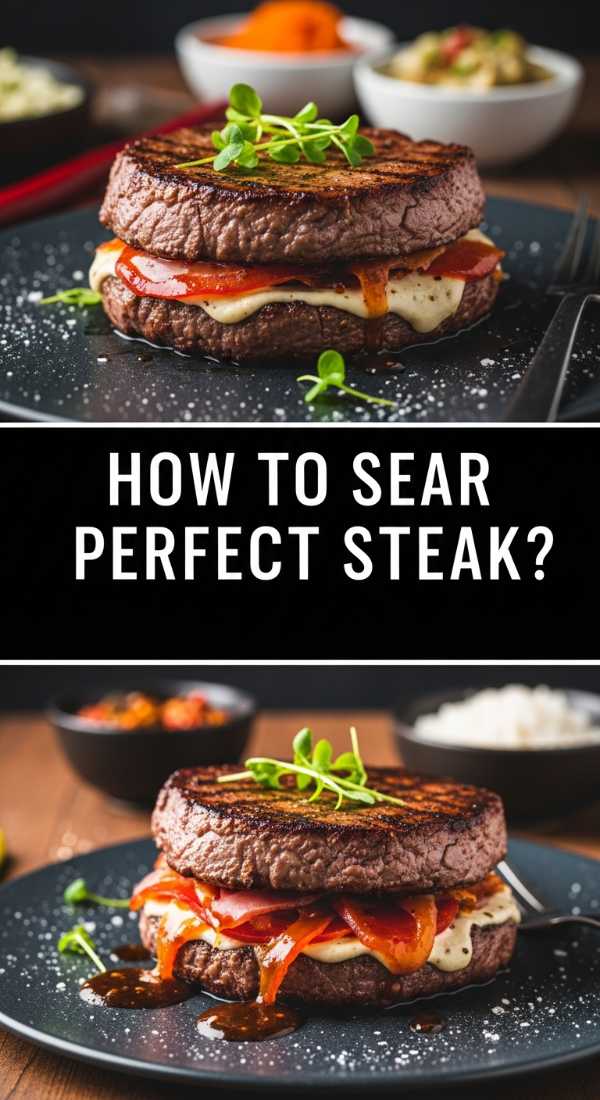
How to sear perfect steak?
Why we love this
A perfectly seared steak is all about the contrast: the intense, savory crust formed by the Maillard reaction versus the buttery, melt-in-your-mouth tender pink center. The scent of browning butter, smashed garlic, and charred thyme creates an atmosphere of luxury and decadence. Each slice offers a deep, umami richness that feels celebratory and grounding. When placed on a board, it’s the showstopper that everyone reaches for, especially when finished with a sprinkle of gray sea salt to make the flavors pop.
Ingredients
- 2 thick-cut Ribeye or New York Strip steaks
- 2 tbsp high-smoke point oil (like grapeseed)
- 3 tbsp unsalted butter
- 3 cloves garlic, smashed
- Fresh thyme sprigs
- Coarse salt and cracked pepper
How to make it
- Remove the steaks from the fridge at least 30 minutes before cooking. Season heavily with salt and pepper on all sides, including the edges. This creates a dry ‘brine’ that helps form a superior crust.
- Heat a heavy cast-iron skillet over high heat until it is smoking slightly. Add the oil and swirl to coat. Carefully lay the steaks away from you into the pan.
- Sear undisturbed for 3 minutes to develop a deep brown crust. Flip the steaks and immediately add the butter, garlic, and thyme to the pan.
- As the butter foams, tilt the pan and use a large spoon to continuously baste the steaks with the hot, flavored butter for another 3-4 minutes. This ‘arroser’ technique cooks the top while adding incredible flavor.
- Remove the steaks when they reach an internal temperature of 130°F (54°C) for medium-rare. Let them rest on a cutting board for at least 10 minutes before slicing against the grain to ensure every bite is tender.
How to make street tacos?

Why we love this
Street tacos are a vibrant explosion of color, texture, and zip. There is something so tactile and fun about assembling a taco—the warmth of a charred corn tortilla, the sizzle of spiced meat, and the cool crunch of white onion and cilantro. The air fills with the citrusy tang of lime and the smoky whisper of cumin. They bring a lively, communal energy to your food board, offering small, flavor-packed bites that are as beautiful to look at as they are satisfying to eat.
Ingredients
- 1 lb flank steak or chicken thighs, diced small
- Corn tortillas
- 1 white onion, finely diced
- Fresh cilantro, chopped
- 2 limes, cut into wedges
- Taco seasoning (cumin, chili powder, garlic powder, salt)
How to make it
- Toss your diced protein with the taco seasoning and a splash of oil. Let it marinate for at least 20 minutes to allow the spices to penetrate the meat.
- Heat a heavy skillet or griddle over high heat. Cook the meat in batches to ensure it sears and browns rather than steams. You want crispy, charred edges for that authentic street-food flavor.
- While the meat rests, warm the corn tortillas directly over a gas flame for a few seconds per side using tongs, or in a dry pan until they are soft, pliable, and show charred spots.
- Stack two tortillas (the traditional way!) and fill with a generous spoonful of meat. Top immediately with the raw diced onion and a heavy sprinkle of cilantro.
- The final, crucial step: serve with plenty of lime wedges. The hit of fresh acid is what bridges the spicy meat and the earthy corn, making the flavors sing.
How to bake garlic bread?

Why we love this
The scent of garlic bread baking is enough to bring anyone to the kitchen; it is the ultimate aromatic siren song. Imagine a baguette that is shatteringly crisp on the outside, but has a center so saturated with herb-flecked butter that it’s almost custard-like. The sharp bite of fresh garlic mellows into a sweet, savory hum in the oven, perfectly complemented by the salty punch of Parmesan. It’s the essential ‘mopping’ tool for any sauces on your board, providing a satisfying, buttery crunch in every bite.
Ingredients
- 1 large French baguette or Italian loaf
- 1/2 cup unsalted butter, softened
- 4 cloves garlic, grated or finely minced
- 1/4 cup fresh parsley, chopped
- 1/2 cup grated Parmesan cheese
- Red pepper flakes (optional)
How to make it
- Preheat your oven to 400°F (200°C). Slice the baguette in half lengthwise and place both halves cut-side up on a baking sheet.
- In a small bowl, combine the softened butter, garlic, parsley, and red pepper flakes. Use a fork to cream them together until you have a smooth, green-flecked paste.
- Spread the garlic butter generously and evenly over the cut sides of the bread, making sure to reach the very edges—the ‘crusty corners’ are often the best part!
- Sprinkle the Parmesan cheese over the top in an even layer. Bake for 10-12 minutes until the butter has melted deep into the bread and the cheese is bubbly.
- For a truly viral finish, turn on the broiler for the last 60 seconds to create deep golden brown spots. Slice into thick diagonals and serve while the butter is still sizzling.
How to cook flaky salmon?

Why we love this
Fresh salmon is a jewel on any food board, offering a vibrant pink hue and a texture that is elegantly delicate. When cooked correctly, the skin becomes a salty, potato-chip-crisp layer that protects the succulent, fatty meat inside. It smells clean and oceanic, enriched by a squeeze of bright lemon and perhaps a dollop of creamy dill sauce. It adds a sophisticated, lighter protein option that feels incredibly healthy yet deeply indulgent, with flakes that slide apart at the mere suggestion of a fork.
Ingredients
- 2 Center-cut salmon fillets (6oz each)
- 1 tbsp olive oil
- Kosher salt and coarse black pepper
- 1 lemon, sliced into rounds
- Fresh dill or parsley for garnish
How to make it
- Remove the salmon from the fridge 15 minutes before cooking. Pat the skin side extremely dry with paper towels to ensure it doesn’t stick to the pan and gets maximum crispiness.
- Season both sides liberally with salt and pepper. Heat a non-stick or stainless steel skillet over medium-high heat and add the oil until it shimmers.
- Place the salmon fillets in the pan, skin-side down. Press down firmly with a spatula for 30 seconds to prevent the skin from curling, ensuring full contact with the heat.
- Cook skin-side down for about 5-6 minutes. Don’t touch it! You will see the color of the flesh slowly turn opaque from the bottom up. Flip only once the skin releases easily from the pan.
- Flip and cook for a mere 1-2 minutes on the flesh side for a perfect medium-rare center. Remove from the pan and let it rest for 3 minutes before serving with a fresh squeeze of lemon juice.
How to make homemade pizza?

Why we love this
There is a primal joy in a homemade pizza—the bubbling mozzarella, the slightly charred ‘leopard spots’ on the crust, and the vibrant red of a simple tomato sauce. The aroma of fermenting dough and toasted flour takes you straight to an Italian trattoria. It’s the ultimate customizable canvas, but when kept simple, it highlights the quality of your ingredients. Pulling a hot pizza from the oven and hearing that crust crack as you slice through it is the most satisfying way to round out a viral grazing board.
Ingredients
- 1 ball of pizza dough (store-bought or homemade)
- 1/2 cup San Marzano tomato sauce
- 1 cup fresh mozzarella, torn
- Fresh basil leaves
- Extra virgin olive oil and cornmeal
How to make it
- Place a pizza stone or an inverted baking sheet in the oven and preheat to its highest setting (usually 500°F/260°C) for at least 45 minutes. A hot surface is the secret to a crispy bottom.
- On a piece of parchment paper dusted with cornmeal, stretch your room-temperature dough into a 12-inch circle. Use your fingers to push air into the edges to create a puffy crust (the ‘cornicione’).
- Spread a thin layer of tomato sauce over the center, leaving a 1-inch border. Arrange the torn mozzarella and a few basil leaves on top. Drizzle with a tiny bit of olive oil.
- Slide the pizza (along with the parchment) onto the hot stone or baking sheet. Bake for 8-10 minutes until the crust is deeply browned and the cheese is blistered and golden.
- Remove from the oven and immediately top with fresh basil. Let it sit for 2 minutes so the cheese sets before slicing into thin wedges that are easy for guests to grab from the board.
The Art of the Board: Bringing It All Together
Building a viral food board is about more than just great recipes; it’s about the composition. Start by placing your larger items—like the whole roasted chicken or the pizza—in the center or at opposite ends to create balance. Fill the gaps with the crispy potatoes and stacks of garlic bread. Use small bowls for the creamy pasta to keep the sauce contained, and nestle the brownies near the edge for a sweet finish. Remember, the ‘viral’ look comes from abundance, so don’t be afraid to let items touch and overlap. Enjoy the process, and most importantly, enjoy the feast!
Frequently Asked Questions
Everything you need to know to master your kitchen and create the perfect spread.