
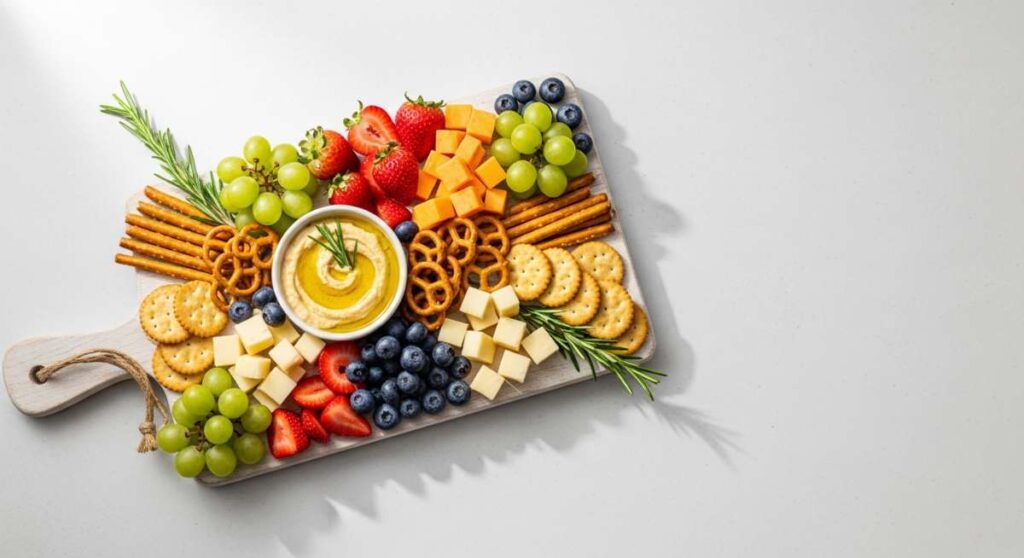
The 5-Minute Viral Food Board That’s Taking Over the Internet
Have you ever had one of those afternoons where the sunlight hits your kitchen table just right, and suddenly, you feel an overwhelming urge to create something beautiful? We’ve all been scrolling through social media, mesmerized by those effortlessly chic food boards that look like a work of art. But let’s be real—most of us don’t have hours to spend on intricate prep. That’s why I am so obsessed with this 5-minute viral simple food board concept; it’s about celebrating the joy of the ‘little things’ without the stress of perfection.
There is something deeply emotional about sharing food. It’s the way we connect, the way we say ‘I love you’ or ‘I’m proud of you’ without uttering a single word. Whether you are hosting a graduation party, prepping a cozy brunch for two, or just trying to make a Tuesday feel a bit more special, these quick and stunning components turn a simple board into a memory. Let’s dive into the elements that will make your next gathering absolutely unforgettable.
How to bake graduation cakes?

Why we love this
There is nothing quite like the aroma of a classic vanilla-scented sponge wafting through the house to signal a massive milestone. This cake is all about that tender, cloud-like crumb that melts on the tongue, paired with a subtle buttery richness that feels both nostalgic and sophisticated. When you slice into it, you see the perfect uniform texture that signifies a bake done with love, making it the crowning jewel of any celebratory food board. The sheer pride of presenting a homemade cake to a graduate is a feeling that stays with you long after the last crumb is gone.
Ingredients
- 2 1/2 cups all-purpose flour
- 1 1/2 cups granulated sugar
- 1 tablespoon baking powder
- 1/2 teaspoon salt
- 3/4 cup unsalted butter, softened
- 1 cup whole milk, room temperature
- 2 teaspoons pure vanilla extract
- 3 large eggs, room temperature
How to make it
- Preheat your oven to 350°F (175°C) and meticulously grease two 8-inch round cake pans, lining the bottoms with parchment paper to ensure an easy release.
- In a large mixing bowl, sift together the flour, baking powder, and salt to aerate the dry ingredients, which ensures a lighter cake texture.
- Using a stand mixer fitted with the paddle attachment, cream the softened butter and sugar on medium-high speed for about 3-5 minutes until the mixture is pale, fluffy, and significantly increased in volume.
- Add the eggs one at a time, beating well after each addition and scraping down the sides of the bowl to ensure a completely homogeneous emulsion.
- Reduce the mixer speed to low and alternate adding the dry ingredients and the milk in three batches, beginning and ending with the flour; do not overmix, as this develops gluten and results in a tough cake.
- Divide the batter evenly between the prepared pans, smoothing the tops with an offset spatula.
- Bake for 28-32 minutes, or until a wooden skewer inserted into the center comes out clean or with just a few moist crumbs, and the cake edges have just begun to pull away from the sides of the pan.
How to make rhubarb jam?

Why we love this
This jam is a literal jar of sunshine, capturing the vibrant, tart essence of spring in every spoonful. The texture is a beautiful balance between silky syrup and soft, jammy chunks of fruit that provide a delightful pop of acidity against the sweetness. As it simmers on the stove, the deep pink hues of the rhubarb intensify, filling your kitchen with a bright, zesty fragrance that feels incredibly refreshing. It’s the perfect companion for a sharp cheese or a buttery scone, adding a sophisticated edge to your viral food board that guest will be talking about for weeks.
Ingredients
- 4 cups chopped rhubarb (1/2 inch pieces)
- 1 1/2 cups granulated sugar
- 2 tablespoons fresh lemon juice
- 1 teaspoon lemon zest
- 1/2 teaspoon vanilla bean paste
How to make it
- In a heavy-bottomed saucepan or a Dutch oven, combine the chopped rhubarb, sugar, and lemon juice, stirring well to coat the fruit.
- Let the mixture sit for about 15-20 minutes at room temperature; this maceration process draws out the natural juices and helps the rhubarb break down more evenly during cooking.
- Place the pan over medium heat and bring the mixture to a gentle boil, stirring frequently with a heat-resistant spatula to prevent the sugar from scorching on the bottom.
- Reduce the heat to low-medium and simmer for 15-20 minutes, skimming off any foam that rises to the surface with a metal spoon.
- Test the set of the jam by placing a small spoonful on a chilled plate; wait 30 seconds, then push the jam with your finger—if it wrinkles, it has reached the setting point.
- Stir in the lemon zest and vanilla bean paste during the last minute of cooking to preserve their volatile aromatic compounds.
- Remove from heat and let cool slightly before transferring into sterilized glass jars, leaving 1/4 inch of headspace.
How to style graduation cupcakes?

Why we love this
Styling cupcakes is where the magic of the celebration truly comes to life, turning a simple dessert into a personalized tribute. There is a tactile joy in the smooth glide of a piping bag and the way a glossy swirl of buttercream catches the light, topped with a miniature mortarboard or a sprinkle of edible gold. The visual appeal of a perfectly styled cupcake adds height and whimsical charm to your board, creating a focal point that draws people in. It’s about more than just taste; it’s about the festive, joyful atmosphere that these tiny, decorated treasures create for your guests.
Ingredients
- Batch of pre-baked cupcakes
- 4 cups stiff-peak vanilla buttercream
- Miniature chocolate squares (for caps)
- Thin licorice or fruit leather (for tassels)
- Gold star sprinkles
- Food coloring (school colors)
How to make it
- Fit a large piping bag with an open star tip (like a Wilton 1M) and fill it with your buttercream, ensuring there are no air pockets by massaging the bag gently.
- Hold the piping bag vertically, about half an inch above the center of the cupcake, and squeeze with consistent pressure while moving in a spiral from the outer edge toward the center.
- To create the graduation cap topper, place a small dab of frosting on the back of a thin chocolate square and press it onto the peak of the frosting swirl.
- Cut a 1-inch strip of licorice or fruit leather, fraying one end with a knife to look like a tassel, and attach it to the center of the chocolate square using another tiny dot of frosting.
- Place a single gold star sprinkle or a small round candy at the base of the tassel to hide the attachment point.
- Arrange the finished cupcakes on your board in a tiered formation or a diagonal line to create a sense of movement and professional flair.
How to mix lemon pesto?
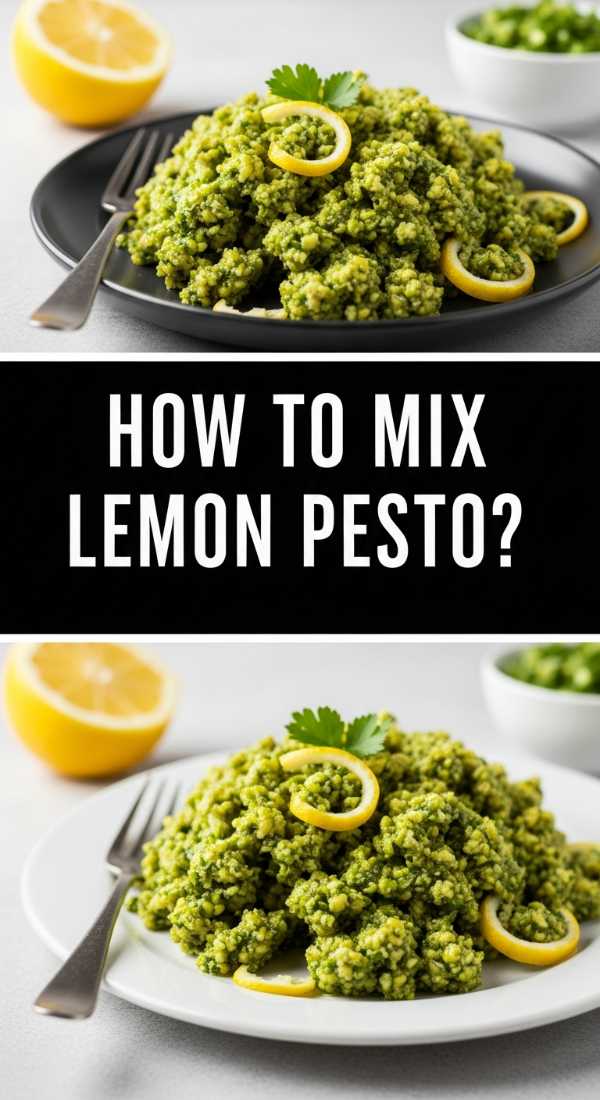
Why we love this
Lemon pesto is the ultimate bright, herbaceous lift that every food board needs to cut through richer components like cheeses or meats. The aroma of freshly slapped basil leaves mixed with the sharp, clean scent of lemon zest is instantly energizing and summery. Its texture is rustic and vibrant, with the crunch of toasted pine nuts providing a satisfying contrast to the smooth, emerald-green oil. This sauce feels like a concentrated burst of garden-fresh flavor that transforms a simple cracker or a slice of baguette into a gourmet experience, making it a versatile superstar in your culinary repertoire.
Ingredients
- 2 cups fresh basil leaves, packed
- 1/3 cup pine nuts, lightly toasted
- 2 cloves garlic, peeled
- 1/2 cup extra virgin olive oil
- 1/2 cup freshly grated Parmesan cheese
- Zest of 2 large lemons
- 3 tablespoons fresh lemon juice
- Salt and pepper to taste
How to make it
- Begin by toasting the pine nuts in a dry skillet over medium-low heat for 3-5 minutes, tossing constantly until they are golden brown and fragrant; let them cool completely before use.
- In a food processor, pulse the basil leaves, garlic cloves, and cooled pine nuts until they are coarsely chopped and evenly distributed.
- With the processor running on low, slowly drizzle in the extra virgin olive oil in a thin, steady stream to create a stable emulsion and prevent the pesto from becoming greasy.
- Add the grated Parmesan cheese, lemon zest, and lemon juice, then pulse just a few times until combined—you want to retain some texture rather than making a completely smooth puree.
- Taste the mixture and season with salt and freshly cracked black pepper, adjusting the lemon juice if you prefer a sharper tang.
- Transfer the pesto to a small serving bowl and top with a thin layer of olive oil to prevent oxidation and keep the color a bright, vivid green.
How to brew coffee drinks?

Why we love this
The ritual of brewing coffee is a sensory journey that starts with the sound of the beans grinding and ends with the comforting warmth of a heavy ceramic mug in your hands. A well-crafted coffee drink provides a sophisticated, bitter backbone to a board filled with sweets, cleaning the palate and grounding the flavors. There’s a beautiful alchemy in the way milk frothed to a silky microfoam swirls into a rich, dark espresso, creating a marble-like pattern that is as pleasing to the eye as it is to the soul. It’s the ultimate invitation for your guests to slow down, linger, and enjoy the conversation.
Ingredients
- Freshly roasted coffee beans (medium to dark roast)
- Filtered water
- Whole milk or oat milk (for frothing)
- Simple syrup or flavored syrups (optional)
- Cinnamon or cocoa powder for garnish
How to make it
- Grind your coffee beans to the specific consistency required for your brewing method—fine for espresso, medium for pour-over, or coarse for a French press.
- Heat filtered water to approximately 195°F–205°F (90°C–96°C), as water that is boiling can scorch the grounds and result in a bitter, over-extracted taste.
- Measure your coffee-to-water ratio precisely; a standard starting point is 1 to 2 tablespoons of coffee for every 6 ounces of water.
- If using a pour-over method, start by ‘blooming’ the coffee: pour just enough water to wet the grounds and wait 30 seconds to allow CO2 to escape, which improves the final flavor profile.
- Continue pouring the remaining water in slow, concentric circles to ensure even saturation of the coffee bed.
- For lattes or cappuccinos, steam your milk using a frothing wand, keeping the tip just below the surface to create ‘wet’ foam with tiny, invisible bubbles that give a velvety mouthfeel.
- Pour the brewed coffee or espresso into a pre-warmed cup, then gently pour the frothed milk over the top, finishing with a light dusting of cinnamon or cocoa.
How to decorate sugar cookies?

Why we love this
Sugar cookies are a blank canvas for creativity, offering a satisfying snap followed by a soft, buttery finish that is purely addictive. Decorating them is a meditative process where the gentle flow of royal icing allows you to create intricate designs that look far more complicated than they actually are. The contrast between the matte cookie and the high-gloss icing creates a professional, high-end look that elevates any board from casual to curated. Each cookie becomes a tiny, edible masterpiece that showcases your personal style and adds a touch of whimsical elegance to the spread.
Ingredients
- Batch of chilled, cut-out sugar cookies
- 4 cups powdered sugar
- 3 tablespoons meringue powder
- 5-7 tablespoons warm water
- Gel food coloring
- Fine-tipped piping bags and toothpicks
How to make it
- Whisk the powdered sugar and meringue powder together in a stand mixer, then add water one tablespoon at a time while mixing on low speed until you reach a ‘thick honey’ consistency for outlining.
- Separate the icing into small bowls and add gel food coloring sparingly with a toothpick, as gel is much more concentrated than liquid coloring.
- Transfer a portion of the icing to a piping bag with a small round tip; pipe a continuous border around the edge of the cookie to create a ‘dam’ for the flood icing.
- Thin out the remaining icing with a few drops of water until it reaches a ’10-second consistency’ (when a ribbon of icing disappears back into the bowl in 10 seconds).
- Fill the center of the outlined cookie with the thinner flood icing, using a toothpick to pop any air bubbles and to nudge the icing into the corners for a smooth, glass-like finish.
- Allow the base layer to dry completely (about 6-8 hours) before using the thicker outline icing to pipe details, dots, or lettering on top.
- Store the finished cookies in a single layer until the icing is completely hard to ensure the designs remain crisp and smudge-free.
How to prepare toddler lunch?

Why we love this
Preparing a toddler-friendly lunch is an act of love that focuses on color, texture, and manageable bites that make eating an adventure rather than a chore. We love this approach because it turns simple, healthy ingredients into a playful mosaic of shapes that are easy for small hands to navigate. There’s something incredibly satisfying about seeing a variety of vibrant fruits and proteins arranged so neatly, encouraging exploration and joy in every mouthful. It takes the stress out of mealtime by offering variety and fun, proving that even the simplest foods can be celebrated when presented with a little bit of imagination.
Ingredients
- Whole grain bread or wraps
- Lean deli turkey or ham
- Mild cheddar or mozzarella cheese slices
- Cucumber slices and baby carrots
- Fresh berries or apple slices
- Hummus or yogurt for dipping
How to make it
- Use small cookie cutters (stars, hearts, or animals) to punch out shapes from the bread, cheese, and deli meat; this makes the food visually appealing and easier for a toddler to grip.
- Spread a very thin layer of hummus or cream cheese on the bread shapes to act as a ‘glue’ for the meat and cheese, creating miniature open-faced sandwiches.
- Cut cucumber and carrots into thin matchsticks or use a crinkle cutter to add texture, which makes them easier to chew and more interesting to touch.
- Hull and slice strawberries or halve grapes lengthwise (to prevent choking) to ensure all fruit is in safe, bite-sized portions.
- Arrange the components in a muffin tin or a partitioned plate to keep different textures separate, which is often preferred by selective eaters.
- Include a small ‘dip’ station with a dollop of Greek yogurt or mild hummus in the center to encourage the interactive element of dipping and tasting.
How to bake rhubarb scones?
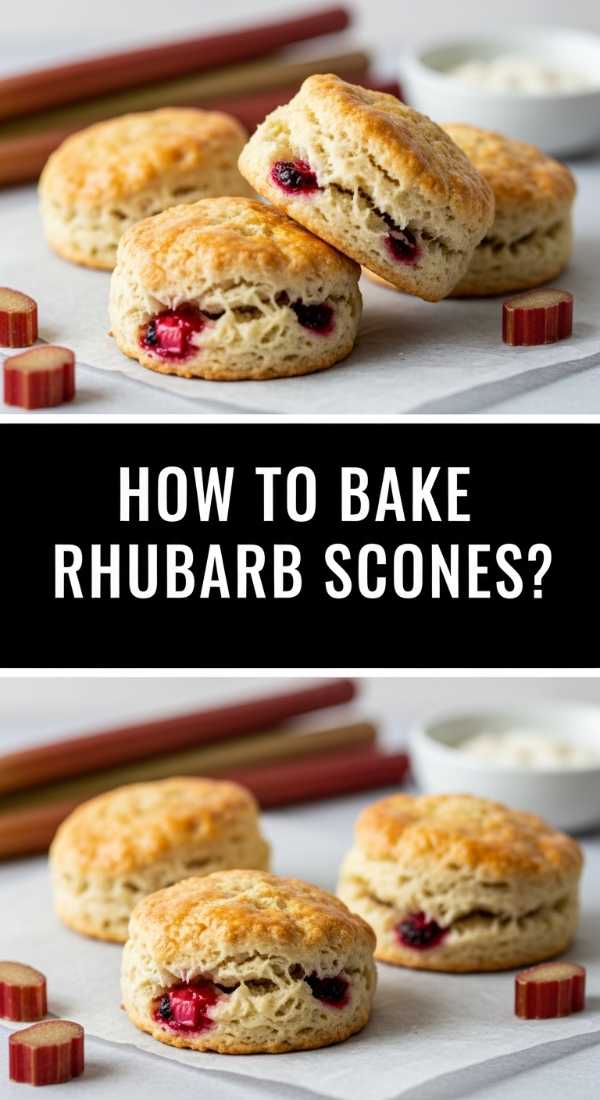
Why we love this
Rhubarb scones are the epitome of rustic charm, featuring a craggy, golden-brown exterior that gives way to a moist, tender interior studded with tart fruit. The way the sharp rhubarb melts into the rich, cream-infused dough creates little pockets of flavor that explode on the palate. When they come out of the oven, the smell of toasted flour and sweet cream is absolutely intoxicating, making them the perfect centerpiece for a morning food board. These scones are less about perfection and more about that ‘home-baked’ feel that makes guests feel instantly comfortable and cared for.
Ingredients
- 3 cups all-purpose flour
- 1/2 cup granulated sugar
- 1 tablespoon baking powder
- 1/2 teaspoon salt
- 3/4 cup cold unsalted butter, cubed
- 1 1/2 cups fresh rhubarb, finely diced
- 1 cup heavy cream (plus extra for brushing)
- 1 teaspoon vanilla extract
- Coarse sparkling sugar for topping
How to make it
- In a large bowl, whisk together the flour, sugar, baking powder, and salt until thoroughly combined.
- Add the cold, cubed butter to the dry ingredients and use a pastry cutter or your fingertips to rub the butter in until the mixture resembles coarse crumbs with some pea-sized pieces of butter remaining.
- Gently fold in the finely diced rhubarb, ensuring the pieces are coated in flour so they don’t clump together in the dough.
- Make a well in the center and pour in the cold heavy cream and vanilla extract, stirring with a fork just until a shaggy dough begins to form—do not overwork.
- Turn the dough out onto a lightly floured surface and gently pat it into a 1-inch thick circle, then cut into 8 even wedges using a sharp knife or a bench scraper.
- Place the wedges on a parchment-lined baking sheet and chill in the refrigerator for 20 minutes; this relaxes the gluten and ensures the butter is cold, resulting in a flakier scone.
- Brush the tops with a little extra cream, sprinkle generously with coarse sugar, and bake at 400°F (200°C) for 18-22 minutes until the tops are golden brown and the centers are set.
How to mold chocolate truffles?
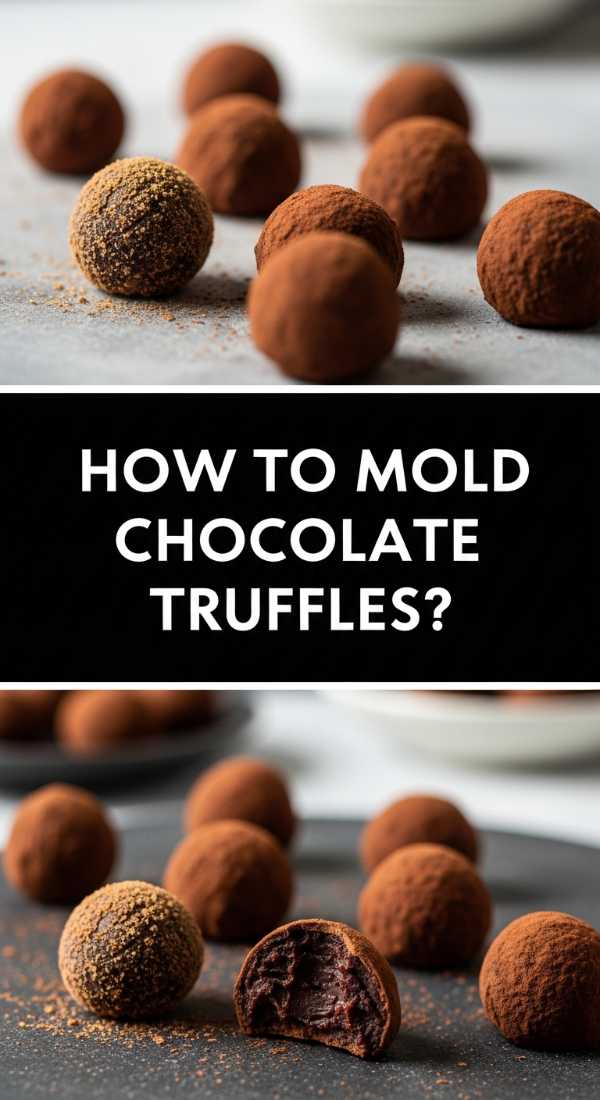
Why we love this
Molding chocolate truffles is the ultimate exercise in indulgence, resulting in a decadent treat that feels incredibly high-end and luxurious. We love the way the thin, tempered chocolate shell snaps between your teeth to reveal a center of silky, dark ganache that coats the tongue in pure chocolate bliss. There is a deep satisfaction in the process of tempering chocolate until it is glossy and smooth, then watching it set into perfect, uniform shapes. These truffles add a touch of drama and elegance to your board, serving as the perfect ‘final bite’ that leaves a lasting impression of sophistication.
Ingredients
- 8 oz high-quality dark chocolate (60% cacao or higher), chopped
- 1/2 cup heavy cream
- 1 tablespoon unsalted butter, room temperature
- Optional: 1 tablespoon liqueur or espresso
- For coating: 12 oz tempered chocolate or cocoa powder
How to make it
- Place the chopped chocolate in a heat-proof glass bowl; bring the heavy cream to a simmer in a small saucepan until small bubbles form around the edges, then pour it immediately over the chocolate.
- Let the mixture sit undisturbed for 5 minutes to allow the heat of the cream to melt the chocolate, then whisk gently from the center outward until a smooth, glossy ganache forms.
- Stir in the butter and any optional flavorings (like liqueur) until completely incorporated, then cover with plastic wrap pressed directly onto the surface and chill for at least 4 hours.
- Once firm, use a small melon baller or a spoon to scoop out 1-inch mounds of ganache, rolling them quickly between your palms to form smooth spheres.
- To mold: fill a clean, dry silicone truffle mold with tempered chocolate, tap it against the counter to remove air bubbles, then invert it over a bowl to pour out the excess, leaving a thin shell.
- Let the shells set, then pipe the chilled ganache into each cavity, leaving 1/8 inch of space at the top; seal the truffles with more tempered chocolate and scrape the surface clean.
- Chill until set, then gently pop the truffles out of the mold—they should have a brilliant, mirror-like shine.
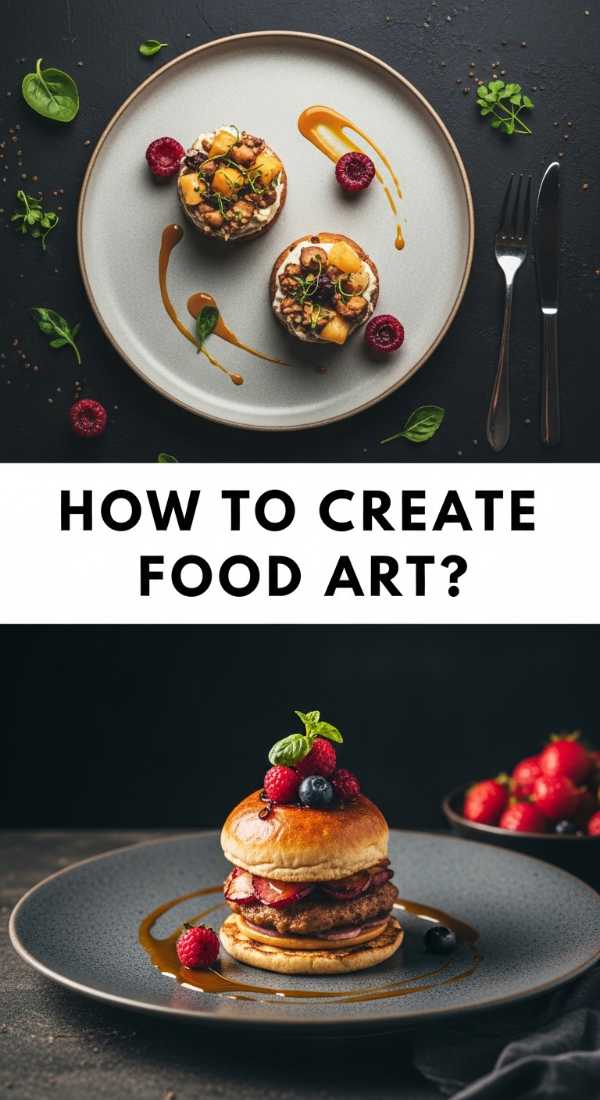
How to create food art?
Why we love this
Creating food art is where your viral board transitions from a simple meal to a storytelling experience. It’s about using the natural colors and shapes of ingredients—the curve of a radish slice, the vibrant green of a microgreen, or the deep purple of a fig—to compose a visual narrative that delights the eye before the first bite is even taken. This process allows you to slow down and appreciate the aesthetic beauty of nature’s bounty, turning the act of hosting into a form of artistic expression. The result is a board that feels balanced, intentional, and so stunningly beautiful that your guests will instinctively reach for their cameras.
Ingredients
- Assorted colorful vegetables (radishes, carrots, peppers)
- Edible flowers (pansies, nasturtiums)
- Fresh herbs (dill, parsley, chives)
- A variety of cheeses and charcuterie
- Small bowls for dips and honey
- A large wooden or marble board
How to make it
- Start by placing your ‘anchors’—the larger items like bowls of dip, wheels of cheese, or bunches of grapes—in a triangular or ‘S’ pattern across the board to create a visual path.
- Use the ‘Rule of Thirds’ to guide your placement, ensuring that no single corner feels too heavy or too empty.
- Incorporate ‘flow’ by shingling crackers or folding charcuterie into roses or ribbons, creating movement that leads the eye from one section of the board to the next.
- Add ‘micro-details’ by using a mandoline to create paper-thin slices of colorful vegetables, then curling or overlapping them to create floral shapes.
- Tuck small sprigs of fresh herbs and edible flowers into any gaps between the larger food items to provide a lush, finished look that mimics a garden.
- Consider the color wheel when placing items; place contrasting colors (like orange carrots next to purple grapes) side-by-side to make each element pop.
- Finish by lightly drizzling honey or sprinkling flaky sea salt over specific areas to add a professional ‘glisten’ and an extra layer of texture.
The Joy of the Viral Food Board
Creating a viral-worthy food board isn’t about following strict rules or spending a fortune—it’s about the heart you put into the presentation and the joy of sharing something beautiful with people you care about. From the tart zing of homemade rhubarb jam to the intricate beauty of hand-decorated sugar cookies, each element we’ve explored today adds a layer of love to your table. I hope these tips inspire you to get into the kitchen, play with your food, and create a masterpiece that is uniquely yours. Remember, the best boards are the ones that end up completely empty, surrounded by the sound of laughter and happy guests!