

Have you ever spent hours scrolling through Pinterest, sighing at the gorgeous, sun-drenched living rooms and perfectly manicured gardens, only to look at your bank account and feel a little bit defeated? We’ve all been there—trapped in that cycle of wanting a high-end home aesthetic but feeling like it’s financially out of reach. But here is a little secret I’ve learned after years of DIY experimenting: the most breathtaking transformations don’t come from a massive contractor’s budget; they come from a little bit of creativity and less than fifty bucks.
Today, I’m sharing the viral home and garden hacks that have absolutely taken the internet by storm because they actually work and they don’t require a second mortgage. From turning a messy plant corner into a curated botanical gallery to creating the kind of backyard privacy that makes you feel like you’re at a five-star resort, these projects are designed to evoke that warm, ‘I can’t believe I did this’ feeling. So, put down the phone, grab your favorite mug of tea, and let’s get into these budget-friendly glow-ups!
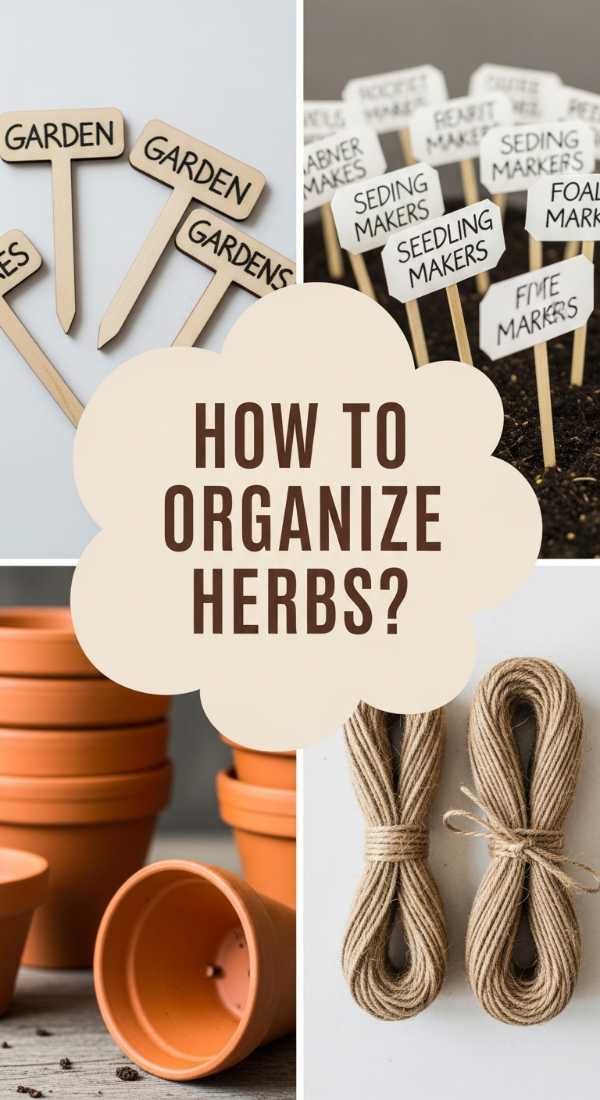
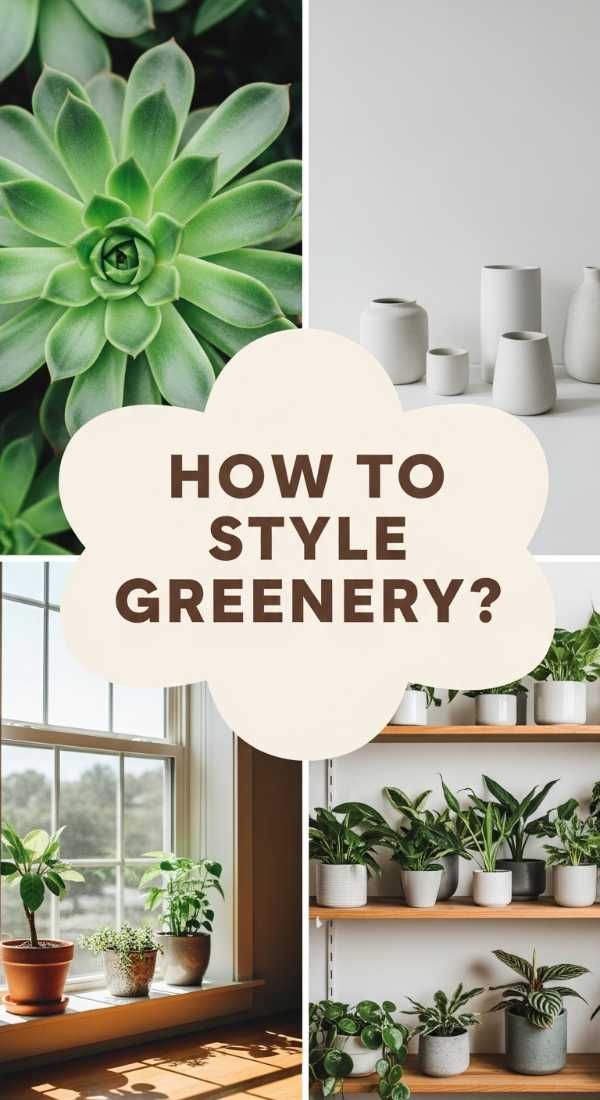
How to Organize Botanical Collections for Aesthetic Growth
Why we love this
There is nothing quite like the sight of a curated plant wall to make a home feel alive and deeply grounded. Imagine the soft morning light filtering through a curtain of Monstera leaves and delicate ferns, their earthy, damp aroma filling your living room with the scent of a hidden rainforest. This organization method turns a cluttered group of pots into a breathing gallery of texture, where the velvety silver of a Pothos meets the rigid, architectural spikes of a Sansevieria. It transforms your space into a serene sanctuary where you can truly breathe and reconnect with nature.
Essential Elements:
- Variable height plant stands or wooden crates
- Coordinated ceramic or terracotta pots
- Pruning shears
- Moss poles for climbing species
- Decorative pebbles for top-dressing
How to make it
- Begin by auditing your collection and grouping plants by their light requirements. Place high-light lovers like succulents at the top and low-light ferns near the bottom.
- Utilize vertical space by installing floating shelves or using tiered stands. The key is to create ‘levels’ so the eye travels across a lush landscape rather than a flat line of pots.
- Repot your plants into a cohesive color palette; for under $50, you can buy bulk terracotta and paint them with a matte chalk finish for a high-end, unified look.
- Incorporate moss poles for trailing vines like Monstera Adansonii. Gently tie the nodes to the pole using soft garden twine, encouraging them to climb upward, which actually triggers larger leaf growth.
- Finish the look by adding a layer of polished river stones or white pebbles to the top of the soil. This hides the dirt, retains moisture, and provides that ’boutique’ botanical shop finish.
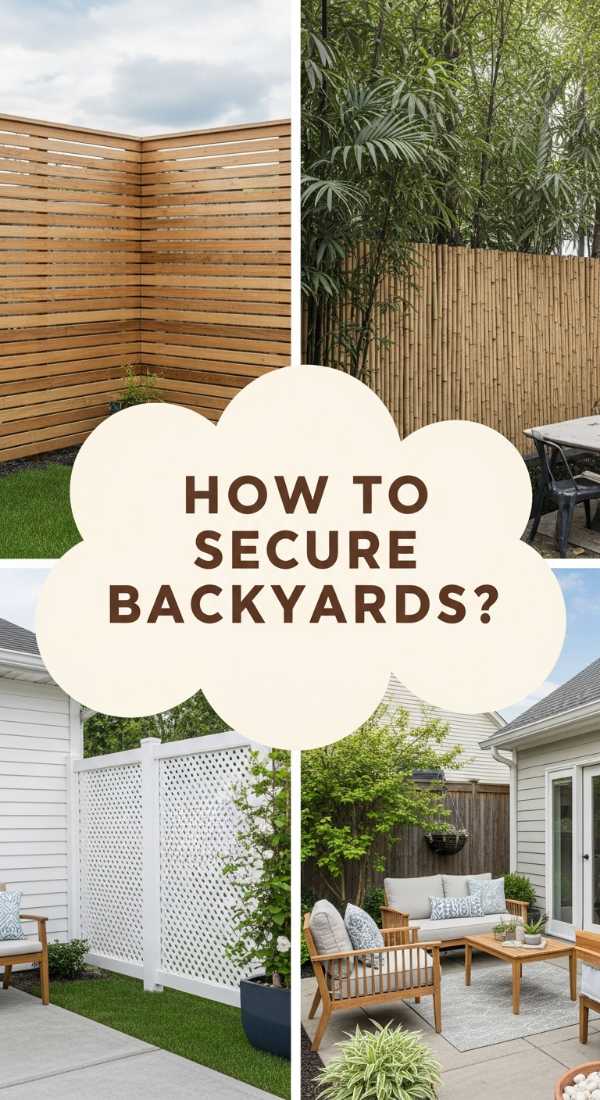
How to Secure Your Backyard for Total Privacy
Why we love this
Creating a private oasis is all about reclaiming your peace and turning your backyard into a personal retreat where the outside world simply disappears. Imagine the sound of a gentle breeze rustling through high-quality outdoor fabric or wooden slats, shielding you from the prying eyes of neighbors while you enjoy your morning coffee in your pajamas. The feeling of total seclusion adds a layer of luxury to your outdoor space, making it feel like an extension of your indoor living room—a cozy, sun-dappled sanctuary where you can truly let your guard down.
Essential Elements:
- Pressure-treated wood furring strips
- Heavy-duty outdoor drop cloths or canvas
- Galvanized screws and a drill
- Outdoor-rated staple gun
- Weather-resistant wood stain
How to make it
- Measure the gaps in your existing fence or the open spaces of your porch that need screening.
- Purchase inexpensive wood furring strips and cut them to size. Sand them down to prevent splinters and apply a dark walnut or cedar stain for an expensive, custom-built appearance.
- Construct a simple rectangular frame using the strips. Use a square tool to ensure the corners are perfectly 90 degrees before driving in your galvanized screws.
- Stretch heavy-duty canvas or drop cloths across the frame. Start at the center of the top rail and work your way out to the corners, pulling the fabric taut before stapling it to the back of the frame.
- Mount the panels to your existing structures using heavy-duty hooks or zip ties for a removable option, or screw them directly into posts for a permanent, high-end privacy wall.
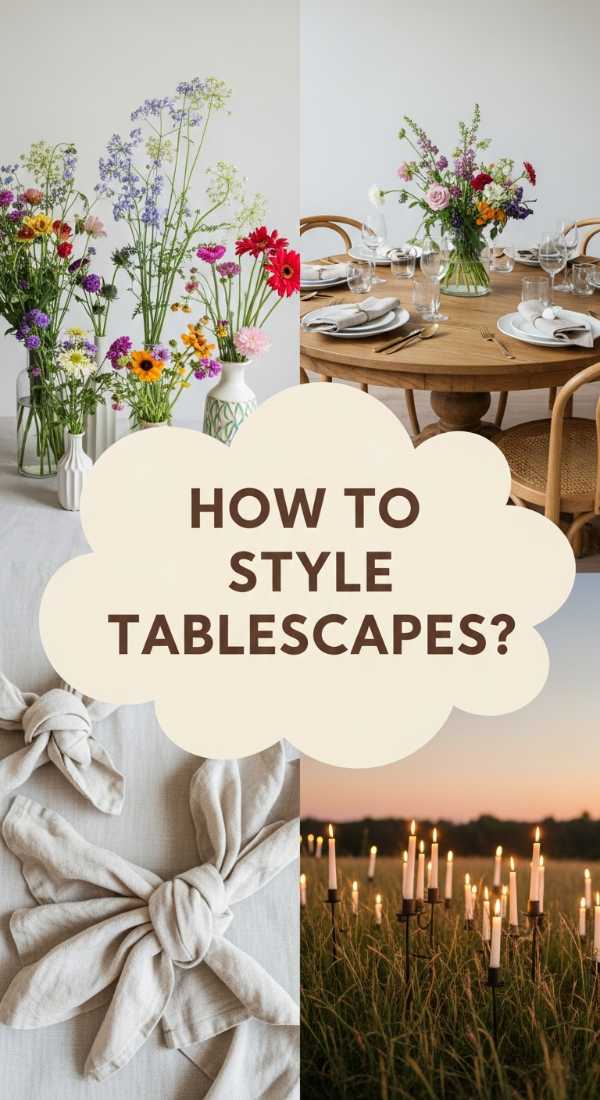
How to Style Summer Tablescapes for Effortless Charm
Why we love this
A beautifully styled table is the heart of summer entertaining, evoking memories of long, golden-hour dinners and the sweet smell of jasmine on the evening air. We love this because it relies on foraged beauty and tactile textures—think crisp linen, the cool touch of stoneware, and the wild, organic shapes of garden-clipped greenery. It makes your guests feel immediately honored and relaxed, creating an atmosphere where the wine flows easily and the conversation lingers long after the sun has set beneath the horizon.
Essential Elements:
- A neutral linen or cotton table runner
- Mismatched vintage glass bottles or bud vases
- Foraged greenery and wildflowers
- Unscented taper candles and holders
- Twine or ribbon for napkin rings
How to make it
- Start with a clean, neutral base by draping a linen runner down the center of the table. Allow the ends to hang naturally for a relaxed, European farmhouse vibe.
- Gather a collection of glass bottles in varying heights. You can find these at thrift stores for pennies. Arrange them in a zig-zag pattern down the length of the runner to create visual movement.
- Head to your garden or a local park and forage for seasonal greenery like eucalyptus, olive branches, or even long-stemmed grasses. Place one or two stems in each bottle, keeping the arrangement light and airy.
- Add height and drama by placing three to five taper candles in simple holders throughout the greenery. Opt for cream or beeswax colors for a warm, flickering glow that feels timeless.
- Roll your napkins loosely and tie them with a simple piece of jute twine and a sprig of rosemary. This adds a sensory, aromatic element that delights guests the moment they sit down.
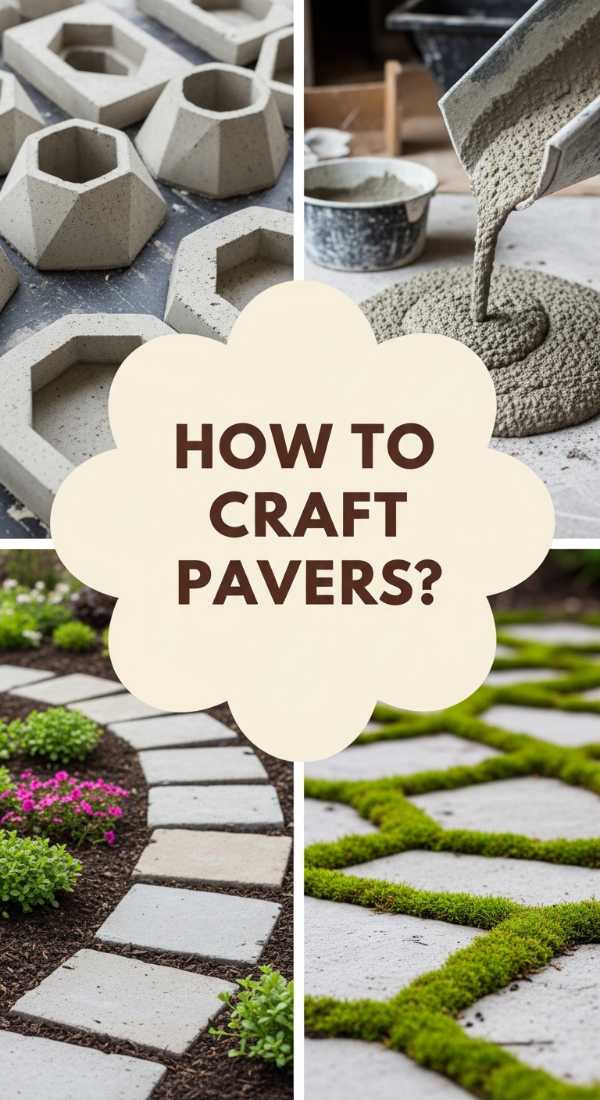
How to Craft Custom Pavers for High End Pathways
Why we love this
There is something incredibly satisfying about walking down a path that you laid with your own two hands, feeling the solid, textured surface beneath your feet. Custom pavers add an architectural rhythm to your garden, leading the eye toward hidden corners and blooming flower beds. By making them yourself, you can infuse them with a bespoke charm—perhaps embedding a few smooth sea-glass fragments or a delicate leaf imprint—creating a high-end, European estate look that usually costs thousands, all for the price of a few bags of concrete.
Essential Elements:
- 80lb bag of Quikrete or concrete mix
- A plastic or silicone paver mold
- A large mixing bucket and stir stick
- Cooking spray (as a release agent)
- A trowel for smoothing
How to make it
- Level the ground where you want your path to go. Remove any sod and lay down a thin layer of sand to create a stable, draining base for your pavers.
- Lightly coat the inside of your paver mold with cooking spray; this ensures the concrete pops out cleanly without chipping the delicate edges.
- Mix the concrete in your bucket, adding water slowly until it reaches the consistency of thick oatmeal. If it’s too runny, the paver will be weak; if it’s too dry, it won’t take the shape of the mold.
- Pour the mixture into the mold, using a trowel to press it into every corner. Tap the sides of the mold firmly to release any trapped air bubbles, which ensures a smooth, professional finish.
- Let the concrete set for at least 24 hours before gently lifting the mold. Repeat the process along your path, filling the gaps between pavers with pea gravel or moss for a lush, established look.
How to Create Room Zones for Chic Separation

Why we love this
In the age of open-concept living, creating ‘zones’ is the secret to making a large room feel cozy, intentional, and expensive. We love this technique because it uses the furniture you already own to dictate the flow of energy throughout your home. Imagine the comfort of a clearly defined ‘reading nook’ tucked away from the main living area, marked by the soft boundary of a rug and the warm glow of a floor lamp. It creates a sense of order and purpose, making your home feel curated rather than cluttered.
Essential Elements:
- Area rugs to anchor specific spaces
- Tall indoor plants or bookshelves
- Sofa tables or slim consoles
- Coordinated lighting (floor and table lamps)
- Decorative floor pillows or poufs
How to make it
- Identify the different functions of your room—perhaps a relaxation zone, a workspace, and a dining area. Visualize invisible lines separating these activities.
- Use an area rug to ‘anchor’ the main seating area. Ensure all the front legs of your furniture are resting on the rug; this visually tethers the pieces together into one cohesive unit.
- Position the back of your sofa toward the rest of the room to act as a physical wall. Place a slim console table behind it with a few books and a lamp to create a sophisticated transition.
- Incorporate ‘soft dividers’ like a tall fiddle-leaf fig or a semi-open bookshelf. These provide a vertical break in the room without blocking light or making the space feel smaller.
- Ensure each zone has its own dedicated light source. A floor lamp over a chair creates an instant reading corner, while a small lamp on a desk defines the workspace during evening hours.
How to Style Indoor Greenery for Lush Vibes
Why we love this
Transforming your home into a lush indoor jungle is about more than just buying plants; it’s about the art of the ‘vibe.’ We love this because it brings a sense of wild, untamed beauty indoors, where the vibrant green leaves contrast beautifully against neutral walls and wooden furniture. There’s a psychological lift that comes from being surrounded by living things—the air feels fresher, the mood feels lighter, and the visual depth created by layered foliage makes even the smallest apartment feel like a grand conservatory.
Essential Elements:
- A mix of trailing, upright, and bushy plants
- Hanging macrame planters
- Decorative wall hooks
- Organic fertilizers (like fish emulsion)
- Fine-mist spray bottle for humidity
How to make it
- Start by choosing a focal point, like a window or an empty corner. Place your largest, most ‘architectural’ plant there, such as a Bird of Paradise or a large Dracaena, to act as the anchor.
- Incorporate height by using hanging planters. Position hooks in the ceiling at varying distances from the window, allowing trailing plants like Pothos or String of Pearls to drape down like living tinsel.
- Cluster smaller plants in groups of three. Use the ‘thriller, filler, spiller’ rule: one tall plant, one bushy plant, and one that hangs over the edge of the pot.
- Maintain the ‘lush’ look by cleaning leaves regularly with a damp cloth. This allows the plant to photosynthesize better and gives the leaves a healthy, high-gloss shine.
- Boost the humidity by grouping plants together; they create their own microclimate. Mist them in the morning to mimic the dew of their natural habitats, keeping the foliage vibrant and crisp.
How to Design Curb Appeal for a Welcoming Entrance

Why we love this
Your front door is the first thing you see when you come home, and it sets the tone for your entire evening. We love this quick renovation because it provides instant gratification—a pop of sophisticated color against a clean porch makes the whole house look refreshed and cared for. Imagine walking up to a glossy navy or sage green door, flanked by the scent of fresh lavender and the glow of updated hardware. It’s a warm hug for you and a stylish statement for every guest who walks through your portal.
Essential Elements:
- One quart of high-quality exterior door paint
- Angled sash brush and a small roller
- New modern house numbers
- Large outdoor planters
- Fresh coir doormat
How to make it
- Start by cleaning your door thoroughly with sugar soap to remove all grease and grime. Lightly sand the surface with 220-grit sandpaper to ensure the new paint adheres perfectly.
- Tape off your hardware and glass inserts using painter’s tape. Apply a primer if you are making a drastic color change (e.g., from dark to light).
- Apply the paint using the ‘panel first’ method. Use your brush for the recessed areas and the roller for the flat surfaces to ensure a smooth, factory-like finish without visible brush strokes.
- Swap out your old, dated house numbers for sleek, modern versions in matte black or brushed brass. Mount them vertically or horizontally depending on your home’s architectural lines.
- Frame the door with two large, identical planters. Fill them with a mix of evergreen shrubs and seasonal flowers to add a burst of life and color that lasts all year round.
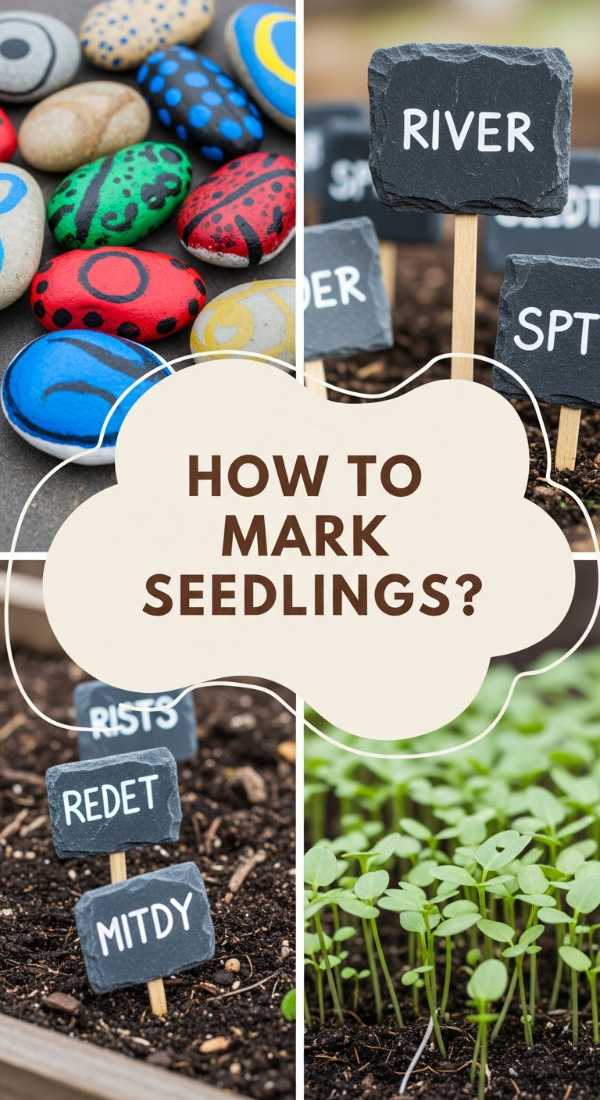
How to Mark Your Seedlings for Expert Gardening
Why we love this
There is a quiet joy in the organization of a spring garden, where every tiny sprout has a name and a future. Custom seedling markers bring a sense of ‘expert’ charm to your vegetable patches, replacing flimsy plastic tags with something tactile and beautiful. We love this because it connects you more deeply to the growing process; seeing ‘Heirloom Tomato’ hand-written on a smooth river stone or a wooden stake makes the garden feel like a curated project rather than a chore. It’s the little details that turn a backyard plot into a master gardener’s retreat.
Essential Elements:
- Smooth river stones or wooden paint stirrers
- Outdoor permanent markers or paint pens
- Clear waterproof sealant spray
- Copper wire (optional for hanging tags)
- Twine
How to make it
- Collect smooth, flat stones from your yard or purchase a small bag of river rocks. Scrub them clean and let them dry completely in the sun.
- Use a white or gold paint pen to write the names of your herbs and vegetables in a clear, calligraphic script. If you prefer a rustic look, use wooden stakes and a wood-burning tool.
- For added flair, draw a tiny icon of the plant next to its name—a small carrot, a leaf of basil, or a tiny sun for sunflowers.
- Once the ink is dry, spray each marker with a clear, UV-resistant waterproof sealant. This prevents the writing from fading under the harsh summer sun or washing away during heavy rains.
- Place the markers at the base of your seedlings. For a ‘high-end nursery’ look, use copper wire to hang wooden tags from the cages of your climbing plants like peas or tomatoes.
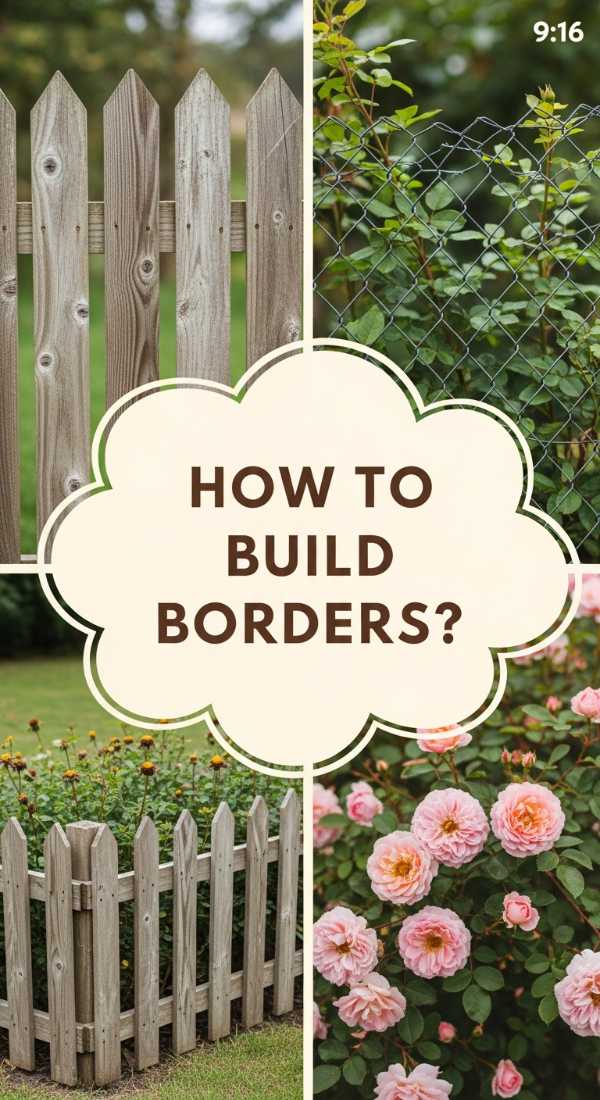
How to Build Rustic Borders for Saving Money
Why we love this
A garden without borders often feels unfinished, but traditional stone edging can cost a fortune. This rustic approach uses natural, often free materials to create a clear, beautiful definition between your lawn and your flower beds. We love the way a hand-built border of woven branches or recycled wood creates a ‘secret garden’ aesthetic. It feels organic, humble, and incredibly stylish, providing a textured frame that makes the colors of your blooms pop while keeping mulch exactly where it belongs.
Essential Elements:
- Flexible fallen branches (willow or hazel work best)
- A rubber mallet
- Sturdy wooden stakes
- Gardening gloves
- Pruning shears
How to make it
- Clear a 2-inch wide trench along the edge of your garden bed. This gives your border a ‘set-in’ look and helps with drainage.
- Drive sturdy wooden stakes into the ground every 12 inches along the trench using your rubber mallet. Ensure they are all at a uniform height for a clean look.
- Take your flexible branches and begin weaving them in and out of the stakes. Start at the bottom and push the branches down firmly to create a tight, solid wall.
- Overlap the ends of the branches as you go to ensure there are no gaps. This ‘wattle’ technique has been used for centuries and is incredibly durable against the elements.
- Once you reach your desired height, trim any stray twigs with your shears. Fill the garden side of the border with fresh mulch to create a striking contrast against the rustic wood.
How to Arrange Floral Displays for Natural Beauty

Why we love this
A professional-looking floral arrangement can change the entire energy of a room, bringing in the sweet, intoxicating perfume of lilies or the bright, cheerful scent of sunflowers. We love the ‘natural’ arrangement style because it celebrates imperfection—it looks as though you simply wandered through a meadow and gathered the most beautiful things you found. The result is an ethereal, airy display that feels sophisticated and expensive, yet costs almost nothing if you forage from your own backyard or buy the ‘clearance’ bundles at the grocery store.
Essential Elements:
- A wide-mouthed vase or ceramic pitcher
- Chicken wire or a floral frog
- Sharp floral shears
- Foraged ‘filler’ (branches, grasses, or leaves)
- Primary ‘focal’ flowers
How to make it
- Create a structure inside your vase using a ball of chicken wire or a floral frog. This is the ‘pro secret’ that allows you to place stems at specific angles rather than having them all fall to the sides.
- Start with your ‘greenery’ or ‘filler.’ Place these stems first to create a structural skeleton for the arrangement. Aim for an asymmetrical shape to keep it looking modern and organic.
- Add your ‘focal’ flowers—the largest, showiest blooms. Place them at varying heights and depths within the arrangement. Rule of thumb: place larger blooms lower and smaller ones higher to create visual balance.
- Fill in the gaps with ‘airy’ elements like Baby’s Breath, Queen Anne’s Lace, or decorative grasses. These should ‘float’ above the main flowers to add movement and light.
- Change the water every two days and trim a half-inch off the stems at a 45-degree angle. This keeps the flowers hydrated and extends the life of your gorgeous, budget-friendly display.
Conclusion: Your Dream Home is Closer Than You Think
As we’ve seen, creating a home that feels like a sanctuary doesn’t require a massive budget or a team of professionals. It’s about the small, intentional touches—the way a plant climbs a pole, the glow of a freshly painted door, or the texture of a hand-woven garden border. These viral DIYs prove that with less than $50 and a little bit of weekend time, you can transform your everyday environment into something truly extraordinary. So, which project are you going to start first? Your beautifully renovated home is just one small project away!