

Sparkle & Shine: 10 Party Nail Designs to Steal the Spotlight
Hello, my loves! There is something so incredibly magical about the way a fresh manicure makes us feel, isn’t there? It’s like wrapping your hands in a tiny, glittering hug. Whether you’re clenching a mimosa at a brunch or dancing under the neon lights, your nails are that little spark of confidence that says, “I’m here, and I’m ready to shine.” I’ve spent so many late nights with my besties, laughing over spilled polish and choosing just the right shade of pink, and I wanted to bring that same warm, fuzzy feeling to you today.
In this guide, I’ve gathered my absolute favorite party-ready designs. Think of this as your personal invitation to play, create, and pamper yourself. We’re going on a journey through soft pastels, daring neons, and timeless pearls. So, grab a cup of tea (or a glass of bubbly!), settle into your favorite cozy chair, and let’s find the perfect look to help you steal the spotlight at your next big event.
5 Easy Steps to Glam Bachelorette Nails

Why to love these Nails:
These nails are the ultimate celebration of friendship and love. They balance that perfect line between high-fashion glamour and playful fun, ensuring you look stunning in every single photo while you’re out on the town with your favorite girls.
Essential Items:
- Soft pink base polish
- Chunky silver glitter
- Fine-tip nail brush
- High-shine top coat
How to Prepare:
- Apply two thin coats of your soft pink base.
- While the second coat is tacky, dab chunky glitter at the base of the nail.
- Use a fine brush to pull a few glitter pieces toward the center for an ombré effect.
- Clean up the edges with a cotton swab dipped in remover.
- Seal the look with a thick layer of high-shine top coat.
Budget Range
- Essie ‘Ballet Slippers’ ($10)
- Holo Taco ‘Cosmic Unicorn Skin’ ($13)
- Seche Vite Dry Fast Top Coat ($9)
Prepare Tea Party Nails in 4 Easy Steps

Why to love these Nails:
Imagine sipping Earl Grey in a sun-drenched garden; these nails are the embodiment of that serene, sophisticated moment. They are delicate, feminine, and whisper elegance without needing to shout.
Essential Items:
- Creamy white polish
- Floral nail decals
- Tweezers
- Matte top coat
How to Prepare:
- Paint your nails with two coats of creamy white for a clean canvas.
- Once dry, use tweezers to carefully place floral decals on your accent nails.
- Press the decals down firmly to ensure there are no air bubbles.
- Finish with a matte top coat for a soft, velvet-like vintage feel.
Budget Range
- OPI ‘Funny Bunny’ ($11)
- Floral Nail Art Stickers from Amazon ($7)
- Sally Hansen Miracle Gel Matte Top Coat ($8)
6 Steps for Sparkly Party Nails

Why to love these Nails:
These are for the nights when you want to be the human equivalent of a disco ball. They catch every flicker of light and turn your hands into the star of the show. It’s pure, unadulterated joy in a bottle.
Essential Items:
- Deep navy or black base
- Multichrome glitter polish
- Sponge applicator
- Nail latex (optional)
- Clean-up brush
- Gel-effect top coat
How to Prepare:
- Apply your dark base color and let it dry completely.
- Apply nail latex around your cuticles to keep things tidy.
- Paint the glitter polish onto a makeup sponge.
- Dab the sponge onto the nail to build maximum glitter density.
- Peel off the latex and clean any stray sparkles with a brush.
- Apply two coats of top coat to smooth out the texture.
Budget Range
- Zoya ‘Storm’ ($12)
- ILNP ‘Mega’ Holographic Polish ($12.50)
- Glisten & Glow Top Coat ($9)
Design 3D Bow Nails in 5 Steps
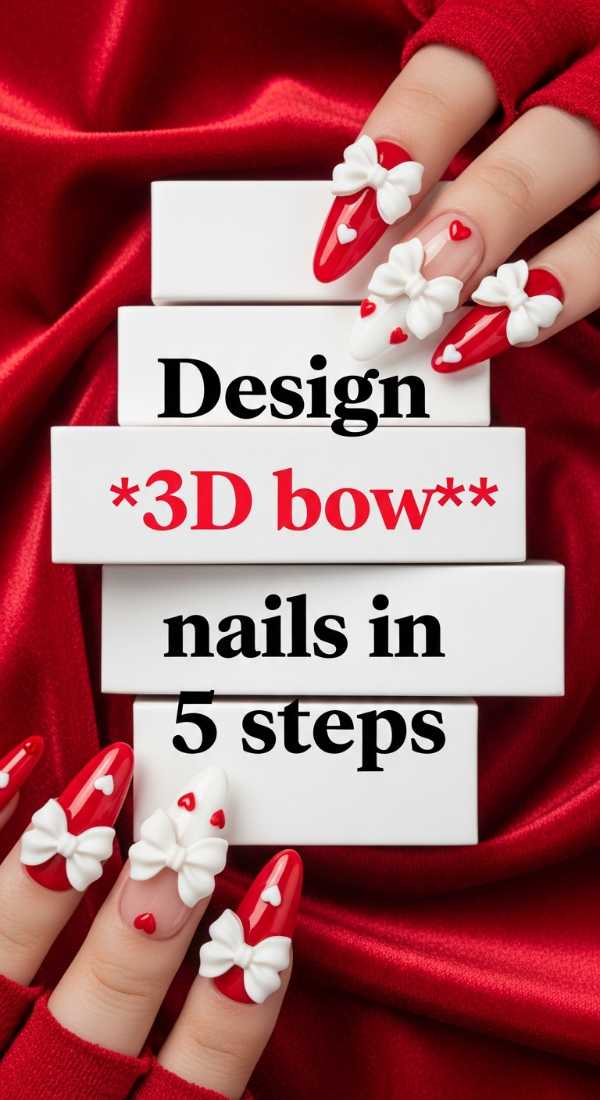
Why to love these Nails:
Coquette aesthetic lovers, this one is for you! Adding a 3D element makes your manicure feel like a piece of wearable art. It’s whimsical, sweet, and adds a touch of couture to your everyday look.
Essential Items:
- Nude gel polish
- Mini resin bow charms
- Nail glue or thick builder gel
- UV lamp (if using gel)
- Dotting tool
How to Prepare:
- Prep your nails with a clean nude gel base and cure.
- Apply a small bead of builder gel or nail glue to the center of your nail.
- Carefully place the resin bow charm onto the glue using a dotting tool.
- Hold the charm in place and cure under the lamp for 60 seconds.
- Apply top coat around the edges of the bow to secure it further.
Budget Range
- Gelish ‘Naked Naive’ ($13)
- Kredioo 3D Nail Charms Kit ($10)
- Makartt Rhinestone Glue ($9)
Create Pearl Bridal Nails in 4 Steps

Why to love these Nails:
There is nothing quite as timeless as pearls. This design is for the bride who wants a touch of tradition with a modern, textured twist. It’s ethereal, romantic, and looks breathtaking against a white dress.
Essential Items:
- Iridescent sheer polish
- Flat-back half pearls
- Wax picker tool
- Strong nail adhesive
How to Prepare:
- Apply two coats of iridescent sheer polish for a pearlescent glow.
- Place tiny drops of adhesive where you want your pearls to sit.
- Use the wax picker tool to gently lift and place the half-pearls onto the adhesive.
- Let the adhesive set completely before adding a final light mist of setting spray.
Budget Range
- Essie ‘Pure Pearlfection’ ($10)
- BORN PRETTY Mixed Pearl Studs ($6)
- Beadsland Wax Pen ($5)
7 Steps to Pastel Tea Party Nails
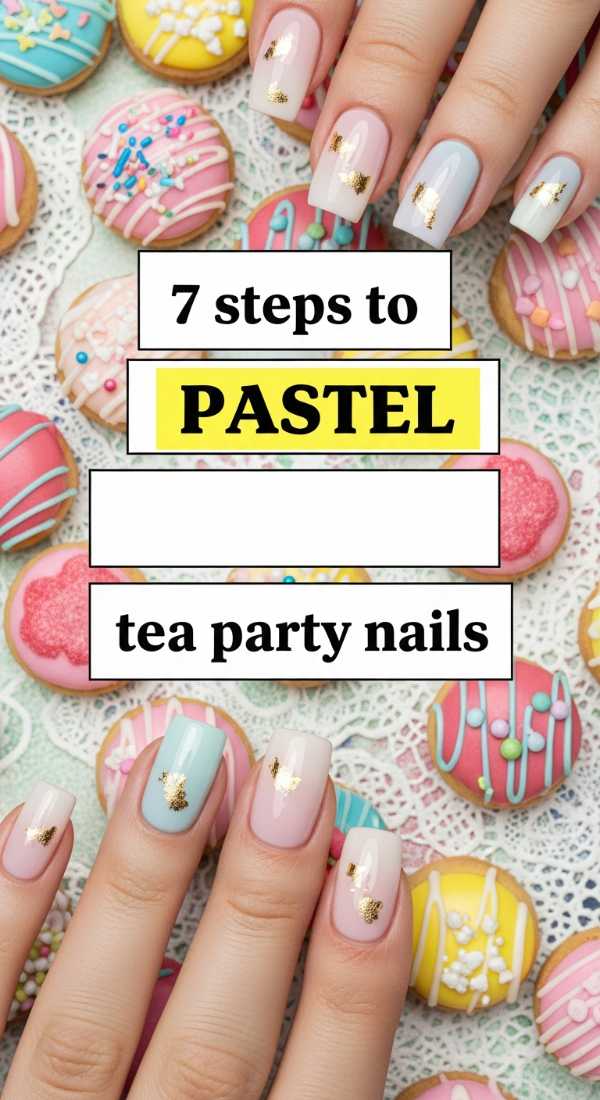
Why to love these Nails:
These nails are like a box of French macarons—sweet, colorful, and completely irresistible. They bring a youthful, breezy energy to any afternoon gathering and look stunning with a lace dress.
Essential Items:
- Pastel mint, lavender, and peach polishes
- Striping tape
- Thin detail brush
- White acrylic paint
- Top coat
- Cuticle oil
- Buffing block
How to Prepare:
- Smooth your nail surface with a buffing block.
- Paint each nail a different pastel shade as a base.
- Apply striping tape diagonally to create sections.
- Use the detail brush to fill in sections with contrasting pastel colors.
- Add tiny white dots using acrylic paint for a lace effect.
- Remove the tape while the polish is still slightly damp.
- Seal with top coat and finish with cuticle oil for a healthy glow.
Budget Range
- Olive & June Pastel Set ($40)
- Winstonia Detail Brushes ($8)
- Cupa Cuticle Oil Pen ($7)
Prepare Disco Party Nails in 3 Steps
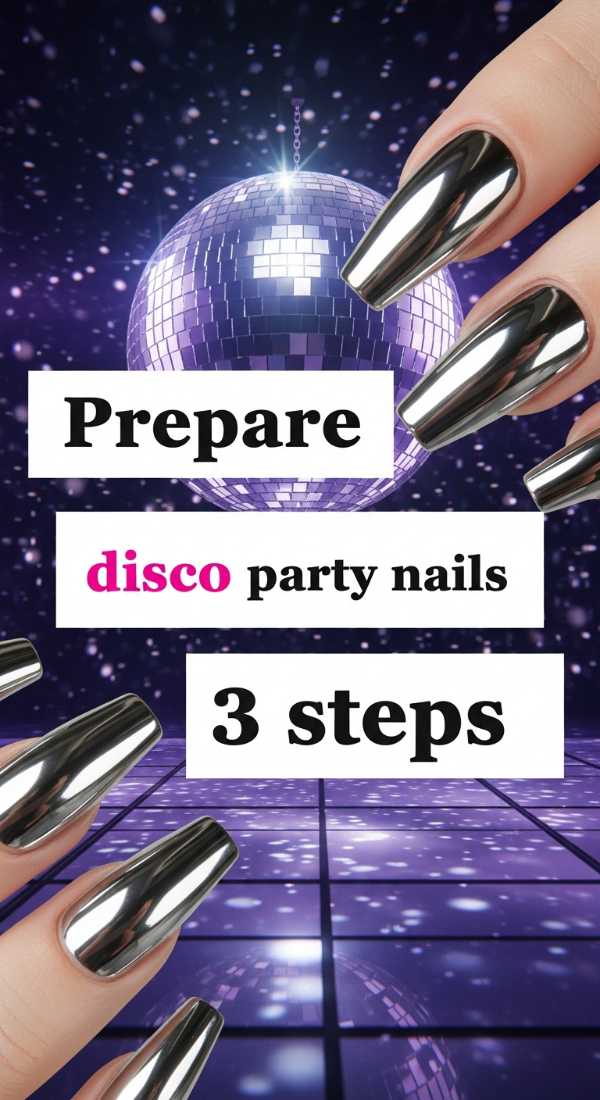
Why to love these Nails:
When the music starts, you want a look that moves with you. These disco nails are fast, flashy, and perfect for the girl on the go who needs high impact with minimal effort.
Essential Items:
- Silver metallic foil polish
- Holographic top coat
- Quick-dry spray
How to Prepare:
- Swipe on two coats of metallic silver foil polish for a mirror-like finish.
- Immediately layer a thick coat of holographic glitter over the top.
- Finish with quick-dry spray so you can hit the dance floor in minutes.
Budget Range
- Sally Hansen Insta-Dri ‘Shooting Star’ ($7)
- China Glaze ‘Fairy Dust’ ($8)
- Demert Nail Enamel Dryer ($9)
4 Steps for Classy Bachelorette Nails
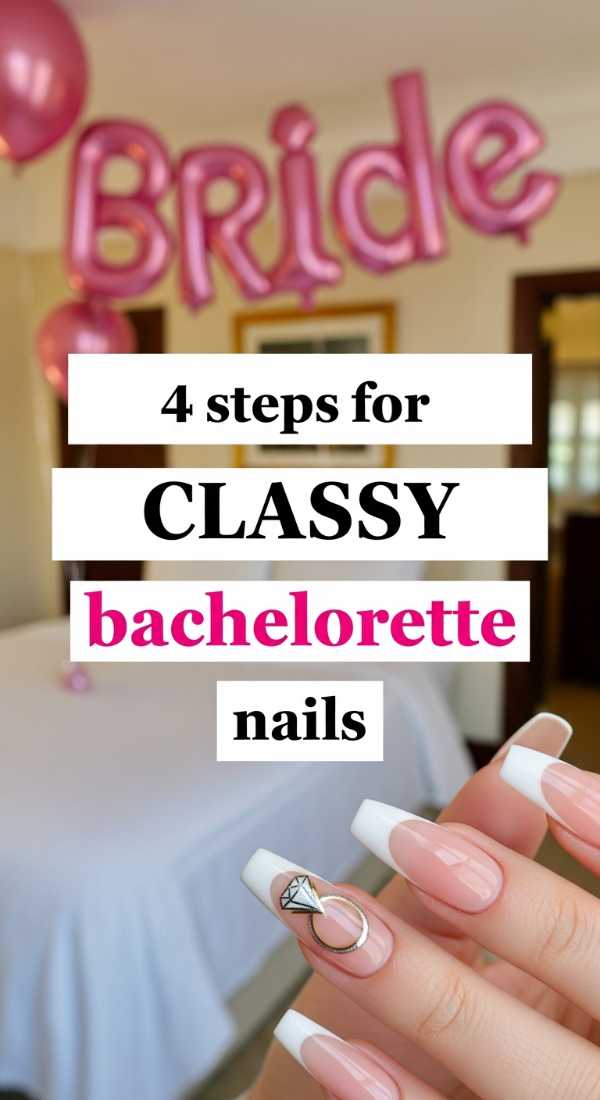
Why to love these Nails:
Sometimes, less is more. These nails are for the sophisticated bridesmaid or bride-to-be who wants a clean, expensive-looking aesthetic that transitions perfectly from brunch to the club.
Essential Items:
- Sheer beige polish
- Gold foil flakes
- Clear top coat
- Tweezers
How to Prepare:
- Apply two coats of sheer beige for a “your nails but better” look.
- Use tweezers to place tiny flecks of gold foil near the tips.
- Gently press the foil down so it lays flat against the nail.
- Apply a generous layer of clear top coat to lock in the gold.
Budget Range
- OPI ‘Bubble Bath’ ($11)
- 24K Gold Leaf Flakes for Nails ($6)
- Seche Vite Dry Fast Top Coat ($9)
Make Vintage Tea Party Nails in 5 Steps

Why to love these Nails:
This design is a love letter to the past. It feels like a vintage wallpaper pattern or a delicate porcelain teacup, bringing a sense of nostalgia and artistry to your fingertips.
Essential Items:
- Dusty rose polish
- Sage green polish
- Toothpick or dotting tool
- Fine-tip brush
- Matte top coat
How to Prepare:
- Paint your nails with a dusty rose base.
- Use a toothpick to create small, swirling circles of a lighter pink for the rosebuds.
- Add two tiny sage green leaves next to each rosebud using the fine brush.
- Wait for the art to dry completely to avoid smearing.
- Apply a matte top coat to give it that aged, vintage ceramic appearance.
Budget Range
- Revlon ‘Teak Rose’ ($6)
- Essie ‘Win Me Over’ Sage ($9)
- Nail Art Dotting Tools Set ($5)
5 Steps for Neon Party Nails

Why to love these Nails:
Electric, vibrant, and full of life! These neon nails are for the bold souls who aren’t afraid to stand out. They glow under blacklight and practically vibrate with fun energy.
Essential Items:
- Bright white base polish
- Neon lime or pink polish
- Glow-in-the-dark top coat
- Clean-up brush
- Acetone
How to Prepare:
- Start with a coat of bright white polish (this makes the neon pop!).
- Apply two coats of your chosen neon shade over the white.
- Use a clean-up brush dipped in acetone to ensure the edges are crisp.
- Apply the glow-in-the-dark top coat for a nighttime surprise.
- Keep the layers thin to ensure even drying and maximum brightness.
Budget Range
- Orly ‘Neon Earth’ Collection ($12/each)
- Sinful Colors ‘White On’ ($3)
- Venalisa Glow In The Dark Top Coat ($8)
Let Your Inner Light Shine
Whether you chose the delicate pearls or the electric neons, remember that the most beautiful thing you can wear is your smile. Your nails are just the cherry on top of the wonderful person you already are. I hope these designs bring a little extra sparkle to your next celebration and remind you to always take a moment for yourself. You deserve to feel pampered and polished, my loves. Go out there and shine bright!