
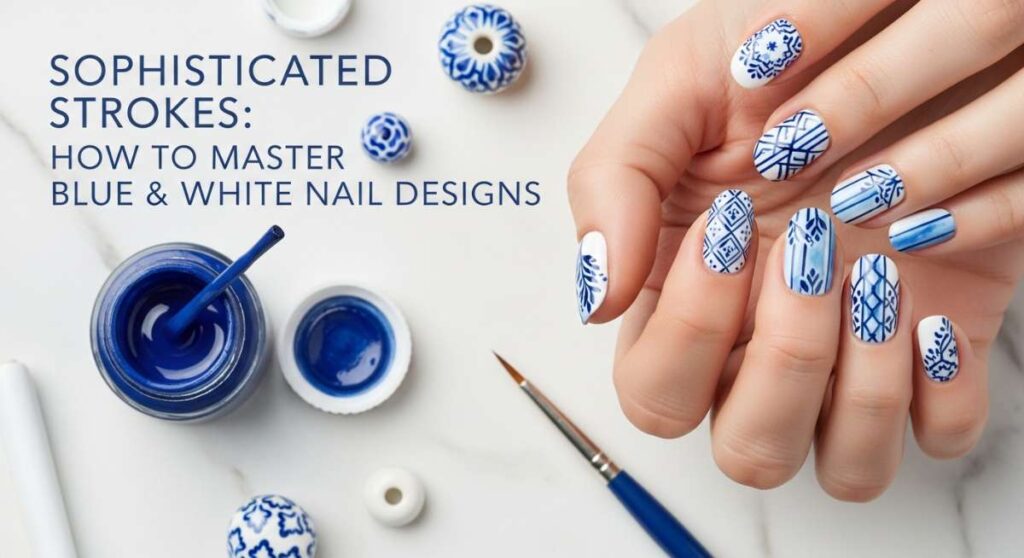
Sophisticated Strokes: How to Master Blue & White Nail Designs
Hello, my loves! Welcome back to our cozy little corner of the internet. There is something so incredibly soul-soothing about the color blue, isn’t there? It’s the shade of a clear summer morning and the deep, mysterious heartbeat of the ocean. When we pair that serenity with the crisp, clean slate of white, we create a look that feels like a warm, cloud-soft embrace for your fingertips.
Today, I want to take you by the hand and guide you through the art of the perfect blue and white manicure. Whether you’re sipping tea on a rainy afternoon or heading out to a sun-drenched brunch, these designs are meant to make you feel polished, peaceful, and entirely yourself. Let’s dive into this sea of sapphire and cream together, shall we?
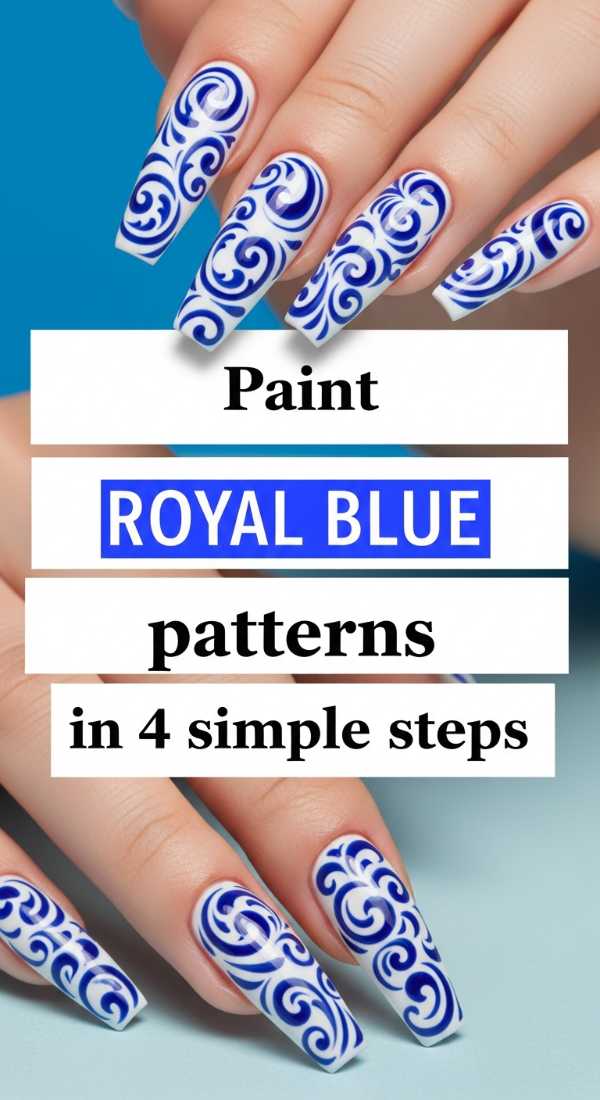
Paint Royal Blue Patterns in 4 Simple Steps
Why to love this Design:
This design is for my loves who want to feel like royalty. Royal blue is a power color—it’s confident yet grounded—and when you use it to create intricate patterns over a white base, it looks like high-end art you’d find in a gallery. It’s bold, it’s beautiful, and it’s surprisingly easy to achieve.
Essential Elements:
- Opaque Royal Blue Polish
- Stark White Base Polish
- Fine Detail Nail Art Brush
- Glossy Top Coat
How to Prepare:
- Apply two thin coats of white polish and let them dry completely until they are smooth as silk.
- Dip your fine detail brush into the royal blue and draw a simple ‘S’ curve or geometric triangle in the center.
- Add smaller dots or delicate leaf-like strokes branching off your main shape to build the pattern.
- Seal your masterpiece with a high-shine top coat to lock in that regal pigment.
Budget Range
- Essie ‘Butler Please’ – $10.00
- Sally Hansen ‘White On’ – $5.00
- Detail Brush Set – $7.00
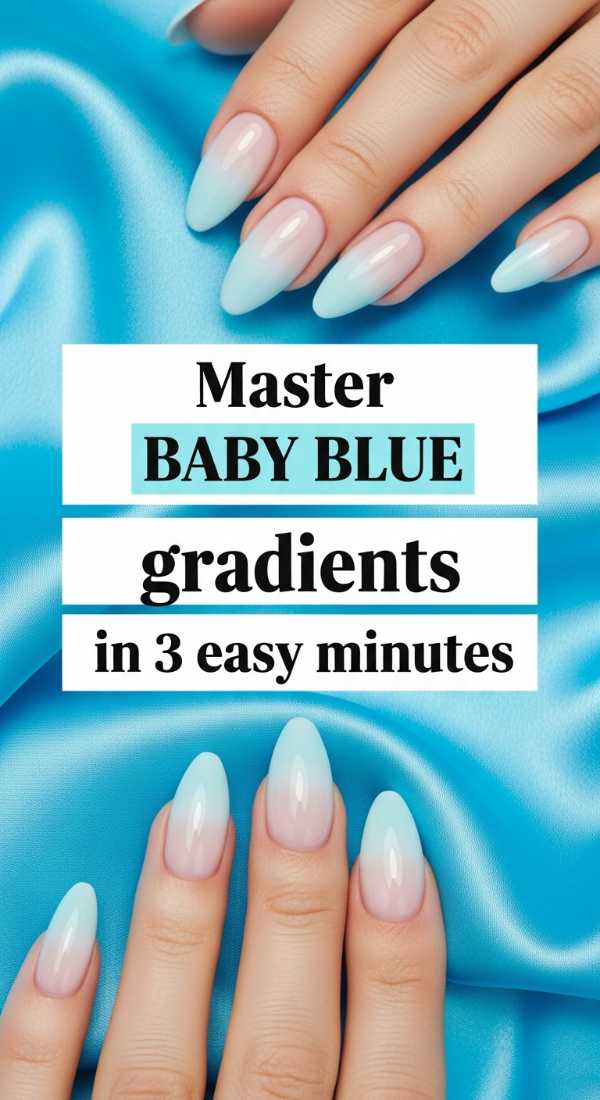
Master Baby Blue Gradients in 3 Easy Minutes
Why to love this Design:
Imagine the sky at dawn when the colors just melt into one another; that is exactly what this gradient feels like. It is the ultimate ‘soft girl’ aesthetic, giving you a delicate, ethereal look that goes with every outfit. It’s the perfect way to wear blue if you prefer a subtle, romantic vibe.
Essential Elements:
- Baby Blue Polish
- Soft White Polish
- Latex-free Makeup Sponge
- Liquid Latex (optional for easy cleanup)
How to Prepare:
- Paint your nails white, then apply stripes of baby blue and white directly onto the edge of your makeup sponge.
- Dab the sponge gently onto your nail, moving it slightly up and down to blur the line where the colors meet.
- Repeat the dabbing once more for depth, then immediately apply a clear top coat while wet to further blend the gradient.
Budget Range
- OPI ‘It’s a Boy!’ – $11.50
- Wedge Makeup Sponges (Bag of 50) – $4.00
- Seche Vite Dry Fast Top Coat – $9.00
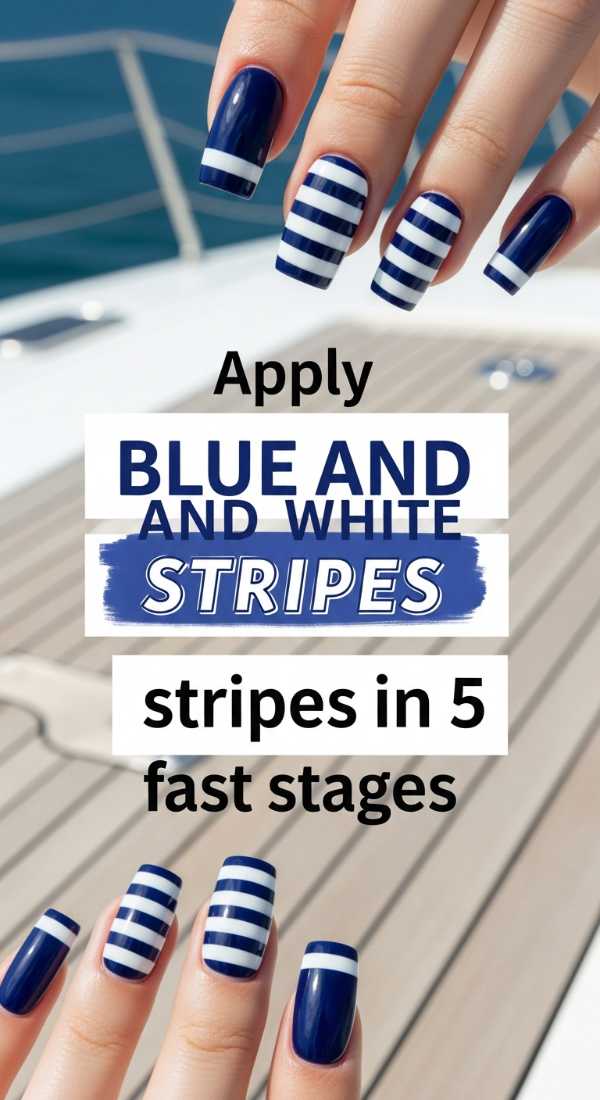
Apply Blue and White Stripes in 5 Fast Stages
Why to love this Design:
Stripes are a timeless classic, reminiscent of breezy nautical trips and French Riviera chic. They add a structured, preppy energy to your look that is instantly sophisticated. It’s clean, it’s crisp, and it makes your nails look longer and more elegant.
Essential Elements:
- Striping Tape
- Midnight Blue Polish
- Bright White Polish
- Tweezers
How to Prepare:
- Start with a solid white base and ensure it is 100% dry—patience is key here, loves!
- Lay three thin strips of striping tape horizontally across each nail using your tweezers for precision.
- Paint a single, firm coat of midnight blue over the entire nail, including the tape.
- Immediately peel the tape away while the polish is still tacky to reveal the crisp white lines underneath.
- Once dry, finish with a smoothing top coat to level out the texture.
Budget Range
- Holo Taco ‘Shady Navy’ – $11.00
- Nail Art Striping Tape Roll – $3.00
- Revlon ‘Ultra HD’ White – $6.00
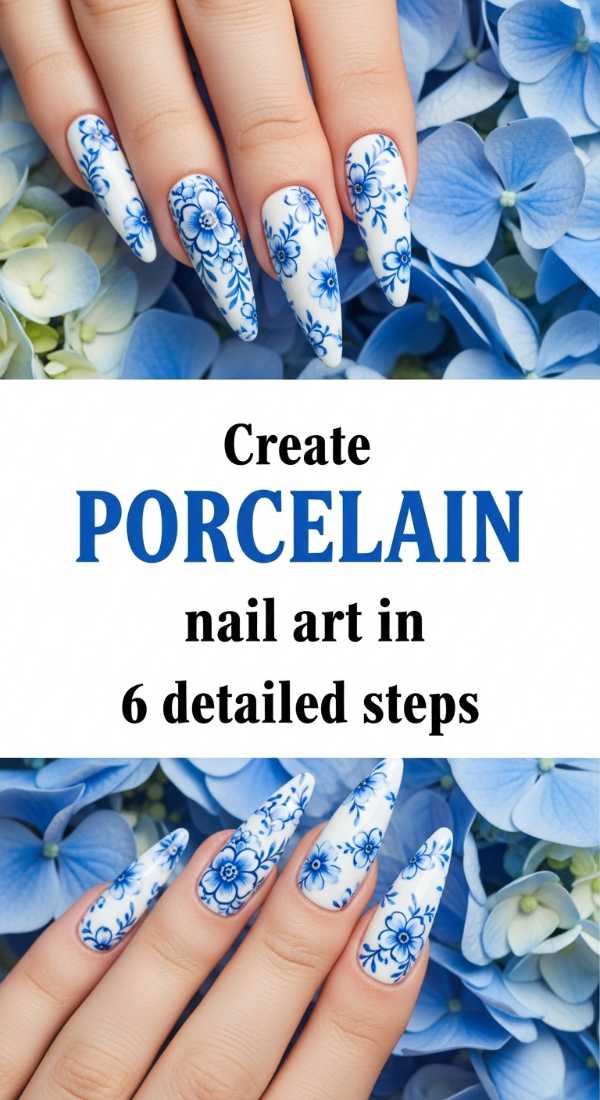
Create Porcelain Nail Art in 6 Detailed Steps
Why to love this Design:
This is arguably the most ‘sophisticated’ look in our collection. Inspired by fine Willow pattern china, this style is delicate and incredibly detailed. It’s like carrying a piece of vintage history on your nails—perfect for my loves who appreciate the finer things in life.
Essential Elements:
- Cobalt Blue Polish or Acrylic Paint
- Pure White Polish
- Ultra-Fine Liner Brush
- Matte or Glossy Top Coat
How to Prepare:
- Apply your white base coat and let it dry to a porcelain-smooth finish.
- Using your thinnest brush, lightly sketch a tiny circle or floral center with cobalt blue.
- Paint tiny, curved strokes around the center to mimic delicate flower petals.
- Add ‘vines’ or thin swirls connecting the floral elements to fill the negative space.
- Use a toothpick to add tiny ‘accent’ dots around the floral clusters for texture.
- Wait five minutes before applying a top coat to prevent any smearing of your fine lines.
Budget Range
- Zoya ‘Pira’ Cobalt Blue – $12.00
- Professional Fine Liner Brush – $9.00
- Orly ‘White Tips’ – $10.00
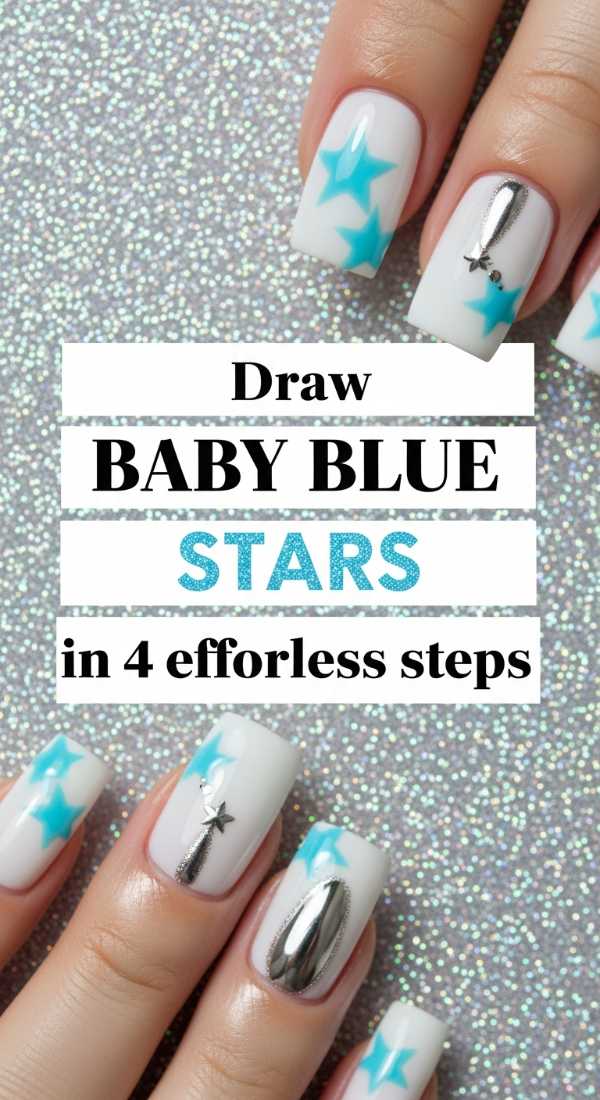
Draw Baby Blue Stars in 4 Effortless Steps
Why to love this Design:
For those nights when you feel like reaching for the moon, these baby blue stars are your best friend. This design is whimsical and youthful, yet the monochromatic blue-on-white palette keeps it looking intentional and chic rather than just ‘cute’.
Essential Elements:
- Baby Blue Polish
- Dotting Tool
- White Base Polish
- Silver Glitter (optional)
How to Prepare:
- Apply your white base and let it dry.
- Place a small dot of baby blue in the center of your nail using the large end of your dotting tool.
- Switch to the smaller end of the tool and pull the polish outward into four or five points to create a star shape.
- Add a tiny silver glitter dot in the center of each star for a little extra magic.
Budget Range
- Olive & June ‘Joe’ (Light Blue) – $9.00
- Dual-ended Dotting Tool – $5.00
- Wet n Wild ‘Color Icon’ Glitter – $3.00
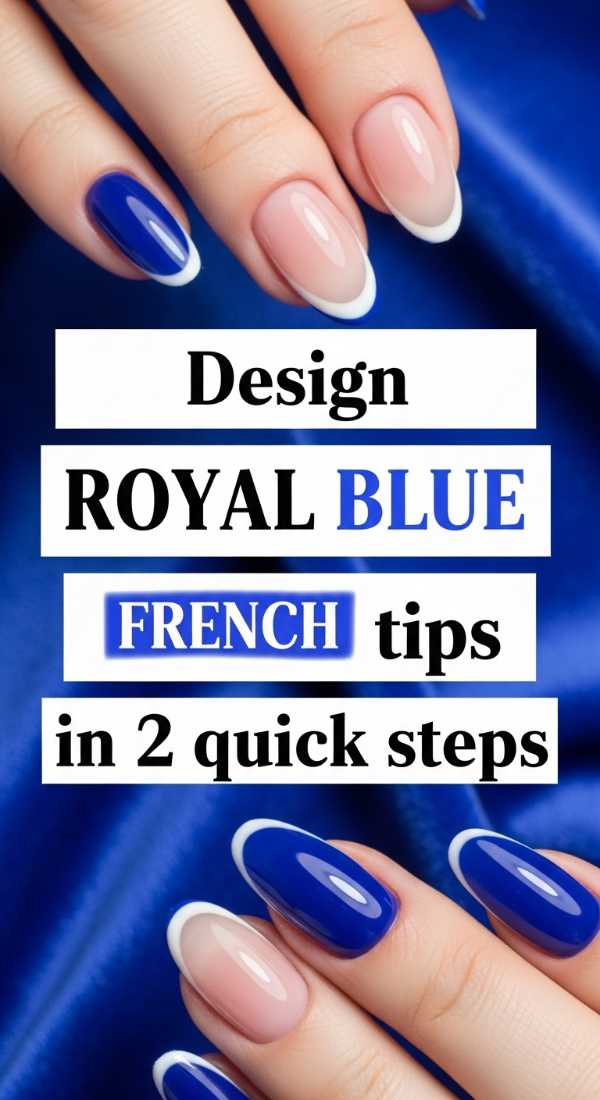
Design Royal Blue French Tips in 2 Quick Steps
Why to love this Design:
Sometimes, we just want a quick refresh, right? The Royal Blue French tip is the modern sister to the classic pink-and-white. It’s sharp, it’s edgy, and it takes about sixty seconds to feel like a whole new woman. It’s minimalist perfection.
Essential Elements:
- French Tip Guide Stickers
- Deep Royal Blue Polish
- Sheer White Base (optional)
How to Prepare:
- Place the guide sticker just below the free edge of your nail.
- Paint the exposed tip with your royal blue polish and peel the sticker away immediately for a perfect crescent.
Budget Range
- Nail Guide Stickers (100 pack) – $4.00
- Barry M ‘Gelly Hi Shine’ Blue – $6.50
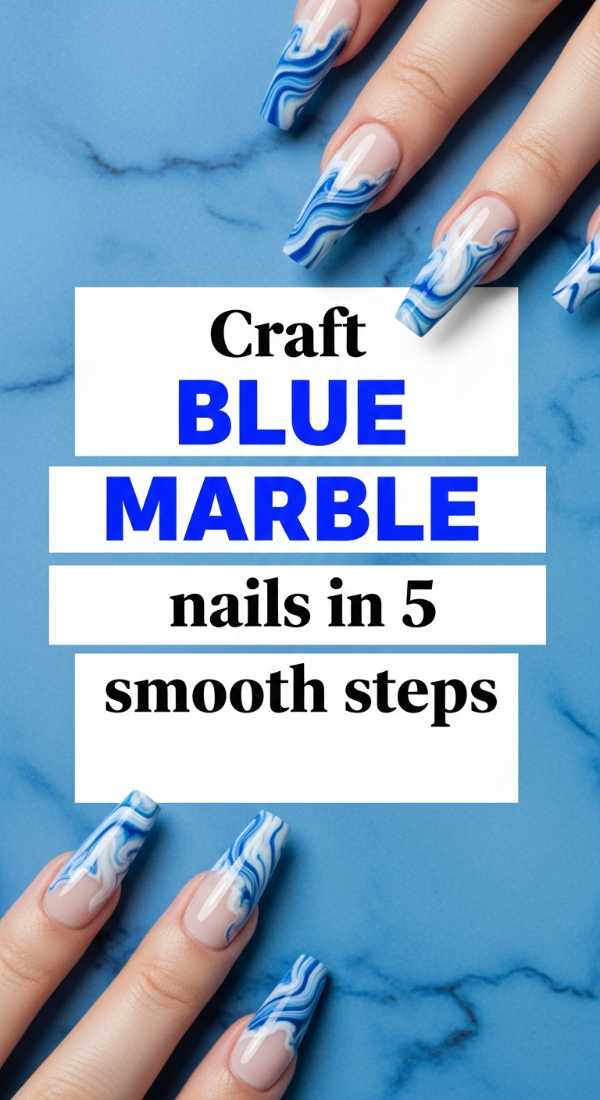
Craft Blue Marble Nails in 5 Smooth Steps
Why to love this Design:
Marble nails are for the free spirits. Since no two nails ever look exactly the same, it’s a celebration of beautiful imperfection. The swirl of blue and white looks like natural stone or rushing water—it’s absolutely mesmerizing to look at throughout the day.
Essential Elements:
- Room temperature water in a cup
- Blue and White Polishes (thin consistency)
- Toothpick
- Hairspray or Acetone
How to Prepare:
- Drop one bead of white and one bead of blue into the center of the water cup so they form concentric circles.
- Use a toothpick to gently swirl the colors together in a marble pattern on the water’s surface.
- Dip your nail (protected by tape or liquid latex) flat onto the pattern and hold for three seconds.
- Slowly lift your finger out and blow on the surface to set the polish.
- Remove the protective tape and clean up the edges for a flawless stone finish.
Budget Range
- Sinful Colors ‘Endless Blue’ – $3.00
- China Glaze ‘White on White’ – $7.50
- Liquid Latex Barrier – $8.00
Paint Thin Blue Stripes in 3 Simple Movements
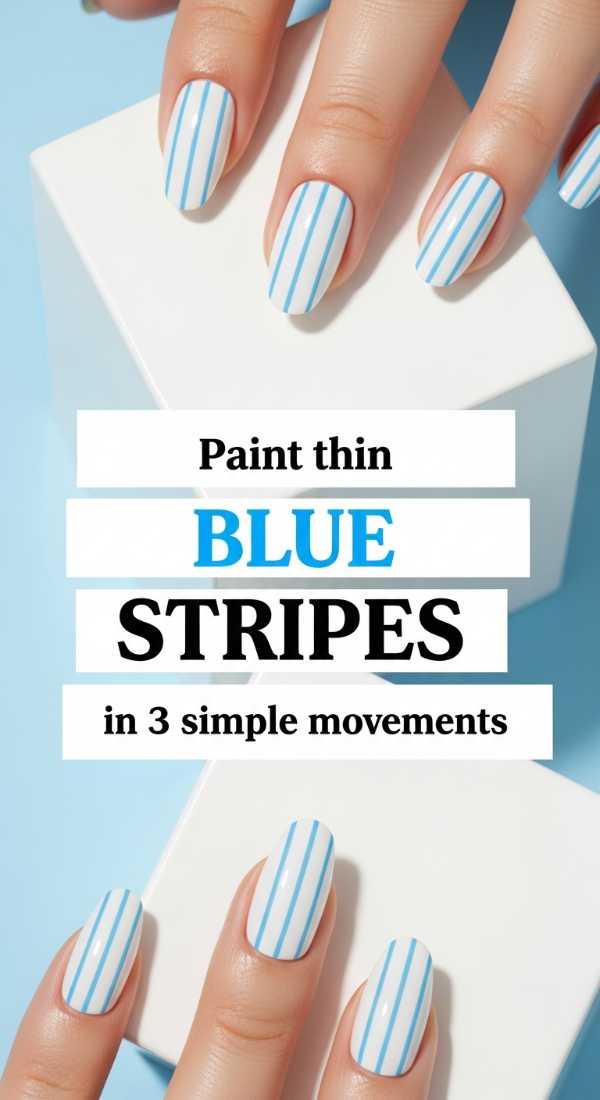
Why to love this Design:
This is the ultimate ‘quiet luxury’ nail art. Just a few ultra-thin vertical blue lines on a white base. It’s understated, lengthening for the fingers, and shows that you pay attention to the smallest, most beautiful details.
Essential Elements:
- Long-haired Liner Brush
- Navy or Sky Blue Polish
- Steady Surface for your hand
How to Prepare:
- Rest your hand on a flat table to ensure no shaking.
- Dip your long liner brush in blue, then place it at the base of your nail.
- Pull the brush in one continuous, fluid motion toward the tip of the nail.
Budget Range
- Beetles Gel Liner Polish (Set of 6) – $15.00
- Butter London ‘Cotton Buds’ White – $18.00
Add Silver Butterflies to Blue Nails in 4 Steps
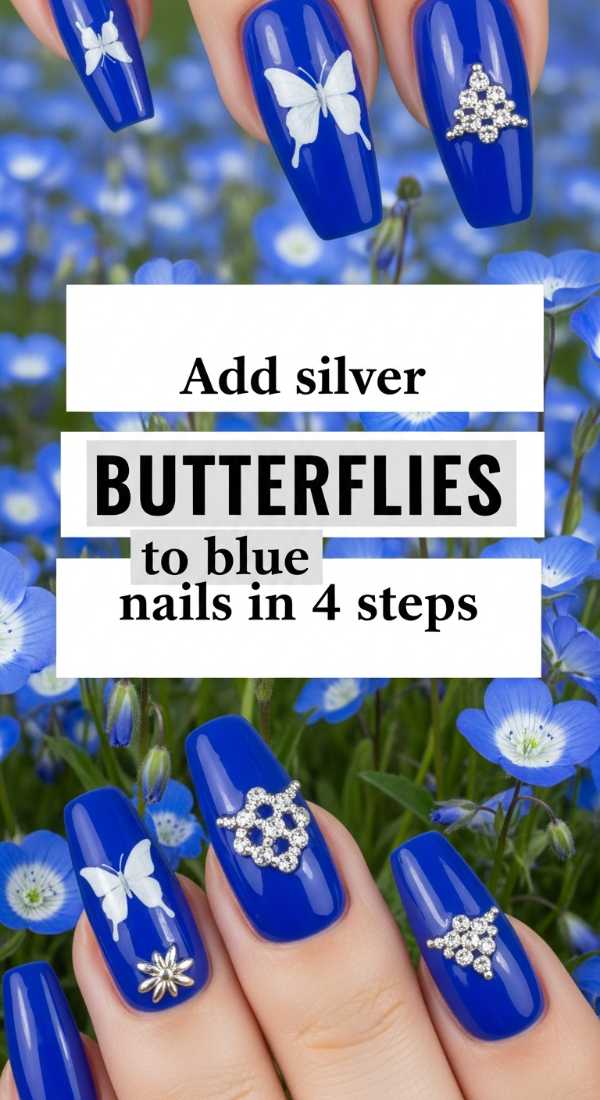
Why to love this Design:
Butterflies symbolize transformation and grace. Adding a silver butterfly decal over a soft blue base is like a little nod to your own personal growth. It’s sparkly, feminine, and brings a little bit of a fairy-tale feeling to your everyday life.
Essential Elements:
- Butterfly Nail Decals or Stickers
- Baby Blue Polish
- Top Coat
How to Prepare:
- Paint your nails with two coats of your favorite baby blue.
- Once dry, use tweezers to carefully peel a silver butterfly sticker and place it on the accent nail.
- Press down firmly with your fingertip to ensure no air bubbles are trapped.
- Seal with a thick layer of top coat so the edges of the sticker don’t catch on your clothes.
Budget Range
- Butterfly Nail Art Stickers (6 sheets) – $6.00
- Essie ‘Saltwater Happy’ – $10.00
Get Perfect Baby Blue Nails in 7 Easy Steps
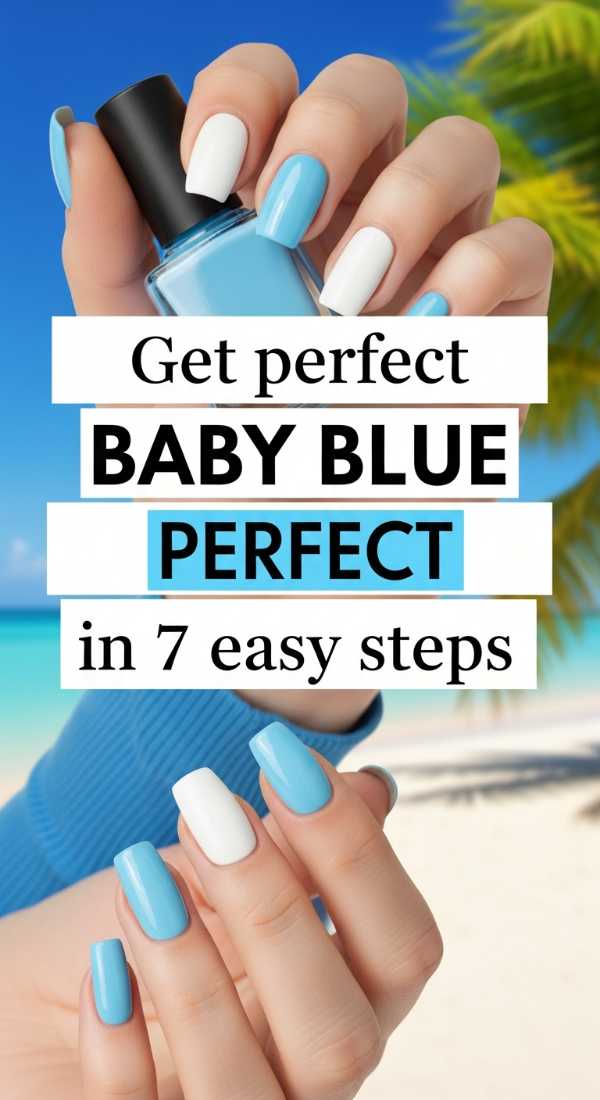
Why to love this Design:
Sometimes, the most sophisticated look is just one perfectly applied solid color. A flawless baby blue manicure says you are organized, calm, and classic. It’s the foundation of every other look we’ve talked about today—the ultimate ‘clean girl’ staple.
Essential Elements:
- Baby Blue Polish
- Base Coat
- Cuticle Oil
- Buffing Block
How to Prepare:
- Gently buff the surface of your nails to create a smooth canvas.
- Apply a high-quality base coat to prevent staining and help the color stick.
- Apply the first layer of baby blue in three strokes: middle, left, right.
- Wait two minutes, then apply a second thin layer for full opacity.
- Cap the ‘free edge’ of your nail with the brush to prevent chipping.
- Apply your top coat and wait for it to be touch-dry.
- Massage a drop of cuticle oil into each finger to give that professional salon glow.
Budget Range
- Deborah Lippmann ‘Gel Lab Pro’ Blue – $20.00
- CND SolarOil – $9.00
- Flowery Scented Buffing Block – $2.00
Embrace Your Inner Artist
And there we have it, my loves! Ten beautiful ways to bring the peace of the blue sky and the purity of white clouds right to your fingertips. Remember, nail art isn’t about being perfect—it’s about the joy of the process and taking a few moments out of your busy day to care for yourself. Whether you chose the intricate porcelain patterns or the simple, calming baby blue, I hope you feel absolutely radiant. You deserve to feel sophisticated and pampered, every single day. Until next time, keep shining!