
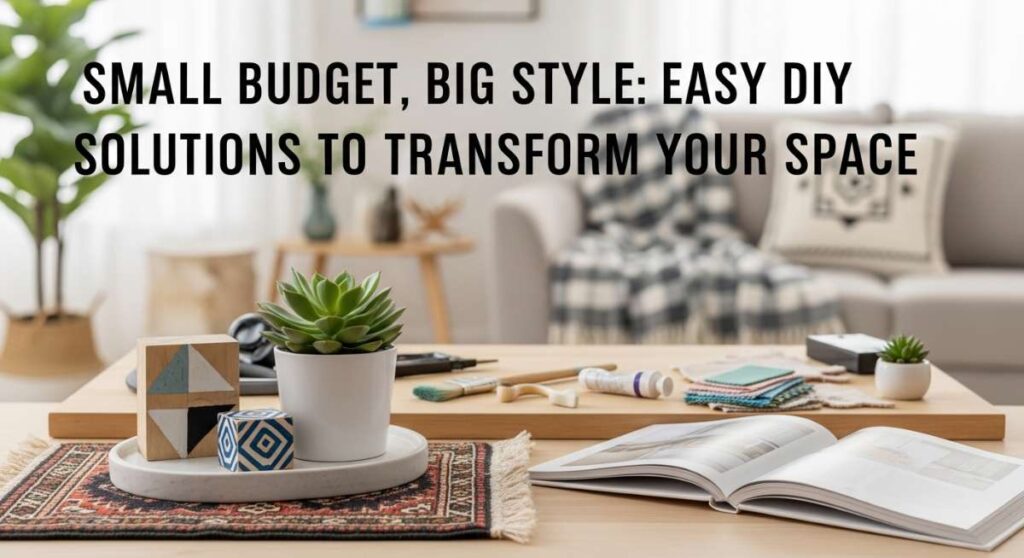
Small Budget, Big Style: Easy DIY Solutions to Transform Your Space
We’ve all been there—scrolling through endless feeds of pristine, designer-curated homes, feeling like a million-dollar aesthetic is just out of reach because of a thin wallet. There’s a certain heartache in wanting your home to be a sanctuary that reflects your soul, only to be met with the reality of high price tags and daunting renovations. But I’m here to tell you a secret: some of the most soulful, ‘Instagrammable’ spaces aren’t born from a shopping spree at a luxury boutique, but from a little bit of creativity and the willingness to get your hands a little dusty.
Your home should be a collection of stories, not just a collection of expensive things. It’s about the way the afternoon light hits a thrifted brass vase or the satisfaction of running your hand over a shelf you built with your own two pins. Transformation doesn’t require a demolition crew; it requires a vision. Whether you’re living in a tiny studio or trying to breathe life into a tired rental, these DIY solutions are designed to bridge the gap between ‘making do’ and ‘making it beautiful.’ Let’s dive into how we can turn your space into a high-end retreat without breaking the bank.
How to Style Dreamy DIY Accents for an Aesthetic Sanctuary
Why we love this
There is something profoundly soothing about surrounding yourself with textures that invite touch, like the grainy matte finish of a hand-painted terracotta vase or the organic weight of a heavy linen throw. These small accents act as the jewelry of a room, catching the light and providing visual interest that makes a space feel intentional and lived-in. When you craft these pieces yourself, they carry a warmth that store-bought items simply lack, creating an atmosphere of curated calm that smells faintly of beeswax and fresh possibilities.
Essential Elements:
- Terra cotta or glass vessels
- Matte acrylic paint and baking soda for texture
- Organic linen or cotton scraps
- Dried botanicals like eucalyptus or pampas grass
- Natural beeswax candles
How to make it
- Begin by cleaning your vessels thoroughly with rubbing alcohol to ensure the paint adheres perfectly to the surface.
- Mix your acrylic paint with a generous tablespoon of baking soda; the chemical reaction creates a thick, ceramic-like paste that mimics expensive artisan pottery.
- Apply the mixture using a sponge brush in a stippling motion to create a varied, tactile surface rather than a flat, industrial finish.
- Allow the first coat to dry for at least four hours in a low-humidity environment until it feels chalky to the touch.
- Layer a second coat of a slightly lighter shade to create depth, then finish by placing dried stems inside to add height and a natural, earthy fragrance to your nook.
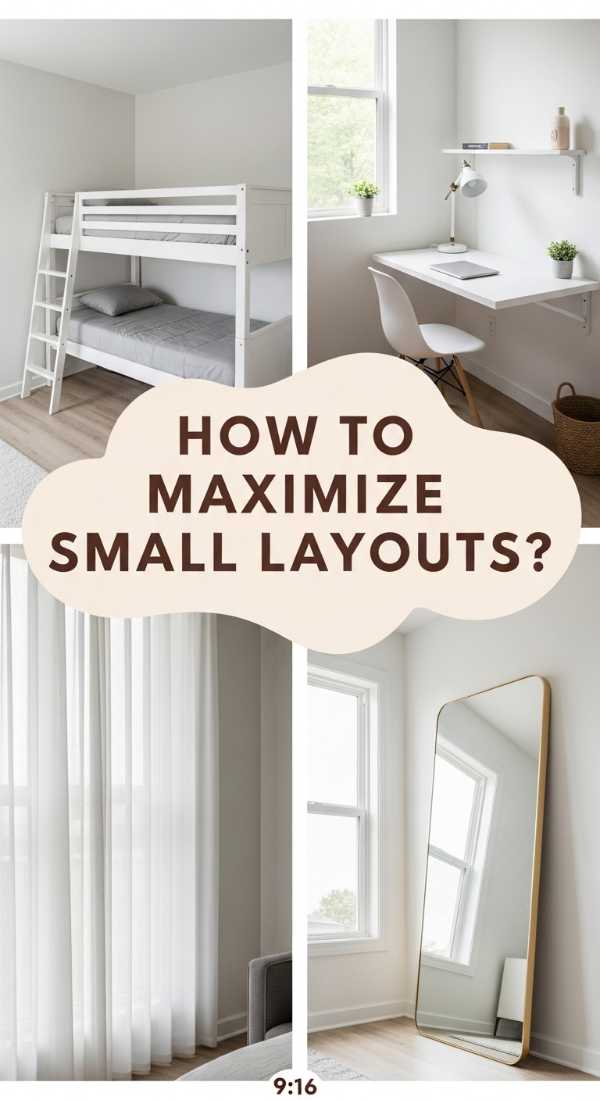
How to Maximize Small Studio Layouts for Effortless Flow

Why we love this
Living in a small space often feels like a puzzle, but when solved, it offers a sense of intimacy and efficiency that is incredibly cozy. The key is creating ‘breathability’—the feeling of air moving freely between zones so you never feel boxed in. Imagine waking up in a sleeping nook that feels like a soft cloud, then pivoting to a workspace that vibrates with focused energy, all within the same four walls. It’s about the tactile joy of high-pile rugs underfoot and the visual clarity of a room that knows exactly what it’s supposed to be.
Essential Elements:
- Large area rugs to define zones
- Open-backed shelving units
- Sheer floor-to-ceiling curtains
- Low-profile furniture with exposed legs
- Multi-functional mirrors
How to make it
- Identify your primary ‘zones’ (sleep, work, eat) and place a large area rug under each functional grouping to visually anchor the space.
- Position open-backed shelving perpendicular to the wall to act as a room divider; this separates the bed from the living area without blocking the natural light.
- Hang sheer curtains as high as possible—ideally hitting the ceiling—to draw the eye upward and create an illusion of soaring height.
- Choose ‘leggy’ furniture, such as a mid-century modern sofa, which allows you to see the floor underneath, instantly making the room feel more expansive and less cluttered.
- Place a large floor mirror opposite your main window; this catches the natural light and reflects it back into the darkest corners of the studio, doubling the perceived depth of the room.
How to Achieve High End Interior Looks on a Tiny Budget

Why we love this
The ‘quiet luxury’ aesthetic is all about subtle sophistication—think the crisp sound of a heavy door closing or the sight of perfectly balanced proportions. You don’t need a designer budget to evoke the feeling of a Parisian pied-à-terre; you just need to focus on ‘architectural jewelry’ like crown molding and metallic finishes. There is a specific thrill in seeing a basic room transformed by the addition of deep, moody colors and brass accents that catch the evening sun, making your morning coffee feel like a five-star experience.
Essential Elements:
- Peel-and-stick wall molding or trim
- High-quality brass or matte black hardware
- Rich, saturated paint (think navy, sage, or charcoal)
- Velvet pillow covers
- Gallery wall frames in uniform colors
How to make it
- Measure your walls and map out rectangular ‘picture frame’ molding sections using painter’s tape to ensure perfect symmetry and scale.
- Apply lightweight, pre-primed molding using a strong construction adhesive, pressing firmly for 60 seconds to ensure a permanent bond without the need for power tools.
- Paint both the wall and the molding in the same rich, matte color; this monochromatic look is a classic high-end designer trick that adds immense architectural depth.
- Swap out basic builder-grade kitchen or furniture knobs for heavy brass hardware; ensure you measure the ‘center-to-center’ distance of existing holes to avoid drilling new ones.
- Curate a gallery wall using mismatched thrifted frames that you have spray-painted the same uniform shade of black or gold for a cohesive, ‘art gallery’ vibe.
How to Build Custom Floating Shelves for Clever Storage
Why we love this
Floating shelves are the ultimate marriage of form and function, offering a stage for your favorite books and treasures while keeping floor space clear. There’s a rugged, organic beauty in a thick slab of wood protruding from a wall, revealing the intricate patterns of the grain and the soft scent of pine or cedar. It creates a vertical landscape that draws the eye upward, making even the smallest kitchen or bathroom feel like a curated boutique where every item is displayed with purpose and grace.
Essential Elements:
- 2×10 lumber (pine or reclaimed wood)
- Heavy-duty floating shelf brackets
- Wood stain and polyurethane
- Spirit level and stud finder
- Power drill and long wood screws
How to make it
- Cut your lumber to your desired length and sand the surfaces starting with 80-grit sandpaper, moving up to 220-grit for a glass-smooth finish.
- Apply a pre-stain wood conditioner to prevent blotching, then follow with a rich wood stain, wiping in the direction of the grain for maximum absorption.
- Use a stud finder to locate the wall studs; this is critical, as floating shelves require structural support to hold weight without sagging.
- Secure the heavy-duty brackets into the studs using a spirit level to ensure they are perfectly horizontal; any slight tilt will be magnified once the shelf is on.
- Slide the prepared wood planks onto the brackets (you may need to drill holes into the back of the wood depending on the bracket style) and finish with a coat of polyurethane for a soft, protective sheen.
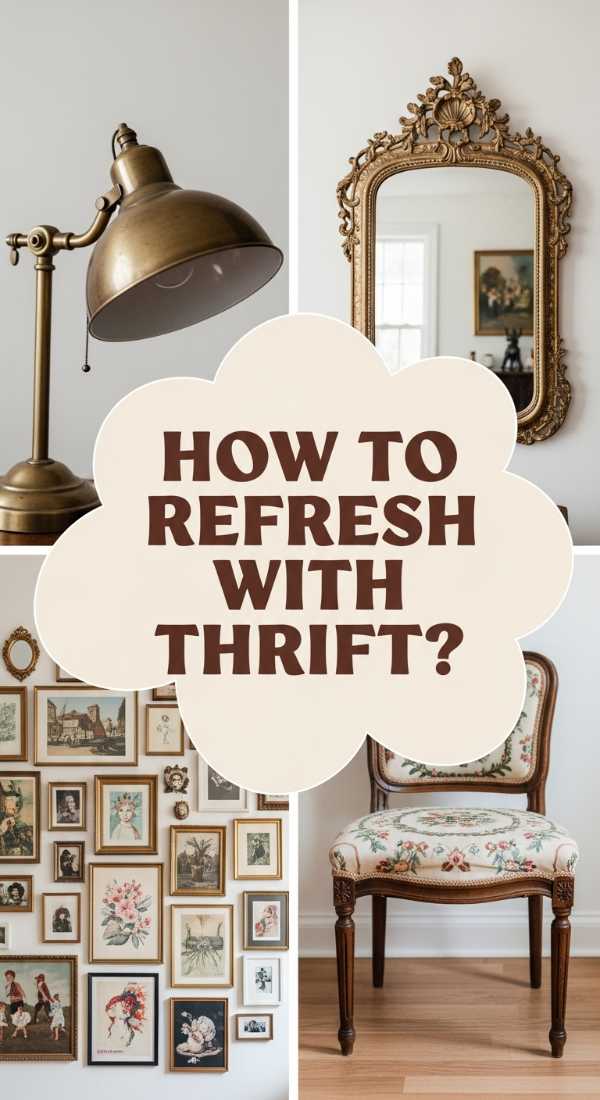
How to Refresh Tired Living Rooms with Thrifted Treasures

Why we love this
Thrifting is like a treasure hunt for your home’s soul, where every scuffed wooden chair or vintage oil painting has a previous life and a story to tell. There is an unmatched satisfaction in finding a piece of furniture with ‘good bones’ and seeing past its dated finish to the masterpiece it can become. The smell of old wood, the weight of solid brass, and the unique silhouettes of decades past bring a layer of character and authenticity that modern, mass-produced furniture simply cannot replicate.
Essential Elements:
- Second-hand wooden furniture (solid wood only)
- Furniture wax or chalk paint
- New upholstery fabric or high-density foam
- Sandpaper (various grits)
- Staple gun
How to make it
- Scour local thrift stores or online marketplaces for solid wood pieces; avoid particle board as it does not take paint or stain well.
- Remove all hardware and sand the piece down to the raw wood to remove old, yellowed lacquer and reveal the natural beauty beneath.
- Apply a coat of chalk paint for a farmhouse look, or use a dark furniture wax to enrich the natural wood grain and provide a water-resistant finish.
- If the piece has a seat cushion, remove the old fabric, cut a fresh piece of high-density foam to size, and stretch new, heavy-duty fabric over it.
- Secure the fabric tightly with a staple gun, starting from the center of each side and working toward the corners to ensure a professional, wrinkle-free finish before reassembling.
How to Create Intimate Nooks in Compact Living Spaces

Why we love this
An intimate nook is a physical manifestation of a ‘hug’ within your home—a small, dedicated space designed for nothing but comfort and reflection. Whether it’s a window seat or a corner of the bedroom, these areas are defined by soft lighting, plush textiles, and a sense of enclosure. Imagine sinking into a velvet armchair with a steaming mug of tea, the world outside fading away as you’re enveloped by the scent of a lavender candle and the soft glow of a nearby lamp. It’s about reclaiming a corner of the world for yourself.
Essential Elements:
- A comfortable accent chair or floor cushions
- Small side table or floating ledge
- Soft-glow floor lamp or wall sconce
- Textured throw blanket (wool or faux fur)
- Personalized wall art or a small bookshelf
How to make it
- Select a corner that is away from the main traffic flow of the house to ensure privacy and a sense of ‘quiet.’
- Place your seating at an angle to the wall; this creates a more inviting, ‘wrapped’ feeling than placing it flat against a surface.
- Layer your textiles: start with a small rug to ground the space, then add a thick throw and at least two pillows of varying sizes for maximum lumbar support.
- Install a plug-in wall sconce at eye level when seated; this provides task lighting for reading without the harsh glare of overhead lights.
- Add a small table just large enough for a drink and a book, ensuring everything you need for a restorative hour is within arm’s reach.
How to Incorporate Lush Greenery for a Natural Home Vibe
Why we love this
Bringing the outdoors in is the fastest way to breathe literal life into a room, filling it with vibrant greens and the earthy, fresh scent of damp soil. Plants act as living sculptures, their leaves trailing down shelves or reaching toward the sun, creating a dynamic energy that changes with the seasons. There is a deep, meditative joy in the ritual of watering and misting, watching a new leaf unfurl as a testament to the care you’ve put into your sanctuary, making the air feel cleaner and the spirit lighter.
Essential Elements:
- Low-maintenance plants (Pothos, Snake Plant, ZZ Plant)
- Decorative pots with drainage holes
- High-quality potting mix
- Plant stands of varying heights
- Misting bottle and pruning shears
How to make it
- Assess the light levels in your room; ‘low light’ means you can easily read a book, while ‘bright indirect’ means the spot is near a sunny window but not in the sun’s rays.
- Repot your nursery plants into decorative ceramic or terracotta pots, ensuring you use a mix that includes perlite for drainage to prevent root rot.
- Group plants in odd numbers (threes or fives) at varying heights; use plant stands or stacks of books to create a ‘jungle’ effect that draws the eye across different levels.
- Place trailing plants like Pothos on high shelves or curtain rods to create a ‘green waterfall’ effect that softens the hard lines of the room.
- Establish a weekly ‘check-in’ where you mist the leaves to remove dust and check the soil moisture with your finger, only watering when the top inch of soil feels dry.
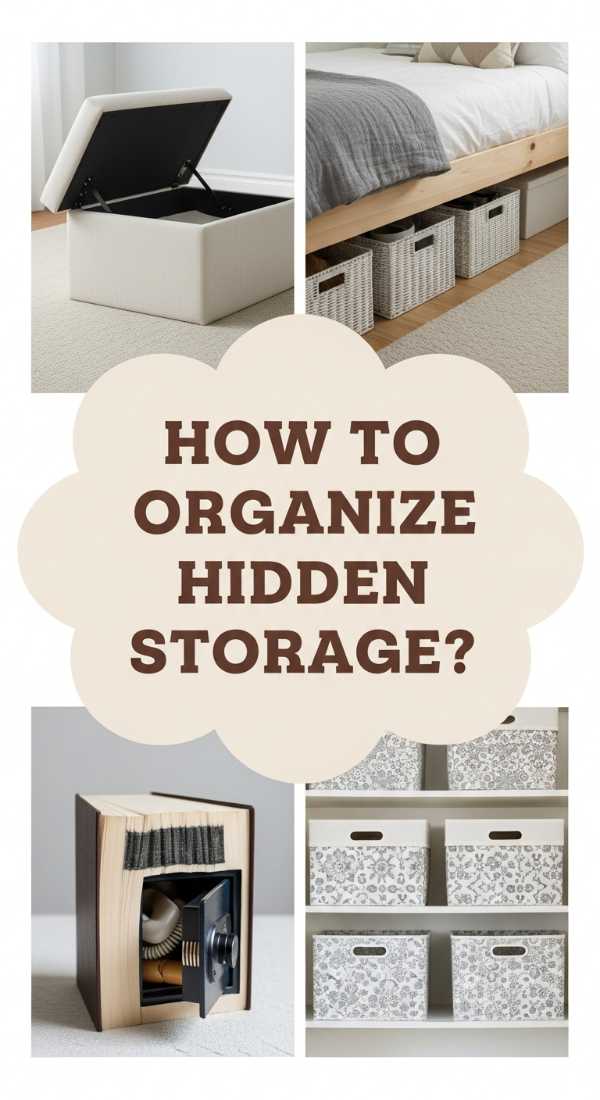
How to Organize Hidden Storage for a Clutter Free Life

Why we love this
Visual clutter is often the biggest barrier to a peaceful home, but hidden storage allows you to maintain a minimalist aesthetic without sacrificing the things you need. There is a profound sense of relief in knowing that everything has a ‘home,’ tucked away in beautiful woven baskets or behind secret panels. It’s the feeling of a clean slate every morning—where the surfaces are clear, the air feels open, and you can focus on the beauty of your decor rather than the stress of your ‘stuff.’
Essential Elements:
- Uniform woven baskets or bins
- Under-bed storage containers on wheels
- Ottomans with internal storage
- Over-the-door organizers
- Label maker or stylish tags
How to make it
- Perform a ‘clutter audit’ by removing everything from a space and only putting back what is used daily; everything else must be ‘hidden.’
- Utilize the ‘dead space’ under your bed by using long, shallow bins; choose versions with wheels for easy access to out-of-season clothing or extra linens.
- Swap your coffee table for a large storage ottoman; this provides a place to tuck away blankets and remote controls while doubling as extra seating.
- Install tension rods inside cabinets to hang cleaning supplies or use clear, stackable bins so you can see the contents without creating visual noise.
- Apply uniform labels to all bins; this small detail creates a sense of professional organization that makes maintaining the system much easier over time.
How to Master Ambient Lighting for an Expensive Glow
Why we love this
Lighting is the most powerful tool in your interior design arsenal—it dictates the mood, the temperature, and the ‘soul’ of a room. A space bathed in the warm, golden glow of multiple light sources feels expensive and curated, whereas a single overhead light can make even a luxury room feel clinical and cold. Imagine the soft flicker of a candle reflecting off a glass surface, combined with the gentle wash of a lamp against a textured wall; it’s an atmosphere that invites conversation and lingering dinners.
Essential Elements:
- Warm-toned LED bulbs (2700K color temperature)
- Dimmer switches or smart plugs
- A mix of floor, table, and accent lamps
- Battery-operated puck lights
- Taper candles and holders
How to make it
- Replace every ‘cool white’ bulb in your home with ‘warm white’ LED bulbs to instantly soften the shadows and warm up the paint colors.
- Layer your lighting by ensuring every room has at least three sources: an overhead (general), a lamp (task), and a candle or small accent light (ambient).
- Install battery-operated puck lights under kitchen cabinets or inside bookshelves to create ‘uplighting’ that highlights your favorite decor pieces.
- Use smart plugs to put your lamps on a timer, so you always walk into a home that is already glowing and welcoming as evening falls.
- Place mirrors behind lamps or candles; the reflection will double the light output and create a shimmering, high-end effect throughout the space.
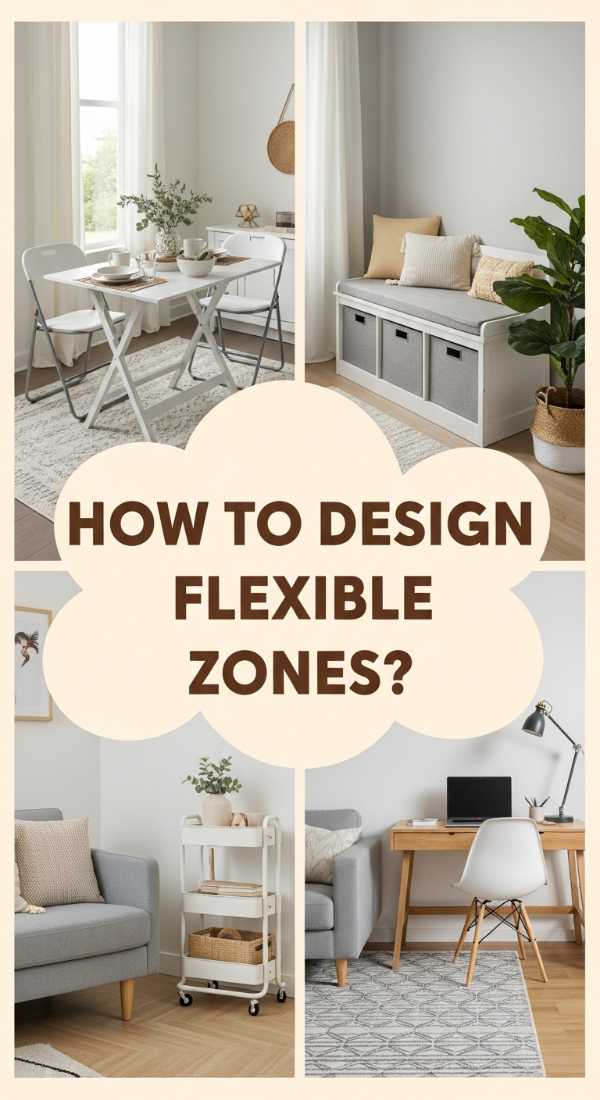
How to Design Multi Purpose Zones for Flexible Urban Living
[IMAGE_10]
Why we love this
In the modern world, our homes have to work harder than ever, often serving as an office, a gym, and a sanctuary all at once. Designing a multi-purpose zone is about the art of the ‘quick change’—having a space that can transition from a focused morning workspace to a relaxed evening dining area with minimal effort. There is a satisfying cleverness to a desk that folds away or a dining table that hides office supplies, allowing your home to adapt to your life’s rhythm rather than forcing you to adapt to its limitations.
Essential Elements:
- Drop-leaf or extendable tables
- Folding or stackable chairs
- Rolling carts for supplies
- Decorative screens or room dividers
- Cohesive color palette across zones
How to make it
- Choose a drop-leaf table that can sit against the wall as a console/desk during the day and be pulled out and expanded for dinner guests at night.
- Use a rolling ‘bar cart’ to store your office supplies, printer, or craft materials; this can be wheeled into a closet when the workday is over.
- Invest in high-quality folding chairs that are beautiful enough to hang on the wall as ‘art’ when not in use, saving precious floor space.
- Keep the color palette consistent across both ‘zones’ so that even when the space is serving two purposes, it feels like one cohesive, well-designed room.
- Use a decorative folding screen to physically hide your ‘work’ zone at the end of the day, helping your brain transition into ‘home’ mode and ensuring a better work-life balance.
Conclusion: Your Home is Your Greatest DIY Project
Transforming your space on a budget isn’t about compromise; it’s about character. It’s about taking the time to sand down the rough edges, to paint the walls a color that makes your heart skip a beat, and to curate a collection of things that truly mean something to you. When you invest your own effort into your surroundings, the result isn’t just a prettier room—it’s a deeper connection to the place you call home. So, grab that paintbrush, head to the thrift store, and start building the sanctuary you deserve.