

There is something inherently magical about waking up in a room that feels like it’s breathing alongside you. For the longest time, my bedroom was just a place where I slept—four white walls and a functional bed. But then, I discovered the transformative power of the botanical aesthetic. It’s more than just a decor trend; it’s about inviting the calming, restorative essence of nature into your most private sanctuary, turning every morning into a soft awakening in a sun-drenched garden.
Imagine the scent of fresh eucalyptus mingling with the softest cotton sheets, and the sight of delicate petals dancing across your duvet. This look is about layers, textures, and a deliberate connection to the earth. Whether you live in a bustling city apartment or a quiet suburban home, mastering the botanical bedroom look allows you to escape the digital noise and retreat into a lush, living oasis that nourishes your soul every single night.
How to Curate Vintage Floral Bedding for a Timeless Sanctuary

Why we love this
Vintage floral bedding carries a sense of nostalgia and heirloom quality that modern prints often lack. We love how the muted color palettes and intricate, hand-painted style designs evoke a sense of history and quiet elegance. There is a tactile richness to high-thread-count cotton or linen adorned with faded roses and wild jasmine; it feels like sleeping inside a Victorian garden hidden away from the modern world. The soft, lived-in texture provides an immediate sense of comfort that grounds the room’s energy.
Essential Elements:
- 100% long-staple cotton or flax linen sheets
- Muted floral prints (think dusty rose, sage green, and cream)
- Pillow shams with scalloped or ruffled edges
- A lightweight quilted coverlet for texture
- Antique-inspired floral patterns like toile or English garden motifs
How to make it
- Begin by selecting a base color that appears in your floral pattern—usually a soft ivory or a pale sage—to keep the look cohesive rather than cluttered.
- Research specific vintage styles such as Chintz or Toile de Jouy; look for high-density weaves that provide that crisp, cool-to-the-touch feeling characteristic of quality vintage linens.
- Wash your new linens with a gentle, scent-free detergent and a cup of baking soda to soften the fibers and give them that authentic, heirloom drape right from the start.
- Iron only the pillowcases and the top border of the flat sheet; leaving the rest slightly rumpled adds to the effortless, romantic charm of the botanical aesthetic.
- Finish by layering a solid-colored throw at the foot of the bed that pulls out the deepest green or burgundy from the floral print to anchor the visual weight of the bed.
How to Style a Floral Bedroom Aesthetic for Ultimate Serenity

Why we love this
Styling a floral aesthetic is an art form that balances vibrancy with tranquility. We love this approach because it turns your sleeping space into a sensory experience where every sightline is filled with soft, organic shapes. The flow of petals and leaves creates a visual rhythm that mimics the outdoors, lowering cortisol levels and promoting deeper relaxation. It’s about creating a soft place to land at the end of a long day, where the walls seem to disappear into a canopy of blossoms and greenery.
Essential Elements:
- A mix of large-scale and small-scale floral patterns
- Neutral-toned wooden furniture to ground the florals
- Dried lavender or eucalyptus bundles for natural aroma
- Sheer curtains that allow dappled sunlight to filter through
- Glass vases with single-stem fresh flowers
How to make it
- Identify your primary floral ‘hero’ piece, such as a large duvet or a statement rug, and ensure its base color matches the wall color to create a seamless visual flow.
- Incorporate ‘visual breathers’ by placing solid-colored pillows or blankets between different floral patterns to prevent the eye from becoming overwhelmed by too much detail.
- Position your bed near a window where natural light can illuminate the floral patterns, making them appear more vivid and lifelike during the golden hour.
- Add organic textures like a woven rattan headboard or a jute side table to emphasize the ‘nature-inspired’ theme of the room.
- Mist the room with a light rosewater spray each morning to reinforce the botanical theme through scent, creating a multi-sensory environment that feels like a true greenhouse retreat.
How to Install a Plant Mural Wall for a Lush Indoor Oasis

Why we love this
A plant mural wall is the ultimate statement piece for anyone who wants to feel completely immersed in nature. We love this because it provides the visual impact of a dense jungle or a sprawling meadow without taking up any floor space. It acts as a permanent ‘window’ to a lush world, making even the smallest bedroom feel expansive and alive. The deep greens and vibrant tropical hues provide a stunning backdrop for your furniture, turning a simple room into a curated masterpiece of interior design.
Essential Elements:
- High-quality peel-and-stick mural or traditional wallpaper
- Smoothing tool (squeegee) to remove air bubbles
- Precision craft knife for trimming edges
- Measuring tape and a level for perfect alignment
- Damp cloth for wall preparation
How to make it
- Prepare your wall by cleaning it thoroughly with a mixture of water and a drop of dish soap; ensure the surface is completely dry and free of dust before starting.
- Measure the width of your wall and mark the center point, then use a level to draw a straight vertical line; this ensures your mural panels stay perfectly straight as you move across the room.
- Peel back the first few inches of the mural backing and align the edge with your vertical line, slowly pressing the adhesive onto the wall from the top down.
- Use your smoothing tool to push air bubbles from the center of the panel toward the outer edges, applying firm but gentle pressure to avoid tearing the material.
- Overlap subsequent panels by exactly the amount specified by the manufacturer (usually 1/2 inch) to ensure the botanical pattern aligns perfectly across the entire wall.
How to Design a Gallery Wall with Plants for an Organic Living Space

Why we love this
The organic gallery wall is a brilliant hybrid of art and nature, where frames and living foliage coexist in a beautiful, vertical dance. We love this because it adds incredible dimension and life to a flat wall, creating a dynamic display that changes as your plants grow and trail. It feels curated yet wild, combining the structure of a traditional gallery with the untamed beauty of climbing vines. The contrast between the rigid lines of the frames and the soft, organic leaves of a Pothos or Philodendron is visually stunning.
Essential Elements:
- Wall-mounted planters or ‘living wall’ pockets
- A collection of mismatched vintage frames
- Botanical sketches or pressed flower art
- Trailing plants like String of Hearts or Ivy
- Sturdy wall anchors and a drill
How to make it
- Layout your frames and planters on the floor first to experiment with the arrangement; place the largest planters at the top to allow vines to drape down over the artwork.
- Intersperse framed botanical prints between the live plants to create a ‘full’ look even if your plants are still young and growing.
- Select low-maintenance plants that thrive in vertical environments, ensuring they are planted in pots with internal drainage reservoirs to prevent water from dripping onto your art.
- Install heavy-duty wall anchors for the planters, as the weight of the soil and water can be significant once the plants are fully hydrated.
- Style the trailing vines by draping them over the corners of the frames, using small, clear command hooks to guide the growth and create a ‘frame within a frame’ effect.
How to Select Cute Rugs for Bedrooms for a Cozy Texture Haven

Why we love this
Rugs are the foundation of any cozy bedroom, and in a botanical-themed space, they act as the ‘earth’ beneath your feet. We love how a soft, textured rug can instantly warm up a room, muffling sound and providing a plush surface to step onto every morning. Choosing rugs with botanical motifs or natural textures like wool and jute reinforces the organic feel of the sanctuary. It’s the finishing touch that ties all the green elements together, making the floor feel like a soft mossy clearing in a secret forest.
Essential Elements:
- High-pile shag or soft wool rugs
- Natural fiber rugs (jute or sisal) for layering
- Floral or leaf-patterned area rugs
- Non-slip rug pads
- Neutral, earthy color palettes (tan, olive, cream)
How to make it
- Measure your bed size and select a rug large enough to extend at least 24 inches on either side, ensuring your feet always land on warmth when you wake up.
- Layer a smaller, plush faux-fur or floral-patterned rug on top of a larger, flat-weave jute rug to create a ‘maximalist’ look with varied heights and textures.
- Opt for rugs made of natural fibers like New Zealand wool, which are naturally stain-resistant and provide a luxurious feel that synthetic fibers cannot replicate.
- Coordinate the rug’s accent colors with the dominant color in your botanical wallpaper or bedding to anchor the room’s color story from the ground up.
- Vacuum the rug regularly with a brush-free setting to preserve the delicate fibers and keep the ‘garden’ floor looking fresh and inviting for years.
How to Master the Floral Bedroom Look for a Fresh Spring Vibe
Why we love this
Mastering the floral look for spring is about capturing that feeling of renewal and light. We love this because it brings a burst of energy and optimism into the home after a long winter. By focusing on lighter fabrics, brighter floral prints, and the addition of live blooms, the bedroom becomes a celebration of growth. It’s a way to let the sunshine in and mimic the world as it wakes up outside, creating a space that feels airy, breezy, and incredibly refreshing to wake up in.
Essential Elements:
- Lightweight percale or linen bedding
- Bright, watercolor-style floral prints
- Fresh cut tulips or peonies in clear jars
- Light-colored wooden accents
- Citrus-scented candles or diffusers
How to make it
- Swap out heavy winter duvets for a breathable cotton coverlet featuring a ‘wildflower meadow’ print with plenty of white space to keep the room feeling light.
- Introduce ‘living’ elements by placing a small indoor tree, like a Fiddle Leaf Fig or an Olive Tree, in a sunny corner to provide height and a true garden feel.
- Update your window treatments to sheer linen panels that allow maximum light to enter the room, highlighting the vibrant colors of your floral decor.
- Rotate your art pieces to include bright, botanical watercolors that emphasize greens, yellows, and pinks, reflecting the natural palette of springtime blossoms.
- Incorporate reflective surfaces like a gold-rimmed mirror to bounce light around the room, making the botanical prints appear to glow with natural luminescence.
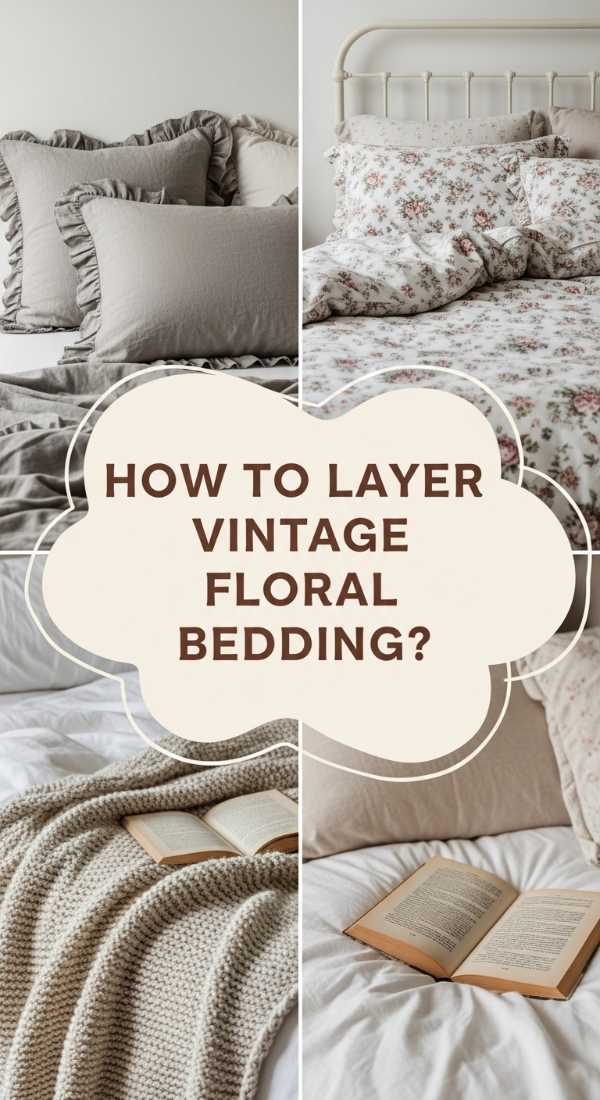
How to Layer Vintage Floral Bedding for a Romantic Cottage Retreat

Why we love this
Layering is the secret sauce to the ‘cottagecore’ botanical look, and we love it because it creates a sense of effortless luxury and warmth. By mixing different floral patterns and textures, you build a bed that looks like it’s been curated over decades. It’s cozy, romantic, and deeply personal. There’s a specific comfort in being nestled under layers of quilts, sheets, and throws, each with its own floral story, making your bed the undisputed crown jewel of your sanctuary.
Essential Elements:
- A mix of micro-floral and large-scale floral prints
- A hand-stitched patchwork quilt
- Lace-trimmed pillowcases
- A chunky knit throw in a coordinating pastel shade
- Standard and Euro-sized pillows for height
How to make it
- Start with a base of high-quality white sheets, then add a medium-weight duvet with a subtle, all-over leaf or flower bud pattern.
- Fold a vintage-style floral quilt at the bottom third of the bed, choosing a print that shares at least two colors with the duvet to maintain harmony.
- Stack your pillows from largest to smallest; place the large Euro shams in a solid color at the back to act as a frame for the floral standard pillows in front.
- Toss a decorative ‘lumbar’ pillow in the center with an embroidered botanical design to provide a focal point and an extra layer of artisanal texture.
- Drape a soft, mohair or knit throw diagonally across the corner of the bed to break up the lines and add that perfectly ‘undone’ cottage aesthetic.
How to Paint a Plant Mural Wall for an Artistic Dream Room

Why we love this
Painting your own plant mural is the ultimate expression of creativity within the botanical look. We love this because it’s completely unique—no one else will have your exact brushstrokes or interpretation of nature. It allows you to tailor the scale and colors of the leaves to perfectly match your furniture and lighting. The process of painting itself is meditative, and the result is a dreamy, hand-crafted atmosphere that feels like living inside a custom-made illustration.
Essential Elements:
- Interior latex paint in varying shades of green, ochre, and brown
- Artist brushes (flat, round, and detail sizes)
- Pencil for sketching the design
- Painters tape for clean edges near the ceiling
- A reference photo of your favorite plants
How to make it
- Sketch your botanical design onto the wall using a light pencil; focus on large, sweeping leaf shapes like Monstera or Banana leaves for a modern, high-impact look.
- Apply your base colors first using a flat brush, filling in the large shapes of the leaves with a mid-tone green while keeping the paint thin and even.
- Add depth by using a darker green or brown to shade the areas where leaves overlap, creating a three-dimensional effect that makes the mural ‘pop’ off the wall.
- Use a fine detail brush to add highlights in a pale sage or cream color along the veins and edges of the leaves to mimic the way light hits a real plant.
- Step back frequently to check the balance of the mural from across the room, ensuring the composition feels natural and flows with the placement of your furniture.
How to Arrange a Gallery Wall with Plants for a Maximalist Aesthetic

Why we love this
Maximalism is about the ‘more is more’ philosophy, and a plant-heavy gallery wall is its most beautiful manifestation. We love this because it’s a feast for the eyes—a dense, lush collection of memories, art, and life. It allows you to display your entire collection of curiosities alongside trailing foliage, creating a wall that feels like a Victorian explorer’s study. The sheer density of textures and shapes creates a vibrant, electric energy that makes the bedroom feel incredibly cozy and lived-in.
Essential Elements:
- Gold-leaf or ornate dark wood frames
- Assorted wall shelves in different lengths
- A variety of plants with different leaf shapes (Calathea, Ferns, Ivy)
- Vintage botanical book pages
- Small decorative mirrors or wall scones
How to make it
- Incorporate ‘living frames’ by mounting air plants inside empty, ornate frames, allowing their spindly leaves to contrast against the wall color.
- Stagger wall shelves at varying heights, placing heavy, bushy plants on the lower shelves and long, trailing vines on the highest points to create a ‘waterfall’ effect.
- Fill the gaps between shelves and frames with small, framed botanical sketches or pressed insects to lean into the ‘naturalist’ theme.
- Vary the leaf textures—pair the waxy, shiny leaves of a Hoya with the soft, ruffled fronds of a Boston Fern to create visual intrigue through contrast.
- Ensure each plant has its own dedicated light source, such as a stylish clip-on grow light, so the maximalist display remains healthy and vibrant in all corners.
How to Pair Cute Rugs for Bedrooms for a Whimsical Floor Display
[IMAGE_10]
Why we love this
Whimsical flooring is the perfect way to add personality to the botanical bedroom. We love the playfulness of layering unconventional rug shapes—like a leaf-shaped rug over a rectangular one—to create a floor that feels like a forest floor. It breaks the traditional rules of decor and invites a sense of wonder. This approach is soft on the feet and incredibly charming, turning an often-overlooked part of the room into a creative canvas that supports the overall garden theme.
Essential Elements:
- Irregularly shaped rugs (leaf, flower, or scalloped)
- Contrasting textures (braided jute vs. soft velvet)
- A color-block rug with earthy tones
- Low-profile rug tape to keep layers secure
- Floor cushions for extra lounging space
How to make it
- Lay down a large, neutral-toned base rug in a flat weave to provide a consistent ‘ground’ for the room’s larger furniture pieces.
- Place a statement ‘leaf-shaped’ rug partially overlapping the base rug near the side of the bed or a reading nook to create a whimsical ‘landing pad.’
- Experiment with ‘rug nesting,’ where you place three or four small, round rugs of varying shades of green and brown in a cluster to mimic stepping stones.
- Secure the overlapping edges with thin, double-sided rug tape to prevent tripping hazards and keep your artistic floor composition perfectly in place.
- Add a few oversized floor pillows in floral velvet to the rug area, creating a secondary relaxation zone that feels like a soft, mossy hill within your indoor sanctuary.
Conclusion: Your Garden Awaits
Transforming your bedroom into a botanical sanctuary is one of the most rewarding home projects you can undertake. It’s about more than just aesthetics; it’s about crafting an environment that prioritizes your peace and mirrors the quiet resilience of nature. By layering vintage florals, inviting in living plants, and focusing on organic textures, you create a space that doesn’t just look beautiful—it feels like a deep breath. So go ahead, plant the seeds of your dream room today, and prepare to bloom every single morning.