
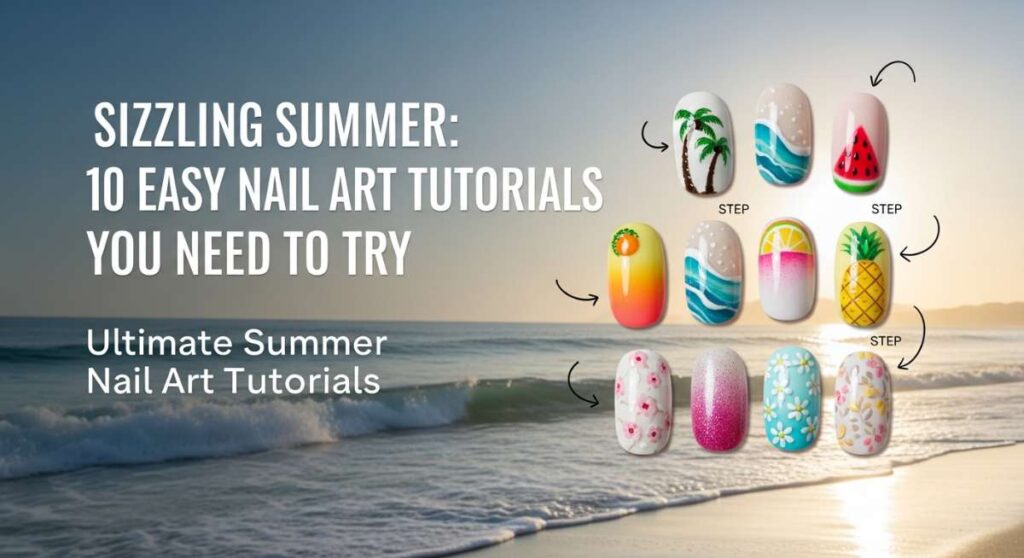
Sizzling Summer: 10 Easy Nail Art Tutorials You Need to Try
Hello my loves! Can you feel that? It’s the sweet, golden warmth of the summer sun finally kissing our skin and the gentle hum of bees in the garden. There is something so magical about this time of year, isn’t there? It’s a season of slowing down, sipping iced tea on the porch, and letting our inner radiance shine through every little detail—especially our fingertips.
I’ve spent the last few mornings tucked away in my sun-drenched nook, playing with colors that remind me of citrus groves and wildflower meadows. I wanted to create something special for you all, a collection of nail art that feels like a cloud-soft embrace for your soul. Whether you’re heading to the beach or just want to feel a bit more whimsical during your morning coffee, these designs are my gift to you. Let’s dive into these little canvases of joy together!
3 Easy Steps to Paint Lemon Nails

Why to love these Nails:
These lemon nails are like a tall glass of cold lemonade on a humid afternoon—refreshing, bright, and instantly uplifting. They bring a zest for life right to your fingertips, making every hand gesture feel like a burst of sunshine.
Essential Items:
- Opaque White Polish
- Bright Yellow Polish
- Fine Liner Brush
- Matte Top Coat
How to Prepare:
- Paint your base with two coats of white and let it dry completely.
- Using your yellow polish, create small oval shapes on the center or edges of the nail.
- Add tiny white lines inside the yellow ovals for segments and finish with a matte top coat.
Budget Range
- Sally Hansen Xtreme Wear in ‘Mellow Yellow’ – $3.99
- Essie ‘Blank Canvas’ – $9.00
4 Ways to Rock Neon Yellow Summer Nails
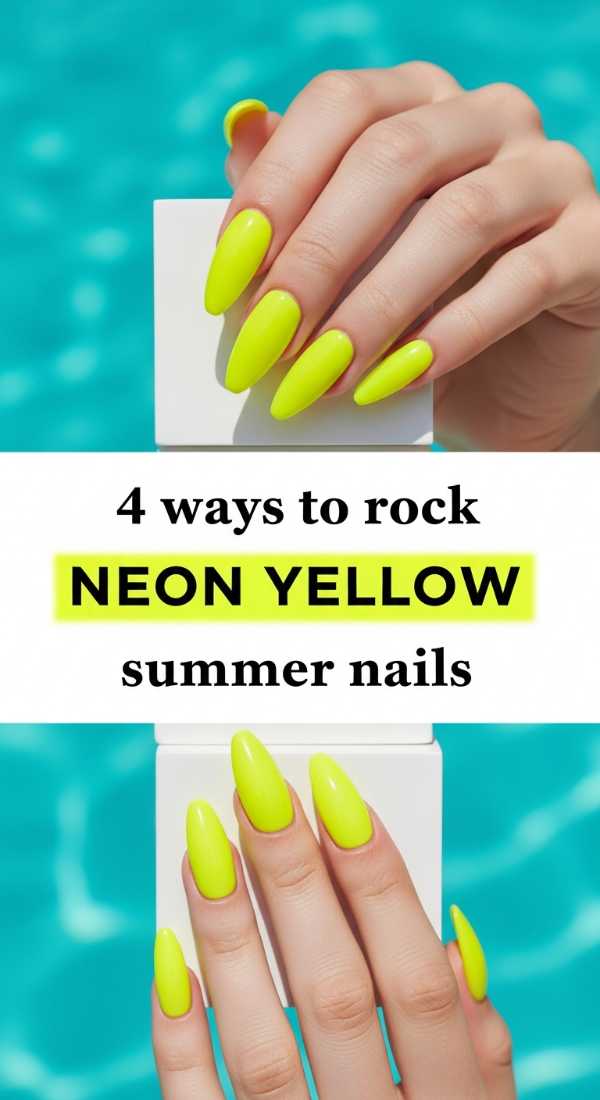
Why to love these Nails:
Neon yellow is the ultimate summer power move! It’s vibrant, energetic, and looks absolutely stunning against a sun-kissed tan. It’s for those days when you want your spirit to glow as brightly as the midday sun.
Essential Items:
- Neon Yellow Polish
- Makeup Sponge
- Silver Glitter
- Clear Top Coat
How to Prepare:
- The Solid Glow: Apply two even coats of neon for a minimalist but high-impact look.
- The Neon French: Paint only the tips of your nails for a modern, sporty vibe.
- The Ombre Melt: Use a sponge to blend the neon into a clear base.
- The Glitter Pop: Add a swipe of silver glitter over the neon for a party-ready finish.
Budget Range
- Orly ‘Glowstick’ Neon – $12.00
- Wet n Wild ‘Nuclear War’ – $2.49
5 Quick Steps for Dragonfly Nails Designs
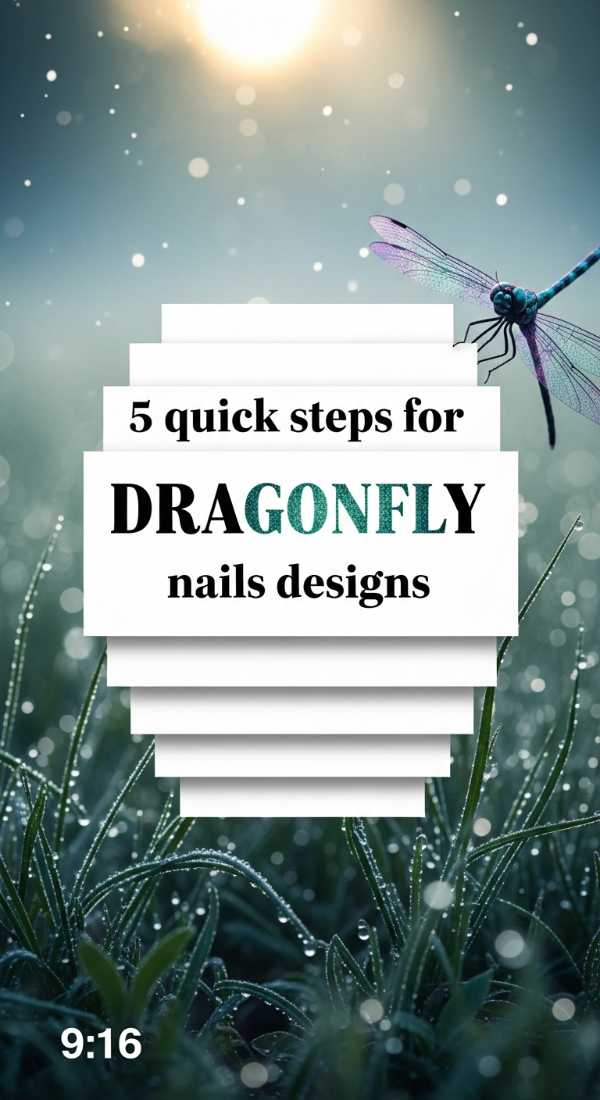
Why to love these Nails:
There is something so ethereal and dainty about dragonflies. They represent change and adaptability, and wearing them on your nails feels like carrying a little bit of garden magic with you wherever you go.
Essential Items:
- Shimmery Blue or Teal Polish
- Black Striper Pen
- Iridescent Flakes
- Dotting Tool
How to Prepare:
- Apply a shimmering base color to mimic the sky or water.
- Use a dotting tool to create a line of four tiny black dots for the body.
- Draw two elongated loops on each side of the body for the delicate wings.
- Place iridescent flakes inside the wings for that holographic flutter effect.
- Seal the design with a high-shine top coat to protect the art.
Budget Range
- Holo Taco ‘Galactic Unicorn Skin’ – $13.00
- Nail Art Dotting Tool Set (Amazon) – $5.99
6 Tips to Style Italy Nails Design
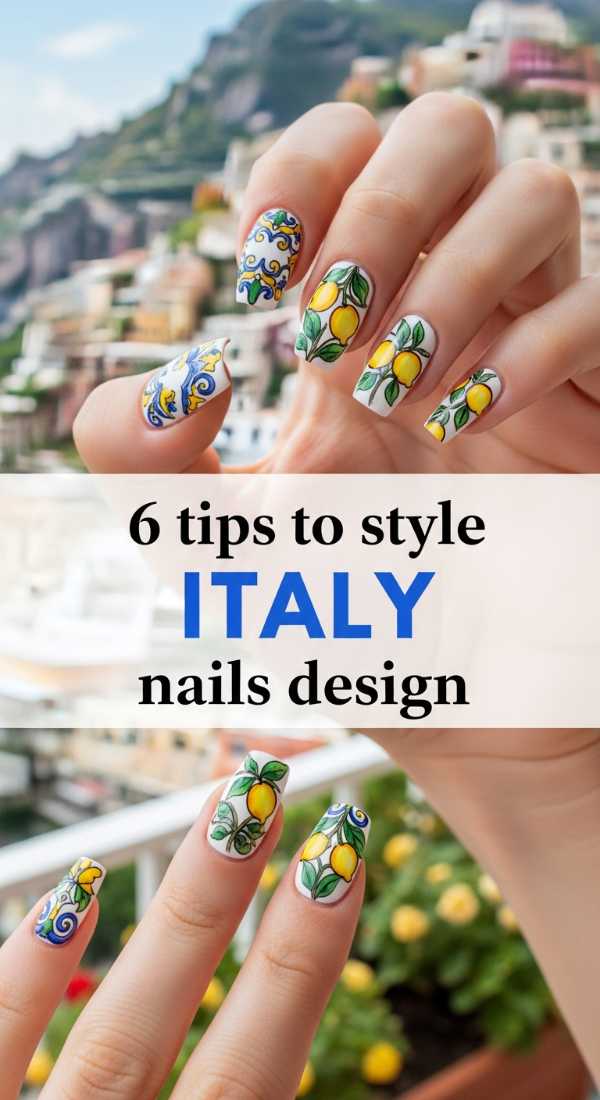
Why to love these Nails:
This design is a romantic love letter to the Amalfi Coast. It’s all about Mediterranean blues, terracotta warmth, and the effortless chic of an Italian summer vacation. It’s sophisticated, timeless, and oh-so-dreamy.
Essential Items:
- Royal Blue Polish
- Gold Leaf or Gold Foil
- White Detail Paint
- Detailing Brush
How to Prepare:
- Tip 1: Use ‘Majolica’ tile patterns by painting tiny blue crosses and squares on a white base.
- Tip 2: Incorporate a single lemon accent nail to break up the blue.
- Tip 3: Apply gold leaf randomly for an antique, sun-drenched feel.
- Tip 4: Keep the lines slightly imperfect to give it a hand-painted ceramic look.
- Tip 5: Mix matte and glossy finishes for texture.
- Tip 6: Use a very thin brush for the delicate scrolls and swirls.
Budget Range
- Zoya ‘Doris’ Blue – $12.00
- Mona Lisa Gold Leaf Sheets – $7.50
3 Simple Steps for Strawberry Nails Designs
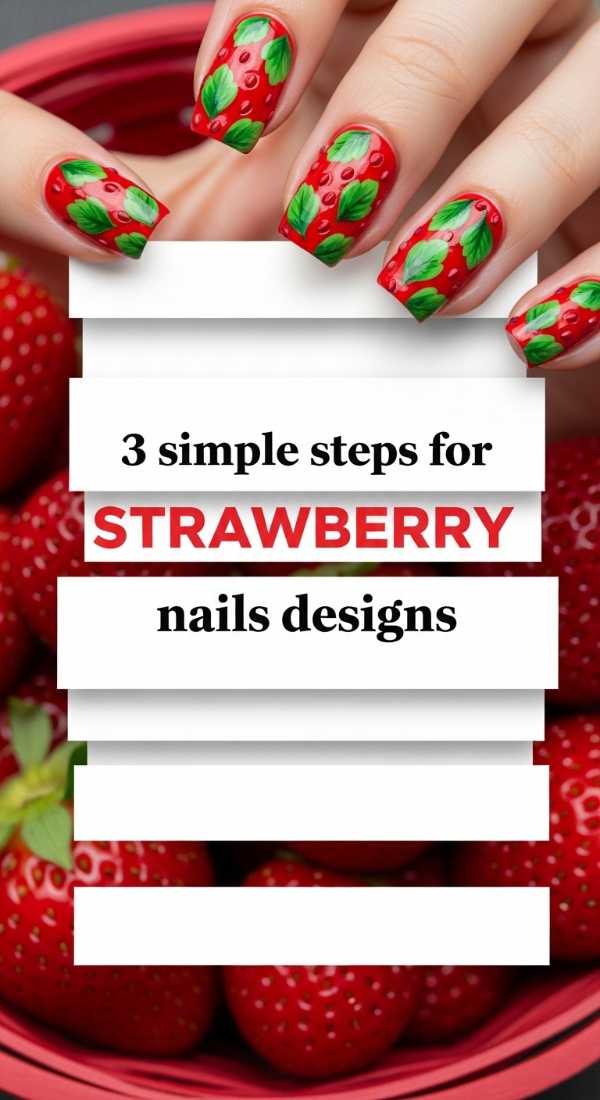
Why to love these Nails:
Sweet, juicy, and perfectly nostalgic! Strawberry nails are the personification of a summer picnic. They are playful and feminine, reminding us of the simple pleasures of picking berries in the tall grass.
Essential Items:
- Bright Red Polish
- Forest Green Polish
- Pale Yellow or White Polish
- Toothpick
How to Prepare:
- Paint your nails a vibrant red and let them dry.
- At the base of the nail (near the cuticle), paint small green triangles to act as the strawberry leaves.
- Use a toothpick to add tiny yellow dots across the red area for the seeds.
Budget Range
- Revlon ‘Red’ – $5.99
- OPI ‘Envy the Adventure’ Green – $11.50
4 Easy Steps for Bumble Bee Nails Design
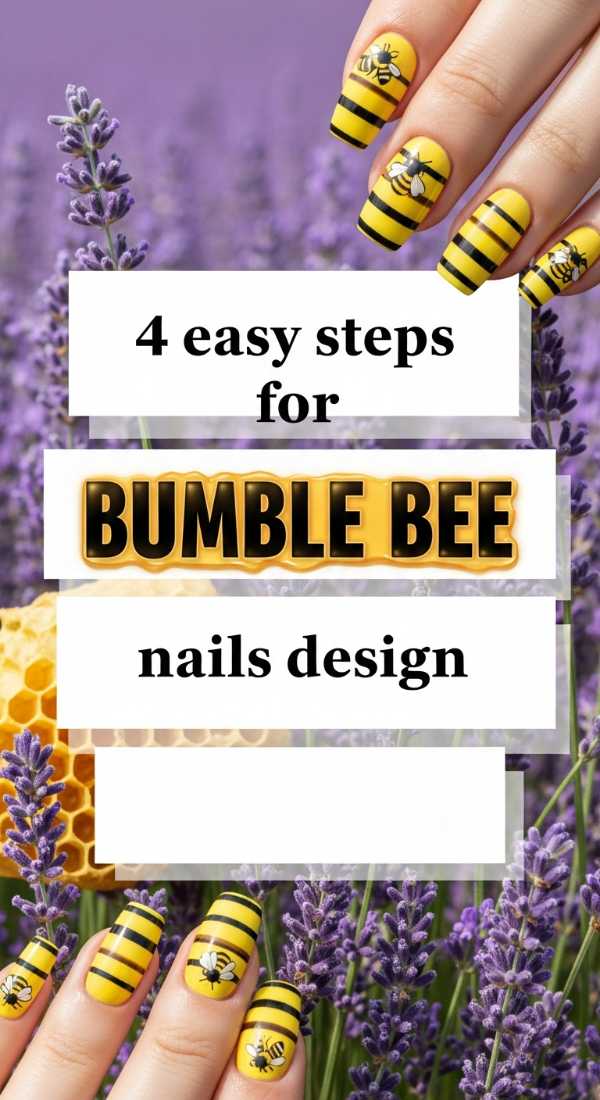
Why to love these Nails:
Bumble bees are the busy little helpers of summer. This design is incredibly cute and adds a whimsical touch to your look. It’s a sweet reminder to stay busy with things that bring you honey-sweet joy.
Essential Items:
- Yellow Polish
- Black Polish
- White Polish
- Thin Striping Brush
How to Prepare:
- Paint a yellow oval in the center of a neutral or clear nail.
- Add three thin black horizontal stripes across the yellow body.
- Use white polish to paint two small semi-circles on top for the wings.
- Add two tiny black dots for eyes if you’re feeling extra detailed!
Budget Range
- Sinful Colors ‘Black on Black’ – $2.99
- China Glaze ‘Daisy Know-How’ – $7.00
7 Secrets to Master Boho Chic Nails

Why to love these Nails:
Boho chic is all about freedom, earthy tones, and artistic expression. These nails are perfect for festival season or simply for those who dance to the beat of their own drum. They feel grounded yet adventurous.
Essential Items:
- Terracotta, Sage, and Mustard Polishes
- Matte Top Coat
- Bronze Metallic Polish
- Small Sponges
How to Prepare:
- Secret 1: Stick to a muted, earthy palette for that organic feel.
- Secret 2: Use ‘negative space’—leave parts of your natural nail showing.
- Secret 3: Dotting tools are your best friend for mandalas and geometric patterns.
- Secret 4: A matte finish always makes boho designs look more expensive.
- Secret 5: Add a touch of bronze for a sun-weathered metallic glow.
- Secret 6: Dry brushing technique creates a beautiful weathered texture.
- Secret 7: Keep designs mismatched; each nail can tell a different story.
Budget Range
- Essie Expressie ‘Saffr-no’ – $9.00
- Lights Lacquer ‘Paper Snow’ – $13.00
5 Steps for Unicorn Chrome Nails Designs

Why to love these Nails:
If you want to feel like a summer goddess, unicorn chrome is the answer. It catches the light in a thousand different ways, creating a pearlescent, magical glow that feels like it’s from another world.
Essential Items:
- White or Pale Pink Base
- No-Wipe Gel Top Coat
- Chrome Powder (Iridescent)
- Sponge Applicator
- UV/LED Lamp
How to Prepare:
- Apply your base color and cure under the lamp.
- Apply the no-wipe top coat and cure it for only 30 seconds.
- Use the sponge applicator to rub the chrome powder onto the nail until it shines.
- Gently brush away any excess powder with a soft brush.
- Seal with a final layer of top coat and cure fully for a mirror-like finish.
Budget Range
- Born Pretty Pearl Powder – $6.99
- SUNUV LED Nail Lamp – $25.00
2 Simple Ways for Ladybug Nails Designs
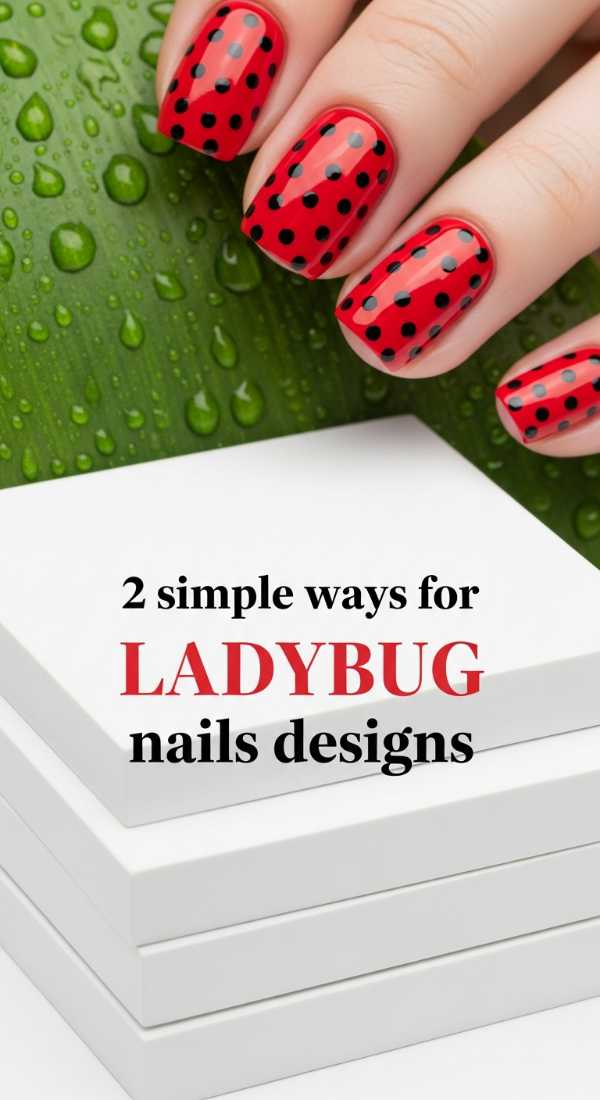
Why to love these Nails:
Ladybugs are symbols of good luck, and who doesn’t need a little extra luck in their life? This design is bold, classic, and incredibly easy to achieve even for beginners. It’s a fun pop of color that makes everyone smile.
Essential Items:
- Classic Red Polish
- Black Polish
- Dotting Tool or Bobby Pin
How to Prepare:
- The Ladybug Accent: Paint all nails red, then on one nail, draw a black line down the center and add black dots on either side.
- The Minimalist Ladybug: Paint a small red semi-circle at the tip of the nail, add black dots, and two tiny antennae.
Budget Range
- Butter London ‘Her Majesty’s Red’ – $18.00
- Nail Art Brushes Set – $4.00
4 Steps to Create Sunflower Nails Design
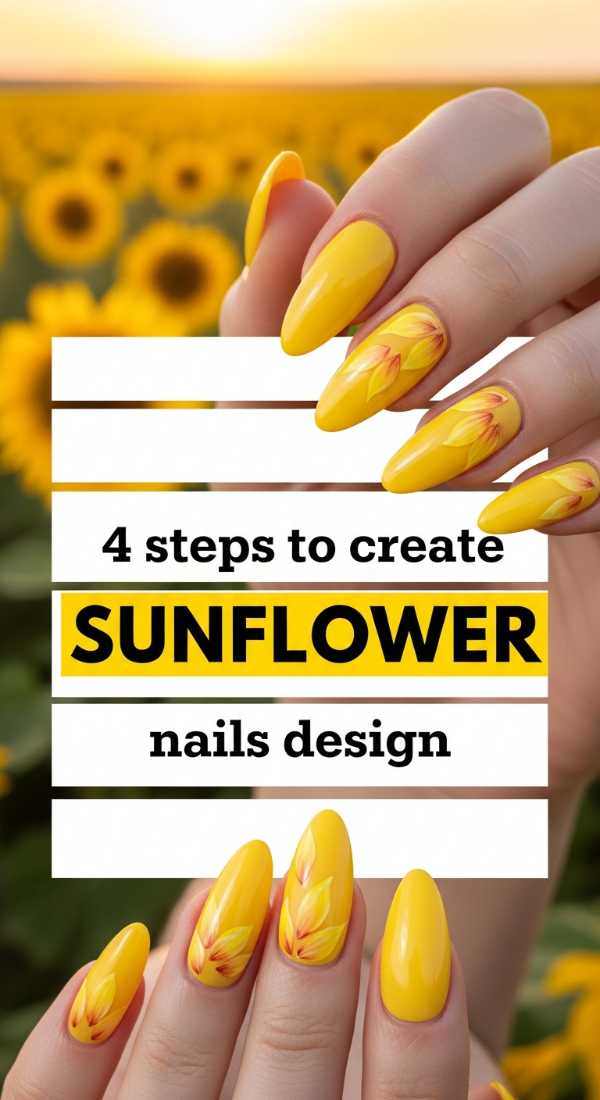
Why to love these Nails:
Sunflowers are the queens of the summer garden. They stand tall and follow the light, which is such a beautiful metaphor for how we should live our lives. These nails are warm, inviting, and truly iconic.
Essential Items:
- Deep Brown Polish
- Golden Yellow Polish
- Clear Base
- Fine Brush
How to Prepare:
- Paint a large brown circle at the corner or base of the nail for the center.
- Use a fine brush to pull short, wispy yellow petals out from the brown center.
- Add a second layer of yellow petals in a slightly different shade for depth.
- Place tiny black or gold dots in the brown center to represent seeds.
Budget Range
- Zoya ‘Honey’ – $12.00
- KL Polish (Select shades) – $10.00
Stay Radiant, My Loves
I hope these tutorials bring a little extra sparkle to your summer days. Remember, nail art isn’t about perfection; it’s about the joy of creating something beautiful for yourself. Take a moment, breathe in the summer air, and let your creativity flow. You deserve to feel pampered and special. I can’t wait to see which design you choose to try first! Tag me in your photos—I’ll be cheering you on from my sun-soaked corner.