
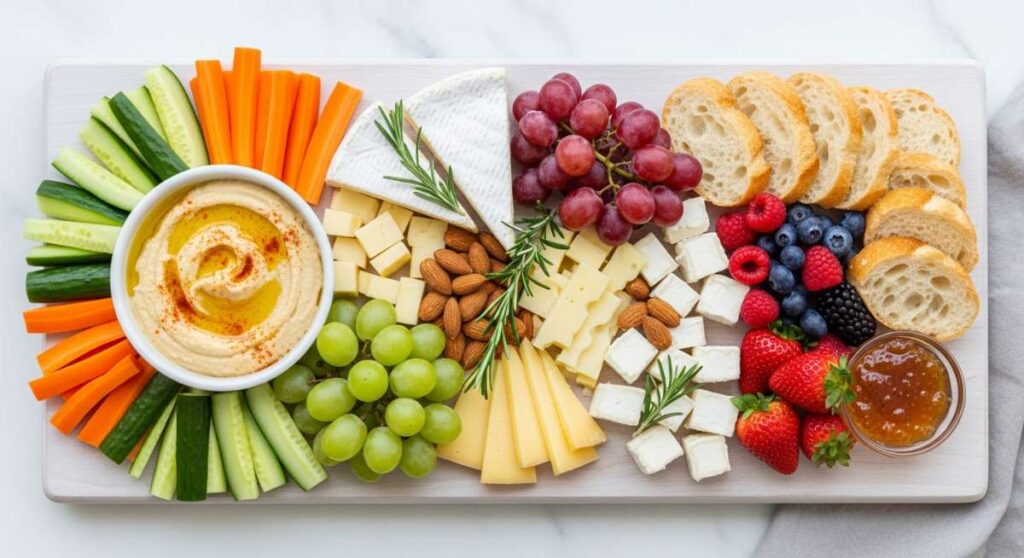
There is something truly magical about that golden hour glow hitting a perfectly curated table as the sun begins to dip. Hosting shouldn’t feel like a chore, yet so often we get bogged down in the kitchen while our favorite people are laughing outside. This season, I’ve found the secret to effortless entertaining: the viral food board. It’s more than just a platter; it’s an invitation to linger, to graze, and to enjoy the vibrant flavors of summer without the stress of a formal sit-down meal.
The ultimate food board is all about balance—mixing the savory with the sweet, the crunchy with the creamy, and the warm with the chilled. Whether you are prepping for a backyard bash or a quiet sunset picnic, these recipes are designed to look as beautiful as they taste. Grab your largest wooden board, a few ceramic ramekins, and let’s dive into the aesthetic world of summer hosting that will leave your guests reaching for their phones to snap a photo before they take a bite.
10 Easy Summer Crockpot Dinners
Why we love this
There is nothing quite like the relief of knowing dinner is already taken care of while you spend the afternoon by the pool or tending to your garden. The aroma of slow-cooked Honey Garlic Chicken fills the house with a sweet and savory perfume that promises a melt-in-your-mouth experience. The chicken becomes so tender it practically falls apart at the touch of a fork, soaking up every bit of the ginger-infused glaze. It’s the ultimate way to enjoy a hot, hearty meal without ever turning on your oven and heating up the entire house during a July heatwave.
Ingredients
- 2 lbs boneless skinless chicken thighs
- 1/2 cup honey
- 1/2 cup soy sauce (low sodium)
- 1/4 cup blackberry preserves (optional for depth)
- 2 tablespoons minced garlic
- 1 tablespoon fresh grated ginger
- 1/2 teaspoon crushed red pepper flakes
- Sesame seeds and sliced green onions for garnish
How to make it
- Begin by patting your chicken thighs dry with a paper towel to ensure the sauce adheres perfectly to the meat. Place them in a single layer at the bottom of your 6-quart slow cooker.
- In a medium glass mixing bowl, whisk together the honey, soy sauce, blackberry preserves, minced garlic, grated ginger, and red pepper flakes until the mixture is cohesive and the honey is fully incorporated.
- Pour the liquid mixture over the chicken, using a spatula to ensure every piece is thoroughly coated. Cover the crockpot with a tight-fitting lid.
- Set the temperature to LOW and cook for 4 to 5 hours. Cooking on low is crucial here; it allows the connective tissues in the chicken thighs to break down slowly, resulting in a superior, buttery texture compared to the faster HIGH setting.
- Once the timer is up, remove the chicken carefully and shred it into large chunks using two forks. If the sauce is too thin, transfer it to a saucepan and simmer over medium-high heat for 5-8 minutes until it reduces to a thick, glossy syrup.
- Toss the shredded chicken back into the glaze and serve immediately topped with a generous sprinkle of sesame seeds and fresh green onions.
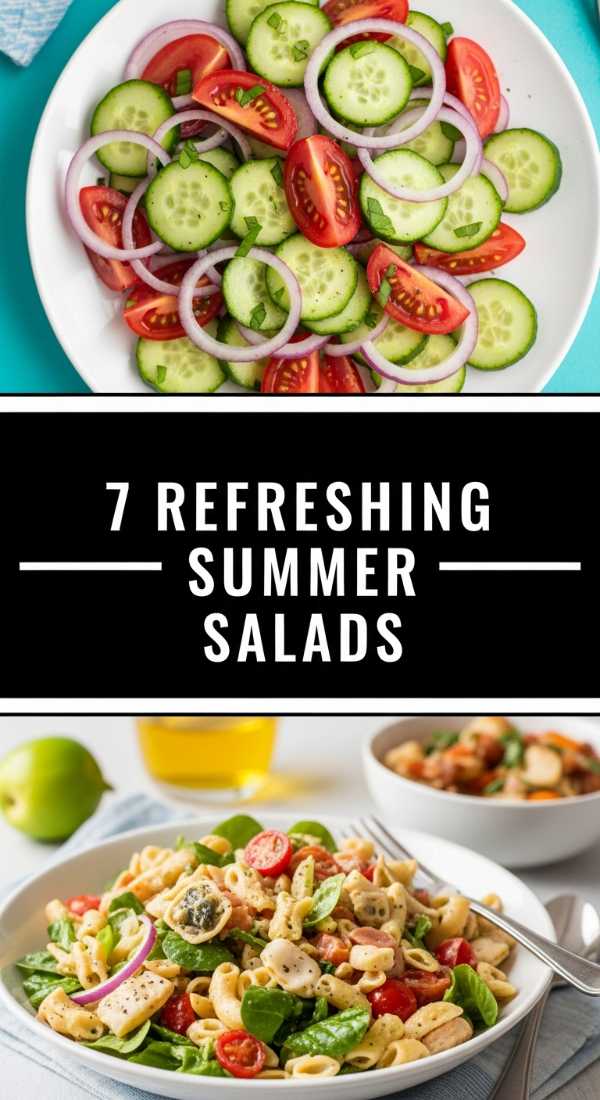
7 Refreshing Summer Salad Recipes

Why we love this
The Watermelon and Feta Mint Salad is a literal explosion of summer in your mouth, offering a profile that is simultaneously sweet, salty, and incredibly hydrating. The crisp, icy crunch of cold watermelon provides a structural contrast to the creamy, tangy crumbles of high-quality sheep’s milk feta. As you bite down, the floral notes of fresh mint leaves dance across your palate, tied together by the subtle acidity of lime juice. It feels like a cooling breeze on a humid afternoon, making it the indispensable star of any outdoor food board.
Ingredients
- 6 cups cubed seedless watermelon (chilled)
- 1 cup crumbled feta cheese
- 1/2 red onion, very thinly sliced
- 1/2 cup fresh mint leaves, torn
- 2 tablespoons extra virgin olive oil
- Juice of 2 large limes
- Flaky sea salt to taste
How to make it
- Start with a cold watermelon that has been refrigerated for at least 4 hours; this ensures the salad is refreshing from the very first bite. Cube the melon into uniform 1-inch pieces.
- Soak the thinly sliced red onions in a small bowl of ice water for 10 minutes. This professional trick removes the harsh “bite” of the onion, leaving behind only the sweetness and crunch.
- In a large, shallow serving bowl (or directly on your food board in a rimmed section), layer the watermelon cubes. Pat the onions dry and scatter them over the top.
- Gently crumble the feta cheese over the melon. Avoid over-mixing, as the feta can start to break down and turn the salad cloudy.
- Whisk the olive oil and lime juice together in a small jar until emulsified. Drizzle this dressing evenly over the salad just before serving to prevent the melon from releasing too much water.
- Tear the mint leaves by hand—bruising them slightly to release their essential oils—and scatter them on top with a final pinch of flaky sea salt.
8 Best Cookout Side Dishes

Why we love this
Nothing says “summer cookout” like the char-grilled sweetness of Mexican Street Corn, or Elote, served off the cob for easier grazing. The kernels are smoky and caramelized, popping with juice against a backdrop of velvety crema and zesty spices. The scent of charred corn mingling with lime and chili powder is enough to draw anyone to the table. It provides a rustic yet sophisticated side dish that pairs beautifully with grilled meats, adding a vibrant pop of yellow and white to your aesthetic food board.
Ingredients
- 4 cups grilled corn kernels (about 5-6 ears)
- 1/4 cup Mexican crema or sour cream
- 1/4 cup mayonnaise
- 1/2 cup crumbled cotija cheese
- 1/2 teaspoon ancho chili powder
- 1/4 cup chopped cilantro
- 1 clove garlic, finely minced
- Lime wedges for serving
How to make it
- Preheat your grill to medium-high heat (about 400°F). Peel back the husks of the corn but leave them attached to use as handles. Remove the silk.
- Grill the corn directly on the grates, turning occasionally, for about 10-12 minutes. You are looking for deep charred spots on all sides—this is where the smoky flavor lives.
- Once charred, remove the corn and let it cool slightly. Use a sharp knife to carefully shave the kernels off the cob into a large mixing bowl.
- In a separate small bowl, whisk together the crema, mayonnaise, minced garlic, and a squeeze of lime until smooth.
- Fold the creamy mixture into the warm corn kernels. The residual heat will help the flavors meld without making the sauce runny.
- Fold in half of the cotija cheese and half of the cilantro. Transfer to a serving bowl, then garnish with the remaining cheese, cilantro, and a dusting of chili powder for that iconic visual appeal.
5 Viral Summer Pasta Salads

Why we love this
This Lemon Orzo Pasta Salad is the ultimate aesthetic addition to a board, featuring bright green herbs, sunny yellow lemon zest, and pearly pasta grains. It feels incredibly light compared to traditional mayo-based salads, focusing instead on the zippy brightness of citrus and the briny punch of Kalamata olives. Every mouthful is a discovery of textures: the softness of the orzo, the snap of English cucumbers, and the juicy burst of cherry tomatoes. It’s the kind of dish that tastes even better the next day after the flavors have had a chance to marry.
Ingredients
- 1 lb orzo pasta
- 1 English cucumber, diced
- 1 pint cherry tomatoes, halved
- 1/2 cup Kalamata olives, sliced
- 1/3 cup pine nuts, toasted
- 1/4 cup fresh dill, chopped
- Dressing: 1/2 cup olive oil, juice of 2 lemons, 1 tsp Dijon mustard, 1 tsp honey, salt and pepper.
How to make it
- Bring a large pot of heavily salted water to a boil. Cook the orzo according to package instructions but pull it off the heat 1 minute early for a perfect al dente texture. Drain and rinse under cold water immediately to stop the cooking process and remove excess starch.
- In a small dry skillet over medium-low heat, toast the pine nuts for 3-5 minutes. Shake the pan constantly; they transition from golden to burnt very quickly. Set aside to cool.
- In a large mixing bowl, combine the cooled orzo, diced cucumber, halved tomatoes, and sliced olives.
- Prepare the vinaigrette by whisking the olive oil, lemon juice, mustard, and honey in a jar. The mustard acts as an emulsifier to keep the oil and juice from separating.
- Pour the dressing over the pasta mixture and toss thoroughly so every grain of orzo is coated.
- Fold in the fresh dill and toasted pine nuts just before serving to maintain their texture and vibrant color.
6 Creamy Summer Dips To Try

Why we love this
Whipped Feta with Honey and Thyme is the dip that will have your guests asking for the recipe before the first hour is up. It’s incredibly silky and luxurious, with a cloud-like consistency that feels indulgent yet light. The saltiness of the feta is perfectly balanced by the floral sweetness of a honey drizzle, while fresh thyme adds an earthy, aromatic undertone that grounds the dish. When spread onto a warm piece of pita or a crisp slice of cucumber, it creates a sophisticated flavor profile that elevates the entire food board experience.
Ingredients
- 8 oz high-quality feta cheese (in brine)
- 1/2 cup Greek yogurt (full fat)
- 1 clove garlic, smashed
- 2 tablespoons extra virgin olive oil
- 1 tablespoon lemon zest
- 2 tablespoons honey
- 1 teaspoon fresh thyme leaves
How to make it
- Drain the feta cheese and crumble it into the bowl of a food processor. Adding a splash of the brine can help with creaminess if needed.
- Add the Greek yogurt, smashed garlic clove, olive oil, and lemon zest to the processor.
- Process the mixture on high for at least 2 to 3 minutes. Stop halfway through to scrape down the sides. You are looking for a completely smooth, airy consistency with no visible lumps.
- Transfer the whipped feta to a shallow bowl or create a “well” directly on your serving board. Use the back of a spoon to create aesthetic swirls on the surface.
- Just before serving, drizzle the honey generously over the swirls so it pools in the crevices.
- Finish with a sprinkle of fresh thyme leaves and additional lemon zest for a professional, gourmet look.
10 Healthy Summer Dinner Recipes

Why we love this
Sheet Pan Lemon Herb Salmon with Asparagus is the epitome of healthy, vibrant summer eating that doesn’t sacrifice flavor for nutrition. The salmon fillets emerge from the oven with a buttery, flake-apart texture, infused with the bright oils of fresh lemon slices and woody rosemary. The asparagus spears become tender-crisp with slightly charred tips that provide a satisfying earthiness. It’s a colorful, nutrient-dense meal that looks stunning when presented on a platter with extra charred lemon halves, making healthy eating feel like a true celebration.
Ingredients
- 4 salmon fillets (6 oz each)
- 1 lb thin asparagus, woody ends trimmed
- 2 lemons (one sliced, one juiced)
- 3 tablespoons olive oil
- 3 cloves garlic, minced
- 1 tablespoon fresh rosemary, chopped
- 1 teaspoon smoked paprika
- Salt and cracked black pepper
How to make it
- Preheat your oven to 400°F (200°C) and line a large rimmed baking sheet with parchment paper for easy cleanup and to prevent the fish from sticking.
- Arrange the salmon fillets in the center of the pan and surround them with the asparagus spears in a single layer. Do not crowd the vegetables, or they will steam instead of roasting.
- In a small bowl, whisk together the olive oil, lemon juice, minced garlic, rosemary, and smoked paprika.
- Brush the marinade generously over the salmon and toss the asparagus in the remaining liquid until evenly coated. Season everything with a bold amount of salt and pepper.
- Place thin lemon slices on top of each salmon fillet. This protects the fish from direct heat and infuses it with moisture.
- Roast for 12-15 minutes, depending on the thickness of the salmon. The fish is done when it reaches an internal temperature of 145°F and flakes easily with a fork. For an aesthetic touch, broil for the last 60 seconds to slightly char the lemon slices.
7 Best Summer Dessert Recipes

Why we love this
Strawberry Shortcake Sliders are the ultimate finger-food dessert for a summer board, offering a nostalgic and whimsical end to the meal. The biscuits are golden and slightly crunchy on the outside, hiding a soft, buttery interior that soaks up the sweet, macerated strawberry juices. Every bite features a cloud of homemade whipped cream that melts away, leaving the bright, tart flavor of the berries to shine. They are small enough to be eaten in two bites, making them perfect for guests who want just a little something sweet while they continue to mingle.
Ingredients
- 1 lb fresh strawberries, sliced
- 3 tablespoons granulated sugar
- 1 pack of high-quality mini brioche buns or small biscuits
- 1 cup heavy whipping cream
- 1/2 cup powdered sugar
- 1 teaspoon vanilla bean paste
- Fresh mint for garnish
How to make it
- Toss the sliced strawberries with granulated sugar in a bowl and let them sit at room temperature for at least 30 minutes. This process, called maceration, draws out the juices to create a natural syrup.
- In a chilled metal bowl, combine the heavy cream, powdered sugar, and vanilla bean paste. Using a hand mixer, beat on medium-high speed until stiff peaks form. The vanilla bean paste adds those beautiful black specks that signify high quality.
- Slice your mini brioche buns or biscuits in half. If using biscuits, a quick toast in a 350°F oven for 5 minutes can add a lovely warmth and crunch.
- Place a generous spoonful of the macerated strawberries onto the bottom half of each bun, ensuring you get some of that liquid syrup on the bread.
- Pipe or dollop a large mound of the whipped cream over the berries.
- Place the top half of the bun at a slight angle to show off the fillings. Secure with a bamboo pick and garnish with a tiny mint leaf for a professional finish.
5 Fun Starbucks Summer Drinks

Why we love this
The DIY Pink Drink is a refreshing, coconut-based beverage that brings a splash of vibrant color and tropical vibes to your drink station. It’s creamy yet surprisingly light, with the subtle sweetness of strawberry and the tartness of passion fruit tea. The coconut milk adds a velvety mouthfeel that contrasts beautifully with the icy, crisp texture of the freeze-dried strawberries. It’s a caffeine-free (or low caffeine) treat that feels like a vacation in a glass, perfect for sipping while you assemble the rest of your food board.
Ingredients
- 2 bags of Tazo Passion Herbal Tea
- 1 cup hot water
- 1/2 cup white grape juice
- 1/2 cup sweetened coconut milk (the kind in the carton)
- 1/4 cup freeze-dried strawberries
- Ice cubes
How to make it
- Steep the two tea bags in 1 cup of boiling water for at least 10 minutes. You want a very concentrated, dark red liquid. Let it cool completely in the fridge.
- Fill a large shaker or a mason jar with plenty of ice. Pour in the chilled passion tea and the white grape juice. The grape juice is the secret ingredient that provides the specific sweetness found in the original version.
- Add the freeze-dried strawberries to the shaker. As they hit the liquid, they will begin to rehydrate and turn the drink a beautiful pastel pink.
- Pour in the coconut milk. Secure the lid and shake vigorously for about 15-20 seconds. Shaking is essential to create that signature frothy top and to ensure the coconut milk is fully integrated.
- Pour into a tall glass filled with fresh ice.
- Garnish with a few extra freeze-dried strawberries on top to make it look exactly like the viral version.
8 Best Kabobs On Grill

Why we love this
Balsamic Glazed Steak and Mushroom Kabobs offer a sophisticated, savory bite that feels much more elevated than your standard backyard fare. The steak is seared to perfection, creating a caramelized crust that seals in all the rich, beefy juices. Each mushroom acts like a sponge, soaking up the tangy balsamic reduction and the aromatic garlic butter. The smell of charred steak hitting the grill is the ultimate signal that summer has arrived. Served on a board, these skewers provide a structured, easy-to-grab protein that looks incredibly organized and appetizing.
Ingredients
- 1.5 lbs top sirloin steak, cut into 1-inch cubes
- 1 lb cremini mushrooms, halved
- 1/4 cup balsamic glaze
- 2 tablespoons olive oil
- 2 tablespoons soy sauce
- 1 teaspoon dried oregano
- 3 cloves garlic, minced
- Wooden or metal skewers
How to make it
- If using wooden skewers, soak them in water for at least 30 minutes to prevent them from burning on the grill.
- In a large bowl, whisk together the balsamic glaze, olive oil, soy sauce, minced garlic, and oregano. Reserve 2 tablespoons of this marinade for later.
- Add the steak cubes and mushrooms to the bowl and toss to coat. Let them marinate in the refrigerator for 30 to 60 minutes. Do not exceed 2 hours, as the acidity in the balsamic will start to “cook” the meat.
- Thread the steak and mushrooms onto the skewers, alternating between them. Don’t pack them too tightly; leaving a tiny bit of space ensures the heat can circulate and cook everything evenly.
- Preheat the grill to high heat. Place the kabobs on the grates and grill for 3-4 minutes per side for medium-rare.
- During the last minute of cooking, brush the reserved marinade over the kabobs to give them a fresh, glossy finish. Let them rest for 5 minutes before placing them on your food board.
9 Best Picnic Side Dishes
[IMAGE_10]
Why we love this
Honey Mustard Broccoli Slaw is the crunchy, vibrant hero of a summer picnic board, offering a fresh departure from soggy, mayo-laden slaws. It features a satisfying snap from the shredded broccoli stalks and carrots, balanced by the sweetness of dried cranberries and the nutty crunch of sunflower seeds. The dressing is bright and tangy, providing a sharp contrast that cuts through heavier grilled meats. It stays crisp for hours, making it the perfect choice for an outdoor gathering where the food might sit out as guests graze at their leisure.
Ingredients
- 1 bag (12 oz) broccoli slaw mix
- 1/2 cup dried cranberries
- 1/4 cup sunflower seeds
- 1/4 cup red onion, finely diced
- Dressing: 1/3 cup Greek yogurt, 2 tbsp Dijon mustard, 2 tbsp honey, 1 tbsp apple cider vinegar, salt and pepper.
How to make it
- In a small mixing bowl, whisk together the Greek yogurt, Dijon mustard, honey, and apple cider vinegar. The yogurt provides a creamy base with much less fat than mayonnaise and a pleasant tang.
- Place the broccoli slaw mix, dried cranberries, and finely diced red onion into a large bowl.
- Pour the dressing over the vegetables and toss using tongs until every shred of broccoli is well-coated.
- Let the slaw sit in the refrigerator for at least 20 minutes before serving. This allows the tough broccoli fibers to soften slightly while still maintaining their essential crunch.
- Just before serving, fold in the sunflower seeds. Adding them at the last minute prevents them from becoming soft.
- Transfer to a bowl for your board and garnish with a few extra cranberries for a pop of deep red color.
Conclusion
Creating the ultimate summer food board is about celebrating the abundance of the season with friends and family. By mixing these diverse recipes—from the smoky depth of grilled kabobs to the refreshing sweetness of a watermelon salad—you create a dining experience that is as much about the visual beauty as it is about the flavor. Remember, the best boards are those that allow you to step away from the kitchen and join the conversation. So, pick your favorite recipes, arrange them with care, and enjoy every bite of your aesthetic summer gathering.