
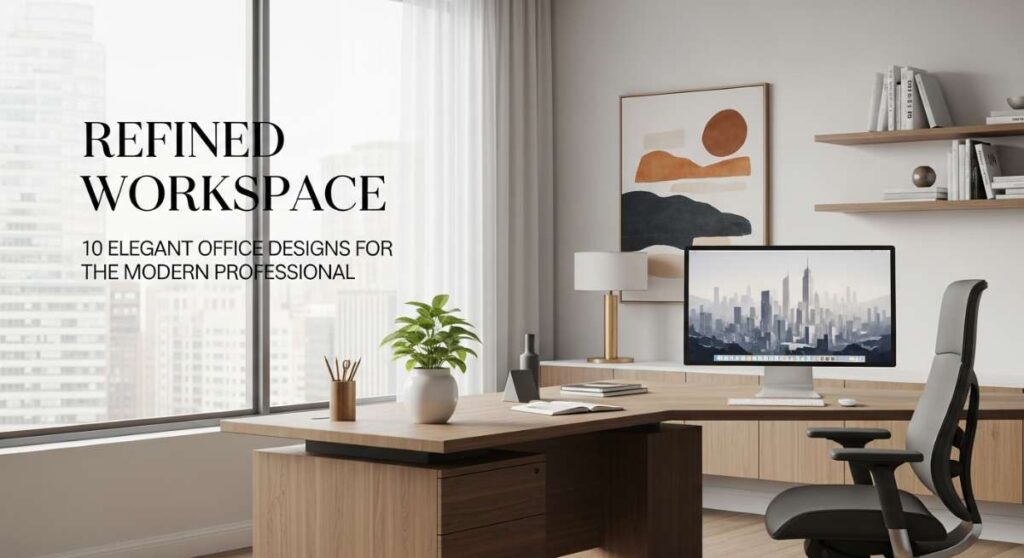
I remember the moment I finally decided to transform my workspace from a cluttered corner of the dining table into a true sanctuary. It was a drizzly Tuesday morning, and the gray light filtering through the window felt uninspiring until I lit a cedar-scented candle and cleared away the stacks of old mail. Suddenly, the air felt lighter, and my mind followed suit. Your office isn’t just a place where you answer emails; it’s the physical manifestation of your ambitions and the one place where your creativity should feel completely unburdened.
We often underestimate how much our surroundings dictate our productivity and mood. When you walk into a space that feels intentional—where the textures are soft, the lighting is warm, and every object serves a purpose—you aren’t just working; you’re thriving. Join me as we explore ten exquisite ways to refine your workspace, from the virtual halls of Bloxburg to the practical beauty of a dual-purpose guest room, ensuring your professional life is as elegant as your personal one.
How to Curate Classy Office Decor for Professional Success

Why we love this
There is something undeniably powerful about a workspace that whispers sophistication through high-quality materials and thoughtful curation. We adore the juxtaposition of a heavy, dark wood desk against the softness of a cream-colored velvet swivel chair, creating a tactile experience that grounds you the moment you sit down. The faint aroma of polished oak and the satisfying ‘click’ of a brass desk lamp turning on provide sensory cues that it is time to focus. It’s about creating a visual symphony where every gold-trimmed organizer and leather-bound planner works in harmony to elevate your professional presence.
Essential Elements:
- Solid oak or mahogany executive desk
- Velvet or high-grade leather ergonomic chair
- Brass or brushed gold desk accessories
- Neutral-toned silk or wool area rug
- High-end linen stationery and a fountain pen
How to make it
- Phase 1: The Foundation. Start by clearing the entire room to assess the natural light; position your primary desk facing the light source to avoid screen glare while maximizing vitamin D.
- Phase 2: Texture Layering. Roll out a high-pile rug to dampen echoes; ensure the rug is large enough so that all four legs of your desk and chair rest comfortably on it, creating a visual ‘zone.’
- Phase 3: Lighting Calibration. Install a warm-toned (2700K) overhead light, then layer in a task lamp with an adjustable neck for focused work; the goal is to eliminate harsh shadows on your workspace.
- Phase 4: Curation. Place three core decorative items—a small sculpture, a textured tray, and a glass vase—using the ‘Rule of Three’ to create a balanced visual weight.
- Phase 5: The Finishing Touch. Spritz a linen spray or light a soy candle with notes of tobacco and vanilla to signal the start of the workday to your olfactory system.
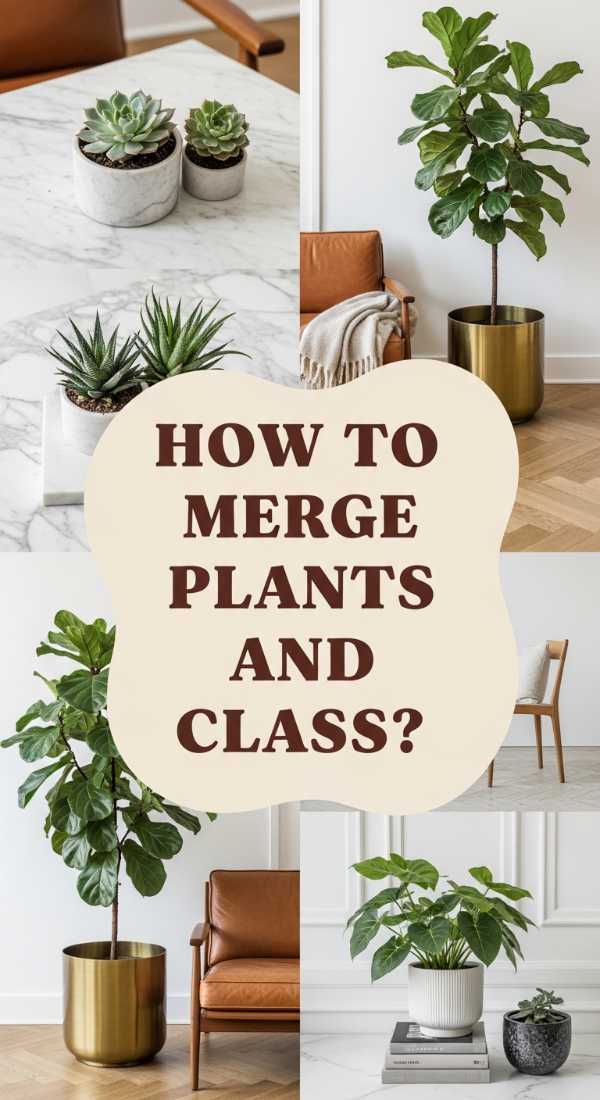
How to Style Green Office Ideas for Natural Inspiration

Why we love this
Integrating nature into your office isn’t just a trend; it’s a breath of fresh air for the soul. We love how a towering Fiddle Leaf Fig can transform a sterile corner into a lush, vibrant sanctuary that feels alive and breathing. The sight of delicate tendrils of Pothos cascading down a bookshelf provides a sense of organic movement that contrasts beautifully with the rigid lines of technology. The earthy scent of damp soil after watering and the varied textures of waxy leaves and terracotta pots create an immersive environment that lowers cortisol and sparks effortless creativity.
Essential Elements:
- Statement floor plants (Monstera or Fiddle Leaf Fig)
- Hanging macramé planters
- Natural terracotta or ceramic glazed pots
- Floating wooden shelves for smaller succulents
- A small misting spray bottle in amber glass
How to make it
- Phase 1: Light Mapping. Identify the ‘bright indirect’ spots in your office—usually 3-5 feet from a window—and reserve these for your larger statement plants.
- Phase 2: Drainage Prep. Ensure all pots have drainage holes; if using a decorative pot without one, place the plant in a plastic nursery liner inside the decorative vessel to prevent root rot.
- Phase 3: Vertical Integration. Install floating shelves at staggered heights to create a ‘green wall’ effect, placing trailing plants on the highest shelf so they can drape naturally.
- Phase 4: Soil Health. Use a high-quality organic potting mix enriched with perlite for aeration; visual cue: the soil should feel like a damp sponge, not mud, when first prepared.
- Phase 5: Maintenance Routine. Set a weekly schedule to dust the leaves with a microfiber cloth; clean leaves photosynthesize better, keeping the office air purified and the plant’s color vibrant.
How to Prepare Aesthetic Office Lunch Ideas for Midday Energy
Why we love this
The midday break should be a celebration of flavor and color, not a sad desk salad in a plastic container. We love the vibrant pop of roasted rainbow carrots paired with the creamy richness of whipped feta, creating a dish that is as beautiful to look at as it is to eat. The crunch of toasted pepitas against the soft grain of quinoa provides a satisfying textural contrast that keeps you engaged with your meal. It’s an opportunity to nourish your body with wholesome ingredients that provide sustained energy without the dreaded afternoon slump, served on a ceramic plate that makes you feel like you’re dining at a bistro.
Essential Elements:
- Tri-color quinoa or farro base
- Roasted seasonal vegetables (beets, carrots, Brussels sprouts)
- Whipped feta or herbed goat cheese
- Toasted seeds or nuts for crunch
- A bright lemon-tahini dressing
How to make it
- Step 1: Grain Prep. Rinse 1 cup of quinoa under cold water to remove bitterness; simmer in 2 cups of vegetable broth for 15 minutes until the germ ‘spirals’ are visible, then fluff with a fork.
- Step 2: Vegetable Roasting. Toss sliced carrots and beets in olive oil and sea salt; roast at 400°F (200°C) until the edges are caramelized and slightly charred, which indicates deep flavor development.
- Step 3: The Creamy Component. Pulse feta cheese with a splash of heavy cream and lemon zest in a food processor until it reaches a silky, mousse-like consistency.
- Step 4: Dressing Emulsion. Whisk together 2 tbsp tahini, the juice of half a lemon, and 1 tsp honey; add warm water teaspoon by teaspoon until the dressing is thin enough to drizzle but thick enough to coat a spoon.
- Step 5: Assembly. Layer the grains at the bottom, arrange vegetables in a semi-circle, dollop the whipped feta in the center, and garnish with seeds; use a wide, shallow bowl for the most ‘aesthetic’ presentation.
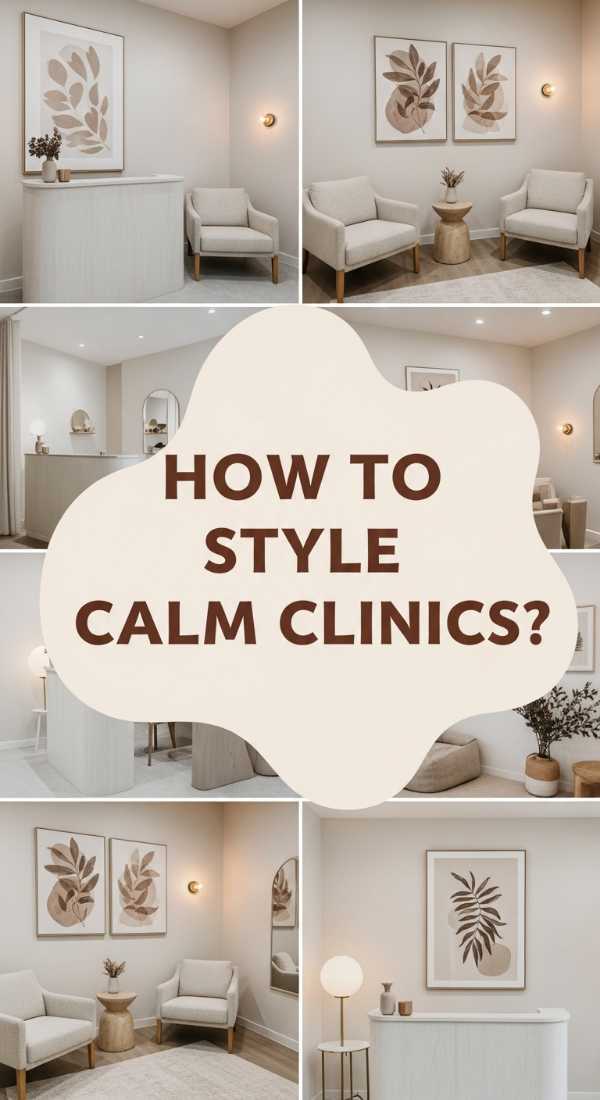
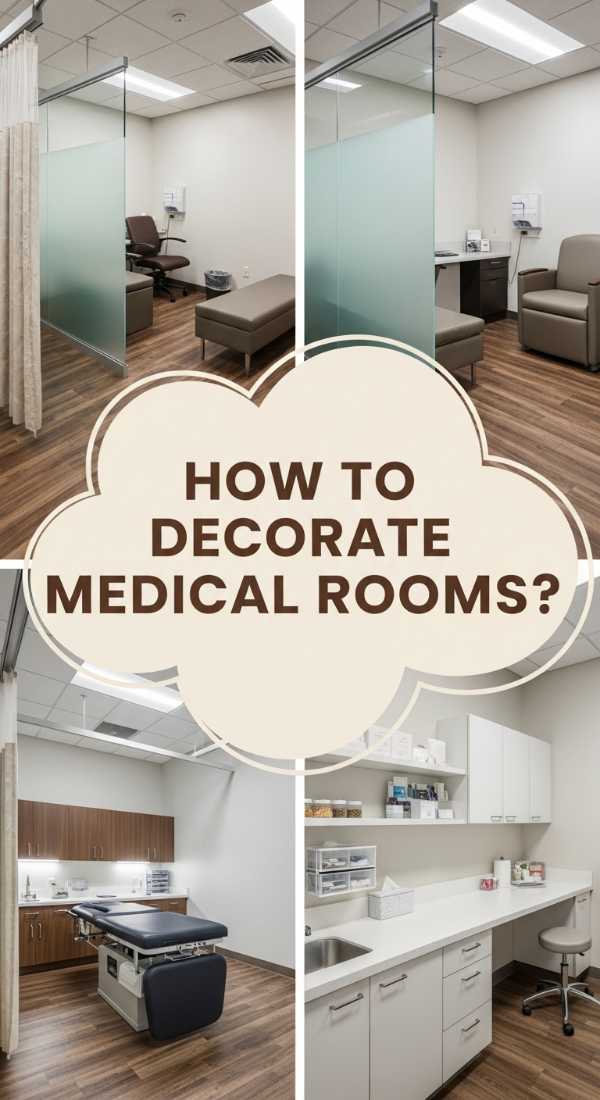
How to Design a Calming Doctor Office for Patient Comfort
Why we love this
Creating a space that eases anxiety requires a delicate touch and a focus on soft, welcoming aesthetics. We love the use of ‘biophilic’ design elements—like a water feature or stone textures—that ground patients the moment they enter. The palette of soft sage greens and muted sand tones replaces the sterile white of traditional clinics, offering a visual embrace that lowers heart rates. Soft, indirect lighting that mimics the glow of sunset ensures that the atmosphere feels more like a high-end spa than a clinical environment, fostering trust and tranquility.
Essential Elements:
- Ergonomic lounge seating in performance fabrics
- Soft-close cabinetry to minimize noise
- Dimmable warm LED lighting
- Framed nature photography or abstract art
- Essential oil diffusers with lavender or eucalyptus notes
How to make it
- Phase 1: Sound Engineering. Install acoustic panels or heavy-duty drapes to absorb the echo of footsteps and voices, ensuring conversations remain private and the environment stays quiet.
- Phase 2: Color Psychology. Apply a coat of ‘Greige’ or ‘Dusty Blue’ paint; these colors are scientifically proven to induce a sense of calm and stability in high-stress environments.
- Phase 3: Seating Layout. Arrange chairs in small clusters rather than rows; this feels more personal and less like a ‘waiting line,’ reducing patient ‘white-coat’ anxiety.
- Phase 4: Sensory Balancing. Set the diffuser to a low, consistent mist; visual cue: the mist should be barely visible against the light, providing a subtle scent without overwhelming sensitive patients.
- Phase 5: Tech Integration. Conceal medical equipment behind stylish cabinetry until needed, keeping the visual field clean and non-threatening.
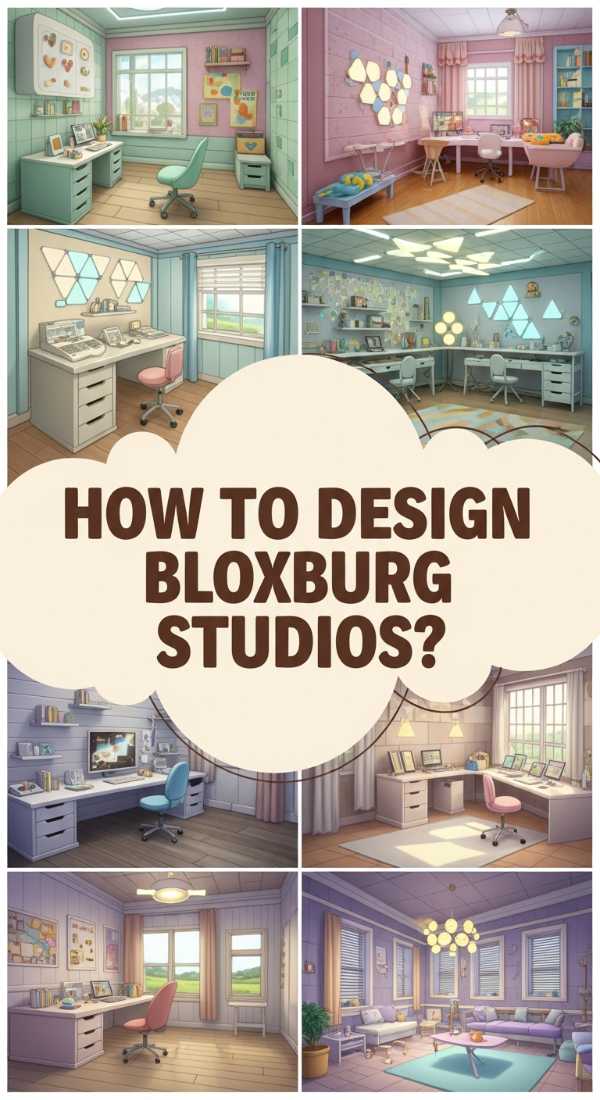
How to Build a Dreamy Bloxburg Office for Virtual Careers
Why we love this
In the world of Bloxburg, your office is a testament to your architectural creativity and digital style. We love the ability to mix ‘Modern’ and ‘Boho’ styles using custom textures like marble-topped desks and cozy knit rugs that look incredibly realistic. The use of large floor-to-ceiling windows to catch the sunset during ‘RP’ sessions creates a magical ambiance that makes virtual work feel rewarding. It’s all about those tiny details—the perfectly placed ‘Decal’ for a coffee cup and the glowing PC setup that makes your virtual career feel like a true lifestyle.
Essential Elements:
- Custom marble or wood textures via Gamepasses
- Detailed shelving with ‘Books’ and ‘Trophy’ items
- Advanced placing for ‘clutter’ items (pens, laptops)
- Warm lighting through ‘Basic Shapes’ or custom lamps
- Personalized decals for wall art
How to make it
- Step 1: Structural Framing. Build a 4×4 room with a large ‘Bay Window’ to maximize natural light; use the ‘Large Plot’ gamepass if you want to include a private balcony.
- Step 2: Color Palette Selection. Use the ‘Color’ tool to select ‘Linen’ or ‘Mid Gray’ for the walls; set the ‘Material’ to ‘Plaster’ for a smooth, high-end professional finish.
- Step 3: Custom Desk Build. Use ‘Basic Shapes’ and the ‘Advanced Placing’ tool to create a custom L-shaped desk; overlap a ‘Modern Desk’ with ‘Pillars’ for a unique, heavy-duty look.
- Step 4: Lighting Logic. Place ‘Recessed Lights’ in the ceiling and change the color to ‘Flint’ or ‘Cloudy Gray’ for a realistic soft glow that isn’t too yellow or harsh.
- Step 5: Detailing. Add a ‘Computer’ and then use the ‘Transform’ tool to place ‘Small Plants’ and ‘Pencils’ at slight angles; visual cue: items should look ‘lived-in,’ not perfectly parallel to the desk edge.
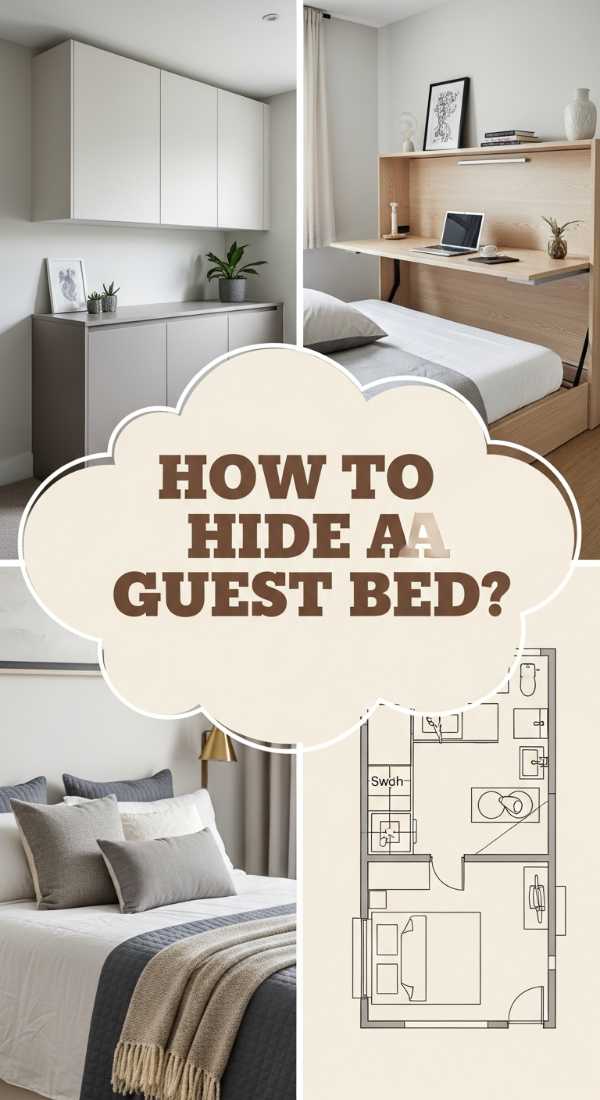
How to Integrate an Office with Murphy Bed Ideas for Small Spaces

Why we love this
The magic of a dual-purpose room lies in its ability to transform its identity in seconds. We love how a sleek, modern desk can exist in the same space as a guest bedroom without ever feeling crowded, thanks to the ingenious design of a Murphy bed hidden behind faux cabinetry. When the bed is tucked away, the room feels like a spacious, airy executive suite where you can think clearly. The seamless transition—lowering the bed over a desk that doesn’t even need to be cleared—is a triumph of modern engineering and aesthetic foresight that makes every square foot work twice as hard.
Essential Elements:
- Horizontal or vertical Murphy bed kit
- Integrated fold-down or slide-under desk
- Built-in shelving for books and decor
- Recessed LED strip lighting inside the bed frame
- High-quality, low-profile mattress
How to make it
- Phase 1: Measurement Precision. Measure your ceiling height and floor clearance twice; ensure you have at least 2 feet of walking space around the bed when it is fully extended.
- Phase 2: Stud Finding. Locate and mark the wall studs; a Murphy bed exerts significant leverage, so it must be anchored into at least three studs with heavy-duty lag bolts.
- Phase 3: Assembly Technique. Assemble the outer cabinet first; then, install the piston or spring mechanism—tighten until the bed frame stays halfway open on its own, which is the visual cue for perfect tension.
- Phase 4: Desk Integration. If using a ‘Desk-over-Bed’ model, ensure the desk height is standard (29-30 inches) and that the clearance for your chair is maintained when the bed is retracted.
- Phase 5: Aesthetic Concealment. Paint the cabinet doors the same color as your walls or add decorative trim to make the unit look like a built-in wardrobe when the office mode is active.
How to Perfect Professional Bloxburg Office Layouts for Realistic Gameplay
Why we love this
For the dedicated roleplayer, a professional layout isn’t just about looks; it’s about the flow of movement. We love creating ‘Zones’ within a single room—a focused workspace, a cozy reading nook for ‘research,’ and a small refreshment station. The satisfaction of walking through a virtual space that feels logically organized, with a clear path from the door to the desk, enhances the realism of the gameplay experience. It’s the subtle touches, like the ‘In-Tray’ for paperwork and a ‘Coat Rack’ near the entrance, that make your virtual business feel like a thriving reality.
Essential Elements:
- Zoned floor plan (Desk area vs. Lounge area)
- Realistic ‘Office Chair’ with custom color wheel
- Functional ‘Bookshelf’ with interactable books
- Small ‘Coffee Station’ with a brewer and mugs
- Area rugs to define different ‘zones’
How to make it
- Step 1: Traffic Flow Design. Place the desk in the ‘Power Position’—the corner furthest from the door but facing it—ensuring there is a 2-tile wide path for your avatar to walk.
- Step 2: Zone Separation. Use a ‘Half Wall’ or a row of ‘Planters’ to separate the desk from a guest seating area; this creates a sense of professional hierarchy.
- Step 3: Material Consistency. Use the ‘Copy Material’ tool to ensure all wood surfaces (desk, shelves, floor) match in grain and hue; a ‘White Oak’ or ‘Dark Walnut’ look works best for professionalism.
- Step 4: Utility Placement. Hide ‘Small Trash Cans’ and ‘Wall Outlets’ behind the desk for a clean, wire-free look; visual cue: the space should look uncluttered from the main camera angle.
- Step 5: Lighting Layers. Add a ‘Floor Lamp’ in the lounge zone and a ‘Desk Lamp’ on the work surface; set both to a ‘Warm White’ color to avoid the default harsh white light.
How to Balance Greenery and Classy Office Decor for Refined Living

Why we love this
Finding the ‘sweet spot’ between luxury and nature is where true design magic happens. We love the sophisticated contrast of a sleek, black metal shelving unit adorned with both leather-bound journals and trailing English Ivy. The organic shapes of the leaves soften the hard edges of modern furniture, creating a space that feels curated yet lived-in. The vibrant chlorophyll green acts as a ‘neutral’ color, popping against gold accents and white marble while providing a calming visual rest for your eyes after hours of staring at a blue-light screen.
Essential Elements:
- Sleek, minimalist metal or glass shelving
- High-end planters in marble, brass, or stone
- A mix of structured plants (Snake Plant) and soft plants (Ferns)
- Designer decor pieces (heavy glass bookends, candles)
- Natural fiber accessories like seagrass baskets
How to make it
- Phase 1: Visual Weight Analysis. Place your heaviest furniture first; then, position your largest plant in the opposite corner to balance the room’s ‘visual gravity.’
- Phase 2: Shelf Styling. Follow the ‘Zig-Zag’ method; place a plant on the top left shelf, then a stack of books on the middle right shelf, and another plant on the bottom left.
- Phase 3: Material Pairing. Pair ‘hard’ materials with ‘soft’ plants; place a spiky Snake Plant next to a smooth glass lamp, or a delicate Maidenhair Fern on a rough stone coaster.
- Phase 4: Color Bridging. Use a deep forest green throw pillow or a green-tinted glass vase to ‘bridge’ the gap between your living plants and your static decor.
- Phase 5: Maintenance Integration. Keep a stylish metal watering can as a permanent decor piece on the shelf; this makes plant care easy and serves as a classy accessory.
How to Master Office Lunch Prep for a Healthier Work Week
Why we love this
There is a unique kind of peace that comes from knowing your nutrition for the week is handled with elegance and care. We love the ritual of ‘Jar Salads,’ where vibrant layers of balsamic vinaigrette, chickpeas, cucumbers, and spinach create a vertical rainbow in your fridge. The crunch of fresh bell peppers and the zest of pickled onions provide a mid-day flavor explosion that awakens the senses. Prepping these meals in high-quality glass containers ensures that your food stays fresh and crisp, making your lunch break a moment of genuine self-care rather than a rushed chore.
Essential Elements:
- Wide-mouth 32oz Mason jars or glass bento boxes
- Protein source (grilled chicken, chickpeas, or tofu)
- Crunchy vegetables (bell peppers, cucumbers, radishes)
- Hearty greens (kale, spinach, or arugula)
- A high-quality olive oil-based dressing
How to make it
- Step 1: Dressing Base. Pour 2-3 tbsp of dressing into the very bottom of the jar; this ‘liquid barrier’ is the secret to preventing soggy greens.
- Step 2: The ‘Shield’ Layer. Add hard, non-absorbent vegetables like sliced carrots, chickpeas, or grape tomatoes directly on top of the dressing; they can marinate without losing texture.
- Step 3: Protein Addition. Layer in your protein; if using warm grilled chicken, ensure it has cooled to room temperature before adding to avoid creating steam in the jar.
- Step 4: Green Packing. Stuff the remaining space with greens, packing them tightly; visual cue: the jar should be full to the brim to minimize the amount of air, which slows oxidation.
- Step 5: The Seal. Close the lid tightly and store upright in the fridge; when ready to eat, shake the jar vigorously or dump it into a bowl—the dressing will perfectly coat everything from top to bottom.
How to Optimize a Modern Doctor Office for Professional Presence
[IMAGE_10]
Why we love this
A modern medical workspace should exude authority while remaining approachable and cutting-edge. We love the integration of hidden technology—like recessed wall tablets and smart-glass partitions that turn opaque for privacy—combined with high-shine surfaces like polished quartz. The clean, crisp lines of mid-century modern furniture provide a timeless professional look that signals expertise. It’s an environment that respects the gravity of the work while embracing the future of medicine, using a palette of slate, navy, and white to create a sharp, decisive atmosphere.
Essential Elements:
- Quartz or high-grade laminate countertops
- Integrated tech charging stations
- Smart-glass or frosted glass partitions
- Mid-century modern visitor chairs
- Minimalist digital wall clocks and signage
How to make it
- Phase 1: Workflow Mapping. Design the room around the ‘Triad of Care’: the doctor’s desk, the patient exam area, and the digital interface, ensuring the doctor can face the patient while taking notes.
- Phase 2: Cable Management. Install ‘Under-Desk Channels’ or drill grommet holes into the quartz; visual cue: not a single wire should be visible to the patient, reinforcing an image of precision and order.
- Phase 3: Material Selection. Choose non-porous, medical-grade surfaces that mimic luxury materials (like antimicrobial quartz that looks like Carrara marble) to balance safety with style.
- Phase 4: Lighting Control. Install a ‘Scene’ controller for the lights; use a ‘Bright/Task’ setting for examinations and a ‘Soft/Consult’ setting for talking through results with patients.
- Phase 5: Brand Integration. Add a subtle, backlit logo on the main wall using cool-toned LEDs; this reinforces professional identity and provides a focal point for the room.
Design Your Way to a Better Workday
Your office is the launchpad for your greatest ideas and your most significant professional milestones. Whether you are building a digital empire in Bloxburg or styling a real-world executive suite, the key is to infuse the space with your unique personality and a commitment to quality. By focusing on sensory details—from the texture of your chair to the crunch of your aesthetic lunch—you create an environment where success isn’t just a goal, but a daily experience. Go ahead, refine your space, and watch how it transforms your work.