

Hello, my loves. Welcome back to my little corner of the internet, where the flour is always dusting the counters and the scent of vanilla feels like a soft, warm embrace. Today, I wanted to share something truly special with you—a collection of kitchen secrets that turn simple baking into a visual and sensory experience. There is a certain magic in creating something with your own hands that looks as beautiful as it tastes, and I truly believe that every time we step into the kitchen, we are weaving a bit of love into our lives.
Lately, I have been mesmerized by the way a simple plate can tell a story on our feeds. Whether it is the crackle of a sourdough crust or the perfect swirl of buttercream, these moments of aesthetic perfection help us connect with one another in such a beautiful way. I have gathered my absolute favorite viral food ideas that are not just about the ‘likes,’ but about the joy of the process itself. Let’s dive into these recipes together, filling our homes with warmth and our hearts with creative inspiration.
The Best Way To Get Perfect Crinkle Top Brownies

Why we love this
There is something so incredibly satisfying about pulling a tray of brownies out of the oven and seeing that delicate, paper-thin, shiny crinkle across the top. It is the hallmark of a truly decadent treat, promising a fudgy center that melts in your mouth with every single bite. This aesthetic is what dreams are made of, turning a simple dessert into a viral-worthy masterpiece that your followers will absolutely adore. It feels like a warm hug for your taste buds and a visual treat for your beautiful feed alike.
Ingredients
- 200g High-quality dark chocolate (60-70% cocoa)
- 115g Unsalted butter
- 200g Granulated sugar
- 2 Large eggs (room temperature)
- 1 tsp Vanilla extract
- 65g All-purpose flour
- 25g Dutch-processed cocoa powder
- 1/2 tsp Sea salt
How to make it
- Preheat your oven to 350°F (175°C) and line an 8-inch square pan with parchment paper, leaving an overhang for easy removal.
- The secret to the crinkle is the sugar—whisk your room-temperature eggs and granulated sugar for a full 5-10 minutes until the mixture is pale, thick, and doubled in volume.
- Melt the butter and dark chocolate together in a heatproof bowl over simmering water or in short bursts in the microwave until completely smooth.
- Gently fold the melted chocolate mixture into the whipped egg and sugar mixture until just combined, being careful not to deflate the air you have worked so hard to incorporate.
- Sift in the flour, cocoa powder, and salt, then fold gently until no streaks of flour remain; the batter should be thick, glossy, and smell absolutely divine.
- Pour into the pan and bake for 25-30 minutes; the center should still have a slight wobble when shaken, ensuring that perfect fudgy texture we all crave.
The Absolute Easiest Method For Beginners To Master Sourdough
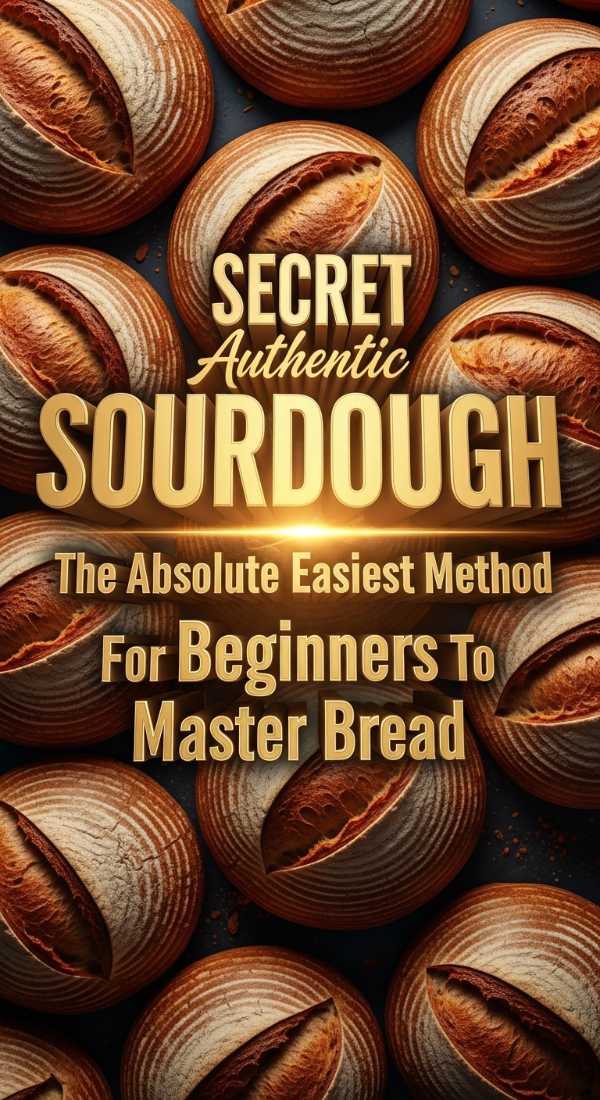
Why we love this
Sourdough feels like a living piece of art that grows with you, a quiet companion in the kitchen that rewards patience with the most incredible flavor and texture. This beginner-friendly method strips away the intimidation, focusing instead on the rhythm of the dough and the simple joy of fermentation. There is no feeling quite like slicing into your first homemade loaf and seeing those beautiful airy bubbles. It connects us to a simpler time, bringing a sense of grounding peace to our busy modern lives and tables.
Ingredients
- 100g Active sourdough starter (bubbly and fed)
- 350g Warm filtered water
- 500g Bread flour
- 10g Fine sea salt
How to make it
- In a large glass bowl, whisk your active starter and warm water together until the starter is mostly dissolved and the water looks milky and frothy.
- Add the bread flour and salt to the bowl, mixing by hand or with a sturdy spatula until a shaggy, messy dough forms and no dry flour remains visible.
- Cover the bowl with a damp cloth and let it rest for 30 minutes; this process, called autolyse, allows the flour to fully hydrate and makes the dough easier to work with.
- Perform four rounds of ‘stretch and folds’ every 30 minutes by grabbing the edge of the dough, pulling it up, and folding it over itself until the dough becomes smooth.
- Let the dough rise at room temperature for 8-12 hours (bulk fermentation) until it has doubled in size and shows small bubbles on the surface.
- Shape the dough gently on a floured surface, place it in a proofing basket, and let it rest in the fridge overnight before baking in a hot oven the next morning.
Professional Flaky Pastry Layers You Can Make At Home

Why we love this
Imagine the sound of a thousand tiny crystal layers shattering as you take a bite of a perfectly laminated pastry, buttery and golden. Achieving this at home feels like a true culinary triumph, turning your kitchen into a high-end patisserie for the morning. It is a slow, meditative process that teaches us the beauty of precision and the magic of cold butter. These layers are not just food; they are a testament to the love and care you put into every fold and every chill in the fridge.
Ingredients
- 250g All-purpose flour
- 250g Bread flour
- 60g Granulated sugar
- 10g Salt
- 10g Instant yeast
- 300g Cold unsalted butter (high fat content is best)
- 250ml Cold whole milk
How to make it
- Mix your flours, sugar, salt, and yeast together, then slowly add the cold milk to form a dough; knead only until it just comes together to keep it tender.
- Wrap the dough in plastic and chill it in the refrigerator for at least two hours, or ideally overnight, to relax the gluten completely before lamination.
- Prepare your ‘butter block’ by pounding cold butter between two sheets of parchment paper into a neat 7×7 inch square, then chill until firm but still flexible.
- Roll the dough into a 10×10 inch square, place the butter block diagonally in the center, and fold the corners of the dough over it like an envelope to seal it.
- Roll the dough out into a long rectangle and perform a ‘letter fold,’ then chill for 30 minutes; repeat this rolling and folding process three times to create the layers.
- Final roll the dough out to your desired thickness, cut into shapes, and bake at a high temperature to cause the water in the butter to steam and lift the layers.
How To Bake The Softest Loaf You Have Ever Tasted

Why we love this
There is a specific kind of comfort found in a slice of bread so soft it feels like a cloud, yielding gently to the touch and melting away. This recipe uses a special technique to lock in moisture, ensuring that every piece remains tender and fresh for days on end. It is the perfect bread for slow mornings with honey or for sharing a sandwich with someone you hold dear. This loaf is a gentle reminder that the best things in life are often the softest and most simple, filled with quiet warmth.
Ingredients
- 350g Bread flour
- 20g Sugar
- 7g Instant yeast
- 1 tsp Salt
- 1 Large egg
- 120ml Warm milk
- 20g Flour + 100ml Water (for the Tangzhong starter)
- 30g Softened butter
How to make it
- Start by making the Tangzhong: whisk 20g flour and 100ml water in a small pan over medium heat until it thickens into a translucent, pudding-like paste.
- In a large bowl, combine the bread flour, sugar, yeast, and salt, then add the cooled Tangzhong, the egg, and the warm milk to the dry ingredients.
- Knead the dough until it is smooth and elastic, then gradually incorporate the softened butter one tablespoon at a time until the dough is silky and supple.
- Place the dough in a greased bowl, cover it, and let it rise in a warm spot for about an hour or until it has doubled in its beautiful volume.
- Punch the dough down, divide into three equal pieces, roll them out and fold them into cylinders, and place them side-by-side in a greased loaf pan.
- Let the loaf rise again until it reaches the rim of the pan, then bake at 350°F (175°C) for 30 minutes until golden and sounding hollow when tapped.
The Most Incredible Frosting Technique For Bakery Cupcakes

Why we love this
We all know that the first bite of a cupcake is actually a bite of the frosting, and this technique ensures it is an unforgettable experience. This method creates a texture that is impossibly smooth, stable enough for intricate piping, yet light enough to feel like a dream. It elevates a simple cupcake into a piece of edible art that looks like it stepped right out of a professional bakery window. It is about bringing that extra touch of whimsy and elegance to your celebrations, making every moment feel a bit more magical.
Ingredients
- 225g Unsalted butter (slightly cool, not soft)
- 500g Sifted powdered sugar
- 2 tbsp Heavy cream
- 1 tsp Pure vanilla bean paste
- Pinch of fine salt
How to make it
- The secret is in the duration: beat your slightly cool butter alone for at least 5-7 minutes using a paddle attachment until it is almost white in color.
- Add half of the powdered sugar and beat on low speed until combined, then increase the speed to medium and beat for another 3 minutes until very fluffy.
- Add the remaining powdered sugar along with the heavy cream, vanilla bean paste, and a pinch of salt to balance the sweetness of the sugar.
- Beat the entire mixture on high for another 5 minutes, which incorporates air and ensures the sugar is fully dissolved for a grit-free texture.
- Switch to the lowest speed for 2 minutes or use a spatula to stir by hand to knock out any large air bubbles, resulting in a silk-smooth finish.
- Use a large piping tip (like a 1M or 2D) and apply steady pressure from the center outward to create that iconic, viral bakery-style swirl on each cupcake.
This Specific Ingredient Makes Your Rolls Better Than Cinnabon

Why we love this
When you take a bite of a cinnamon roll that is dripping with glaze and perfectly tender, the world seems to stand still for just a second. There is a secret addition that transforms these rolls from ordinary to legendary, creating a gooey, soft texture that is simply unmatched. It is the ultimate indulgence for a cozy weekend in, filling your home with the scent of cinnamon and caramelized sugar. These rolls are a love letter to comfort food, designed to be shared and savored with those you love most in this world.
Ingredients
- Standard sweet yeast dough (risen)
- 1/2 cup Softened butter
- 1 cup Brown sugar + 2 tbsp Cinnamon
- 1/2 cup Heavy cream (room temperature)
- Cream cheese frosting (for topping)
How to make it
- Roll out your risen yeast dough into a large rectangle and spread the softened butter evenly across the surface, reaching right to the very edges.
- Sprinkle your brown sugar and cinnamon mixture generously over the butter, then roll the dough tightly into a log and slice into even rounds.
- Place the rolls into a greased baking dish, leaving a little bit of space between them for their final rise, and let them proof until they are touching.
- Here is the viral secret: just before putting them in the oven, pour the room-temperature heavy cream into the spaces between the rolls in the pan.
- Bake at 350°F (175°C) for 20-25 minutes; the cream will bubble up and soak into the bottom of the rolls, creating an incredibly soft, gooey texture.
- While still warm, slather the rolls with a thick layer of cream cheese frosting so it melts slightly into the crevices of the cinnamon-sugar swirls.
Why Chilling Your Dough Is The Only Rule That Matters

Why we love this
In our fast-paced lives, we often want results immediately, but the kitchen teaches us that the best things come to those who wait. Chilling your dough is the single most important step in creating a cookie or pastry with depth, flavor, and the perfect structure. It allows the fats to solidify and the flavors to meld together into something truly complex and sophisticated. This quiet period of rest in the fridge is where the real magic happens, ensuring your bakes turn out perfectly every single time you preheat the oven.
Ingredients
- Your favorite cookie or pastry dough recipe
- Time (at least 24 to 72 hours)
- Plastic wrap or an airtight container
How to make it
- Prepare your dough according to your recipe, ensuring all ingredients are well incorporated but being careful not to overmix the flour.
- For cookies, scoop the dough into individual balls before chilling; this makes it easier to bake them off later and ensures even cooling of the fat.
- Place the dough balls or the wrapped pastry block into the refrigerator, making sure it is well-sealed to prevent it from absorbing any stray fridge odors.
- Allow the dough to rest for a minimum of 24 hours; during this time, the flour fully hydrates and the enzymes break down starches into sugars.
- When you are ready to bake, take the dough out of the fridge—for cookies, you can bake them straight from cold for a thicker, less-spread result.
- Observe the difference: you will notice a deeper golden color, a more complex ‘toffee’ like flavor profile, and a much better texture in the finished product.
Achieve High Bakery Style Domed Tops With This Simple Hack

Why we love this
There is nothing quite as inviting as a muffin or cupcake with a high, proud dome that looks like it came straight from a professional pastry chef’s oven. It creates such a beautiful silhouette and provides more of that delicious, golden surface area we all crave when we indulge in a treat. This little hack is a game-changer for home bakers, proving that you don’t need fancy equipment to get professional results. It is about understanding the science of heat and using it to create something that looks absolutely stunning on any plate.
Ingredients
- Your favorite muffin or quick-bread batter
- A standard muffin tin
- Parchment paper liners
How to make it
- Prepare your batter as usual, but ensure it is slightly thicker than a standard cake batter to help it hold its structure as it rises quickly.
- The first part of the hack is to fill your muffin liners almost all the way to the top, rather than the traditional two-thirds full recommendation.
- Preheat your oven to 425°F (218°C), which is significantly higher than the usual baking temperature for small cakes or muffins.
- Place the muffins in the oven and bake at this high heat for exactly 5 minutes; this causes a rapid burst of steam and a quick rise.
- Without opening the oven door, turn the temperature down to 350°F (175°C) and finish baking for the remaining time required by your specific recipe.
- The initial blast of heat sets the outer edges and pushes the center upward, while the lower temperature ensures the inside cooks through without burning.
The Fail Proof Secret To A Perfectly Level Sponge Every Single Time
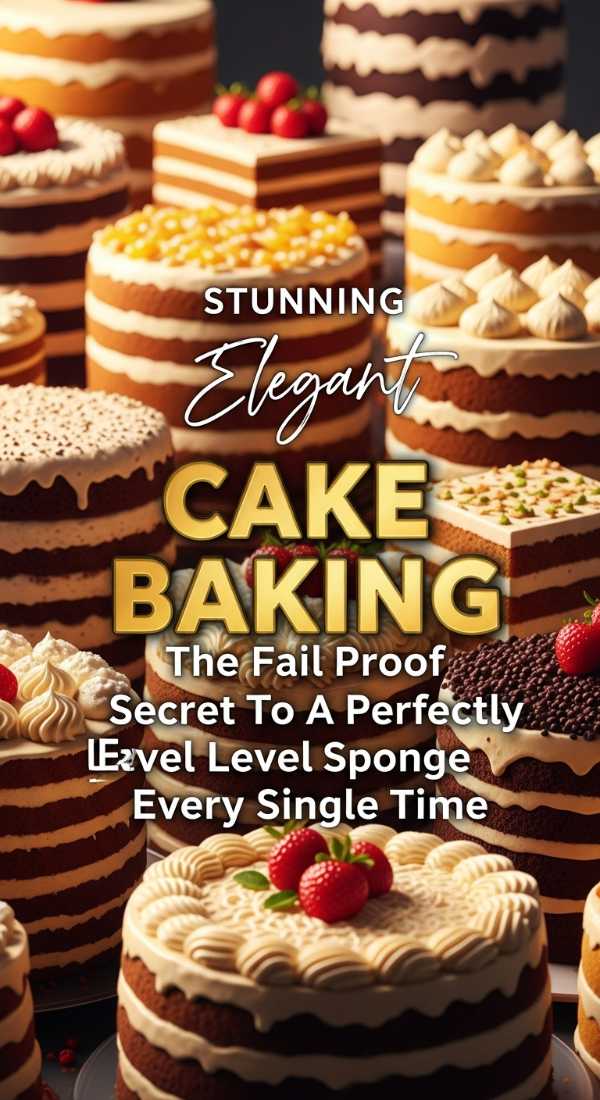
Why we love this
Flat, level cake layers are the foundation of a beautiful, professional-looking layer cake, but they can be so elusive for even the most experienced bakers. This secret eliminates the need for trimming away precious cake and ensures your stacks are stable and aesthetically pleasing from the very start. It is a small step that makes a world of difference in the final look of your creation, allowing you to focus on the joy of decorating. This technique brings a sense of calm and confidence to your baking, knowing your layers will be perfect every time.
Ingredients
- Cake batter
- Old cotton towel or professional cake strips
- Safety pins (if using towels)
- Water
How to make it
- Prepare your cake pans by greasing them and lining the bottoms with parchment paper to ensure easy release once the sponges have finished baking.
- Cut an old cotton towel into strips that are long enough to wrap around the exterior of your cake pans with a slight overlap.
- Soak the cotton strips (or professional cake strips) in cold water until they are completely saturated, then squeeze out the excess so they aren’t dripping.
- Wrap the damp strips tightly around the outside of your filled cake pans, securing them with safety pins or the built-in fasteners if using professional strips.
- Bake your cake at the temperature specified in the recipe; the damp strips keep the edges of the pan cooler, allowing the entire cake to rise evenly.
- Remove the strips immediately after taking the pans out of the oven and let the cakes cool completely; you will have perfectly flat, level tops ready for stacking.
Creating That Perfect Crunchy Crust Without A Dutch Oven

Why we love this
That iconic, glass-like crunch of a professional loaf of bread is usually achieved using expensive Dutch ovens, but you can create that same magic with items you already have. This method allows the steam to work its wonders, developing a beautiful, blistered crust that sings when you press on it. It opens up a world of possibilities for those who are just starting their bread journey or don’t have a lot of storage space. There is a deep satisfaction in hearing that first crackle of the crust, knowing you created that professional finish right in your own kitchen.
Ingredients
- Your shaped bread dough
- A baking tray or pizza stone
- A deep roasting pan
- 1 cup Boiling water
How to make it
- Preheat your oven to its highest setting with your baking tray or pizza stone inside, as well as a separate empty roasting pan on the rack below it.
- Carefully transfer your proofed and scored dough onto the hot baking tray or pizza stone using a piece of parchment paper to assist with the move.
- As soon as the bread is in the oven, pour the one cup of boiling water into the empty, hot roasting pan sitting on the rack below.
- Quickly close the oven door to trap the burst of steam inside; this steam keeps the surface of the dough moist, allowing it to expand fully.
- After about 15 minutes, carefully remove the water pan and continue baking until the crust is a deep, dark golden brown and sounds hollow when tapped.
- The steam is what creates that thin, crispy, and blistered crust that characterizes high-end artisan bread, all without needing a heavy lid or special pot.
A Sweet Conclusion
Thank you so much for spending this time with me in my kitchen sanctuary. I hope these ideas spark a little light in your heart and encourage you to try something new this weekend. Remember, it isn’t just about the final photo—it’s about the flour on your apron, the warmth of the oven, and the love you share with every bite. I can’t wait to see what you create, my loves. Happy baking!