
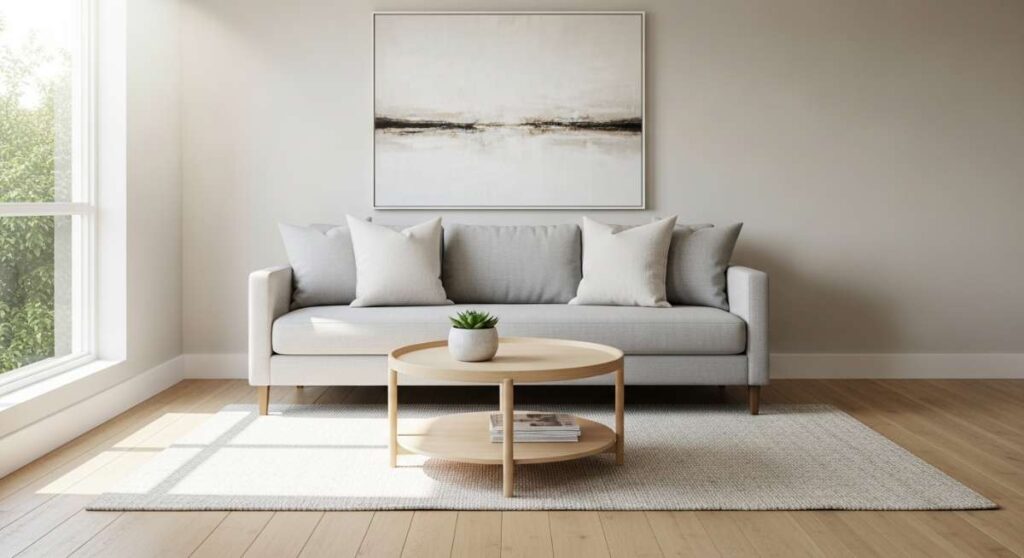
Have you ever walked into a room and felt your shoulders instantly drop an inch? There’s a specific kind of magic that happens when our physical environment aligns with our internal need for peace. For years, I thought ‘minimalism’ meant living in a cold, white box with one chair and zero personality, but I’ve learned that modern minimalism is actually about making room for what truly matters. It’s about stripping away the visual noise so that the textures, colors, and memories we actually love can finally breathe.
Transforming your home into a sanctuary shouldn’t require a second mortgage or a team of contractors. It’s about the small, intentional shifts—the way the morning light hits a perfectly placed plant or the satisfaction of a desk that doesn’t feel like a chaotic paper storm. In this guide, we’re diving into ten ways to elevate your lifestyle and your space on a budget, focusing on that sweet spot where high-end aesthetics meet everyday livability.
How to Transform Your Simple Landscaping Front Yard for Instant Curb Appeal

Why we love this
There is nothing quite like the pride of pulling into your driveway and seeing a crisp, manicured landscape that looks like it belongs on a magazine cover. We love this approach because it focuses on the earthy aroma of fresh cedar mulch and the tactile satisfaction of clean, sharp edges against a vibrant green lawn. The visual transition from a dusty, neglected patch to a structured garden bed creates an immediate sense of calm and order. It’s about the way the golden hour light dances across the leaves of your perennials, making your home feel welcoming before you even step through the front door.
Essential Elements:
- Black or dark brown hardwood mulch
- Stone or plastic lawn edging
- A mix of evergreen shrubs and flowering perennials
- Solar-powered LED pathway lights
- A sharp garden spade or edger
How to make it
- Begin by defining your bed lines using a garden hose or spray paint to create smooth, organic curves that lead the eye toward your entryway.
- Use a sharp spade to cut a ‘V’ trench along your marked line, removing any grass or weeds to create a 3-inch deep barrier that prevents grass from creeping into your beds.
- Amend your soil with a layer of organic compost, mixing it into the top few inches of dirt to ensure your plants have a nutrient-rich foundation.
- Place your tallest plants in the back and smaller ones in the front, ensuring you leave at least 12-18 inches of space between them to allow for future growth and air circulation.
- Apply a generous 3-inch layer of mulch across the entire bed, taking care not to pile it against the stems of the plants (the ‘volcano’ effect), which can cause rot.
- Install solar path lights at even intervals along the walkway, angling them slightly toward the path to provide a warm, inviting glow that highlights your new landscaping at night.
How to Organize an Office Desk Setup for a Productive Work Cubicle

Why we love this
A cluttered desk is a cluttered mind, and we are obsessed with the ‘blank slate’ feeling of a perfectly organized cubicle. Imagine the smooth, cool touch of a vegan leather desk mat beneath your wrists and the silent, satisfying glide of a drawer that finally closes properly. This setup is all about the quiet hum of productivity, where every tool has a home and your tech feels integrated rather than intrusive. It’s the difference between starting your Monday feeling overwhelmed and starting it feeling like the CEO of your own life, surrounded by curated items that spark focus.
Essential Elements:
- Large felt or leather desk mat
- Monitor riser with built-in storage
- Adhesive cable management clips
- Minimalist desk lamp with warm bulb
- Uniform acrylic or wood organizers
How to make it
- Completely clear your desk of every single item, wiping down the surface with a microfiber cloth to remove dust and static buildup for a fresh start.
- Position your monitor riser in the center of your view, ensuring the top of the screen is at eye level to prevent neck strain during long hours of work.
- Place your desk mat centrally; this acts as an ‘anchor’ for your keyboard and mouse, providing a soft texture that dampens sound and protects the desk surface.
- Route all charging cables behind the desk using adhesive clips, grouping them by function so that only the necessary tips are visible on the desktop.
- Organize your drawers using the ‘zone’ method: keep daily essentials like pens and post-its in the front row, and archival items or extra tech further back.
- Finish the setup by adding a single low-maintenance plant, like a snake plant or succulent, to the corner to introduce a natural element that improves air quality and mood.
How to Master the Perfect Tech Aesthetic with JBL Speakers Wallpapers

Why we love this
We are living for the intersection of high-fidelity sound and high-definition visuals. Mastering the tech aesthetic is about more than just owning gadgets; it’s about the sensory experience of the deep, thumping bass from a JBL speaker vibrating through a sleek surface while your screens display matching, high-contrast wallpapers. It’s a vibe that feels both futuristic and grounded, using light and shadow to create a workspace or entertainment hub that feels truly ‘custom.’ There is a specific satisfaction in seeing your digital world and physical hardware speak the same design language.
Essential Elements:
- JBL Bluetooth speaker (Flip or Charge series)
- High-resolution 4K minimalist wallpapers
- RGB backlight strips for monitors
- Microfiber cleaning kit for screens
- Cable sleeves for a ‘one-wire’ look
How to make it
- Select a wallpaper that features deep blacks and a single accent color that matches the hue of your JBL speaker to create visual continuity.
- Apply RGB LED strips to the back of your monitor or TV, setting the color to a soft ‘cool white’ or a dim version of your wallpaper’s primary accent color.
- Position your JBL speaker on a non-vibrating surface, ideally at ear level, to ensure the soundstage is balanced and the bass doesn’t muddy the mid-tones.
- Synchronize your device’s accent colors (system menus, taskbars) to the wallpaper’s palette for a seamless ‘hacker’ or ‘pro’ aesthetic.
- Keep the tech area pristine by using a screen cleaner and microfiber cloth daily, as fingerprints are the enemy of a high-end tech aesthetic.
How to Build Luxury Vibes with Cheap Pool Deck Ideas on a Budget

Why we love this
You don’t need a five-star resort when you can recreate that sun-drenched, poolside luxury in your own backyard for a fraction of the cost. We love the feeling of warm wood underfoot, the smell of chlorine and sunscreen, and the sight of crisp white linens fluttering in the breeze. This aesthetic is all about ‘resort-core’—using affordable materials to create a high-end experience where the water looks bluer and the afternoons feel longer. It’s about creating a space where you can escape the world without ever leaving your property.
Essential Elements:
- Outdoor concrete paint or wood stain
- Inexpensive outdoor rugs
- Large terracotta or plastic planters
- Striped oversized pool towels
- String bistro lights
How to make it
- Pressure wash your existing pool deck or patio surface to remove all grime and algae, which is the most effective way to instantly brighten the area.
- Apply a high-quality deck stain or anti-slip concrete paint in a neutral ‘greige’ or sand tone to mimic the look of expensive travertine.
- Anchor your seating areas with large, weather-resistant rugs; this defines the space as a ‘living room’ rather than just a utility area.
- Group large planters of varying heights in the corners, filling them with hardy tropicals like Hibiscus or Palms to create a lush, ‘hidden jungle’ feel.
- Roll your oversized towels tightly and store them in a wicker basket near the water’s edge, just like a boutique hotel would.
- String lights in a ‘criss-cross’ pattern above the deck to provide soft, overhead illumination for evening swims.
How to Add Privacy and Style Using Vinyl Lattice Panels for Your Garden

Why we love this
There is a romantic, secret-garden quality to lattice panels that we just can’t get enough of. We love how they provide a delicate balance between total seclusion and the play of dappled sunlight filtering through the gaps. Vinyl lattice, specifically, offers a clean, bright texture that never needs painting and looks stunning against the deep greens of climbing ivy or jasmine. It’s about creating ‘outdoor rooms’ that feel private and cozy, transforming a basic backyard into a series of intimate, stylish vignettes.
Essential Elements:
- White or wood-grain vinyl lattice panels
- 4×4 pressure-treated posts or existing fence structure
- Heavy-duty vinyl-coated screws
- Climbing plants (Clematis, Jasmine, or Ivy)
- U-channel molding for a finished edge
How to make it
- Measure your desired privacy area and cut the vinyl panels to size using a circular saw with a fine-tooth blade to prevent chipping.
- Install the U-channel molding around the perimeter of the panel; this hides raw edges and gives the installation a professional, framed appearance.
- Attach the panels to your posts or existing structure, leaving a 1/4-inch gap for thermal expansion, as vinyl will slightly expand and contract with the temperature.
- Plant your climbing vines at the base of the lattice, gently weaving the first few tendrils through the bottom holes to ‘train’ the plant to grow upward.
- Secure the vines with soft garden twine until they are established enough to support their own weight on the lattice structure.
How to Create Radiant Summer Table Centerpieces for Your Next Outdoor Dinner

Why we love this
Summer dining is all about the sensory explosion of fresh citrus, the clinking of ice in glasses, and the soft glow of candlelight as the sun sets. We love these centerpieces because they bring the bounty of the season directly to the table, using vibrant oranges, lemons, and herbs that smell as incredible as they look. It’s an evocative way to decorate that feels effortless yet sophisticated, turning a simple meal into an ‘event’ that lingers in your guests’ memories long after the last course is served.
Essential Elements:
- Long wooden dough bowl or tray
- Fresh lemons, limes, and oranges
- Sprigs of rosemary or eucalyptus
- Unscented pillar candles of varying heights
- Small glass bud vases
How to make it
- Start with a neutral table runner to protect your table and provide a visual base for the centerpiece.
- Place your dough bowl or tray in the center and arrange your pillar candles first, ensuring they are spaced far enough apart to burn safely.
- Fill the gaps around the candles with a generous amount of whole citrus fruit, mixing colors and sizes for a natural, harvested look.
- Tuck sprigs of rosemary or eucalyptus between the fruits; the heat from the candles will gently release the herbal oils, scenting the air beautifully.
- Add a few small bud vases filled with white wildflowers to the ends of the arrangement to provide height and a delicate texture.
- Light the candles 15 minutes before guests arrive so the wax is already pooled and the glow is steady when dinner begins.
How to Decorate a Patriotic Front Porch with Timeless American Style

Why we love this
A patriotic porch is the epitome of classic, nostalgic Americana. We love the crisp contrast of navy blue, stark white, and cherry red against the natural wood of a porch deck or the black metal of a rocking chair. It’s a style that feels sturdy and honorable, evoking memories of parades, lemonade, and summer fireworks. The texture of heavy cotton flags and the sight of red geraniums in white pots create a timeless look that feels both celebratory and deeply cozy, welcoming everyone with a sense of heritage.
Essential Elements:
- High-quality embroidered American flag
- Red geraniums or petunias
- Navy blue throw pillows
- White wicker or black Adirondack chairs
- Bunting for the porch railings
How to make it
- Hang your main flag at a 45-degree angle from a sturdy bracket mounted to the house siding or a porch pillar, ensuring it has enough clearance to wave freely.
- Drape pleated bunting along the top rail of your porch, securing it with zip ties every 2 feet to ensure it hangs in even, symmetrical ‘smiles.’
- Place a pair of rockers or chairs on the porch, adding navy blue outdoor pillows to provide a pop of color and extra comfort.
- Flank the front door with oversized white planters filled with bright red flowers and a ‘filler’ of white alyssum for a cohesive color story.
- Add a simple coir doormat with a blue stripe or star motif to ground the entryway and keep the interior of your home clean.
How to Curate a Whimsical Apartment Aesthetic for a Dreamy Living Space

Why we love this
This aesthetic is like a warm hug for your soul. We love the whimsical apartment look because it rejects the ‘perfection’ of traditional design in favor of magic, softness, and play. Think fairy lights reflected in ornate vintage mirrors, the velvet touch of a mismatched sofa, and the ethereal glow of sheer curtains swaying in the breeze. It’s about creating a space that feels like it belongs in a storybook—a place where you can lose track of time while reading by the light of a mushroom lamp, surrounded by objects that tell a story.
Essential Elements:
- Warm-toned fairy lights or ‘curtain’ lights
- Sheer, iridescent window treatments
- Velvet floor pillows
- Hanging macramé plant holders
- Gold-framed thrifted artwork
How to make it
- Swap out harsh overhead lighting for layers of soft, warm lamps and string lights placed at different heights throughout the room.
- Layer your window treatments by hanging sheer panels over light-filtering blinds; this creates a ‘misty’ light effect during the day.
- Group your thrifted gold-framed art in a ‘gallery wall’ fashion, but keep the spacing slightly uneven to maintain a relaxed, organic feel.
- Incorporate ‘living’ decor by hanging trailing plants like Pothos from the ceiling, allowing the vines to frame doorways or windows.
- Scatter floor pillows in rich textures like velvet or faux fur around a low coffee table to encourage a grounded, bohemian lifestyle.
How to Design Serene Aquarium Setup Ideas for an Underwater Paradise

Why we love this
There is a meditative quality to a well-designed aquarium that no other home decor can match. We love the rhythmic bubble of the filter, the shimmering movement of the water, and the vibrant, neon-flecked scales of the fish as they glide through a forest of green. It’s an underwater paradise that brings a piece of the natural world into your living room. The cool blues and deep greens of an aquascaped tank act as a living piece of art that reduces stress and provides a hypnotic focal point for any room.
Essential Elements:
- Rimless glass aquarium tank
- Natural driftwood or ‘dragon stone’
- Live aquatic plants (Anubias or Java Fern)
- Dark aquarium substrate (sand or soil)
- LED lighting with ‘moonlight’ mode
How to make it
- Layer 2 inches of nutrient-rich substrate at the bottom of the tank, sloping it higher toward the back to create a sense of depth and perspective.
- Arrange your ‘hardscape’ (driftwood and stones) according to the ‘rule of thirds,’ placing the largest piece slightly off-center to create a natural-looking focal point.
- Carefully plant your live greenery using aquascaping tweezers, burying the roots firmly in the substrate while leaving the ‘rhizome’ of plants like Anubias exposed.
- Fill the tank slowly by pouring water over a small plate placed on the substrate; this prevents the water from disturbing your carefully placed plants and sand.
- Install your filter and heater, hiding them behind the larger pieces of driftwood or tall plants to maintain the ‘natural’ illusion.
- Cycle the tank for at least two weeks before adding fish to ensure the biological balance is safe for your new underwater friends.
How to Embrace the Vintage Grandma House Aesthetic for a Nostalgic Home

Why we love this
Affectionately known as ‘Grandmacore,’ this aesthetic is all about the soul-soothing comfort of the past. We love the smell of dried lavender and beeswax, the intricate texture of crocheted doilies, and the heavy, reliable weight of antique wooden furniture. It’s a style that celebrates the ‘well-loved’ and the ‘well-worn,’ proving that beauty is found in the details of a floral tea set or a stack of weathered books. It creates a home that feels lived-in, safe, and rich with history, even if you’re starting from scratch.
Essential Elements:
- Floral patterned wallpaper or textiles
- Crocheted or knitted throw blankets
- Antique brass candlesticks
- China display or open shelving
- Dried flower arrangements
How to make it
- Layer your textiles by draping a handmade quilt or crochet throw over the back of a neutral sofa to add immediate warmth and pattern.
- Display your ‘treasures’—like vintage teacups or mismatched saucers—on open shelving, grouping them by color to keep the look intentional rather than cluttered.
- Replace modern hardware (knobs and pulls) on your cabinets with antique brass or ceramic versions for an instant vintage upgrade.
- Hang bundles of dried flowers (like lavender or baby’s breath) upside down in the kitchen or entryway for a rustic, fragrant decorative touch.
- Use lace runners on wooden tables to soften the edges of the room and provide that quintessential ‘grandma’s house’ tactile experience.
Conclusion: Your Sanctuary, Your Way
Modern minimalism isn’t about following a strict set of rules or living with less just for the sake of it. It’s about being the curator of your own life. Whether you’re leaning into the nostalgic warmth of ‘grandmacore’ or the sleek lines of a tech-forward office, the goal remains the same: to create a space that supports the person you are becoming. Start small, trust your eye, and remember that the most beautiful homes are the ones that tell the story of the people who live inside them.