
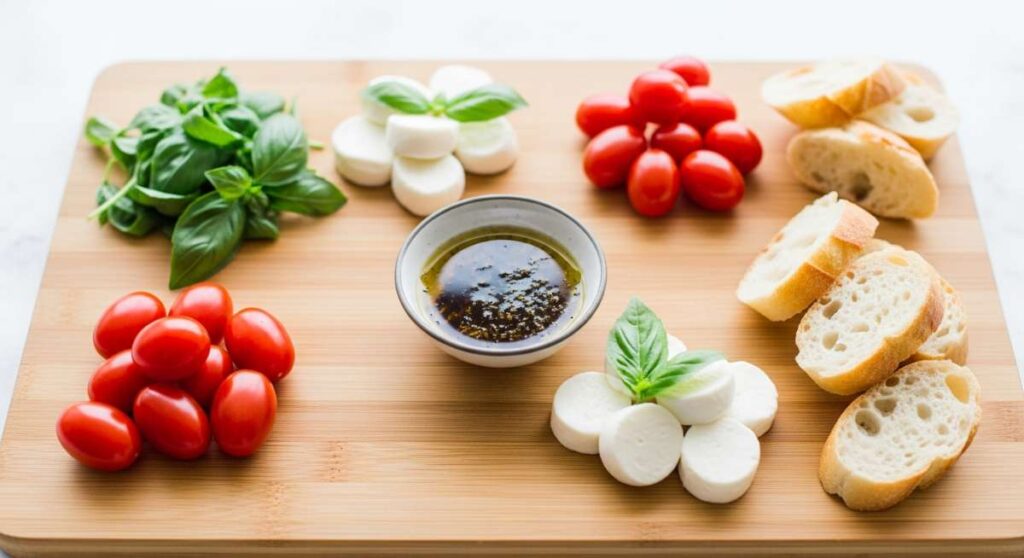
There is something inherently magical about a shared meal that doesn’t require hours of stressful preparation behind a closed kitchen door. We’ve all been there—sweating over a complex recipe while our guests laugh in the living room. But lately, the trend of the ‘Viral Simple Food Board’ has completely changed the game for me. It’s about more than just food; it’s about that collective ‘ooh’ and ‘ahh’ when a vibrant, overflowing board hits the center of the table, inviting everyone to dig in with their hands and hearts.
This aesthetic, low-stress approach to dining focuses on high-quality ingredients and textures that play well together. Whether you are hosting a cozy weeknight gathering or a festive Sunday brunch, these boards prove that you don’t need a Michelin star to create a memorable experience. It’s about the crunch of a perfectly roasted potato, the salty-sweet glaze on a piece of charred protein, and the vibrant colors of seasonal produce arranged with just a bit of intentional chaos.
In this post, I’m sharing my favorite viral board components that strike that perfect balance between ‘minimal effort’ and ‘maximum impact.’ These are the recipes that have taken over my social feeds and my dinner table, and once you try them, you’ll understand why. Let’s dive into the sensory delights of simple, beautiful cooking.
How to make crispy potatoes?

Why we love this
These potatoes are the ultimate comfort food, offering a symphony of textures that dance on the palate. Imagine biting through a glass-like, golden-brown crust into a center so fluffy and light it almost melts like mashed potatoes. The aroma of toasted rosemary and shimmering duck fat fills the kitchen, creating an atmosphere of rustic warmth. Every bite is punctuated by the sharp crunch of flakey sea salt, making these the undisputed star of any food board they grace.
Ingredients
- 2 lbs Yukon Gold potatoes
- 3 tbsp duck fat or high-quality olive oil
- 2 sprigs fresh rosemary, finely chopped
- 1 tsp flaky sea salt
- 1/2 tsp garlic powder
How to make it
- Begin by peeling your potatoes and cutting them into uniform 2-inch chunks to ensure even cooking throughout the process.
- Place the potatoes in a large pot of heavily salted cold water and bring to a rolling boil. Parboil them for about 8-10 minutes until the edges are soft but the centers are still firm.
- Drain the potatoes and let them steam-dry in the colander for 2 minutes. This step is crucial; moisture is the enemy of crispiness.
- Give the colander a vigorous shake to ‘rough up’ the edges of the potatoes. This creates a starchy mash on the surface that will fry into a deep crunch in the oven.
- Preheat your roasting pan in a 425°F (220°C) oven with the duck fat until the fat is shimmering and slightly smoking.
- Carefully toss the potatoes into the hot fat, ensuring each piece is coated. Roast for 45-50 minutes, turning every 15 minutes, until they are deep mahogany and audibly crunchy.
- Toss with fresh rosemary, garlic powder, and flaky salt immediately after removing from the oven while the fat is still sizzling.
How to cook spam dinner?

Why we love this
There is a nostalgic, savory magic to a perfectly prepared Spam board that surprises even the most skeptical diners. When sliced thin and seared until the edges are caramelized and brittle, Spam transforms into a salty, umami-rich delicacy that pairs beautifully with sweet glazes. The aroma is smoky and inviting, reminiscent of island vacations and cozy breakfasts. Topped with a drizzle of unagi sauce and furikake, it offers a sophisticated twist on a classic pantry staple that feels both indulgent and playful.
Ingredients
- 1 can of Spam (Classic or Low Sodium)
- 2 tbsp soy sauce
- 1 tbsp brown sugar
- 1 tsp sesame oil
- Cooked jasmine rice and seaweed snacks for serving
How to make it
- Remove the Spam from the tin and slice it into consistent 1/4-inch rectangles. Uniform thickness is key for achieving that perfect snap in every bite.
- In a small bowl, whisk together the soy sauce, brown sugar, and sesame oil until the sugar has completely dissolved into a glossy syrup.
- Place a non-stick or cast-iron skillet over medium-high heat. Do not add oil, as the Spam has enough fat to fry itself to a beautiful golden brown.
- Lay the slices in the pan, ensuring they don’t overlap. Sear for 3-4 minutes on the first side until a dark, mahogany crust forms.
- Flip the slices and immediately brush the seared side with your soy-sugar glaze using a pastry brush.
- Fry the second side for another 3 minutes, then flip once more briefly to caramelize the glaze for 30 seconds. Watch closely as the sugar can burn quickly.
- Remove from heat and serve immediately on a bed of warm rice with toasted seaweed.
How to grill summer chicken?
Why we love this
Nothing says summer quite like the scent of herb-marinated chicken hitting a hot grill. This dish is all about that contrast between a smoky, charred exterior and an incredibly succulent, juice-filled interior that bursts with the brightness of lemon and fresh oregano. The skin becomes crackly and infused with woodsmoke, while the meat remains tender enough to pull apart with just a fork. It’s a vibrant, communal centerpiece that looks stunning when garnished with grilled citrus halves and fresh green herbs.
Ingredients
- 2 lbs bone-in, skin-on chicken thighs
- 1/4 cup olive oil
- Zest and juice of 2 lemons
- 4 cloves garlic, smashed
- 2 tbsp fresh oregano, chopped
- Salt and cracked black pepper
How to make it
- In a large bowl or zip-top bag, combine olive oil, lemon zest, lemon juice, garlic, and oregano. Submerge the chicken and marinate in the fridge for at least 2 hours, though overnight is best for deep flavor penetration.
- Remove chicken from the fridge 30 minutes before grilling to take the chill off, which ensures even cooking.
- Preheat your grill to medium-high heat (about 400°F). Clean and oil the grates thoroughly to prevent the skin from sticking and tearing.
- Place chicken skin-side down over direct heat. Sear for 5-7 minutes without moving it to develop deep grill marks and render the fat.
- Flip the chicken and move it to the cooler side of the grill (indirect heat). Close the lid and continue cooking for 15-20 minutes.
- Use an instant-read thermometer to check for a temperature of 165°F (74°C) near the bone.
- Let the meat rest for at least 10 minutes before serving. This allows the juices to redistribute, ensuring every bite is moist and flavorful.
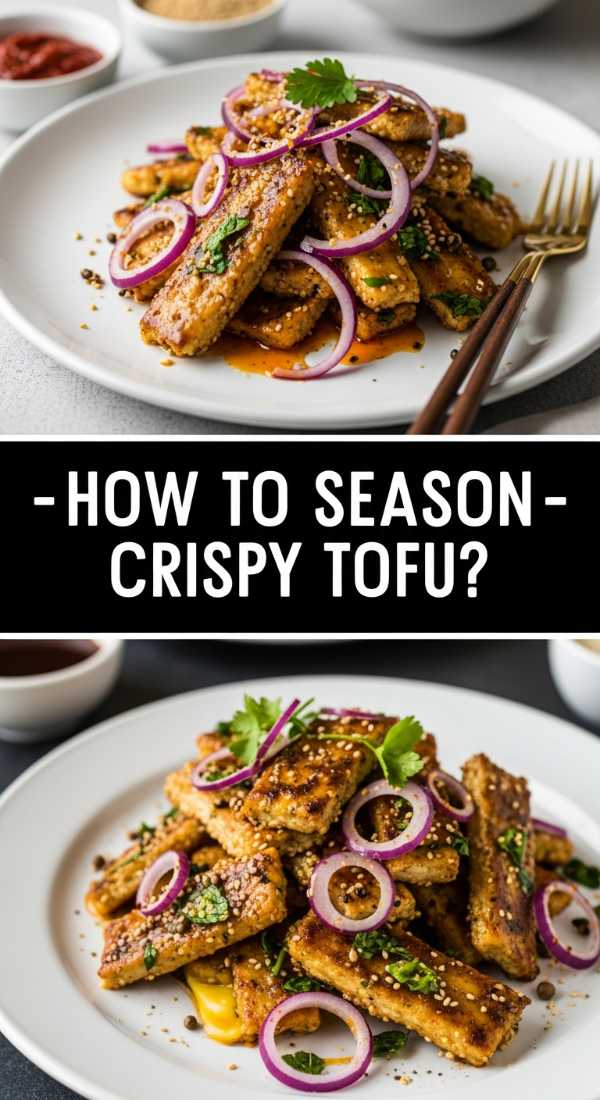
How to season crispy tofu?

Why we love this
This crispy tofu is a revelation for those who think plant-based proteins are bland or soft. By focusing on a dual-texture approach, you get a shatteringly crisp outer shell that gives way to a creamy, custard-like center. The seasoning is a layers-of-flavor affair, combining the nuttiness of sesame with the sharp kick of ginger and a hint of sweetness. It’s light yet satisfying, and the way the golden cubes catch the light on a food board makes them look like little nuggets of savory gold.
Ingredients
- 1 block extra-firm tofu
- 2 tbsp cornstarch
- 1 tsp garlic powder
- 1/2 tsp ground ginger
- 2 tbsp soy sauce
- 1 tbsp toasted sesame oil
How to make it
- Begin by pressing your tofu. Wrap the block in a clean kitchen towel and place a heavy skillet or books on top for 20-30 minutes to extract as much moisture as possible.
- Cut the pressed tofu into 1-inch cubes. The smaller the cubes, the more surface area there is for maximum crunch.
- In a large bowl, whisk together the cornstarch, garlic powder, and ginger.
- Toss the tofu cubes in the soy sauce and sesame oil first so they are lightly damp, then immediately toss them in the starch mixture until every side is white and chalky.
- Heat a generous layer of neutral oil in a skillet over medium-high heat. Once the oil shimmers, add the tofu in a single layer.
- Fry for 3-4 minutes per side. Do not crowd the pan, or the tofu will steam instead of fry. Use tongs to flip each cube individually once they are golden and rigid.
- Drain on a wire rack (not paper towels) to maintain the crispness before adding to your board.
How to bake spring salmon?

Why we love this
Baking salmon for a spring-themed board is all about celebrating delicacy and color. When cooked ‘low and slow’ or just until the fat begins to render, the salmon takes on a buttery, silk-like texture that flakes effortlessly at the touch of a fork. The aroma of fresh dill and lemon slices mingling in the oven creates a fragrance that is clean and sophisticated. It looks breathtaking when served as a whole side of fish, decorated with vibrant green asparagus and bright pink radishes, epitomizing the freshness of the season.
Ingredients
- 1 large side of salmon (approx 2 lbs)
- 1 lemon, thinly sliced
- 1 bunch fresh dill
- 2 tbsp unsalted butter, softened
- 1 tsp sea salt
- 1/2 tsp cracked black pepper
How to make it
- Preheat your oven to a gentle 325°F (165°C). Lower temperatures prevent the white albumin (protein) from leaching out, keeping the fish moist and pretty.
- Line a large baking sheet with parchment paper and lay the salmon skin-side down. Pat the surface completely dry with paper towels.
- Spread the softened butter evenly over the flesh and season generously with salt and pepper.
- Layer the thin lemon slices and sprigs of fresh dill over the top of the salmon, creating a ‘shingle’ effect that protects the fish from drying out.
- Bake for 15-20 minutes. The visual cue for doneness is when the meat is opaque and the thickest part yields slightly when pressed with a finger.
- For a perfect medium-rare, aim for an internal temperature of 125°F-130°F. If you prefer it more well-done, go to 145°F.
- Let the salmon rest for 5 minutes on the tray before sliding it onto your serving board to preserve the delicate flakes.
How to make asian noodles?

Why we love this
There is an undeniable joy in a board centered around long, glossy Asian noodles. They provide a satisfying, slurpy texture that is the perfect canvas for a punchy, umami-laden sauce. The scent of toasted sesame oil, sautéed aromatics, and spicy chili crisp is intoxicating, drawing everyone to the table instantly. Each strand is coated in a balanced glaze that hits every taste bud—salty, sweet, spicy, and tangy—making it a versatile base for any combination of toppings you choose to scatter on top.
Ingredients
- 10 oz lo mein or udon noodles
- 3 tbsp soy sauce
- 1 tbsp oyster sauce
- 1 tbsp chili crisp
- 2 cloves garlic, minced
- 3 scallions, sliced
- 1 tsp sugar
How to make it
- Bring a large pot of water to a boil and cook your noodles according to the package instructions. Aim for ‘al dente’—they should still have a slight bite as they will cook further in the pan.
- While the noodles boil, whisk together the soy sauce, oyster sauce, chili crisp, garlic, and sugar in a small bowl.
- Reserve 1/4 cup of the starchy noodle cooking water before draining the noodles. This liquid gold is the secret to a silky, emulsified sauce.
- Heat a wok or large skillet over high heat with a splash of oil. Add the whites of the scallions and sauté for 30 seconds until fragrant.
- Add the drained noodles to the pan followed by the sauce mixture. Toss vigorously using tongs or a pasta fork.
- Pour in the reserved pasta water slowly while tossing. The starch will bind the sauce to the noodles, creating a thick, glossy coating rather than a puddle at the bottom.
- Finish with the green parts of the scallions and a final drizzle of sesame oil before piling them high on your board.
How to prep healthy meals?

Why we love this
A ‘Healthy Meal Board’ is a celebration of abundance and wellness that never feels like a sacrifice. It’s a riot of colors—deep purple kale, bright orange roasted carrots, and golden grains—that makes eating well feel like an indulgent feast. The textures range from the creamy silkiness of a tahini dressing to the earthy pop of quinoa and the crunch of toasted seeds. It’s the ultimate way to meal prep because it allows for ‘build-your-own’ bowls that keep the palate excited all week long.
Ingredients
- 2 cups cooked quinoa or farro
- 1 head of kale, stemmed and chopped
- 2 cups roasted chickpeas
- 1 avocado, sliced
- 1/2 cup tahini dressing (tahini, lemon, water, garlic)
How to make it
- Start by batch-cooking your grains. Boil quinoa in vegetable broth instead of water for extra flavor, then fluff it with a fork and let it cool completely to prevent sogginess.
- For the kale, place it in a large bowl with a drizzle of olive oil and a pinch of salt. Use your hands to ‘massage’ the leaves for 2-3 minutes until they turn dark green and become tender. This removes the bitterness.
- Roast your chickpeas at 400°F for 20 minutes with cumin and paprika until they are airy and light. This provides a crucial protein-packed crunch.
- Prep your dressing by whisking tahini with lemon juice and a splash of warm water until it reaches a pourable consistency. It will thicken first before thinning out—don’t panic!
- Arrange the components in distinct piles on your board. This ‘deconstructed’ look allows people to choose their own ratios.
- Keep avocado and dressings separate until the moment of serving to ensure everything stays fresh and vibrant.
How to roast paleo steak?
Why we love this
For the meat lovers, a paleo-style steak board is the height of rustic luxury. There is nothing quite like the primal aroma of a high-quality ribeye searing in hot ghee, infused with the woody scent of thyme and crushed garlic. The steak develops a salty, dark crust that yields to a perfectly pink, tender center. Carved into thick, juicy slices and served with roasted root vegetables, it feels incredibly nourishing and sophisticated, providing a high-protein anchor for a hearty food board.
Ingredients
- 2 thick-cut ribeye or New York strip steaks
- 2 tbsp ghee or clarified butter
- 4 cloves garlic, crushed
- 3 sprigs fresh thyme
- Coarse kosher salt and cracked black pepper
How to make it
- Remove the steaks from the refrigerator at least 45 minutes before cooking. Bringing the meat to room temperature is the only way to ensure the center cooks through without burning the outside.
- Pat the steaks extremely dry with paper towels. Moisture on the surface creates steam, which prevents that iconic brown crust (the Maillard reaction) from forming.
- Season aggressively with salt and pepper on all sides, including the fatty edges.
- Heat a heavy cast-iron skillet over high heat until it is ‘screaming hot’—you should see a thin wisp of smoke.
- Add the ghee, then carefully lay the steaks away from you into the pan. Sear for 3-4 minutes per side without moving them to develop a deep crust.
- During the last 2 minutes of cooking, add the garlic and thyme sprigs. Tilt the pan and use a large spoon to continuously ‘baste’ the steaks with the hot, infused fat.
- Check for an internal temp of 130°F (54°C) for medium-rare. Remove and rest the meat for 10 full minutes on a cutting board before slicing against the grain.
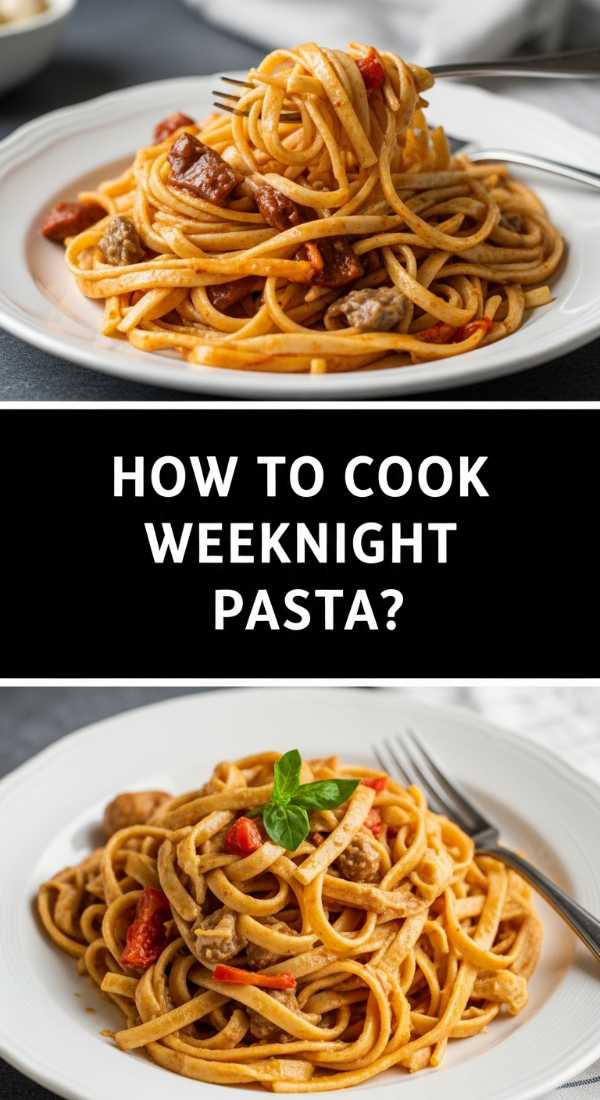
How to cook weeknight pasta?

Why we love this
This is the ultimate ‘low effort, high reward’ board component. A simple weeknight pasta board focuses on comfort and speed, featuring a sauce that is velvety, rich, and clings perfectly to every curve of the noodle. The scent of sautéed garlic and bubbling cream is the universal signal that a good meal is coming. Topped with a mountain of freshly grated parmesan and a sprinkle of bright parsley, it transforms humble pantry staples into a decadent, communal experience that everyone will be reaching for.
Ingredients
- 1 lb rigatoni or penne pasta
- 1 cup heavy cream
- 1/2 cup grated Parmesan cheese
- 3 cloves garlic, minced
- 1 tsp red pepper flakes (optional)
- Fresh parsley for garnish
How to make it
- Boil your pasta in a large pot of water that is ‘salted like the sea.’ The salt in the water is your only chance to season the pasta itself from the inside out.
- Drain the pasta 1 minute before the ‘al dente’ time listed on the box. It will finish cooking in the sauce.
- In the same pot (now empty), heat a touch of olive oil over medium heat and sauté the garlic and red pepper flakes until fragrant but not brown (about 1 minute).
- Pour in the heavy cream and bring to a gentle simmer. Let it bubble for 2-3 minutes until it thickens slightly.
- Stir in the Parmesan cheese slowly, whisking constantly to ensure a smooth, clump-free sauce.
- Toss the pasta back into the pot. Stir vigorously for 60 seconds over low heat. The pasta will absorb some of the cream, and the starch will create a tight, glossy bond.
- Transfer to a platter and garnish immediately with more cheese and parsley while it’s steaming hot.
How to prepare southern shrimp?
[IMAGE_10]
Why we love this
Southern-style shrimp bring a zesty, buttery brightness to any board that feels like a celebration of the coast. The combination of smoky Old Bay seasoning and fresh lemon juice creates a flavor profile that is bold, nostalgic, and incredibly addictive. Each shrimp is plump and snappy, coated in a shimmering butter sauce that begs to be mopped up with a piece of crusty bread. It’s a finger-food favorite that adds an element of fun and messy-in-a-good-way interaction to your dinner table.
Ingredients
- 1 lb large shrimp, peeled and de-veined (tails on)
- 3 tbsp unsalted butter
- 1 tbsp Old Bay seasoning
- Juice of 1/2 lemon
- 2 tbsp fresh parsley, chopped
- 2 cloves garlic, minced
How to make it
- Ensure your shrimp are completely thawed and patted dry. Wet shrimp will boil in the pan rather than searing, resulting in a rubbery texture.
- In a large skillet, melt the butter over medium-high heat until the foaming subsides and it begins to smell slightly nutty.
- Add the garlic and sauté for only 30 seconds—garlic burns quickly at this heat.
- Add the shrimp in a single layer. Sprinkle the Old Bay seasoning evenly over the top.
- Cook for 2 minutes on the first side. You will see the edges turn pink and the bodies start to curl into a ‘C’ shape.
- Flip the shrimp and cook for only 1 more minute. Overcooked shrimp turn into a tight ‘O’ and become tough.
- Remove the pan from the heat and immediately squeeze the lemon juice over the top. The acid deglazes the pan, picking up all the spicy brown bits.
- Toss with fresh parsley and serve piled high with extra lemon wedges on the side.
The Joy of the Shared Board
At the end of the day, food is the vehicle, but connection is the destination. These viral food boards work because they strip away the formality of traditional plating and replace it with a relaxed, tactile way of eating that encourages conversation and lingering. Whether you’re crunching on a potato or slurping up noodles, you’re doing it together. So, grab your largest platter, pick a few of these favorites, and let the board do the talking. Happy hosting!
Frequently Asked Questions
What is the best way to keep a food board looking fresh?
The secret is to prep your ‘wet’ ingredients (like sauces or oily proteins) last, or keep them in small decorative bowls on the board to prevent them from soaking into other items. Also, use plenty of fresh herb garnishes right before serving to add a pop of life.
Can I make these board components ahead of time?
While proteins like steak and shrimp are best served fresh, you can parboil the potatoes, make the sauces, and prep the healthy meal grains up to two days in advance. Just do the final sear or roast right before guests arrive!
How do I choose which recipes to combine on one board?
Try to balance your board with one ‘main’ protein (like the salmon or chicken), one ‘filling’ carb (like the potatoes or noodles), and one ‘fresh’ element (like the healthy kale or spring veggies). Contrast is key for both taste and photos!