

Minimal Effort, Maximum Aesthetic: How to Build the Ultimate Viral Snack Board
There is something inherently magical about a gathering that centers around a beautifully curated board. We’ve all seen them—those effortlessly chic, colorful spreads that dominate our social media feeds and make our mouths water instantly. But let’s be real: the secret to a truly viral snack board isn’t just expensive cheeses or artisanal crackers. It’s about the warmth and depth of flavor that only roasted elements can bring. When you pull a tray of caramelizing vegetables out of the oven, the aroma alone transforms your kitchen into a cozy sanctuary, setting the stage for a meal that feels both grounded and incredibly sophisticated.
Building the ultimate board is about playing with textures and temperatures. Imagine the crunch of a perfectly charred floret against the silkiness of a roasted carrot glaze. By incorporating these roasted gems, you’re not just serving food; you’re crafting an experience. It’s an invitation for your guests to linger, to dip, and to discover new flavor combinations that they’ll be talking about long after the last crumb is gone. Today, I’m sharing my favorite ways to elevate your snack board game with the power of the oven.
7 Best Roasted Vegetable Recipes (Step-by-Step Guide)

Why we love this
This collection is the backbone of any aesthetic board, offering a kaleidoscope of colors from deep purple beets to vibrant orange sweet potatoes. The magic happens in the oven’s high heat, which coaxes out the natural sugars, creating a candy-like exterior and a tender, melting interior. As these vegetables roast, they fill the air with a rustic, earthy perfume that promises comfort and indulgence in every bite. There’s a certain joy in seeing these humble ingredients transform into golden, glistening treasures that look as good as they taste.
Ingredients
- 2 large beets, peeled and wedged
- 1 pound Brussels sprouts, halved
- 2 large sweet potatoes, cubed
- 1 head of cauliflower, cut into florets
- 3 tbsp extra virgin olive oil
- 1 tsp flaky sea salt
- 1/2 tsp cracked black pepper
- Fresh thyme sprigs
How to make it
- Preheat your oven to 425°F (220°C). This high temperature is crucial for achieving that signature caramelized crust without overcooking the inside into mush.
- Prepare your vegetables by ensuring they are all cut into uniform sizes. This guarantees they will cook at the same rate, avoiding the tragedy of burnt garlic and raw potatoes.
- In a large mixing bowl, toss the vegetables with olive oil until every surface is lightly glistening. This oil acts as a heat conductor, ensuring even browning and a rich mouthfeel.
- Spread the vegetables in a single layer on a heavy-duty rimmed baking sheet. Crowding is the enemy of crispiness; if the veggies are too close, they will steam instead of roast.
- Slide the tray into the center of the oven and roast for 25-30 minutes. Halfway through, use a wide spatula to flip and toss the vegetables, ensuring the side touching the pan gets that beautiful deep brown color.
- Look for visual cues: edges should be slightly charred and crispy, while a fork should easily pierce the thickest piece. Remove from the oven and sprinkle immediately with flaky salt and fresh thyme while the heat is still radiating from the pan.
5 Top Roasted Vegetable Soups (Step-by-Step Guide)
Why we love this
Roasted vegetable soups bring a depth of flavor that a standard stovetop boil simply cannot match. By roasting the base ingredients first, you develop a smoky, concentrated essence that makes the final soup feel luxurious and complex. The texture is velvety and rich, wrapping you in a warm embrace on a chilly afternoon. Serving a small bowl of concentrated roasted soup on your snack board creates a sophisticated dipping element that surprises and delights every guest.
Ingredients
- 4 large tomatoes, halved
- 1 head of garlic, top sliced off
- 2 red bell peppers, deseeded
- 1 white onion, quartered
- 4 cups vegetable broth
- 1/2 cup heavy cream or coconut milk
- Salt and smoked paprika to taste
How to make it
- Preheat the oven to 400°F (200°C). Arrange the tomatoes, peppers, onion, and the whole garlic bulb (cut side up) on a baking sheet.
- Drizzle generously with oil and roast for 35-40 minutes until the pepper skins are charred and the garlic is soft and golden.
- Remove from the oven and allow to cool slightly. Squeeze the roasted garlic cloves out of their skins directly into a high-powered blender.
- Add the roasted tomatoes, peppers, and onions into the blender, ensuring you scrape up all the concentrated juices from the pan.
- Pour in 2 cups of warm vegetable broth and blend on high until completely smooth. Gradually add more broth until you reach your desired thickness.
- Transfer the mixture to a pot over medium-low heat. Stir in the cream and seasonings, allowing the flavors to meld for 5 minutes without reaching a boil, which preserves the delicate roasted notes.
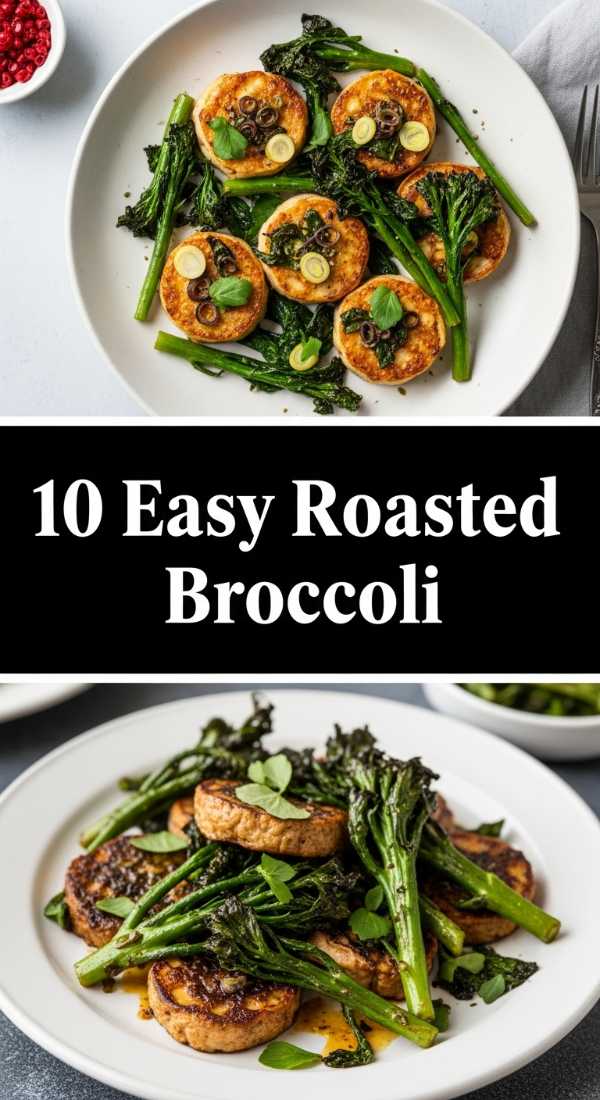
10 Easy Roasted Broccoli Ideas (Step-by-Step Guide)
Why we love this
Broccoli is the unsung hero of the roasting world, turning from a simple side dish into a crispy, nutty obsession. When roasted at high heat, the florets become lacey and charred, absorbing flavors like a sponge while maintaining a satisfying snap. It’s the perfect addition to a board because its rugged texture provides a wonderful contrast to soft cheeses or creamy hummus. The aroma of toasted broccoli with a hint of garlic is practically irresistible, making it the first thing people reach for.
Ingredients
- 2 large heads of broccoli, cut into bite-sized florets
- 3 tbsp olive oil
- 1/4 cup grated Parmesan cheese
- 1/2 tsp red pepper flakes
- Zest of one lemon
- 3 cloves garlic, minced
How to make it
- Set your oven to 425°F (220°C). Use a large baking sheet and line it with parchment paper for easy cleanup and to prevent sticking.
- Dry the broccoli florets thoroughly with a clean kitchen towel. Any moisture left on the surface will create steam, preventing the broccoli from getting those coveted crispy, dark edges.
- In a bowl, whisk together the oil, minced garlic, and red pepper flakes. Toss the broccoli florets in this mixture until they are well coated, paying attention to the porous heads.
- Spread the broccoli on the baking sheet, ensuring plenty of space between florets. Roast for 15-20 minutes.
- At the 15-minute mark, sprinkle the Parmesan cheese over the broccoli and return to the oven for another 5 minutes or until the cheese is melted and golden.
- Remove from the oven and immediately zest the lemon over the hot broccoli. The residual heat will release the lemon oils, creating a bright, citrusy finish that cuts through the richness of the roast.
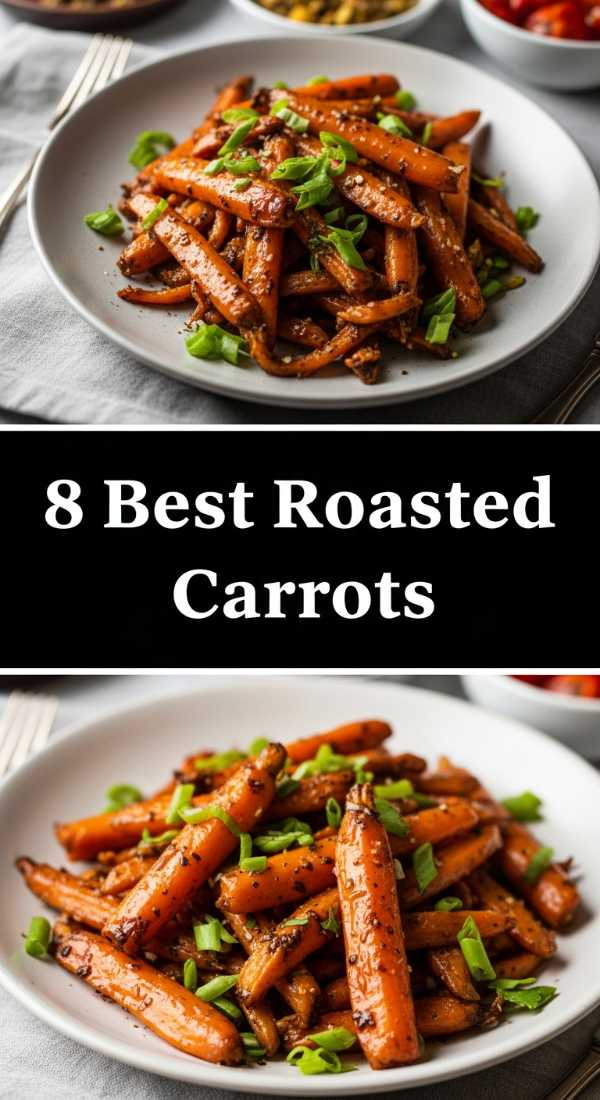
8 Best Roasted Carrot Glazes (Step-by-Step Guide)

Why we love this
Carrots have a natural sweetness that is amplified ten-fold when roasted and paired with a strategic glaze. These aren’t just your everyday carrots; they are glistening, jewel-toned sticks of pure flavor that add a high-end feel to your viral board. The glaze caramelizes into a sticky, savory-sweet coating that clings to every curve, making them look like something straight out of a professional food shoot. The bite is tender but with enough resistance to make them the perfect finger food for dipping.
Ingredients
- 1 lb rainbow carrots, scrubbed and tops trimmed
- 2 tbsp honey or maple syrup
- 1 tbsp balsamic vinegar
- 1 tbsp melted butter
- 1/2 tsp ground cumin
- Fresh parsley for garnish
How to make it
- Preheat your oven to 400°F (200°C). Prepare the carrots by leaving them whole if they are slender, or slicing them lengthwise if they are thick.
- In a small saucepan over low heat, whisk together the honey, balsamic vinegar, melted butter, and cumin until the mixture is cohesive and slightly bubbling.
- Place the carrots on a parchment-lined tray and pour two-thirds of the glaze over them. Use your hands or a brush to ensure every carrot is fully lacquered.
- Roast for 20-25 minutes. Every 10 minutes, open the oven and roll the carrots around to ensure the glaze doesn’t burn on the bottom.
- Once the carrots are tender and the glaze has thickened into a sticky coating, remove them from the oven.
- Brush the remaining glaze over the carrots immediately to give them a fresh, glossy sheen. Garnish with chopped parsley for a pop of green contrast.
6 Crispy Roasted Vegetable Tips (Step-by-Step Guide)
Why we love this
Achieving the perfect crunch is the holy grail of vegetable roasting, and understanding the science behind it changes the game forever. There is a specific sensory satisfaction in biting through a crispy outer layer into a succulent interior—a texture profile that makes vegetables feel like a decadent snack. These tips elevate your cooking from “standard side dish” to “viral sensation,” ensuring your board features components with maximum structural integrity and flavor punch. It’s about mastering the heat and the timing to create something truly memorable.
Ingredients
- Selection of starchy vegetables (potatoes, parsnips, carrots)
- High-smoke point oil (avocado or grapeseed oil)
- Cornstarch (secret ingredient for extra crunch)
- Heavy baking stone or thick aluminum pan
How to make it
- Always preheat your baking sheet. Placing your vegetables onto a hot surface immediately starts the searing process, locking in moisture while crisping the bottom.
- Use a high-smoke point oil. Olive oil is great for flavor, but for extreme crispiness, avocado oil allows you to use higher temperatures (450°F) without the oil breaking down or tasting bitter.
- The Cornstarch Trick: Lightly dust your oiled vegetables with a teaspoon of cornstarch before roasting. This creates a microscopic textured surface that crisps up into a glass-like crunch.
- Don’t crowd the pan. This is the most common mistake. Space your vegetables at least half an inch apart to allow hot air to circulate entirely around each piece.
- Rotate the pan. Most ovens have hot spots; rotating the tray 180 degrees halfway through ensures that every piece reaches the same level of golden perfection.
- The Cooling Rack Method: Once out of the oven, move the vegetables to a wire cooling rack for 2 minutes. This prevents the bottom from becoming soggy due to residual steam as they sit on the hot pan.
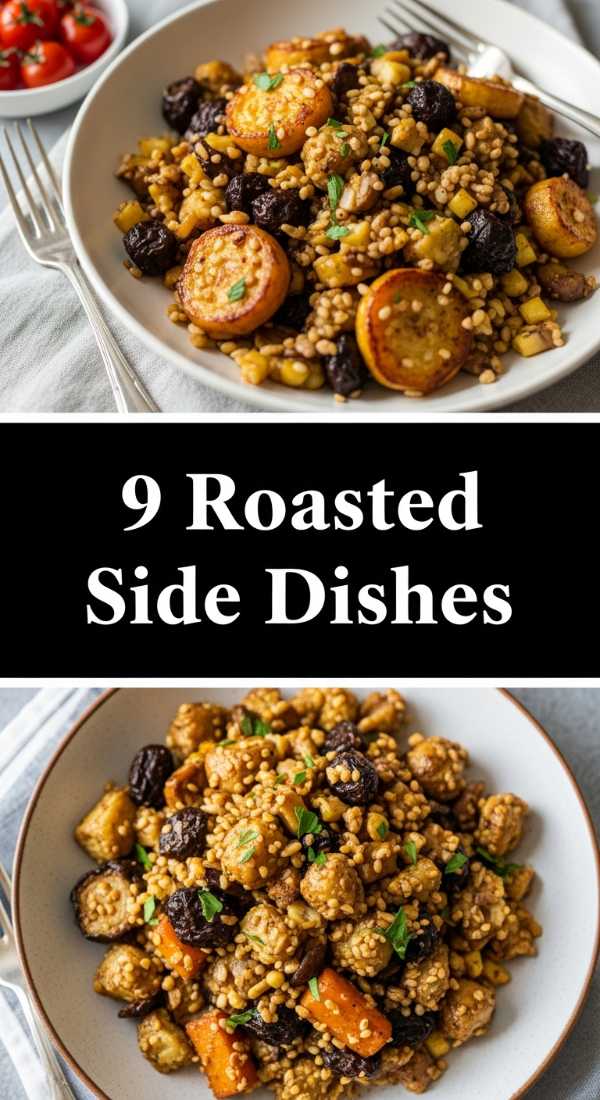
9 Delicious Roasted Side Dishes (Step-by-Step Guide)

Why we love this
Side dishes are where you can really play with international flavors and unexpected pairings. From miso-glazed eggplants to zesty radishes, these dishes add variety and intrigue to your snack spread. The roasting process mellows out the sharpness of vegetables like radishes, turning them sweet and buttery, which is a revelation for many guests. These sides are designed to be conversation starters—dishes that look complex but rely on the simple, honest transformation of heat and seasoning.
Ingredients
- 1 bunch of radishes, halved
- 1 lb asparagus, woody ends trimmed
- 2 cups cherry tomatoes
- 3 tbsp olive oil
- 1 tbsp dried oregano
- 1/4 cup crumbled feta cheese
How to make it
- Heat oven to 400°F (200°C). On a large sheet pan, create “zones” for your different vegetables since they may have slightly different cook times.
- Toss the radishes and cherry tomatoes in oil, salt, and oregano. Place them in the oven first, as they take longer to soften and blister.
- Roast for 10 minutes, then add the asparagus to the remaining section of the pan. Asparagus is delicate and only needs about 8-10 minutes to become tender-crisp.
- Monitor the tomatoes; you want them to burst and release their juices, creating a natural sauce on the pan.
- Remove the entire tray once the asparagus is bright green with slightly charred tips and the radishes are translucent.
- While still hot, sprinkle the feta cheese over the tomatoes and asparagus. The cheese will soften and slightly melt, creating a creamy contrast to the roasted vegetables.
12 Top Roasted Broccoli Bowls (Step-by-Step Guide)

Why we love this
Bowl meals are the ultimate cozy food, and roasted broccoli is the star that ties everything together. Building a bowl around these charred florets allows you to balance earthy grains, creamy dressings, and crunchy nuts. It’s a harmonious blend of textures that feels both healthy and incredibly satisfying. The roasted broccoli provides a deep, savory base that anchors the brighter notes of pickled onions or fresh herbs. This is how you turn snack board leftovers into a viral-worthy lunch bowl.
Ingredients
- 3 cups roasted broccoli florets
- 2 cups cooked quinoa or farro
- 1 avocado, sliced
- 1/4 cup toasted almonds
- Lemon-tahini dressing
- Pickled red onions
How to make it
- Start with a base of warm grains. If using quinoa, fluff it with a fork and season lightly with salt and a squeeze of lemon to wake up the flavor.
- Arrange a generous heap of roasted broccoli (reheated in the oven for 5 minutes to restore crispiness) on one side of the bowl.
- Place sliced avocado and pickled onions in separate sections. The acidity of the onions cuts through the richness of the roasted broccoli.
- Scatter the toasted almonds over the top. Toasting nuts for 3-5 minutes in a dry pan enhances their aroma and provides a secondary crunch.
- Drizzle the lemon-tahini dressing in a zig-zag pattern. For a viral look, keep the drizzle thin and consistent.
- Finish with a sprinkle of red pepper flakes or sesame seeds to add visual detail and a final layer of texture.
5 Best Sheet Pan Veggies (Step-by-Step Guide)
Why we love this
The sheet pan is the hero of the minimalist kitchen, allowing you to create a bounty of flavor with almost zero cleanup. There’s something so visually satisfying about a sheet pan filled with a rainbow of vegetables, all roasting together and sharing their juices. This method is perfect for a viral snack board because it creates a cohesive look and feel for all your components. The veggies come out perfectly seasoned, with a rustic charm that says “homemade with love” while looking like a professional catering spread.
Ingredients
- 1 red onion, sliced into wedges
- 1 zucchini, sliced into rounds
- 1 yellow squash, sliced into rounds
- 1 cup baby carrots
- 2 tbsp avocado oil
- 1 tsp garlic powder and 1 tsp onion powder
How to make it
- Preheat oven to 425°F (220°C). Use your largest sheet pan to ensure the vegetables have plenty of room to breathe.
- In a large bowl, whisk together the oil and dried spices. Garlic and onion powder are used here instead of fresh to prevent burning during the high-heat roast.
- Add all the vegetables to the bowl and toss thoroughly. Ensure the onion wedges stay somewhat intact to keep their beautiful shape.
- Arrange the vegetables on the pan. Try to keep similar types together so you can easily remove one group if they cook faster than the others.
- Roast for 20-25 minutes. At the 15-minute mark, use a spatula to gently turn the zucchini and squash rounds to brown both sides.
- The veggies are done when the onions are softened and translucent with charred edges and the carrots are easily pierced by a fork.
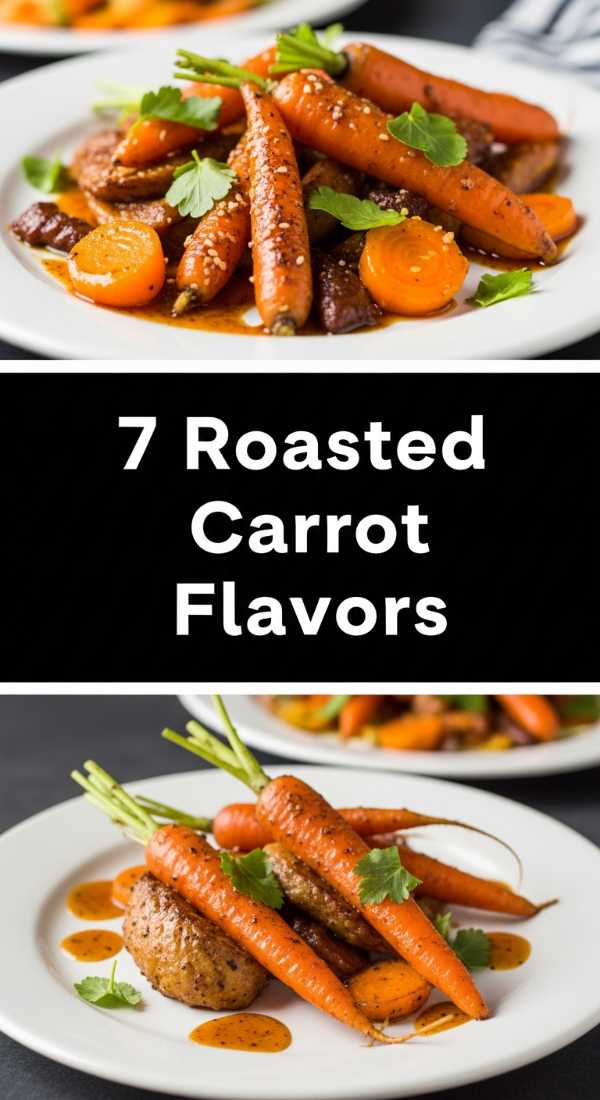
7 Sweet Roasted Carrot Flavors (Step-by-Step Guide)

Why we love this
Sweet roasted carrots are like nature’s candy, and when you experiment with different flavor profiles, they become the centerpiece of your board. Whether you lean into the warmth of cinnamon or the brightness of orange zest, these carrots offer a complex sweetness that pairs beautifully with salty meats or sharp cheeses. They bring a sophisticated, almost dessert-like quality to the vegetable world, proving that healthy eating can be incredibly indulgent. The way they glisten under the kitchen lights is pure aesthetic perfection.
Ingredients
- 1 lb slender Dutch carrots
- 2 tbsp maple syrup
- 1/2 tsp ground cinnamon
- Zest of half an orange
- 1 tbsp melted coconut oil
- A pinch of sea salt
How to make it
- Preheat oven to 400°F (200°C). Scrub the carrots well, but leave the skins on for a rustic look and extra nutrients.
- In a small bowl, combine the maple syrup, cinnamon, orange zest, and coconut oil. The coconut oil adds a subtle tropical note that enhances the carrot’s sweetness.
- Lay the carrots on a baking sheet and coat them thoroughly with the sweet mixture using a pastry brush.
- Roast for 20 minutes, then turn the carrots over. The sugars in the maple syrup will begin to bubble and darken, creating a thick syrup.
- Roast for another 10 minutes. Watch closely during this final stage as the high sugar content can transition from caramelized to burnt very quickly.
- Once they are tender and the glaze is tacky, remove them. Let them sit for 3 minutes; as the glaze cools slightly, it will set into a beautiful, shiny coating.
10 Best Roasted Veggie Dinners (Step-by-Step Guide)
[IMAGE_10]
Why we love this
Transforming roasted vegetables into a full dinner is the ultimate move for the busy but stylish home cook. These dinners are hearty, wholesome, and burst with the concentrated flavors that only the oven can provide. By combining roasted roots with proteins like chickpeas or halloumi, you create a complete meal that feels intentional and gourmet. The textures range from the snap of a roasted bean to the creaminess of a squash, providing a multi-sensory dining experience that is as fulfilling as it is beautiful to photograph.
Ingredients
- 1 can chickpeas, drained and patted dry
- 1 block halloumi cheese, cubed
- 2 cups cubed butternut squash
- 1 red onion, sliced
- 3 tbsp olive oil
- 1 tbsp harissa paste
How to make it
- Preheat oven to 425°F (220°C). This is a “one-pan wonder” recipe, so choose a large, sturdy tray.
- Whisk the olive oil and harissa paste together in a large bowl. Harissa adds a smoky, spicy depth that binds the squash and chickpeas together.
- Toss the squash, chickpeas, and onion in the harissa oil until evenly coated. The chickpeas need to be very dry to ensure they get crispy rather than just soft.
- Spread the mixture on the sheet pan and roast for 20 minutes.
- Remove the pan and tuck the cubes of halloumi among the vegetables. Halloumi has a high melting point, so it will brown and soften without losing its shape.
- Roast for a final 10-15 minutes until the halloumi is golden and the squash is caramelized. Serve directly from the pan for a rustic, communal dinner vibe.
Conclusion
Creating a viral-worthy snack board is truly an art form that anyone can master with a little help from their oven. By focusing on the rich textures and deep flavors of roasted vegetables, you move beyond the basic and into the extraordinary. Whether you’re hosting a big party or just treating yourself to a cozy night in, these recipes offer the perfect blend of minimal effort and maximum aesthetic. So, grab your favorite wooden board, roast up a storm, and get ready to snap that perfect photo before you dive in. Happy roasting!