
Mastering Dimension: The Ultimate Guide to Colorful 3D Acrylic Art
Hello, my sweet loves! Pull up a chair, grab a warm cup of tea, and let’s just breathe for a moment together. I’ve always felt that our hands are the storytellers of our souls—they hold our loved ones, they create magic, and they deserve to be draped in the most beautiful colors imaginable. Today, I want to wrap you in a cloud-soft embrace of creativity as we dive into the world of 3D acrylic art.
There is something so deeply therapeutic about the rhythm of the brush and the way a tiny bead of acrylic transforms into a blooming petal or a textured dream. This isn’t just about ‘doing your nails,’ it’s about taking a quiet moment for yourself to celebrate the vibrant person you are. Let’s walk through this colorful journey together, hand in hand.
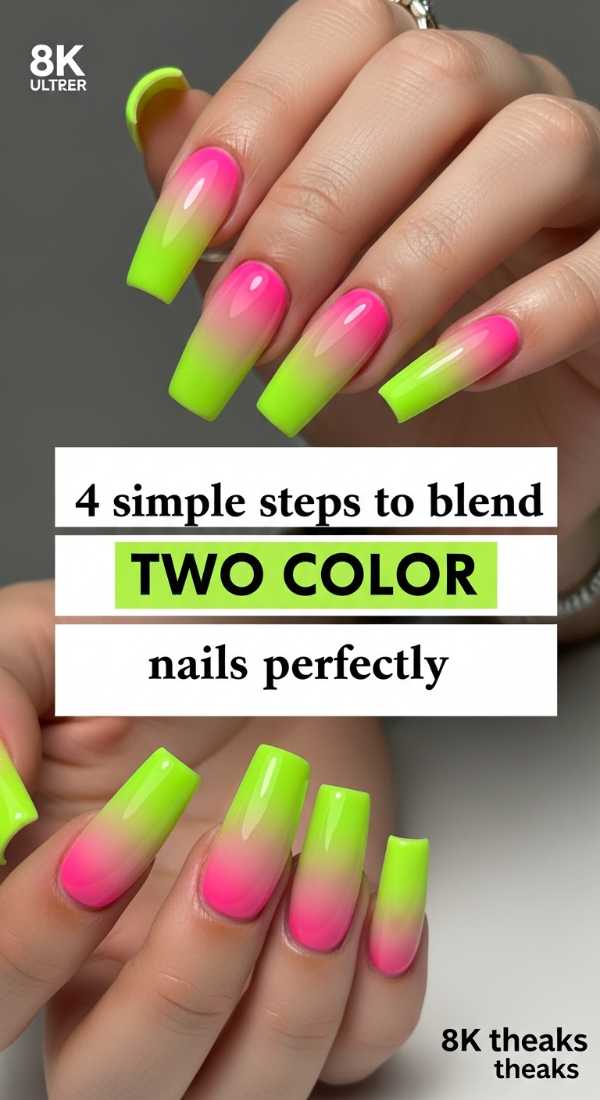
4 Simple Steps to Blend Two Color Nails Perfectly
Why to love this recipe:
Oh, loves, there’s nothing quite like the soft transition of a perfect gradient. It’s like watching a sunrise right at your fingertips, blending two souls into one harmonious dance of color.
Essential Ingredients:
- Two complementary acrylic powders
- A high-quality monomer
- A size 8 kolinsky brush
- Fine-grit buffer
How to Prepare:
1. Start with a thin base layer. 2. Place your first color bead at the tip and fade it toward the center. 3. Place the second color at the cuticle and gently pull it over the first color while wet. 4. Finish with a clear cap to protect that seamless blend.
Budget Range
- Mia Secret Acrylic Powder ($8.00)
- Saviland Acrylic Nail Brush ($12.00)
- Morovan Monomer ($15.00)
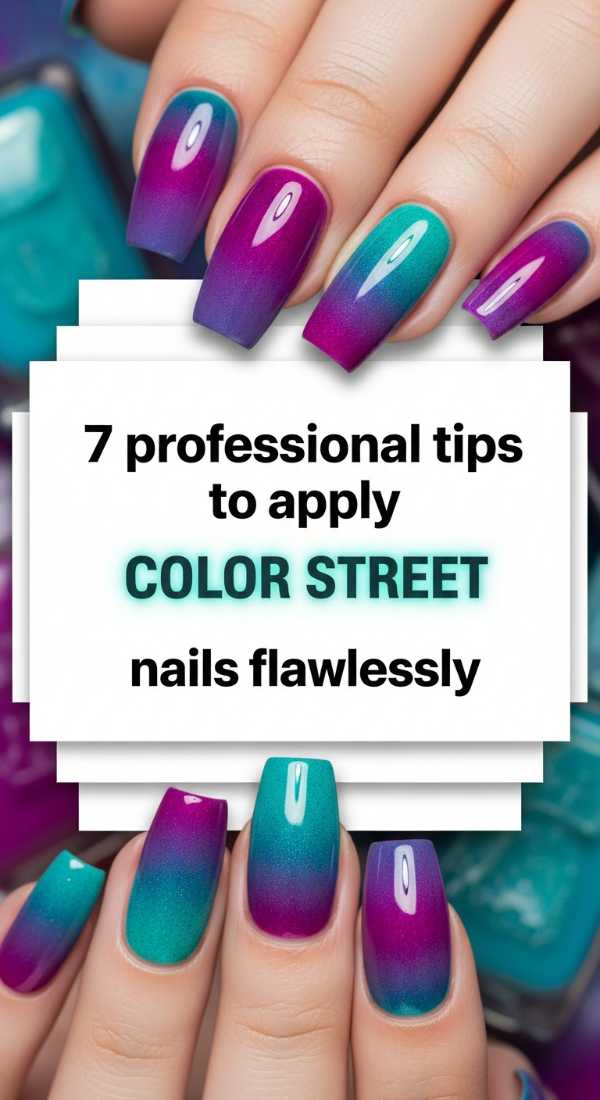
7 Professional Tips to Apply Color Street Nails Flawlessly
Why to love this recipe:
For my busy loves who still want that touch of elegance, this is a total game-changer. It’s the easiest way to feel polished and ready to take on the world in minutes.
Essential Ingredients:
- Color Street nail strips
- Alcohol prep pads
- Glass nail file
- Rubber cuticle pusher
How to Prepare:
1. Cleanse your nails thoroughly with alcohol. 2. Gently push back cuticles. 3. Size the strip to your nail. 4. Peel the clear plastic. 5. Apply starting at the base. 6. Smooth out any bubbles with your thumb. 7. Fold and file the excess downward.
Budget Range
- Color Street Sets ($11.00 – $14.00)
- Glass Nail File ($6.00)
- Bona Fide Buffer ($5.00)
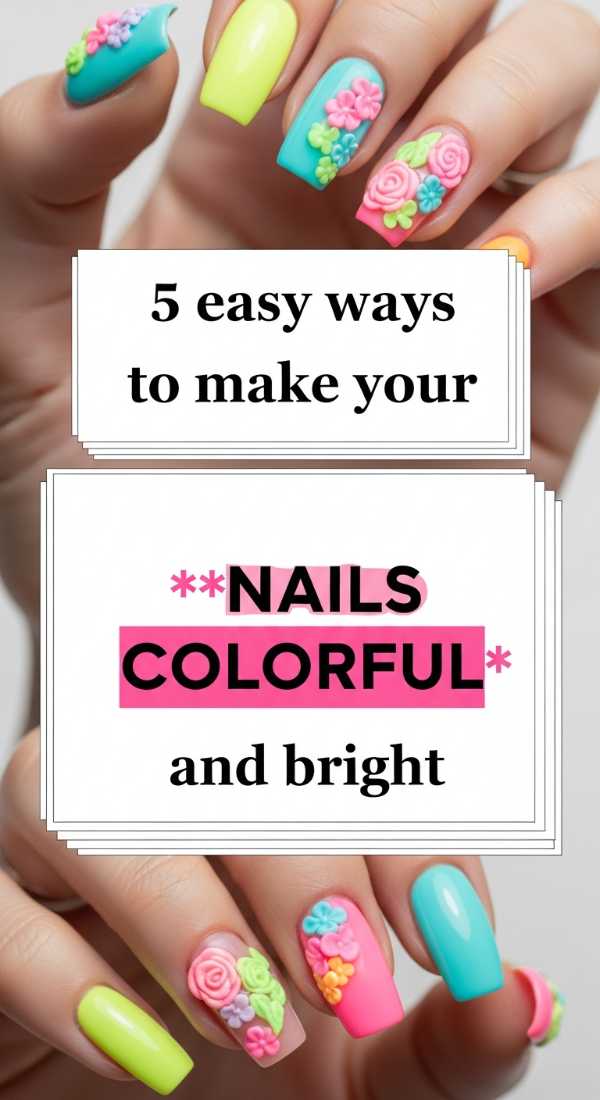
5 Easy Ways to Make Your Nails Colorful and Bright
Why to love this recipe:
Sometimes we just need a little pop of joy! These methods are like a shot of espresso for your mood, bringing light and sunshine to your daily routine.
Essential Ingredients:
- Neon pigments
- White base polish
- Glossy top coat
- Sponge applicators
How to Prepare:
1. Always start with a white base to make colors pop. 2. Layer thin coats rather than one thick one. 3. Use a sponge for ‘aura’ effects. 4. Mix matte and gloss finishes. 5. Add a holographic topper for extra sparkle.
Budget Range
- Modelones Neon Gel Set ($15.00)
- OPI Alpine Snow White ($11.00)
- Seche Vite Dry Fast Top Coat ($9.00)
6 Proven Tricks for Stunning Multicolor Nails at Home
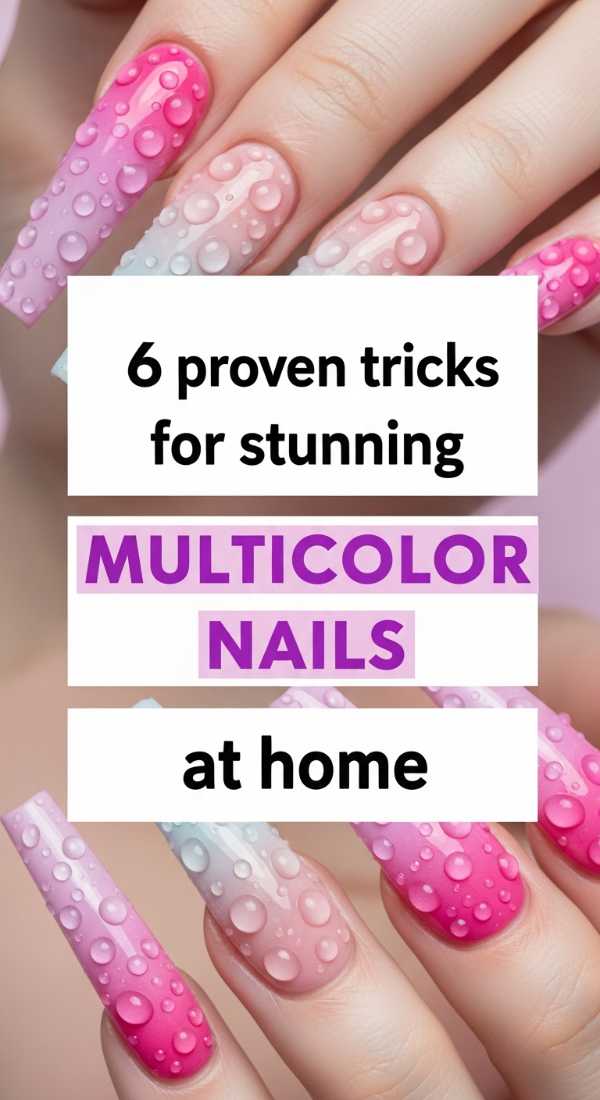
Why to love this recipe:
You don’t need a salon to feel like royalty. These tricks bring that high-end multicolor magic right to your kitchen table, wrapped in the comfort of home.
Essential Ingredients:
- Dotting tools
- Striping tape
- Vibrant lacquer set
- Liquid latex for skin protection
How to Prepare:
1. Use striping tape for clean geometric lines. 2. Try the ‘mismatched’ trend (different color on each finger). 3. Use liquid latex to keep edges clean. 4. Create tiny dots for a confetti look. 5. Use a toothpick for marble swirls. 6. Seal with two layers of top coat.
Budget Range
- Dotting Tool Set ($4.00)
- Beetles Rainbow Gel Polish Set ($20.00)
- Pueen Latex Tape ($8.00)
8 Creative Hacks for the Best Colorful Nail Inspo
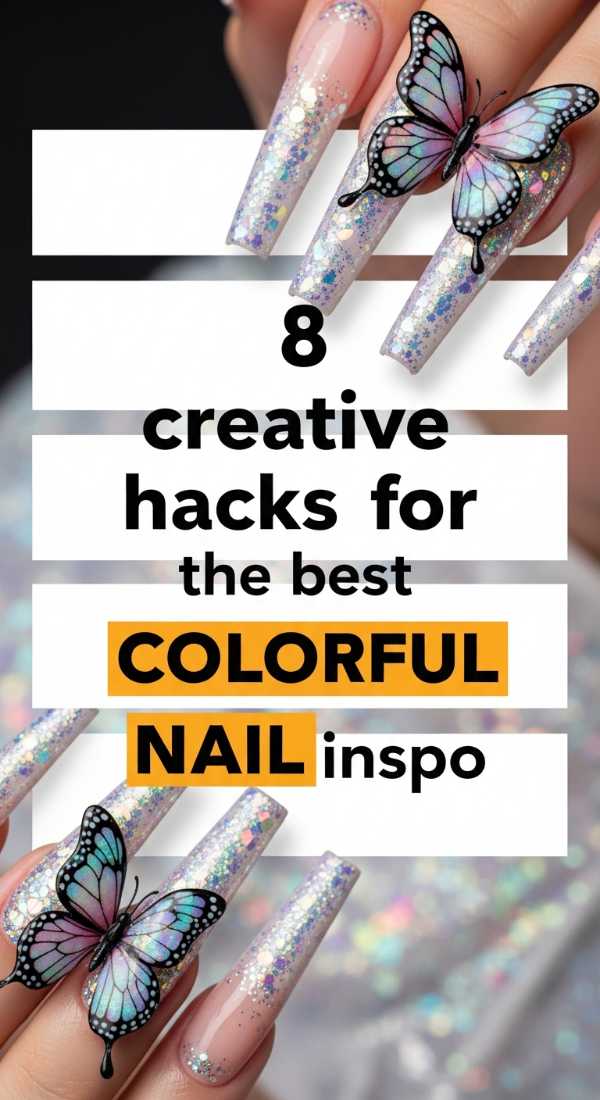
Why to love this recipe:
Hacks are like little secrets shared between friends. These will spark your imagination and help you find beauty in the most unexpected places, my loves.
Essential Ingredients:
- Pinterest app
- Nature (flowers/sunset)
- Texture sponges
- Chrome powders
How to Prepare:
1. Save photos of sunsets for natural palettes. 2. Use eyeshadow as nail pigment. 3. Look at fabric patterns for design ideas. 4. Try the ‘water drop’ effect with top coat. 5. Use old lace as a stencil. 6. Mix your own custom colors. 7. Layer jelly polishes for depth. 8. Keep an inspo journal.
Budget Range
- Artdone Chrome Powder ($10.00)
- Makeup Sponges ($3.00)
- Notebook for sketches ($5.00)
10 Hidden Secrets for Flawless Colourful Acrylic Nails
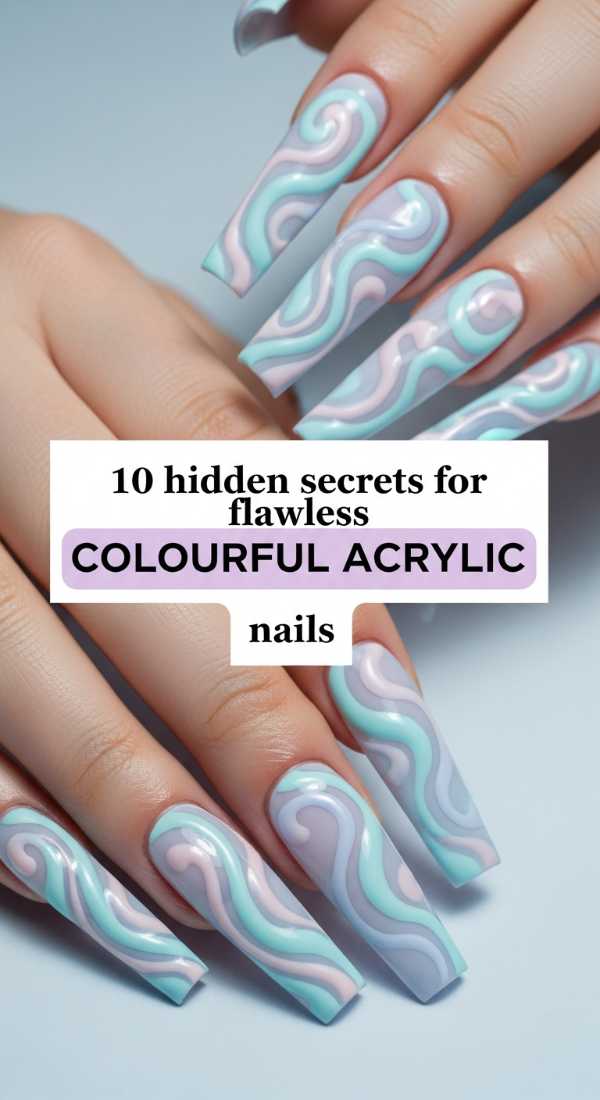
Why to love this recipe:
The pros always have their secrets, and today, I’m sharing them all with you. It’s the little things that make the biggest difference in achieving that flawless, buttery finish.
Essential Ingredients:
- Dehydrator and Primer
- Quality Acrylic Liquid
- Correct ratio of powder to liquid
- Dappen dish
How to Prepare:
1. Never skip the dehydrator. 2. Keep your brush clean between beads. 3. Work in small sections. 4. Tap the side of the brush to release air bubbles. 5. Control your room temperature. 6. Practice the ‘pearl’ consistency. 7. Use a 45-degree angle. 8. Blend the cuticle area thin. 9. File in one direction. 10. Oil your cuticles immediately after.
Budget Range
- Young Nails Protein Bond ($13.00)
- Mia Secret Dehydrator ($7.00)
- Cuccio Revitalize Oil ($9.00)
3 Fast Methods to Shape Colorful Stiletto Nails Easily
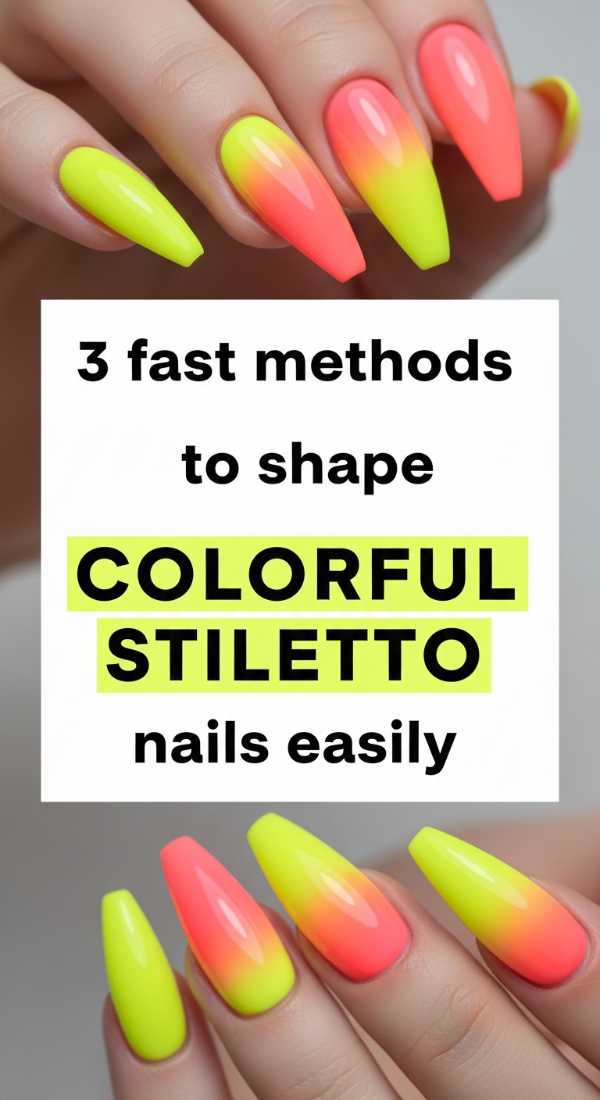
Why to love this recipe:
Stiletto nails are so fierce yet so feminine. They elongate your hands and make every gesture feel like a piece of performance art. Let’s make it easy!
Essential Ingredients:
- 100/180 grit file
- C-curve clips
- Nail forms
How to Prepare:
1. Use the ‘central point’ method by marking the exact middle of the tip. 2. File the sides straight toward that center point. 3. Use C-curve clips while the acrylic is ‘chewy’ to pinch the shape into a sharp, elegant point.
Budget Range
- Makartt Nail Files ($7.00)
- Nail Shaping Clips ($5.00)
- Long Nail Forms ($8.00)
5 Minutes to Create Neon Two Color Nails Effortlessly
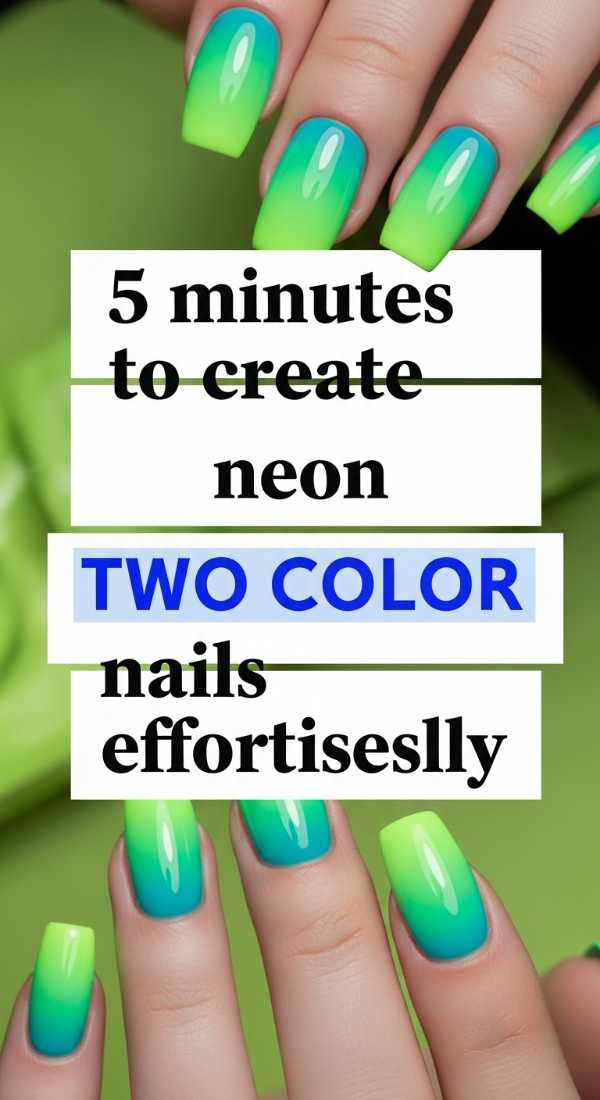
Why to love this recipe:
For my darlings on the go! This method is fast, punchy, and perfect for a last-minute summer party or just a Tuesday where you need some extra zest.
Essential Ingredients:
- Neon Gel Polish duo
- UV/LED Lamp
- Lint-free wipes
How to Prepare:
1. Apply neon color A on the left half of the nail. 2. Apply neon color B on the right half. 3. Use a dry brush to ‘wiggle’ the middle line. 4. Cure for 60 seconds. 5. Apply top coat and cure again.
Budget Range
- SUNUV LED Lamp ($25.00)
- Gellen Neon Duo ($10.00)
- Isopropyl Alcohol ($4.00)
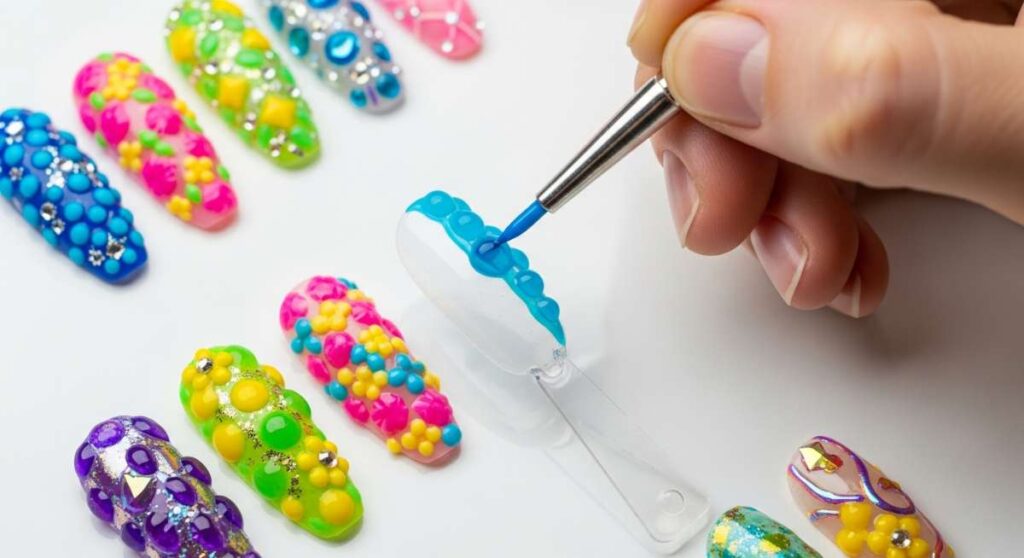
9 Expert Steps to Sculpt 3D Colorful Acrylic Nails

Why to love this recipe:
This is where the true mastery happens. Sculpting 3D art is like bringing a garden to life on your nails. It’s intricate, soft, and absolutely breathtaking.
Essential Ingredients:
- 3D sculpting brush (Size 2 or 4)
- Colored acrylic powder (highly pigmented)
- Silicone tools
- Patience and love
How to Prepare:
1. Pick up a very small, dry bead. 2. Place it on the nail. 3. Wait 5 seconds for it to set slightly. 4. Use the tip of the brush to press the center. 5. Pull the edges to form a petal. 6. Layer petals for a rose. 7. Add tiny green beads for leaves. 8. Use a silicone tool for veins. 9. Add a tiny crystal in the center.
Budget Range
- Pana 3D Brush ($9.00)
- Acrylic Powder Set ($18.00)
- Nail Art Rhinestones ($6.00)
4 Pro Techniques for Textured Multicolor Nails Today
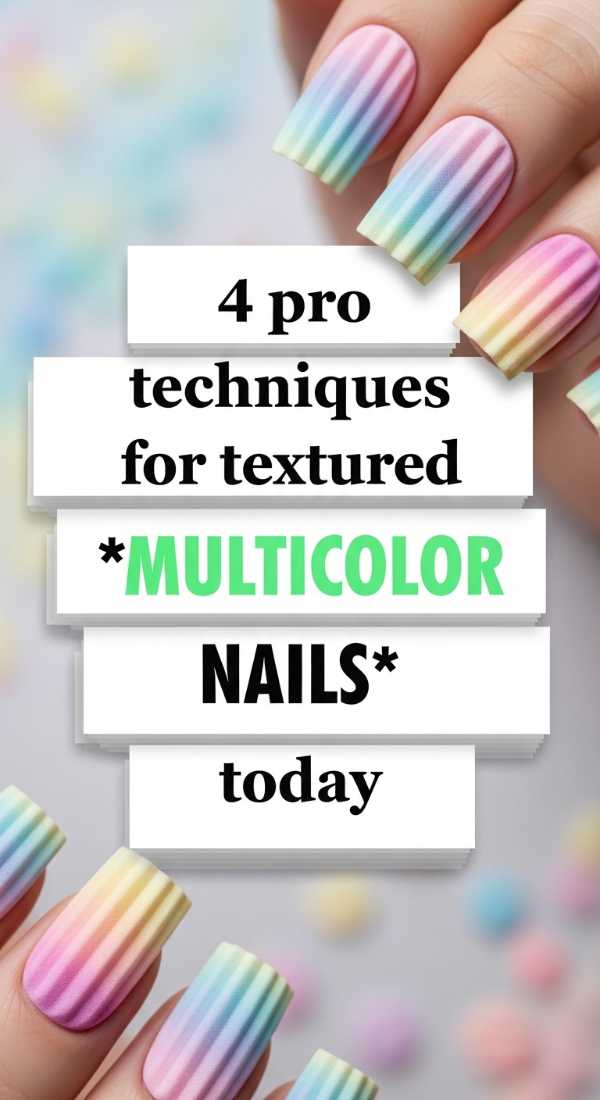
Why to love this recipe:
Texture adds a whole new dimension of touch. It’s for the loves who want something different, something that catches the light and feels as good as it looks.
Essential Ingredients:
- Sugar powder/Glitter
- Matte top coat
- Clear builder gel
- Fine sand
How to Prepare:
1. The ‘Sugar’ effect: Sprinkle glitter over wet top coat and cure. 2. The ‘Sweater’ effect: Use builder gel to draw raised lines and cure. 3. Velvet finish: Use a dedicated matte topper. 4. Mix matte and shiny patterns on the same nail for contrast.
Budget Range
- Kupa Matte Top Coat ($12.00)
- Fine Nail Art Glitter ($8.00)
- Saviland Builder Gel ($10.00)
Embrace Your Inner Artist
My loves, I hope you feel inspired to try something new and colorful today. Remember, there are no mistakes in art—only happy accidents and new paths to explore. Your hands are a reflection of your beautiful, multifaceted soul. Go ahead and let them shine! I can’t wait to see the masterpieces you create. Sending you so much love and light until next time.