
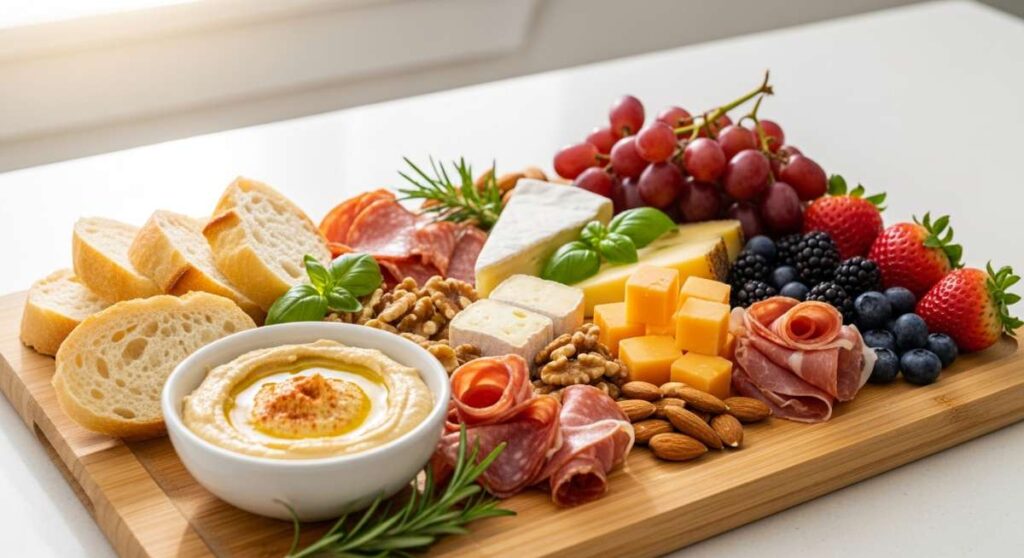
Low Effort, High Impact: How to Master the Simple Food Board Trend
There is something almost magical about the way a gathering shifts when you place a beautiful food board in the center of the table. We’ve all been there: the frantic kitchen dance, the mounting stress of timing five different dishes, and that nagging feeling that you’re missing out on the actual conversation. But lately, I’ve embraced a different philosophy. I’ve leaned into the ‘simple food board’ trend—an approach that prioritizes vibrant colors, fresh textures, and communal grazing over complex culinary gymnastics.
This trend isn’t just about food; it’s about reclaiming your time and energy while still creating a ‘wow’ moment for your guests. It’s about the clink of glasses over a wooden plank overflowing with summer goodness, the sun dipping below the horizon, and the ease of a meal that feels curated rather than labored. In this post, I’m sharing my favorite ways to translate this high-impact, low-effort aesthetic into your summer hosting routine, from crockpot staples to beach-ready snacks.
10 Easy Summer Crockpot Recipes You Need to Try
Why we love this
Using a slow cooker in the heat of July feels like a secret life hack. Imagine coming home from a long day at the pool to the savory, mouth-watering aroma of honey-garlic pulled chicken without ever turning on the oven. The meat becomes so tender it practically melts under the weight of a fork, soaking up a rich, glossy glaze that balances sweet and salty notes perfectly. It’s the ultimate low-effort base for a DIY slider board, allowing you to stay cool while serving a meal that tastes like it took all day to prepare.
Ingredients
- 2 lbs boneless skinless chicken thighs
- 1/2 cup low-sodium soy sauce
- 1/2 cup honey
- 4 cloves minced garlic
- 1 tbsp freshly grated ginger
- 1 tsp sriracha
- Sliced green onions and sesame seeds for garnish
How to make it
- Begin by patting your chicken thighs dry with paper towels to ensure the sauce adheres perfectly. Place them in a single layer at the bottom of your 6-quart crockpot.
- In a medium mixing bowl, whisk together the soy sauce, honey, minced garlic, ginger, and sriracha until the honey is fully incorporated and the sauce is smooth.
- Pour the mixture over the chicken, making sure every piece is submerged or well-coated. Set your crockpot to ‘Low’ and cook for 4 to 5 hours. Avoid using the ‘High’ setting if possible, as the slower cook time breaks down the connective tissue in the thighs for a superior texture.
- Once the chicken is tender and registers 165°F internally, remove the thighs to a cutting board. Use two forks to shred the meat into bite-sized ribbons.
- Optional Professional Tip: Transfer the remaining liquid from the crockpot to a small saucepan. Simmer over medium-high heat for 5-8 minutes until it reduces by half into a thick, syrupy glaze. Toss the shredded chicken back into this concentrated sauce before serving on your board.
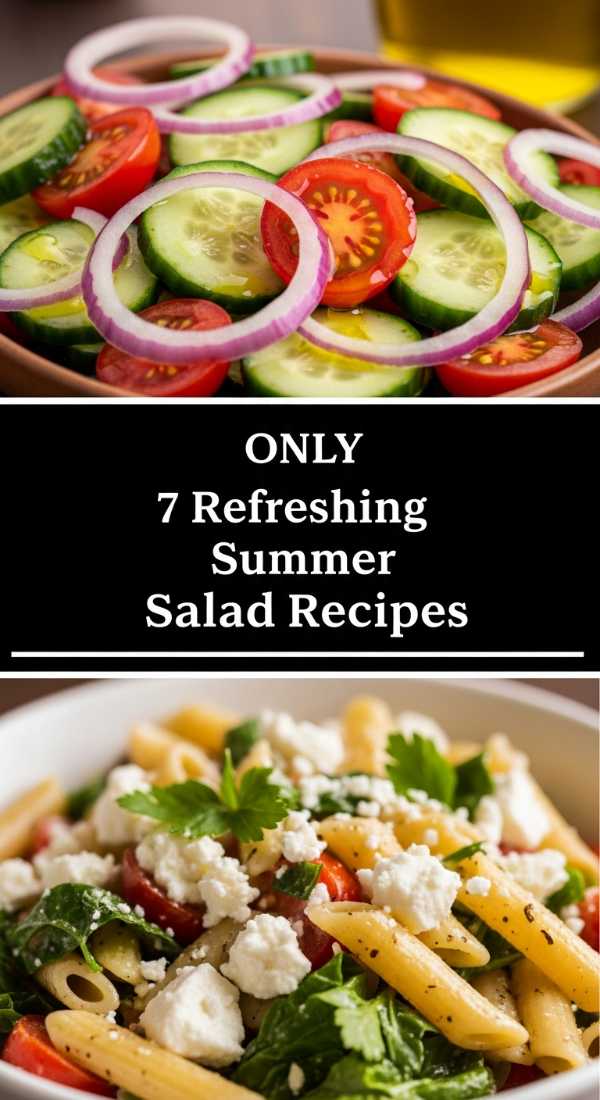
7 Refreshing Summer Salad Recipes for Hot Days

Why we love this
Nothing says ‘summer impact’ like a vibrant Watermelon and Feta salad spread across a dark slate board. The visual contrast of the ruby-red fruit against the snowy white crumbles of cheese and the emerald pop of fresh mint is a feast for the eyes before the first bite. When you do take that bite, you’re met with an explosion of sensations: the icy, crisp juice of the melon, the creamy, salty tang of the feta, and a finishing drizzle of balsamic glaze that adds a sophisticated depth. It’s a sensory reset button for a sweltering afternoon.
Ingredients
- 1 small seedless watermelon, cubed
- 6 oz high-quality sheep’s milk feta
- 1/2 cup fresh mint leaves, chiffonade
- 1/2 red onion, thinly shaved
- Extra virgin olive oil
- Balsamic glaze
- Flaky sea salt
How to make it
- Start with a cold watermelon. Cut it into uniform 1-inch cubes; uniformity is key for that professional ‘food board’ aesthetic. Drain any excess juice so the board stays clean.
- Thinly shave the red onion using a mandoline if available. To take away the harsh ‘bite’ of the onion, soak the slices in a bowl of ice water for 10 minutes, then pat dry.
- Arrange the watermelon cubes in a loose, artistic mound on your serving board. Scatter the soaked red onions over the top.
- Crumble the feta by hand rather than buying pre-crumbled varieties. Large, irregular chunks provide a better texture and look more artisanal.
- Just before serving, sprinkle the mint leaves and a generous pinch of flaky sea salt. Drizzle with a thin stream of olive oil and the balsamic glaze. The salt is crucial—it draws out the sweetness of the melon and balances the acidity of the glaze.
12 Best Cookout Side Dishes for Your Next BBQ
Why we love this
Elevating a BBQ often comes down to the sides, and a Street Corn (Elote) board is the king of cookout impact. The aroma of charred, smoky kernels mingled with zesty lime and funky cotija cheese is absolutely intoxicating. There is something deeply satisfying about the charred texture of the corn paired with a creamy, spiced sauce that clings to every crevice. It’s a messy, joyful eating experience that encourages guests to get stuck in and enjoy the rustic charm of outdoor dining.
Ingredients
- 8 ears of sweet corn, husks removed
- 1/2 cup Mexican crema or sour cream
- 1/4 cup mayonnaise
- 1/2 cup crumbled Cotija cheese
- 1 tsp chili powder or ancho chili powder
- Fresh cilantro, chopped
- Lime wedges
How to make it
- Preheat your grill to medium-high heat (about 400°F). Lightly oil the grates to prevent sticking.
- Place the corn directly on the grates. Grill for 10-12 minutes, turning occasionally. You are looking for specific visual cues: the kernels should be bright yellow with distinct, dark charred spots on all sides.
- While the corn grills, whisk together the crema, mayonnaise, and chili powder in a small bowl until smooth.
- Remove the corn from the grill and immediately brush each ear with a generous coating of the crema mixture while the corn is still steaming hot—this allows the sauce to slightly melt into the kernels.
- Lay the ears on a wooden board. Shower them with the crumbled cotija cheese and cilantro. Serve with plenty of lime wedges on the side so guests can add that essential hit of bright acidity themselves.
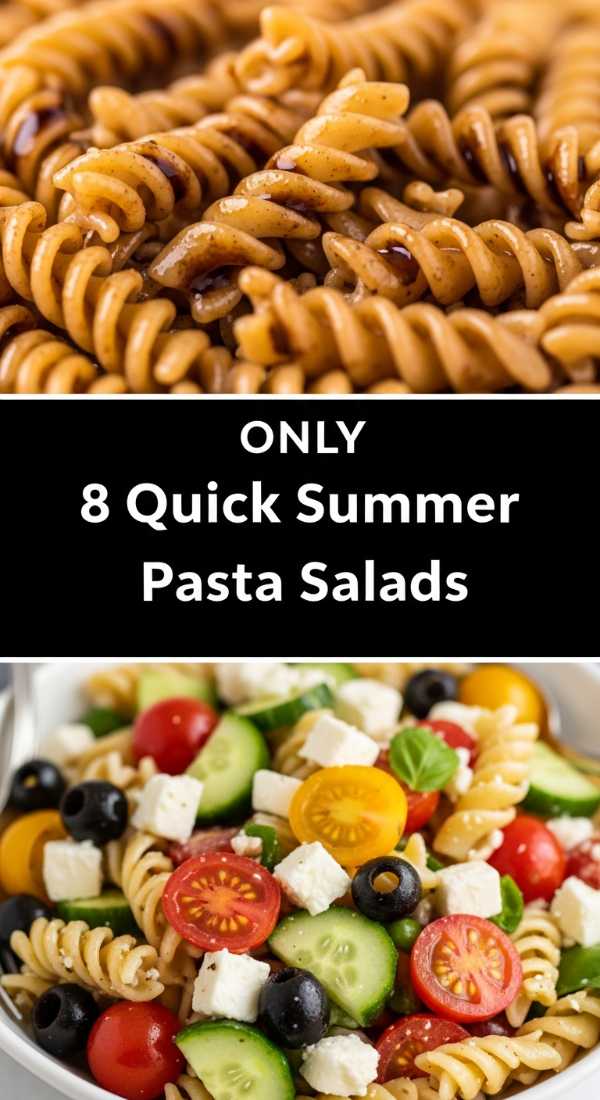
8 Quick Summer Pasta Salad Ideas

Why we love this
Pasta salad is a nostalgic staple, but the ‘Simple Food Board’ version uses Pesto Tortellini to bring a gourmet flair to the table. The cheese-filled pasta pillows provide a much more indulgent mouthfeel than standard rotini, especially when coated in a bright, herbaceous basil pesto. Combined with sun-dried tomatoes and pearls of fresh mozzarella, it’s a dish that feels rich yet remains incredibly easy to pull together. The aroma of fresh basil and garlic wafting from the board is enough to draw a crowd instantly.
Ingredients
- 1 lb refrigerated cheese tortellini
- 1 cup high-quality basil pesto
- 1/2 cup sun-dried tomatoes in oil, chopped
- 8 oz fresh mozzarella pearls
- 2 cups baby arugula
- Toasted pine nuts for crunch
How to make it
- Bring a large pot of salted water to a rolling boil. Add the refrigerated tortellini and cook according to package instructions—usually only 2-3 minutes. It is vital not to overcook them; they should be ‘al dente’ so they hold their shape on the board.
- Drain the pasta and immediately rinse with cold water. This stops the cooking process and prevents the pasta from becoming gummy.
- In a large bowl, gently fold the cold tortellini with the basil pesto. Do this while the pasta is slightly damp to help the sauce emulsify and coat every curve.
- Add the sun-dried tomatoes and mozzarella pearls. Toss lightly so you don’t break the delicate pasta skins.
- Lay a bed of fresh arugula on your serving board to act as a vibrant green base. Spread the tortellini mixture over the top and garnish with toasted pine nuts. The arugula adds a peppery bite that cuts through the richness of the cheese and pesto.
5 Best Viral Summer Dips Everyone Loves
Why we love this
The Whipped Feta dip has gone viral for a reason: it is the ultimate ‘low effort, high impact’ appetizer. The texture is ethereal—light, airy, and cloud-like—yet it carries the bold, salty punch of feta. When topped with a pool of golden honey and toasted pistachios, it becomes a masterclass in flavor balancing. It’s the kind of dish where people will keep dipping ‘just one more time’ until the board is scraped clean, making it a guaranteed crowd-pleaser for any summer social.
Ingredients
- 8 oz block of Greek feta (in brine)
- 1/2 cup Greek yogurt
- 1 clove garlic, grated
- Zest of one lemon
- 2 tbsp honey
- 1/4 cup crushed pistachios
- Warm pita bread or crackers
How to make it
- Place the feta, Greek yogurt, grated garlic, and lemon zest into a food processor or high-speed blender.
- Process the mixture on high for 2-3 minutes. This timing is essential; you aren’t just mixing, you are aerating. Stop when the texture is completely smooth and looks like thick whipped cream.
- Spread the whipped feta onto a shallow board or platter, using the back of a spoon to create deep ‘swirls’ and ‘valleys’ in the dip.
- Drizzle the honey generously into the swirls you created. The honey will settle into the grooves, creating a beautiful golden contrast.
- Top with the crushed pistachios and an extra grating of lemon zest. Serve immediately with warm, charred pita bread. The contrast of the cold, creamy dip against the warm bread is a highlight of the experience.
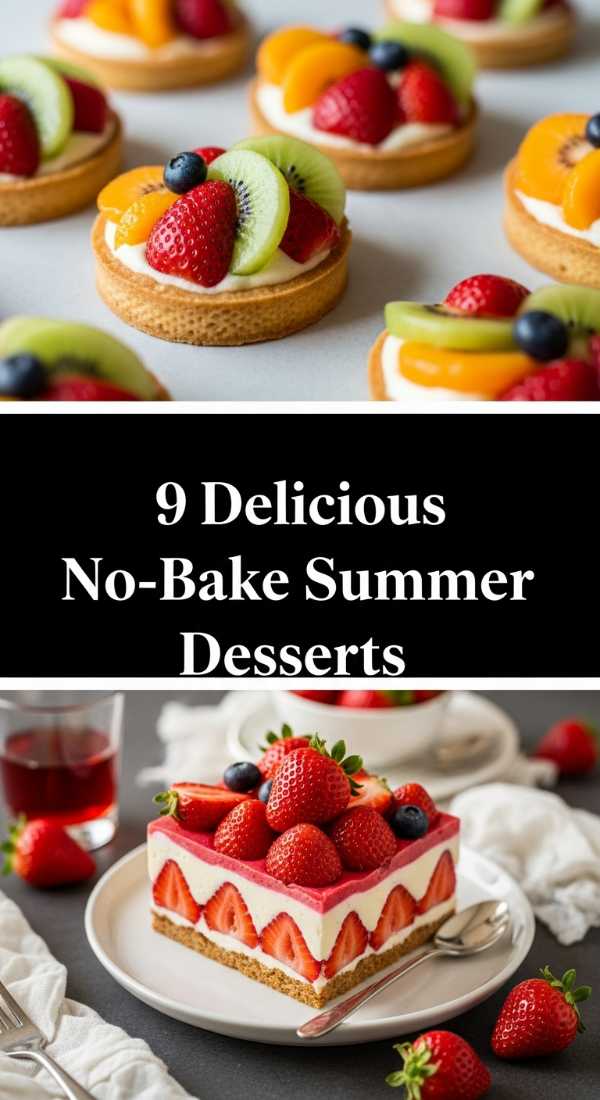
9 Delicious No-Bake Summer Desserts

Why we love this
When the temperature rises, the last thing anyone wants to do is turn on the oven. Enter the No-Bake Lemon Icebox Cake board. This dessert is the epitome of summer freshness, featuring layers of crisp graham crackers that soften into a cake-like consistency as they chill with a tart, silky lemon cream. It’s light, zesty, and incredibly refreshing. Serving it on a board with fresh berries and sprigs of mint makes for a stunning, effortless finale to any meal.
Ingredients
- 2 cups heavy whipping cream
- 1 can (14 oz) sweetened condensed milk
- 1/2 cup fresh lemon juice
- 1 tbsp lemon zest
- 2 boxes graham crackers
- Fresh blueberries and raspberries for garnish
How to make it
- In a large chilled bowl, beat the heavy cream until stiff peaks form. In a separate bowl, whisk together the sweetened condensed milk, lemon juice, and lemon zest until thickened.
- Gently fold the whipped cream into the lemon mixture. Use a spatula and a ‘cutting’ motion to keep as much air in the mixture as possible.
- On a rectangular board or in a shallow dish, place a single layer of graham crackers. Spread a thick layer of the lemon cream over the top.
- Repeat the layers until you have used all the cream, finishing with a cream layer. Cover and refrigerate for at least 4 hours, though overnight is best. This allows the crackers to absorb moisture and turn into a soft, ‘cake’ texture.
- Before serving, garnish the top with a bounty of fresh summer berries and extra lemon zest for a pop of color and flavor.
6 Refreshing Fun Summer Drink Ideas
Why we love this
A ‘Drink Board’ centered around Sparkling Peach Rosé Sangria is the ultimate way to serve a crowd. It’s bubbly, sophisticated, and looks like a sunset in a glass. The aroma of ripe, macerated peaches and fresh raspberries infuses the crisp wine, creating a beverage that is as much an experience as it is a drink. It invites guests to customize their glasses with fruit garnishes, making the process interactive and fun.
Ingredients
- 1 bottle (750ml) chilled Rosé wine
- 1/2 cup peach schnapps
- 2 cups sparkling water or club soda
- 3 ripe peaches, sliced
- 1 cup fresh raspberries
- Fresh mint sprigs
How to make it
- In a large pitcher, combine the sliced peaches, raspberries, and peach schnapps. Let this sit in the fridge for at least an hour. This ‘maceration’ process is vital as it draws out the natural juices and sweetness of the fruit.
- When ready to serve, pour the chilled Rosé over the fruit. Stir gently with a long-handled spoon to combine the flavors without bruising the fruit.
- Top the pitcher with the sparkling water just before bringing it to the board to ensure the bubbles are at their peak.
- Arrange the board with extra fruit slices, mint sprigs, and beautiful glassware. Fill the glasses with ice first, then pour the sangria, making sure each guest gets a few pieces of the booze-soaked fruit.
- Pro Tip: Use frozen peach slices instead of ice cubes in the pitcher to keep the drink cold without diluting the flavor.
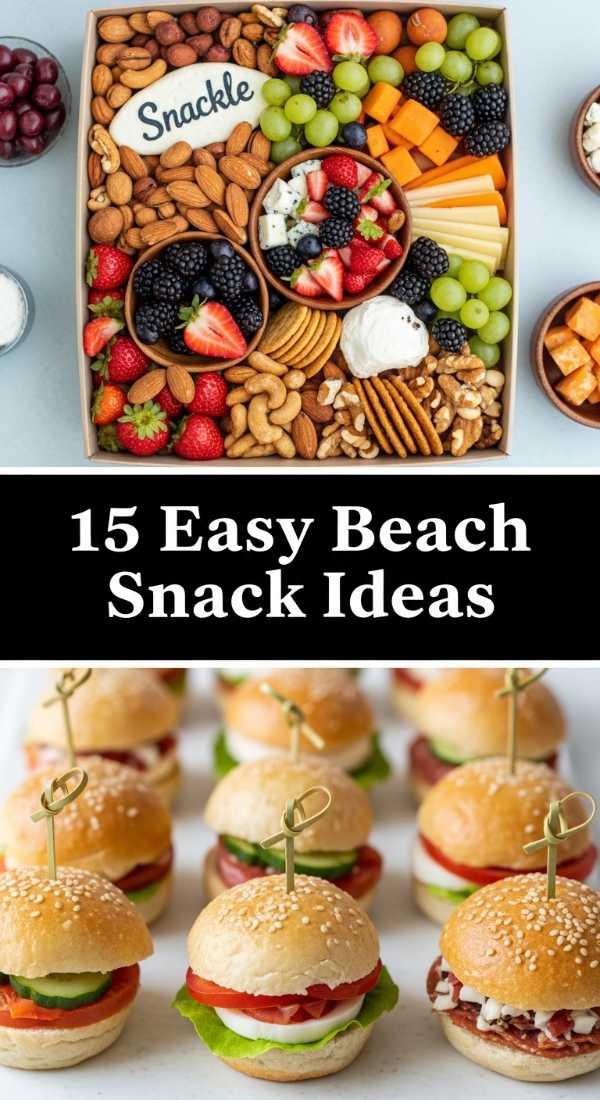
15 Easy Beach Snack Ideas for Adults

Why we love this
Adult beach snacking should feel like a mini-vacation in itself. A ‘Beach Bento Board’ featuring Prosciutto-Wrapped Melon and Marinated Olives offers a sophisticated alternative to soggy sandwiches. The saltiness of the cured meat paired with the hydrating, cool melon is the perfect antidote to a day in the sun. These snacks are designed to be hand-held, mess-free, and incredibly satisfying, providing a gourmet touch to your seaside cooler.
Ingredients
- 1 cantaloupe, sliced into wedges
- 6 oz thinly sliced Prosciutto di Parma
- 1 jar Marinated Castelvetrano olives
- Marcona almonds
- Seedless grapes
- Hard cheese wedges (like Manchego)
How to make it
- Prepare the melon by removing the seeds and slicing it into long, thin wedges. Wrap a single, paper-thin slice of prosciutto around the center of each wedge. The natural moisture of the melon will help the meat adhere.
- Drain the olives but keep a small amount of the oil. Place them in a leak-proof container if traveling, or a small bowl if serving immediately.
- Arrange the wrapped melon, olives, almonds, and grapes on a sturdy board. Use hard cheeses like Manchego because they hold up better in the summer heat than soft cheeses.
- For transport to the beach: Use a container with dividers (bento style) to keep the components separate and prevent the almonds from getting soft from the melon juice.
- Keep the board in a chilled cooler until the moment you’re ready to snack. The contrast of the cold fruit against the salty meat is most refreshing when served chilled.
10 Healthy Summer Dinner Recipes in 30 Minutes

Why we love this
Weeknight dinners in the summer should be fast, fresh, and light. Honey Garlic Shrimp Skewers served on a bed of quinoa or greens make for a stunning 30-minute board. The shrimp cook in a matter of minutes, developing a beautiful caramelized exterior and a tender, snappy bite. The glaze is a crowd-pleaser, offering a sticky-sweet finish that feels like a treat while remaining a healthy, high-protein option for busy evenings.
Ingredients
- 1 lb large shrimp, peeled and deveined
- 3 tbsp honey
- 2 tbsp soy sauce
- 3 cloves garlic, minced
- 1 tbsp lemon juice
- Wooden or metal skewers
- Cilantro for garnish
How to make it
- If using wooden skewers, soak them in water for at least 20 minutes before grilling to prevent them from burning.
- In a small bowl, whisk together the honey, soy sauce, garlic, and lemon juice. Reserve half of this mixture in a separate small dish for later.
- Thread the shrimp onto the skewers, about 4-5 per skewer. Brush them generously with the first half of the honey garlic sauce.
- Heat a grill pan or outdoor grill to medium-high heat. Cook the skewers for 2-3 minutes per side. Visual cue: Shrimp are done when they turn opaque and form a ‘C’ shape. Do not overcook them into an ‘O’ shape, as they will become rubbery.
- Remove the skewers and immediately brush with the reserved (clean) sauce. Arrange on a board over a bed of grain or salad and garnish with fresh cilantro. The extra glaze at the end provides that glossy, viral-worthy finish.
8 Best Fourth of July Party Food Ideas
[IMAGE_10]
Why we love this
For the Fourth of July, impact is all about the Red, White, and Blue. A Berry Shortcake Slider board is a playful, festive way to serve dessert. Using small biscuits or ‘shortcakes’ as the base for mini-sandwiches filled with whipped cream and macerated berries makes for an adorable presentation. The combination of the buttery, crumbly cake with the tart berries and clouds of cream is a classic Americana flavor profile that never goes out of style.
Ingredients
- 12 mini buttermilk biscuits or shortcakes
- 2 cups sliced strawberries
- 1 cup blueberries
- 2 tbsp sugar
- Homemade whipped cream
- Fresh mint for garnish
How to make it
- Toss the sliced strawberries and blueberries with 2 tablespoons of sugar in a bowl. Let them sit for 15-20 minutes. This is ‘macerating,’ and it creates a beautiful natural syrup that will soak into the shortcakes.
- Split the mini biscuits in half horizontally. Place the bottom halves across your serving board.
- Spoon a generous amount of the berries and their syrup onto each biscuit base.
- Top the berries with a large dollop of freshly whipped cream. For the best impact, use a piping bag to create neat swirls, though a rustic spoonful works beautifully too.
- Place the top half of the biscuit on at an angle so guests can see the colorful filling. Garnish the board with extra loose berries and mint leaves for a festive, patriotic display.
Conclusion
Mastering the simple food board trend is all about balance: balancing flavors, textures, and most importantly, your own effort. By choosing high-impact ingredients and focusing on beautiful, communal presentation, you can create memorable summer moments without spending the entire season stuck in the kitchen. Whether it’s a casual beach snack or a festive Fourth of July spread, remember that the best boards are the ones that bring people together. So, grab a board, pick a theme, and start grazing!