
How to Master the Simple Food Board Trend Without Breaking the Bank
There is something inherently magical about gathering around a communal spread, isn’t there? I remember the first time I set out a rustic wooden board piled high with simple cheeses and crusty bread; the room’s energy shifted instantly from stiff formalities to a warm, shared experience. In our fast-paced digital world, the ‘Food Board’ trend has exploded not just because it’s ‘Instagrammable,’ but because it speaks to our deep-seated need for connection and slow, mindful eating. It’s about the art of the assembly and the joy of picking exactly what you crave.
But let’s be honest: those viral grazing tables can look intimidatingly expensive. I’m here to tell you that you don’t need a designer budget or a culinary degree to create a masterpiece. By focusing on seasonal ingredients, smart grocery store swaps, and a little bit of ‘aesthetic’ styling, you can master the food board trend while keeping your wallet very happy. Let’s dive into the ultimate guide for creating beautiful, budget-friendly picnic and board experiences that will have your friends begging for your secrets.
How to make picnic sandwiches?
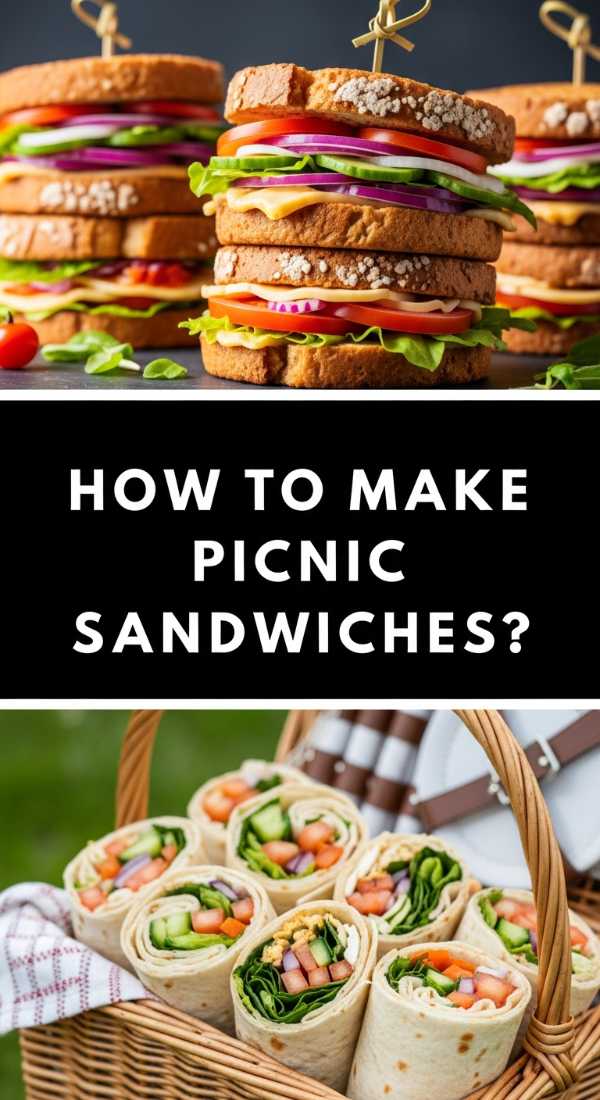
Why we love this
A well-crafted picnic sandwich is more than just lunch; it is a portable feast that holds the promise of a sunny afternoon. Imagine biting into a crusty baguette that has softened just enough from the juices of ripe heirloom tomatoes and creamy, herb-infused goat cheese. The contrast between the chewy bread, the velvety spread, and the crisp snap of fresh arugula creates a symphony of textures that feels both rustic and incredibly sophisticated. It’s the ultimate comfort food that tastes even better when enjoyed under the canopy of a sprawling oak tree.
Ingredients
- 1 large French baguette or ciabatta loaf
- 4 tbsp herbed goat cheese or cream cheese
- 2 ripe tomatoes, thinly sliced
- 1 cup fresh arugula
- 4-6 slices of prosciutto or thin-sliced deli ham
- Balsamic glaze and extra virgin olive oil
- Salt and cracked black pepper
How to make it
- Slice your bread lengthwise, but don’t cut all the way through; this creates a ‘hinge’ that keeps your fillings from sliding out during transport.
- Spread a generous, even layer of the herbed cheese on both the top and bottom interior. This acts as a moisture barrier to prevent the bread from getting soggy.
- Layer your proteins first. Fold the deli meat loosely rather than laying it flat to create volume and a better ‘mouthfeel.’
- Add the tomato slices. Pat them dry with a paper towel before adding to remove excess moisture. Season the tomatoes directly with salt and pepper to draw out their natural sweetness.
- Top with a handful of arugula. Drizzle lightly with olive oil and balsamic glaze right onto the greens.
- Wrap the entire sandwich tightly in parchment paper and tie it with kitchen twine. Let it sit for at least 30 minutes before slicing; this allows the flavors to meld and the bread to compress slightly for a perfect bite.
How to pack aesthetic snacks?
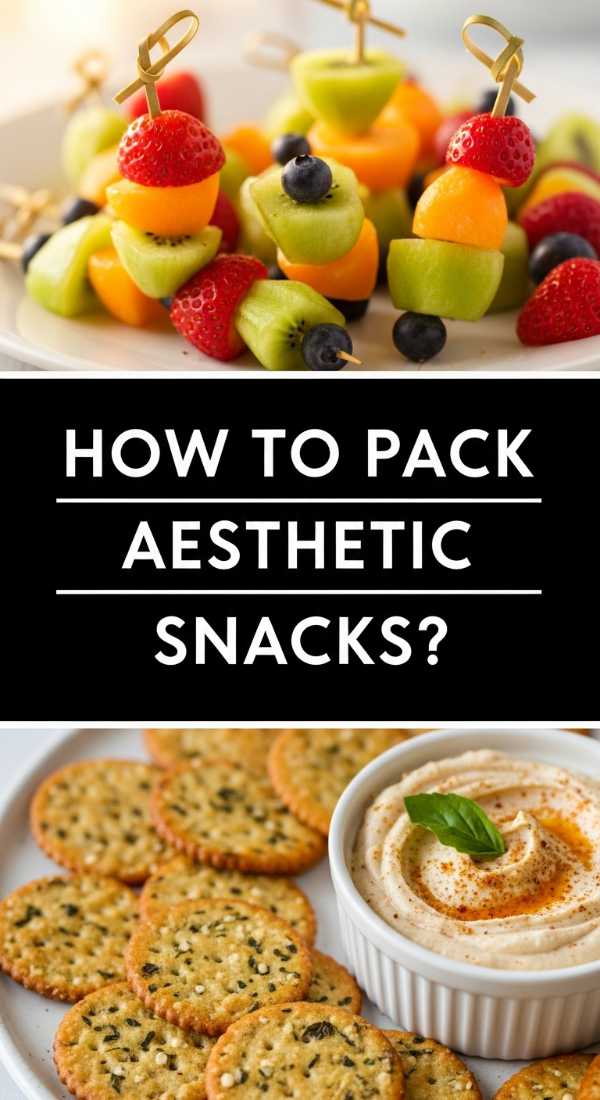
Why we love this
We eat with our eyes first, and there is a profound sense of satisfaction in opening a container to find a rainbow of organized delights. Aesthetic snacks turn a mundane midday break into a curated experience, featuring vibrant pops of color from snap peas, the earthy matte finish of almonds, and the glistening dew on fresh berries. The tactile pleasure of picking through various shapes and colors makes healthy eating feel like an indulgence rather than a chore, transforming a simple snack into a visual and culinary highlight of your day.
Ingredients
- Reusable bento boxes or glass jars
- Mini cucumbers and rainbow carrots
- Raw almonds or walnuts
- Cheddar cheese cubes
- Dried apricots or cranberries
- Hummus or tzatziki
How to make it
- Start with a color palette. Choose 3-4 colors (like green, orange, and white) to keep the look cohesive and professional.
- Prep your vegetables into uniform shapes. Slice cucumbers into thick rounds and carrots into long, elegant batons. Consistency in size is the secret to that ‘expensive’ aesthetic look.
- Use small silicone cupcake liners inside your main container to create compartments. This keeps wet items (like pickles or cheese) from touching dry items (like nuts or crackers).
- Place the heaviest and largest items at the bottom or in the corners to create a structural base.
- Fill the gaps with smaller items like dried fruits or nuts. This ‘packing’ technique prevents the food from shifting and looking messy after travel.
- Garnish with a single sprig of mint or a sprinkle of sesame seeds on the dip for that final, viral-worthy touch.
How to prepare kids picnic?
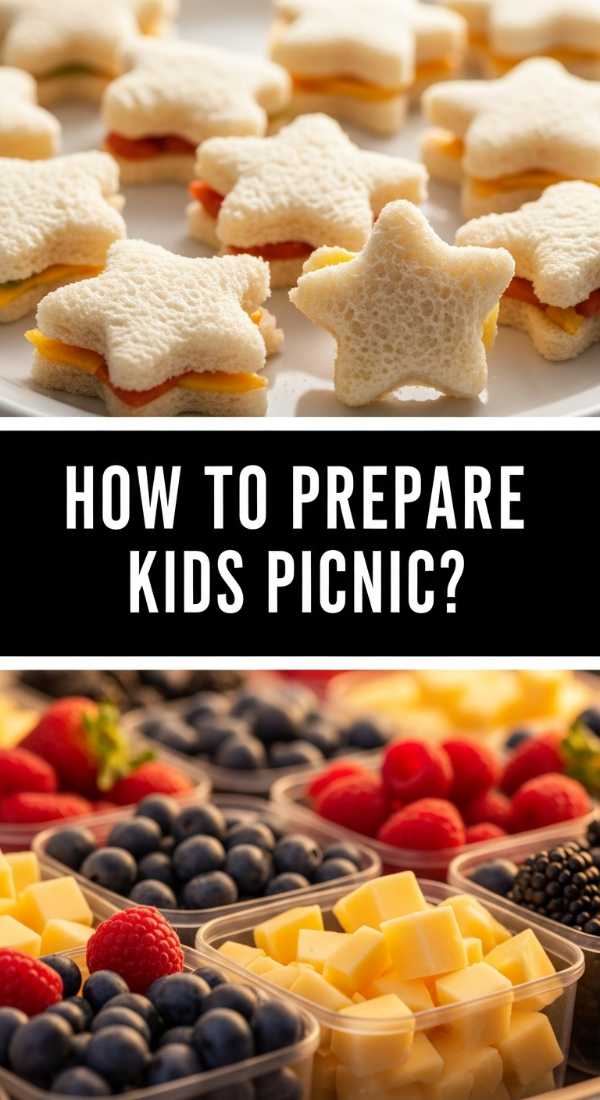
Why we love this
A kids’ picnic is all about whimsy and the magic of ‘miniature’ things. There’s a special joy in seeing little hands reach for bite-sized treats that are as fun to look at as they are to eat. The aroma of peanut butter and honey, the bright crunch of apple slices, and the playful shapes of star-cut sandwiches create an atmosphere of pure childhood wonder. It’s about making mealtime an adventure where the grass is the table and every bite is a small discovery, fostering a love for fresh food in the most delightful way possible.
Ingredients
- Whole wheat bread slices
- Peanut butter (or sunflower butter) and jam
- Apple slices and grapes (halved)
- String cheese or cheese shapes
- Small pretzels
- Yogurt tubes (frozen)
How to make it
- Use cookie cutters to punch out fun shapes from sandwiches. This reduces crust-resistance and makes the meal feel special. Press firmly to ensure clean edges.
- Prepare ‘fruit kabobs’ using blunt-edged skewers or even colorful straws. Alternate grapes and apple slices to make them visually appealing and easy to grab.
- Freeze yogurt tubes the night before. They act as edible ice packs in the lunchbox and thaw to a perfect slushy consistency by lunchtime.
- Pre-portion snacks like pretzels or popcorn into small, individual brown paper bags decorated with stickers. Kids love the ‘unboxing’ experience.
- Stick to ‘one-bite’ sizes. Small children are more likely to finish their meal if everything is easy to manage without utensils.
- Pack a damp washcloth in a zip-top bag with a slice of lemon; it’s a refreshing and ‘fancy’ way to clean up sticky hands after the picnic is over.
How to plan romantic picnics?

Why we love this
A romantic picnic is the ultimate expression of thoughtful intimacy, stripping away the noise of a crowded restaurant in favor of whispered conversations and shared glances. The sensory experience is heightened—the silkiness of a fine brie, the effervescence of a chilled sparkling cider, and the soft scent of nearby wildflowers. It’s about creating a private sanctuary in a public space, where the simple act of breaking bread together becomes a memory etched in the golden light of the setting sun. It is effortlessly elegant and deeply personal.
Ingredients
- A soft, oversized linen blanket
- Sparkling juice or a bottle of rosé
- Brie or Camembert cheese
- Fresh strawberries and dark chocolate
- A small baguette and salted butter
- Olives and cornichons
How to make it
- Choose your location wisely. Look for a spot with a view but away from high-traffic paths to ensure privacy. Timing is key—aim for the ‘golden hour’ (one hour before sunset).
- Invest in a low-profile basket or a wooden crate that can double as a flat table surface. Stability is crucial for preventing spills on uneven grass.
- Focus on ‘finger foods’ that don’t require heavy cutting. Pre-slice your baguette and have the cheese at room temperature so it’s easy to spread.
- Layer your textures. Combine the creamy brie with the sharp, salty crunch of a cornichon for a sophisticated flavor profile.
- Bring real cloth napkins and perhaps a small portable speaker for low-volume background music. These small details elevate the experience from ‘eating outside’ to a ‘date night.’
- Pack a small ‘trash bag’ inside your basket so you can clean up quickly and maintain the romantic mood without fumbling with litter.
How to make easy salads?
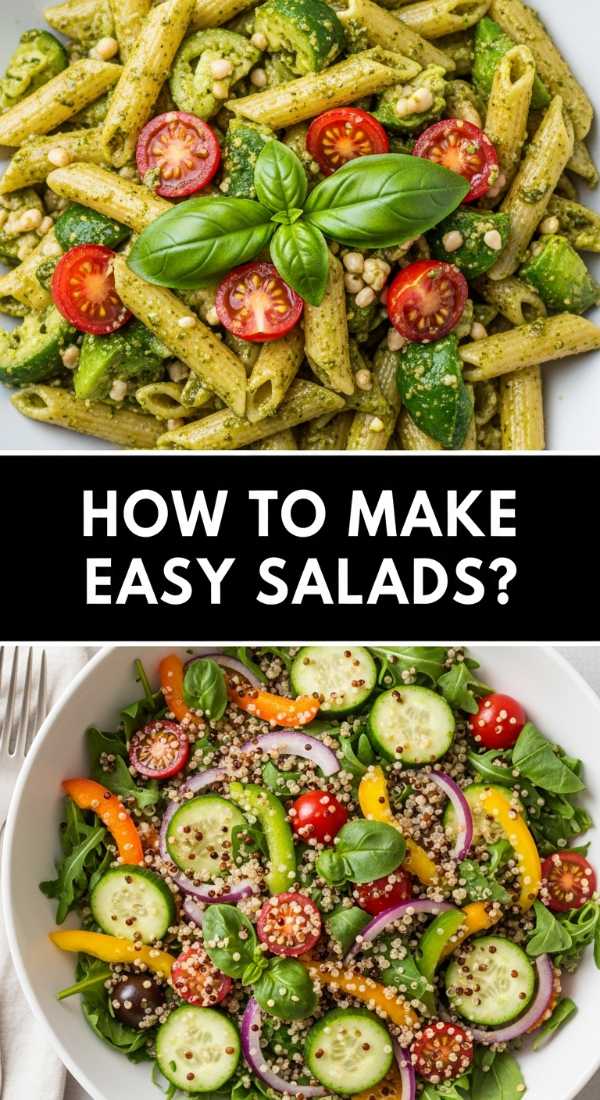
Why we love this
The perfect easy salad is a celebration of freshness and the vibrant energy of the earth. There is something so revitalizing about the crisp, cool bite of romaine lettuce paired with the juicy burst of cherry tomatoes and the zesty tang of a homemade vinaigrette. It feels light and nourishing, leaving you energized rather than weighed down. The aroma of fresh cracked pepper and the herbaceous notes of chopped parsley create a sensory experience that proves you don’t need complex ingredients to create a dish that is deeply satisfying and beautiful.
Ingredients
- 1 head of Romaine or a bag of spring mix
- 1 cup cherry tomatoes, halved
- 1 cucumber, diced
- 1/4 cup feta cheese crumbles
- 3 tbsp olive oil
- 1 tbsp lemon juice or red wine vinegar
- Salt, pepper, and dried oregano
How to make it
- The secret to a non-soggy salad is the ‘Jar Method.’ Start by pouring your dressing (oil, lemon juice, spices) into the very bottom of a large mason jar.
- Add your ‘hard’ vegetables next. Cucumbers and tomatoes can sit in the dressing without losing their texture; in fact, they lightly marinate, which enhances their flavor.
- Create a ‘buffer layer’ with items like chickpeas or feta cheese to separate the wet ingredients from the greens.
- Pack your leafy greens tightly at the very top. They should stay completely dry until you are ready to eat.
- When ready to serve, simply shake the jar vigorously to distribute the dressing, or pour it out into a bowl.
- Pro tip: Always dry your greens thoroughly after washing. Even a little bit of water on the leaves will prevent the dressing from sticking, resulting in a bland salad.
How to pack picnic fruit?
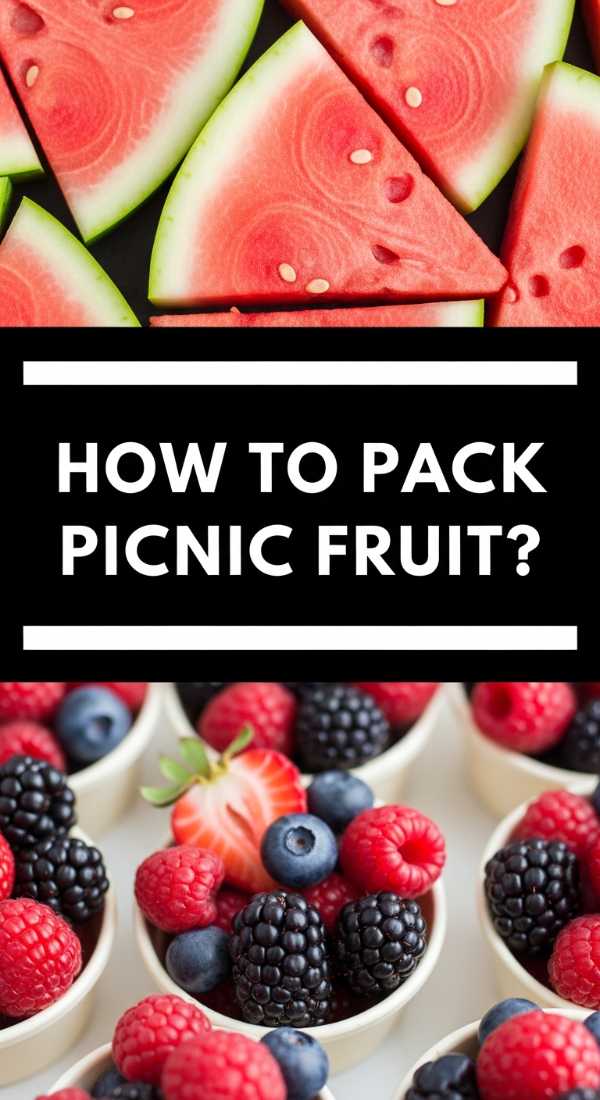
Why we love this
Fruit at a picnic is nature’s candy, offering a refreshing, hydrating burst of sweetness that balances out salty cheeses and savory meats. Picture a bowl of glistening watermelon cubes, their deep pink hue contrasting with the vibrant green of fresh mint leaves. The scent is intoxicatingly summery, and the texture—cold, crisp, and dripping with juice—is the ultimate palate cleanser. It’s a simple pleasure that feels like a luxury, providing a bright and healthy end to an outdoor meal under the sun.
Ingredients
- Watermelon, cantaloupe, or pineapple
- Fresh berries (blueberries, raspberries)
- Fresh mint leaves
- A squeeze of lime juice
- Honey or agave (optional)
How to make it
- Cut melons into uniform cubes or use a melon baller for a more ‘viral’ aesthetic look. Uniformity helps the fruit pack tighter and look more intentional.
- Toss the fruit gently with a squeeze of lime juice. The acidity prevents browning in fruits like apples and adds a bright ‘zing’ that cuts through the sugar.
- Layer sturdier fruits (like melon and pineapple) at the bottom of your container, and place delicate berries on top to prevent crushing.
- Tuck fresh mint leaves between the fruit layers. The mint will infuse the fruit with a subtle, cooling aroma during transit.
- Keep the fruit in an insulated bag with an ice pack. Fruit is significantly more refreshing and holds its structure better when kept at a cold temperature.
- Serve with a side of honey-sweetened yogurt for dipping if you want to turn a simple fruit cup into a decadent dessert.
How to cook cold pasta?
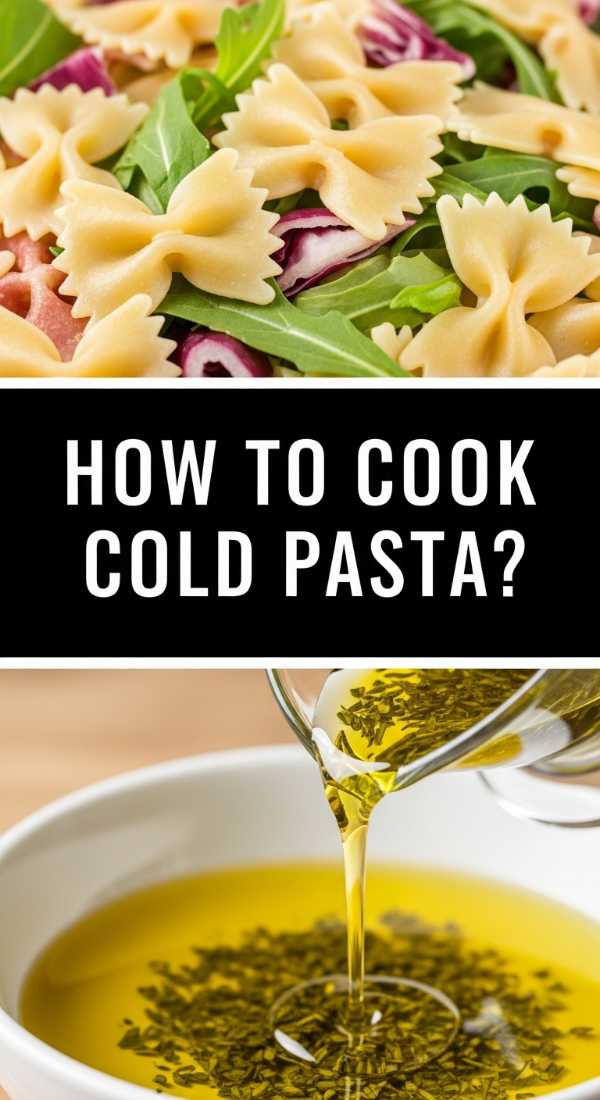
Why we love this
Cold pasta salad is the unsung hero of the picnic world, offering a hearty, satisfying base that only gets better as it sits. We love the way the rotini spirals capture little pockets of vinaigrette, ensuring every bite is a flavor explosion. The combination of al dente pasta, crunchy bell peppers, and silky pearls of fresh mozzarella creates a delightful textural contrast. It’s savory, cooling, and evokes memories of classic summer potlucks, but with a modern, gourmet twist that makes it feel entirely fresh and exciting.
Ingredients
- 1 lb Rotini or Penne pasta
- 1/2 cup Italian dressing or pesto
- 1 cup cherry tomatoes, halved
- 1/2 cup black olives, sliced
- 1/2 cup mini mozzarella pearls
- Fresh basil leaves, torn
How to make it
- Boil your pasta in heavily salted water. This is your only chance to season the pasta itself. Cook it for exactly 1 minute less than the package directions for ‘al dente.’
- Drain the pasta and immediately rinse it under cold running water. This stops the cooking process and removes excess starch, preventing the pasta from sticking together.
- While the pasta is still slightly damp, toss it with half of your dressing. The warm pasta will absorb the flavors more deeply than cold pasta.
- Let the pasta cool completely in the refrigerator before adding your vegetables and cheese. Adding them to warm pasta can wilt the veggies and make the cheese sweaty.
- Just before leaving for your picnic, add the remaining dressing and toss again. Pasta tends to ‘soak up’ liquid as it sits, so this second dose ensures it’s not dry.
- Garnish with fresh basil at the very end to keep the herb from bruising and turning black.
How to make healthy wraps?
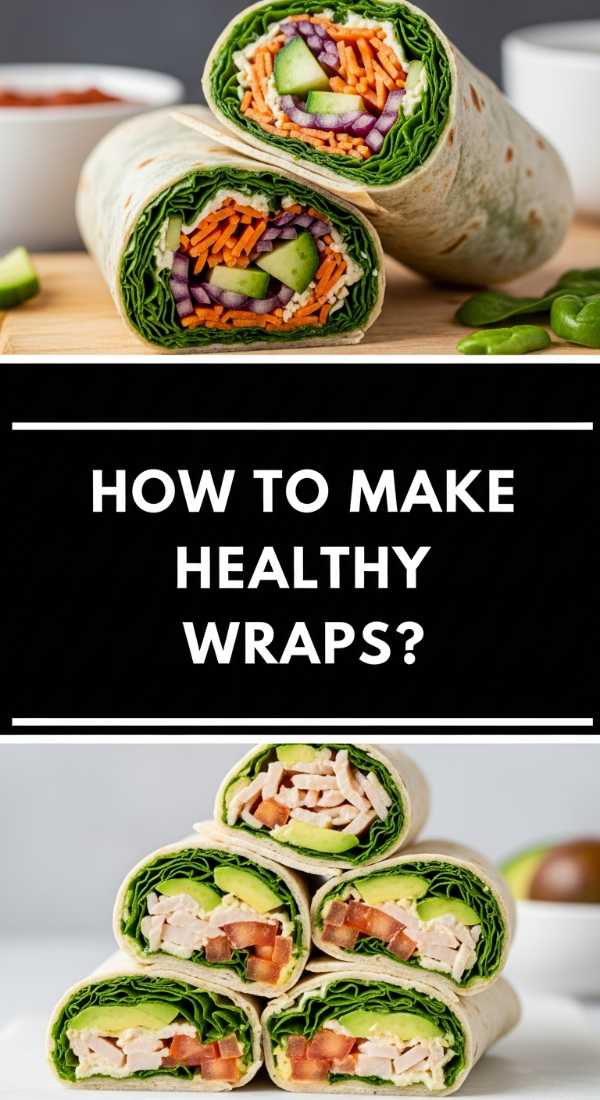
Why we love this
Healthy wraps are the ultimate ‘clean’ fuel, packing a garden’s worth of nutrients into a tidy, handheld package. There is a specific joy in the crunch of a spinach tortilla yielding to layers of creamy avocado, crisp sprouts, and lean protein. The flavor profile is bright and clean, often accented by a tangy hummus or a spicy mustard. It’s the perfect choice for those who want to feel light and mobile, providing a burst of energy without the ‘food coma’ that often follows a heavy meal.
Ingredients
- Large spinach or whole grain tortillas
- 1/2 avocado, mashed
- 2 tbsp hummus
- 1/2 cup shredded carrots and cabbage
- 4 slices of turkey breast or smoked tofu
- Handful of sprouts or microgreens
How to make it
- Warm your tortilla for 10 seconds in a dry pan or microwave. A warm tortilla is more pliable and less likely to tear during the folding process.
- Apply your ‘glue’—spread the hummus and mashed avocado in a thin layer across the entire surface, leaving about an inch border at the edges.
- Place your solid proteins in a line down the center. Layer your shredded vegetables on top of the protein.
- The Fold: Fold the left and right sides of the tortilla inward over the filling. Then, starting from the bottom, roll the tortilla tightly upward, tucking the contents in as you go.
- Slice the wrap diagonally with a sharp serrated knife. A diagonal cut looks more professional and makes the wrap easier to eat.
- Wrap tightly in foil or wax paper. This keeps the wrap compressed and holds its shape until you’re ready to take that first crunchy bite.
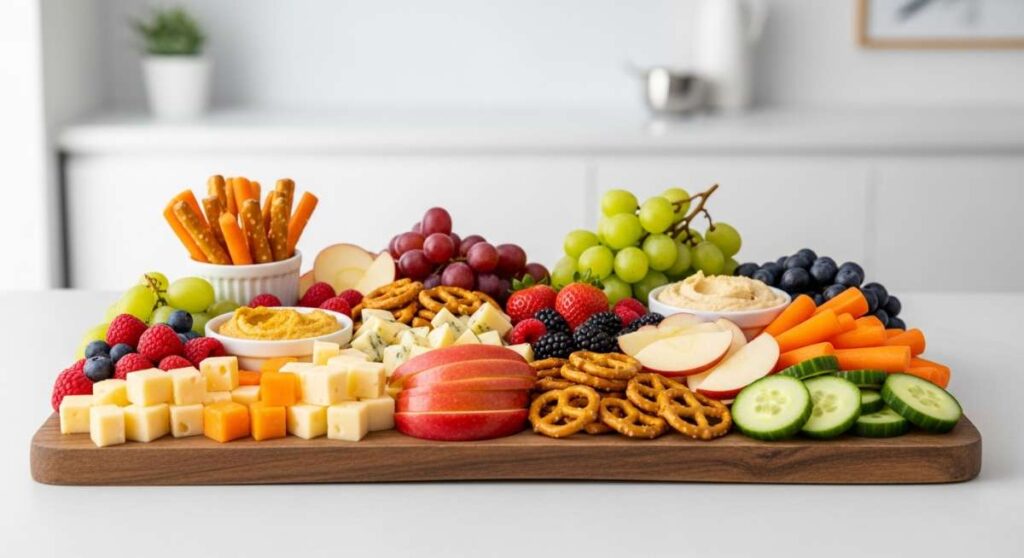
How to assemble picnic boards?

Why we love this
The picnic board is the centerpiece of the modern outdoor feast, a curated landscape of flavors that invites exploration and sharing. We love the effortless elegance of a board—the way a wedge of sharp cheddar sits next to a pile of glistening grapes, or how a swirl of salami creates a focal point among a sea of golden crackers. It’s a tactile, social way to eat that encourages guests to linger, graze, and discover new pairings. It feels like an art project you can eat, bringing a touch of luxury to even the simplest park bench.
Ingredients
- A wooden board or flat platter
- 2 types of cheese (one hard, one soft)
- 2 types of charcuterie (salami, prosciutto)
- Assorted crackers and a small baguette
- Grapes, berries, and dried apricots
- Nuts and olives for filler
How to make it
- Start with your ‘anchors.’ Place your cheeses and any small bowls (for honey or olives) on the board first. Space them out to create balance.
- Build ‘rivers’ of crackers and meat. Fold your salami into quarters or fans and tuck them tightly against the cheeses to create a sense of flow and abundance.
- Group your fruits by color. Place a cluster of dark grapes in one corner and bright red strawberries in another to draw the eye across the board.
- Fill every single gap. The secret to a professional board is ‘abundance.’ Use nuts, dried fruits, or sprigs of rosemary to fill any empty wooden spaces.
- Vary the heights. Stack some crackers vertically and leave others flat. Place a wedge of cheese on a small pedestal if possible.
- Keep it transportable: If assembling on-site, prep all components in separate containers and use a photo on your phone as a guide to rebuild your masterpiece in minutes.
How to pack beach food?
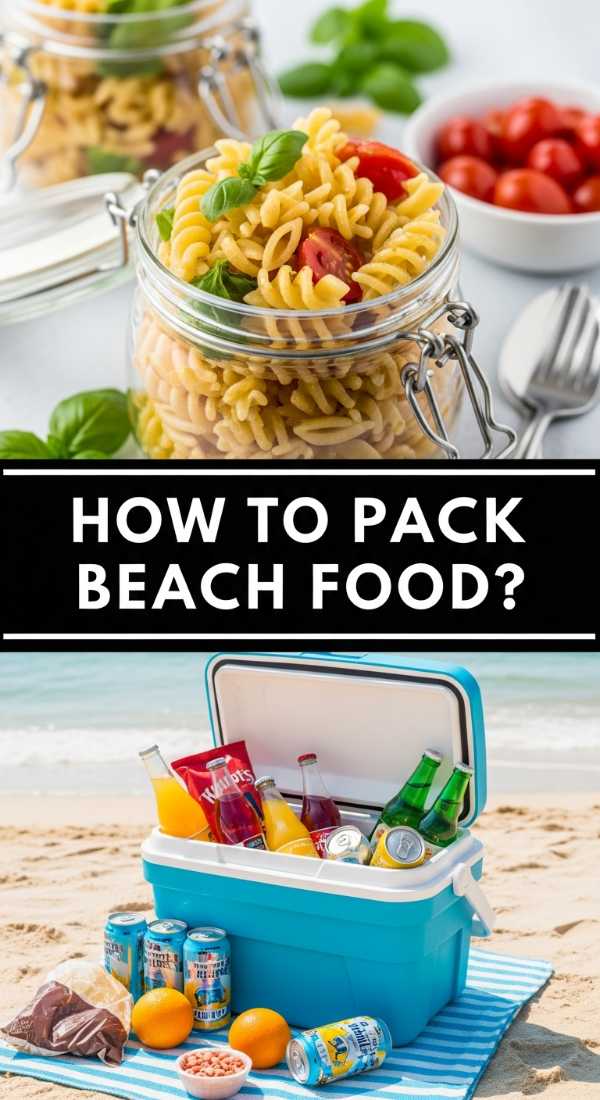
Why we love this
Beach food needs to be sand-proof, heat-resistant, and incredibly refreshing. We love the utility of a well-packed beach cooler—the sound of ice clinking, the feel of a chilled soda can against a sun-warmed palm, and the salt-tinged taste of a fresh wrap. It’s about being prepared for the elements so you can enjoy the rhythm of the waves without worrying about wilted lettuce or sandy sandwiches. It’s the ultimate fuel for a day of swimming and sun-seeking, designed for maximum ease and minimum mess.
Ingredients
- Frozen water bottles (as ice packs)
- Pre-cut fruit (grapes and melon)
- Hearty wraps (avoid soggy bread)
- Individual bags of chips or pretzels
- Salt-resistant snacks like nuts and dried fruit
- Wet wipes and a dedicated ‘sand-free’ zone
How to make it
- Use frozen water bottles instead of loose ice. As they melt, you have ice-cold drinking water, and they won’t leave a pool of ‘cooler soup’ at the bottom of your bag.
- Avoid mayonnaise-based salads or delicate cheeses that can spoil quickly in the heat. Opt for vinegar-based dressings and hard cheeses like aged gouda or cheddar.
- Pack everything in airtight, snap-top containers. Sand has a magical way of finding its way into even the smallest openings, so double-sealing is your best friend.
- Store your food in reverse order: put the items you’ll eat last at the bottom and the snacks you’ll want first right on top to minimize the time the cooler is open.
- Bring a small ‘hand-washing’ station: a bottle of fresh water and a small towel specifically for cleaning hands before touching food.
- Pro tip: Shake a little baby powder on your hands before eating; it’s the most effective way to instantly remove stubborn dry sand from your skin!
Mastering the Board: Final Thoughts
Creating a viral-worthy food board isn’t about how much you spend; it’s about the intention and love you put into the presentation. Whether you’re planning a romantic sunset date or a chaotic kids’ picnic, the principles remain the same: focus on fresh ingredients, play with textures and colors, and don’t be afraid to keep it simple. The ‘Simple Food Board’ trend is a reminder that the best meals are often the ones that are shared in the fresh air, with good company and a little bit of creative flair. So grab a blanket, head outside, and start building your own edible masterpiece today!