
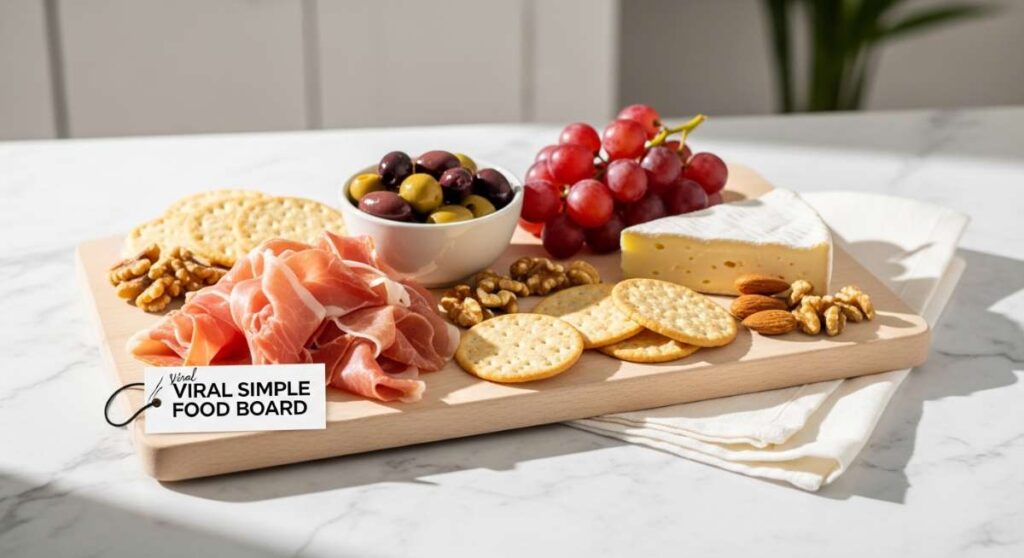
There is something inherently magical about gathering around a table filled with vibrant, bite-sized treasures. We’ve all seen those stunning food boards scrolling through our feeds, but the ‘Simple Food Board’ trend is truly about reclaiming the joy of eating without the stress of perfection. It’s that feeling of a warm summer evening, laughter echoing in the kitchen, and the effortless beauty of fresh ingredients coming together to create a feast for both the eyes and the soul.
For me, the food board isn’t just about aesthetics; it’s a love letter to the people sitting across from me. It’s about creating a relaxed environment where everyone can customize their plate, graze at their own pace, and enjoy a variety of flavors that dance together harmoniously. Whether you’re hosting a backyard bash or just want to elevate a weeknight dinner, mastering these simple board components will turn any meal into a viral-worthy memory.
How to grill juicy chicken?
Why we love this
There is nothing quite like the intoxicating aroma of herb-marinated chicken hitting a hot grill, sending plumes of savory smoke into the air. When done right, the exterior achieves a stunning, caramelized char while the interior remains incredibly tender and bursting with moisture. Each bite offers a satisfying snap from the seared skin followed by the bright, zesty notes of lemon and fresh oregano, making it the perfect protein anchor for any summer food board.
Ingredients
- 4 boneless, skinless chicken breasts
- 1/4 cup extra virgin olive oil
- 3 cloves garlic, minced
- 1 lemon, zested and juiced
- 1 tablespoon fresh oregano, chopped
- 1 teaspoon smoked paprika
- Kosher salt and cracked black pepper
How to make it
- Begin by evening out your chicken breasts. Place them between two sheets of plastic wrap and use a meat mallet or rolling pin to pound them to a uniform thickness of about 3/4 inch; this ensures even cooking across the entire piece.
- In a medium bowl, whisk together the olive oil, minced garlic, lemon juice, zest, oregano, and paprika to create a vibrant marinade.
- Submerge the chicken in the marinade, ensuring every inch is coated. Let it sit for at least 30 minutes at room temperature, or up to 4 hours in the refrigerator for deep flavor infusion.
- Preheat your grill to medium-high heat (about 400°F to 450°F). Clean the grates thoroughly and lightly oil them to prevent sticking.
- Place the chicken on the grill and cook undisturbed for 6 to 7 minutes. You are looking for those distinct, dark grill marks and a natural release from the grates.
- Flip the chicken and cook for another 5 to 6 minutes. Use an instant-read thermometer to check for a visual cue of 165°F (74°C) at the thickest part.
- Remove the chicken from the grill and let it rest on a cutting board for at least 5 to 8 minutes before slicing. This allows the juices to redistribute, ensuring a succulent bite every time.
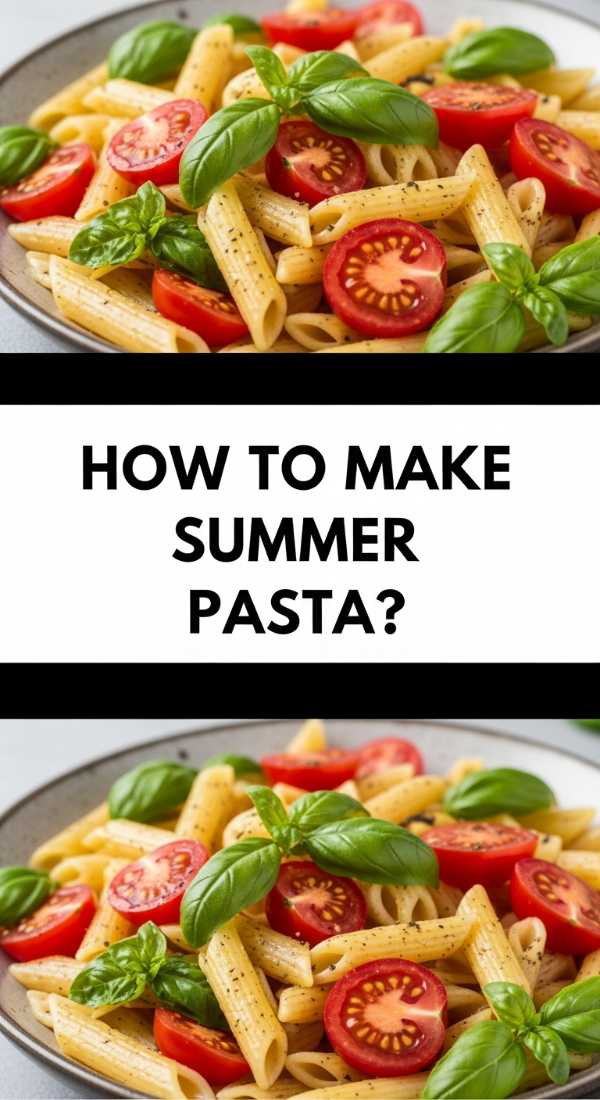
How to make summer pasta?
Why we love this
Summer pasta is the ultimate celebration of the season’s bounty, featuring colors that look like a sunset on a plate. The silkiness of the olive oil-coated noodles contrasts beautifully with the pop of blistered cherry tomatoes and the crunch of toasted pine nuts. As you toss it together, the fragrance of fresh basil fills the room, creating an experience that feels like a rustic dinner in the heart of Tuscany, light enough for a hot day yet deeply satisfying.
Ingredients
- 1 lb linguine or spaghetti
- 2 cups cherry tomatoes, halved
- 1/2 cup extra virgin olive oil
- 4 cloves garlic, thinly sliced
- 1/2 teaspoon red pepper flakes
- 1 cup fresh basil leaves, torn
- 1/2 cup grated Parmesan cheese
- Salt and pepper to taste
How to make it
- Bring a large pot of heavily salted water to a rolling boil. Cook the pasta according to the package instructions until it is just slightly under ‘al dente’—it should still have a firm bite.
- While the pasta cooks, heat the olive oil in a large skillet over medium-low heat. Add the thinly sliced garlic and red pepper flakes. Sauté gently for 2-3 minutes until the garlic is golden and fragrant, taking care not to burn it.
- Add the halved cherry tomatoes to the skillet. Increase the heat to medium and cook for about 5 minutes, stirring occasionally, until the tomatoes begin to burst and release their juices, creating a light, natural sauce.
- Reserve 1 cup of the starchy pasta water before draining the noodles.
- Add the cooked pasta directly into the skillet with the tomatoes. Toss vigorously, adding splashes of the reserved pasta water to help the sauce emulsify and coat every strand of pasta.
- Turn off the heat and fold in the fresh basil and Parmesan cheese. The residual heat will melt the cheese and wilt the basil just enough to release its oils.
- Season with plenty of black pepper and a final drizzle of high-quality olive oil before serving warm.
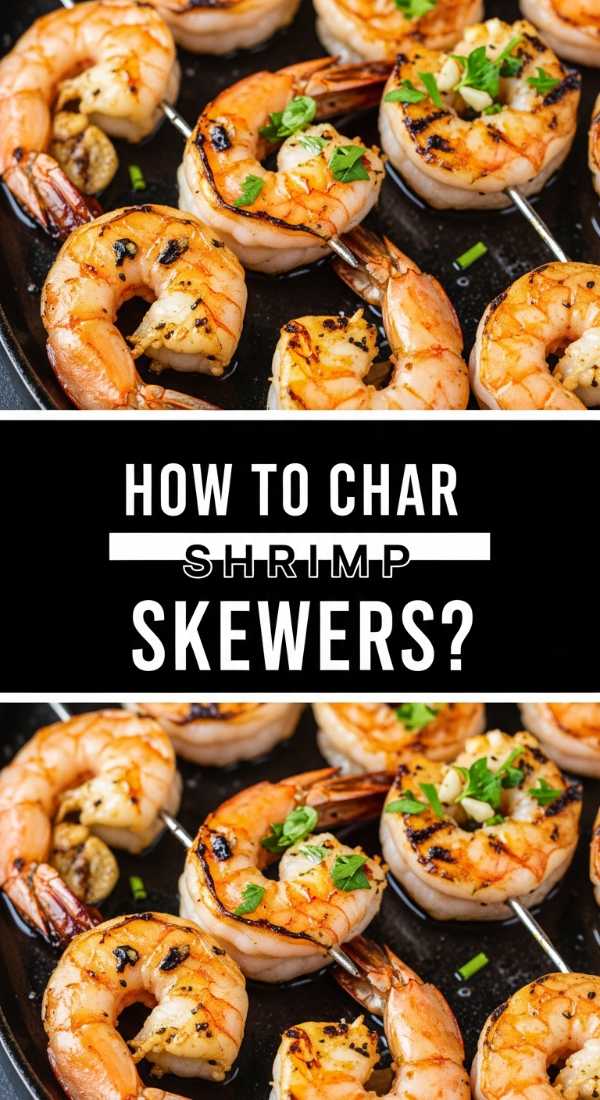
How to char shrimp skewers?

Why we love this
There’s a playful elegance to shrimp skewers that instantly upgrades any food board from simple to sophisticated. The shrimp turn a gorgeous opaque pink with charred edges that offer a slight, smoky crunch against the succulent, sweet meat inside. Infused with garlic and a hint of heat, these skewers provide a light, high-protein option that guests can easily grab and enjoy while mingling, making them the star of any social gathering.
Ingredients
- 1 lb large shrimp, peeled and deveined
- 2 tablespoons melted butter
- 1 tablespoon honey
- 1 teaspoon chili powder
- 2 cloves garlic, crushed
- Wooden or metal skewers
- Fresh parsley for garnish
How to make it
- If using wooden skewers, soak them in water for at least 30 minutes prior to use to prevent them from burning on the grill.
- In a small bowl, whisk together the melted butter, honey, chili powder, and crushed garlic to create a glossy, sweet-and-spicy glaze.
- Pat the shrimp dry with paper towels. Thread 4 to 5 shrimp onto each skewer, piercing them through the head and tail ends so they lay flat and cook evenly.
- Brush both sides of the shrimp generously with the prepared glaze and season with a pinch of salt.
- Preheat your grill or a cast-iron grill pan to high heat. You want it screaming hot to achieve a quick char without overcooking the delicate shrimp.
- Place the skewers on the heat source. Grill for 2 minutes per side. You will see the shrimp turn from translucent to a bright, opaque pink with distinct charred spots.
- Immediately remove from heat and brush with any remaining glaze. Garnish with chopped parsley and serve with lemon wedges for an extra pop of acidity.
How to assemble fish tacos?

Why we love this
Fish tacos are a masterclass in texture and balance, offering a refreshing explosion of flavors in every bite. The contrast between the warm, flaky white fish and the cold, crunchy cabbage slaw is nothing short of addictive. When topped with a creamy, lime-infused sauce and a slice of buttery avocado, it creates a handheld feast that feels like a beachside vacation, perfect for a casual yet impressive addition to your DIY food board.
Ingredients
- 1 lb white fish (cod or tilapia)
- 2 tablespoons lime juice
- 1 teaspoon cumin
- Small corn tortillas
- 2 cups shredded red cabbage
- 1/2 cup sour cream or Greek yogurt
- 1 avocado, sliced
- Fresh cilantro
How to make it
- Season the fish fillets with lime juice, cumin, salt, and pepper. Let them marinate for 15 minutes to firm up the proteins and infuse flavor.
- Cook the fish in a non-stick skillet over medium-high heat for about 3-4 minutes per side until it flakes easily with a fork. Once cooked, gently break the fillets into large, bite-sized chunks.
- Prepare the ‘crema’ by mixing the sour cream with a squeeze of lime and a pinch of salt until smooth and pourable.
- Toss the shredded cabbage with a splash of vinegar and salt to create a quick, acidic slaw that will cut through the richness of the fish.
- Warm the corn tortillas in a dry skillet for 30 seconds per side until soft and slightly charred. Keep them wrapped in a clean kitchen towel to stay pliable.
- To assemble, place a generous portion of fish in the center of a tortilla, top with a handful of cabbage slaw, a slice of avocado, and a drizzle of the lime crema.
- Finish with a sprinkle of fresh cilantro and serve immediately while the tortillas are still warm.
How to build healthy bowls?

Why we love this
The beauty of a healthy bowl lies in its infinite variety and the vibrant, nourishing energy it provides. There is something deeply grounding about a bowl filled with fluffy grains, crisp greens, and colorful roasted vegetables all tied together by a velvety dressing. It’s a sensory experience of earthy smells, crunchy textures, and bright colors that make you feel as good as the food looks, proving that healthy eating can be an art form on your board.
Ingredients
- 2 cups cooked quinoa or brown rice
- 2 cups kale or spinach, chopped
- 1 cup roasted sweet potatoes
- 1/2 cup chickpeas, rinsed
- 1/4 cup pumpkin seeds
- Tahini or lemon-tahini dressing
How to make it
- Start with a base of your choice. Use fluffy, seasoned quinoa or brown rice as the foundation, filling about one-third of the bowl.
- Add a layer of greens. Massage your kale with a tiny bit of olive oil and salt for 1 minute before adding it; this breaks down the tough fibers and makes it much more tender and palatable.
- Arrange your roasted vegetables and proteins in distinct sections on top of the greens. This ‘deconstructed’ look is what makes the bowls so visually appealing for a board.
- Add ‘crunch’ elements like pumpkin seeds or sliced almonds to provide a textural contrast to the soft grains and vegetables.
- Drizzle the dressing in a zig-zag pattern across the entire bowl. Using a creamy tahini dressing adds a rich, nutty depth that pulls the earthy components together.
- Finish with a sprinkle of sea salt and red pepper flakes for a subtle heat. Serve the bowls slightly warm or at room temperature for the best flavor profile.
How to sear perfect steak?
Why we love this
A perfectly seared steak is the crown jewel of any protein-focused food board, offering a rich, umami depth that is hard to beat. The sound of the meat hitting the hot pan is like music, followed by the intoxicating scent of browning butter and garlic. When you cut into that dark, crusty exterior to reveal a perfectly pink, succulent center, it feels like a true culinary achievement—tender enough to melt in your mouth and robust enough to satisfy the heartiest appetite.
Ingredients
- 2 thick-cut Ribeye or New York Strip steaks
- 2 tablespoons high-smoke point oil (canola or avocado)
- 3 tablespoons unsalted butter
- 4 cloves garlic, smashed
- 3 sprigs fresh rosemary or thyme
- Coarse sea salt and cracked black pepper
How to make it
- Remove the steaks from the refrigerator at least 45 minutes before cooking. Bringing the meat to room temperature is crucial for an even cook throughout.
- Pat the steaks extremely dry with paper towels. Any moisture on the surface will create steam and prevent that iconic dark crust from forming.
- Generously season all sides, including the edges, with coarse sea salt and plenty of black pepper.
- Heat a cast-iron skillet over high heat until the oil begins to shimmer and just starts to smoke.
- Carefully lay the steaks into the pan, laying them away from you to avoid oil splashes. Press down slightly to ensure maximum contact. Sear for 3-4 minutes without moving them.
- Flip the steaks. Immediately add the butter, smashed garlic, and herb sprigs to the pan.
- As the butter melts and foams, tilt the pan and use a large spoon to continuously bast the steaks with the hot, aromatic butter for another 3 minutes (for medium-rare).
- Remove the steaks to a warm plate and pour the pan juices over them. Let them rest for 10 full minutes to allow the fibers to relax before slicing against the grain.
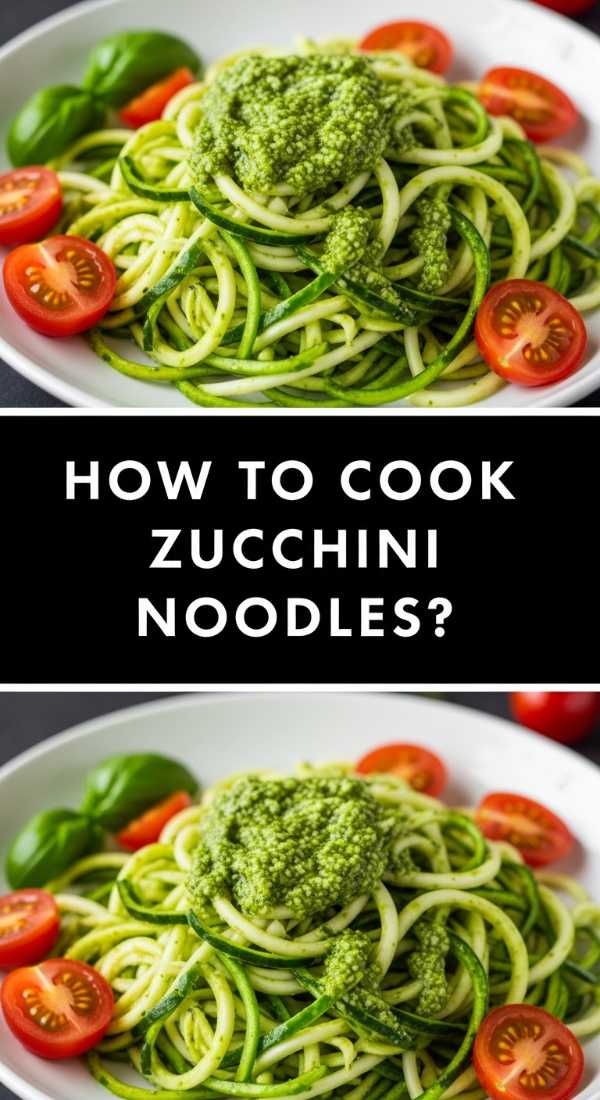
How to cook zucchini noodles?
Why we love this
Zucchini noodles, or ‘zoodles,’ are a whimsical and refreshing way to bring lightness to your food board. They possess a beautiful, bright green hue and a delicate, slightly sweet flavor that serves as a wonderful canvas for bold sauces. When cooked just right, they maintain a slight ‘al dente’ snap, offering a garden-fresh alternative to traditional pasta that leaves you feeling energized and light, making them a favorite for health-conscious hosting.
Ingredients
- 3 large zucchini, spiralized
- 1 tablespoon olive oil
- 1 teaspoon salt (for sweating)
- 2 cloves garlic, minced
- Lemon wedges
- Red pepper flakes
How to make it
- After spiralizing the zucchini, place the noodles in a colander and sprinkle with 1 teaspoon of salt. Let them sit for 15-20 minutes. This ‘sweating’ process draws out excess water, which prevents soggy noodles.
- Gently squeeze the noodles with a clean kitchen towel or paper towels to remove as much moisture as possible.
- Heat the olive oil in a large skillet over medium-high heat. Add the minced garlic and sauté for 30 seconds until fragrant but not browned.
- Add the zucchini noodles to the skillet. Use tongs to toss them constantly. Cook for only 2 to 3 minutes maximum. Overcooking is the enemy of the zoodle; you want them warm but still firm.
- Immediately remove the skillet from the heat to stop the cooking process.
- Season with a squeeze of fresh lemon juice and red pepper flakes to brighten the flavor.
- Serve immediately on your board, perhaps topped with a dollop of pesto or a sprinkle of nutritional yeast for a cheesy flavor without the dairy.
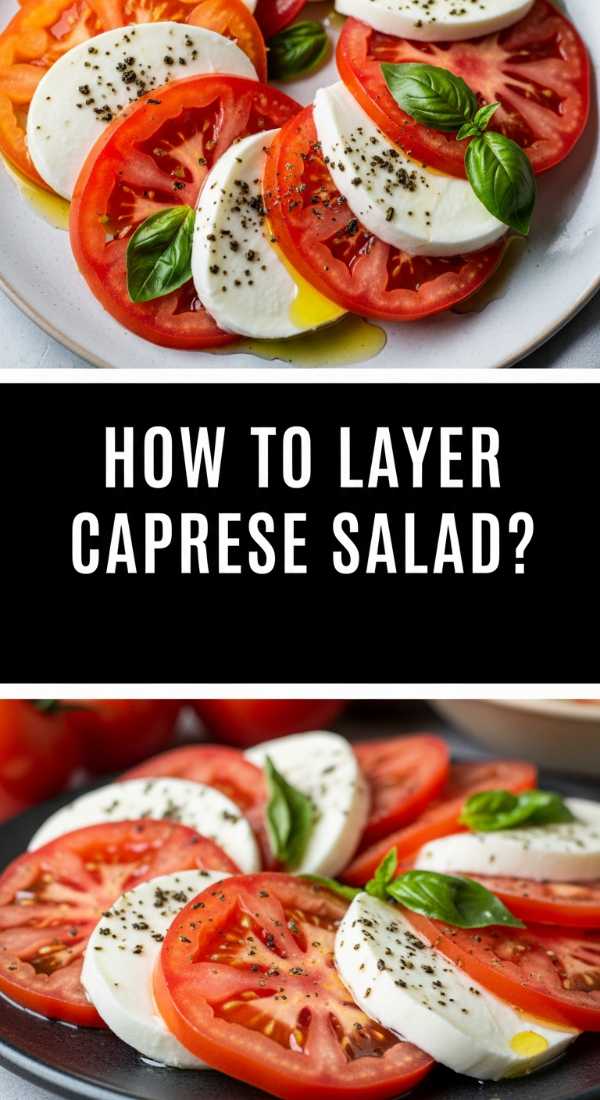
How to layer caprese salad?
Why we love this
The Caprese salad is a timeless masterpiece of simplicity, where the quality of the ingredients truly shines. The sight of alternating ruby-red tomato slices and snowy-white mozzarella rounds is instantly recognizable and always inviting. Every bite is a perfect harmony of creamy, acidic, and herbaceous notes, finished with the rich, syrupy sweetness of a balsamic glaze that ties the whole garden-fresh experience together in a way that feels effortlessly chic.
Ingredients
- 3 large heirloom tomatoes, sliced
- 1 lb fresh buffalo mozzarella, sliced
- 1 bunch fresh large basil leaves
- Extra virgin olive oil
- Balsamic glaze
- Flaky sea salt
How to make it
- Select tomatoes of varying colors—yellow, purple, and red—to create a visually stunning ‘viral’ look for your board. Slice them into 1/2 inch thick rounds.
- Slice your fresh mozzarella to match the thickness of the tomatoes. If using buffalo mozzarella, handle it gently as it is much softer and creamier.
- On a platter or directly on your food board, create a shingled pattern by alternating a tomato slice, a mozzarella slice, and a large, whole basil leaf.
- Repeat this pattern until you have a beautiful, rhythmic line or circle of ingredients.
- Just before serving, drizzle the entire arrangement with your best quality extra virgin olive oil. The oil should be green and fragrant.
- Apply the balsamic glaze in a decorative drizzle. You can do a grid pattern or free-form swirls for a professional touch.
- Finish with a generous sprinkle of flaky sea salt and freshly cracked black pepper. The salt is essential to drawing out the sweetness of the tomatoes.
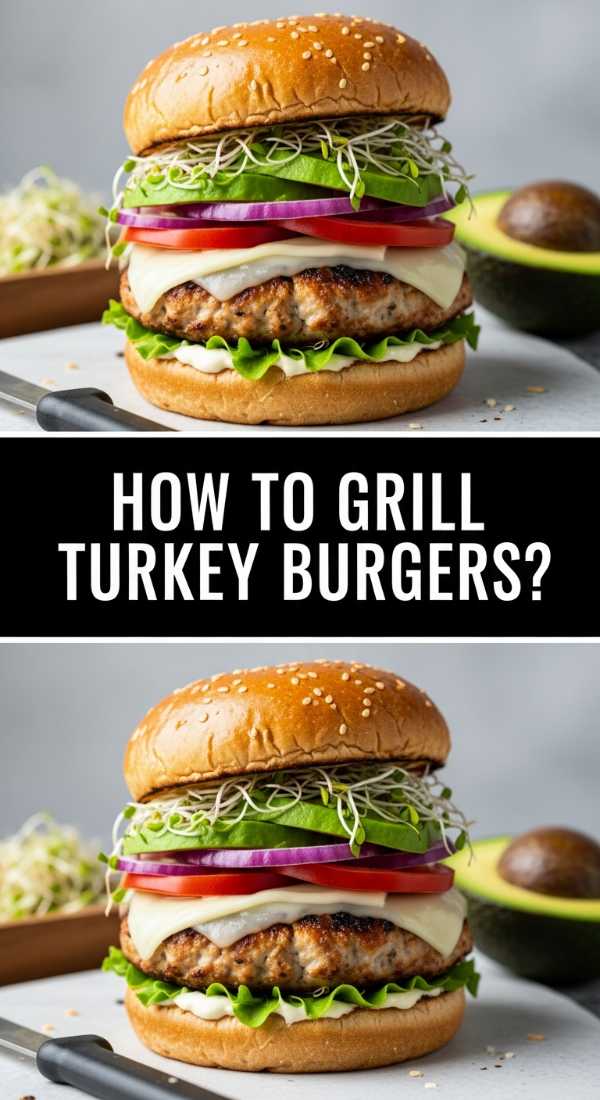
How to grill turkey burgers?

Why we love this
Turkey burgers are often misunderstood, but when prepared with care, they are incredibly flavorful, juicy, and a fantastic lighter alternative to beef. There is a subtle, savory sweetness to grilled turkey that pairs exceptionally well with tangy toppings like goat cheese or pickled onions. Seeing those golden-brown patties on a board, topped with melted cheese and crisp lettuce, promises a satisfying meal that feels indulgent yet clean, perfect for a balanced food spread.
Ingredients
- 1 lb lean ground turkey
- 1/4 cup finely chopped red onion
- 2 tablespoons Worcestershire sauce
- 1/4 cup crumbled feta cheese (optional, for moisture)
- 1 teaspoon garlic powder
- Salt and pepper
How to make it
- In a large bowl, combine the ground turkey, chopped onion, Worcestershire sauce, garlic powder, salt, pepper, and feta cheese. The feta is a secret tip—it creates pockets of moisture that prevent the lean turkey from drying out.
- Mix the ingredients with your hands until just combined. Do not overwork the meat, as this results in a dense, tough burger.
- Divide the mixture into 4 equal portions and form them into patties about 1-inch thick. Use your thumb to make a slight indentation in the center of each patty; this prevents them from puffing up into balls on the grill.
- Lightly brush the patties with oil. Preheat your grill to medium heat (around 375°F).
- Place the patties on the grill and cook for 5 to 6 minutes per side. Unlike beef, turkey must be cooked through, but you want to avoid charring it to a crisp.
- Check the internal temperature with a thermometer; it should reach exactly 165°F (74°C).
- Let the burgers rest for 2-3 minutes before placing them on toasted buns with your favorite toppings to ensure the juices stay within the patty.
How to roast summer corn?
[IMAGE_10]
Why we love this
Roasted summer corn is the quintessential taste of sunshine, bringing a charred, smoky sweetness that is absolutely irresistible. There is a tactile joy in holding a warm cob, seeing the golden kernels slightly blackened from the flame, and smelling the buttery, savory aroma. It adds a rustic, ‘farm-to-table’ vibe to any food board, especially when dressed with lime and spices, making it a nostalgic favorite that appeals to both kids and adults alike.
Ingredients
- 4 ears of fresh sweet corn, husked
- 2 tablespoons melted butter
- 1 teaspoon smoked paprika
- 1/4 cup crumbled cotija cheese
- Fresh cilantro, chopped
- Lime wedges
How to make it
- Begin by removing the husks and all of the silky threads from the corn. Rinse the ears and pat them dry.
- Brush each ear of corn generously with melted butter and season with a pinch of salt and smoked paprika.
- Preheat your grill or oven broiler to high heat. For a board, the grill provides the best visual ‘char’ marks.
- Place the corn directly onto the grill grates. Cook for about 10-12 minutes, turning the ears every 2 minutes. You want the kernels to turn a deep golden yellow with patches of dark brown char.
- Once cooked, remove the corn and immediately roll it in additional butter if desired.
- For a ‘street corn’ style, sprinkle the crumbled cotija cheese and chopped cilantro over the hot cobs so the cheese adheres to the surface.
- Serve on your board with lime wedges on the side, allowing guests to squeeze fresh juice over the corn just before eating for a bright, acidic finish.
The Art of the Simple Board
Mastering the simple food board trend is all about embracing high-quality ingredients and straightforward techniques to create a shared experience that is as beautiful as it is delicious. By focusing on these ten versatile components, you can mix and match to create a unique spread every time you host. Remember, the best boards are the ones that encourage people to slow down, try new things, and enjoy the simple pleasure of a meal made with love. Happy boarding!