
How to Curate a Pinterest-Perfect Home on a Budget
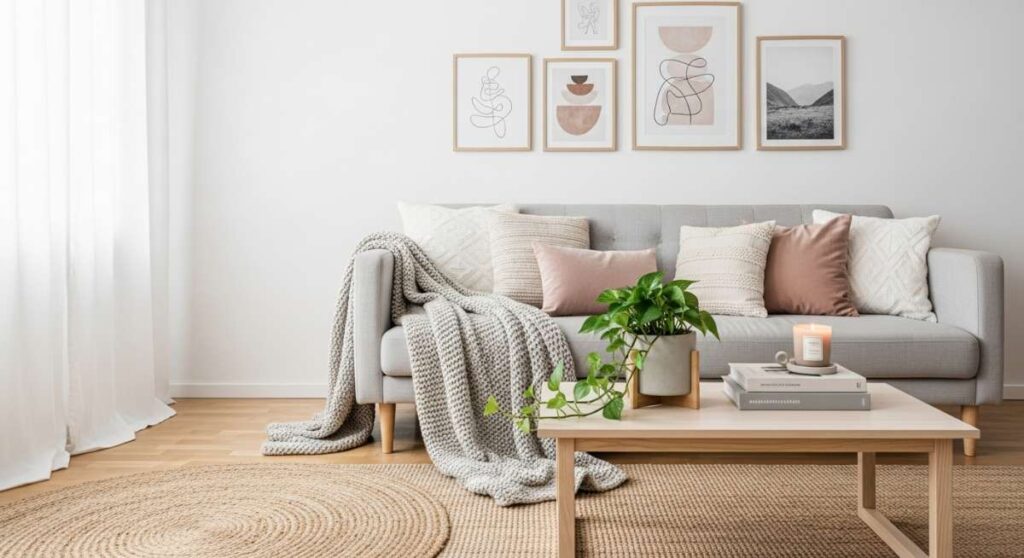
We’ve all been there: scrolling through an endless feed of ethereal sun-drenched living rooms and perfectly styled garden nooks, wondering how on earth someone can live in a space that looks like a literal dream. For the longest time, I thought that kind of aesthetic was reserved for those with a professional design team and a bottomless bank account. But here’s the secret I learned after years of DIY trials and errors: a Pinterest-worthy lifestyle isn’t about the price tag; it’s about the intention and the texture you bring into your daily rituals.
Creating a home that feels like a sanctuary is really about curating moments of joy. Whether it’s the way the morning light hits your balcony plants or the specific fragrance of a slow-burning candle in your ‘midnight oasis,’ these details are what transform a standard living space into a viral-worthy lifestyle board. It’s time to stop waiting for your ‘forever home’ and start romanticizing the space you have right now with these accessible, high-impact transformations.
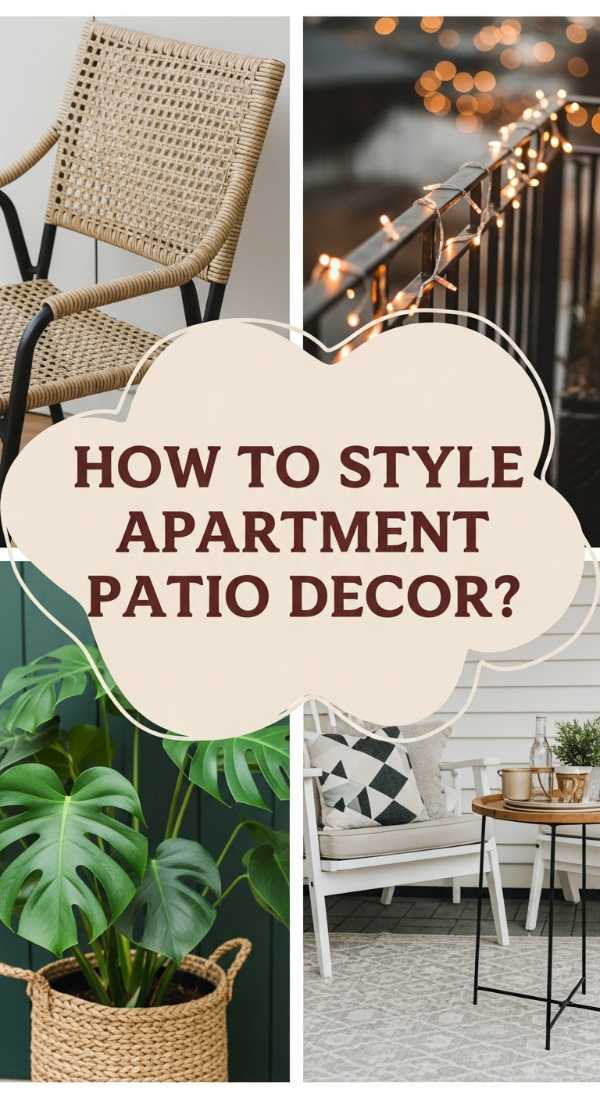
How to Create a Lush Balcony Garden for Serene Morning Coffee
Why we love this
There is nothing quite like the sensory symphony of a private garden nestled right outside your door. Imagine stepping out onto cool, weathered wood or soft outdoor rugs while the scent of damp earth and blooming jasmine fills the air. The gentle rustle of fern leaves and the vibrant pops of green create a living wall that buffers the noise of the outside world, making your morning coffee ritual feel like a meditative escape. It’s the perfect blend of organic textures and serene stillness that resets your nervous system before the day even begins.
Essential Elements:
- Tiered wooden plant stands
- A mix of trailing ivy and structural ferns
- Weather-resistant bistro set
- Outdoor string lights (Edison bulbs)
- Ceramic pots in earthy, neutral tones
How to make it
- Measure your balcony floor space and vertical clearance to ensure you don’t overcrowd the walkway; leave at least a 24-inch path for movement.
- Install vertical shelving or a wooden trellis against the main wall to maximize greenery without sacrificing floor space; use heavy-duty zip ties or brackets to secure it against wind.
- Select a variety of plants with different leaf textures and heights—pair tall, spiky snake plants with soft, overflowing Boston ferns for a layered, professional look.
- Layer your flooring by placing a durable jute or polypropylene rug down first, then positioning your bistro table and chairs on top to create a defined ‘zone.’
- Incorporate ‘living’ lighting by weaving solar-powered fairy lights through your taller plants and hanging larger Edison bulbs along the railing for a warm, amber glow at dusk.
How to Style a Cozy Nomad Haven for the Perfect Road Trip

Why we love this
This aesthetic is all about the romance of the open road and the tactile comfort of a home that moves with you. It’s the feeling of thick, chunky knit wool against your skin as the sun dips below the horizon, and the smell of cedar wood and aged leather filling the cabin. By layering rich textures and warm, sunset hues, you turn a functional vehicle into a soulful sanctuary that feels both rugged and incredibly luxurious. It’s about creating a soft place to land after a day of dusty trails and mountain peaks.
Essential Elements:
- Faux sheepskin rugs and wool throw blankets
- Battery-operated copper wire lights
- A collection of vintage-inspired kilim pillows
- Small wooden crate for a makeshift coffee table
- Enamel mugs and a French press
How to make it
- Start by clearing your vehicle’s cargo area and laying down a high-density foam mattress or thick sleeping pads to create a level, cushioned base.
- Layer your bedding starting with a fitted sheet, followed by a heavy wool duvet and at least three layers of textured throws in varying shades of cream, rust, and mustard.
- Group your pillows by size, placing the largest ‘Euro’ shams in the back and smaller, patterned accent pillows in the front to create a deep, inviting ‘nest’ effect.
- String warm-toned LED fairy lights along the interior ceiling using small adhesive clips, ensuring the wires are tucked away so they don’t catch on gear.
- Set up a ‘hospitality station’ in a corner using a sturdy wooden crate; stack your enamel mugs and French press here to keep the space organized and visually charming.
How to Personalize a Graduation Masterpiece for a Memorable Walk

Why we love this
This is more than just a craft; it is a visual celebration of a massive milestone, rendered in glitter, silk, and heartfelt memories. We love the way the light catches on iridescent crystals and the smooth, satin finish of hand-placed ribbons as you walk across the stage. It’s a tactile representation of your journey—the rough edges of hard work smoothed over by the elegance of achievement. Holding this piece feels like holding a physical manifestation of your pride and the bright, shimmering future that lies just ahead.
Essential Elements:
- Flat graduation cap (mortarboard)
- Heavy-weight cardstock (scrapbook paper)
- E6000 industrial adhesive
- Assorted flat-back pearls and crystals
- Silk artificial flowers
How to make it
- Trace the outline of your cap onto a piece of high-quality cardstock and cut it out, including a small hole in the center for the tassel button; this protects the fabric and provides a sturdy base.
- Plan your layout on the cardstock before gluing anything; start with your largest elements, like silk peonies or cardstock letters, to establish the focal point.
- Apply a thin layer of E6000 adhesive to the back of your cardstock and press it firmly onto the cap, letting it cure for at least 30 minutes under a heavy book.
- Use fine-tipped tweezers to place smaller rhinestones or pearls in the gaps between flowers, creating a ‘gradient’ effect that sparkles from the center outward.
- Seal any loose glitter elements with a light mist of clear acrylic spray to ensure no debris falls on your gown during the ceremony.
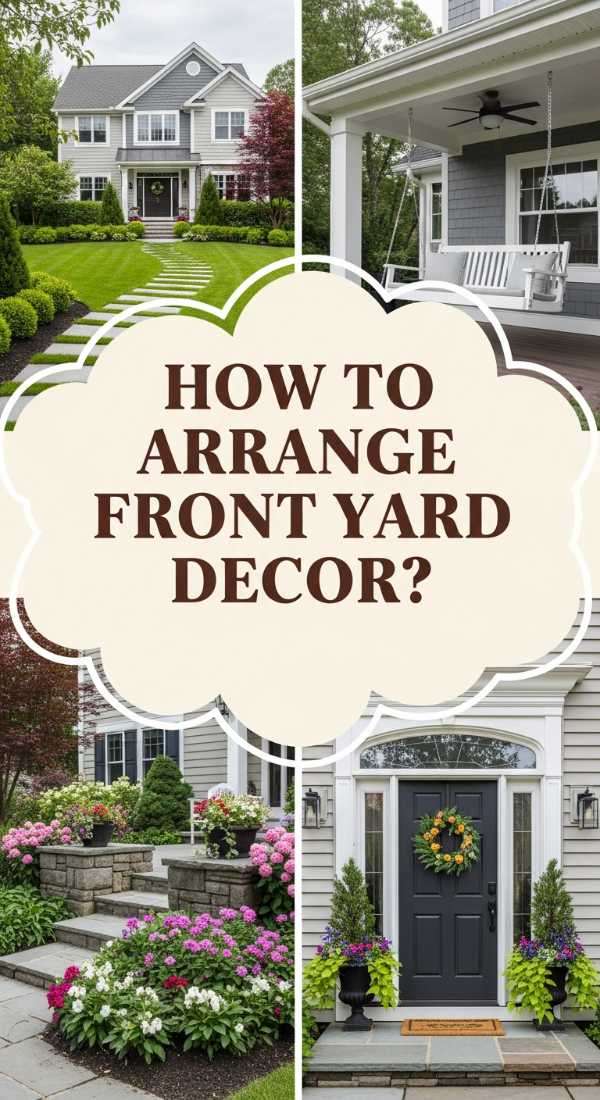
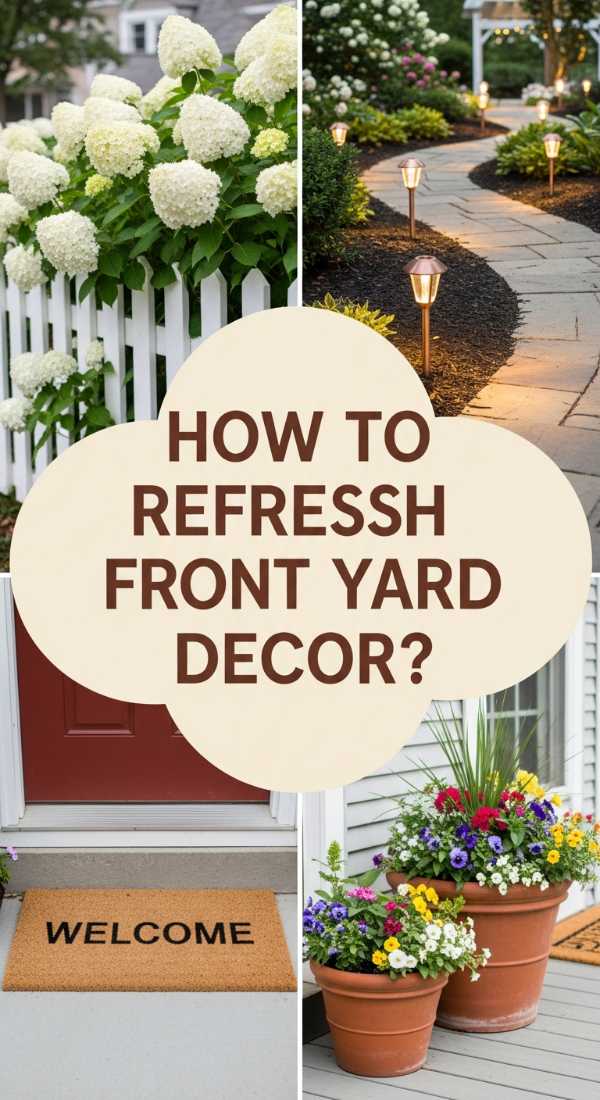
How to Enhance Your Curb Appeal for an Everlasting First Impression
Why we love this
The entrance to your home should feel like a warm hug before you even step inside. We love the crisp contrast of a freshly painted door against the soft, organic shapes of manicured boxwoods and the sweet, nostalgic scent of blooming hydrangea. There’s a certain satisfaction in the symmetry of polished brass hardware and the rhythmic click of heels on a clean stone path. It’s about creating a visual narrative that says ‘welcome home’ with every detail, from the texture of the doormat to the glow of the porch light.
Essential Elements:
- Modern oversized house numbers
- Symmetrical oversized planters
- A high-quality coir doormat
- Updated matte black or brass hardware
- Year-round evergreen shrubs
How to make it
- Power wash your front walkway and porch to remove years of grime; a clean slate is the most important foundation for any curb appeal project.
- Paint your front door in a bold yet sophisticated hue like navy, sage, or charcoal, using a high-quality exterior enamel for a smooth, weather-resistant finish.
- Flank the door with two identical, large-scale planters; fill them with ‘thrillers’ (tall grass), ‘fillers’ (mounded flowers), and ‘spillers’ (vines) for a professional florist look.
- Replace outdated, small house numbers with 5-inch or 6-inch modern floating numbers, ensuring they are perfectly level and visible from the street.
- Swap out your old porch light fixture for a larger, lantern-style piece that matches your new door hardware, creating a cohesive and high-end aesthetic.
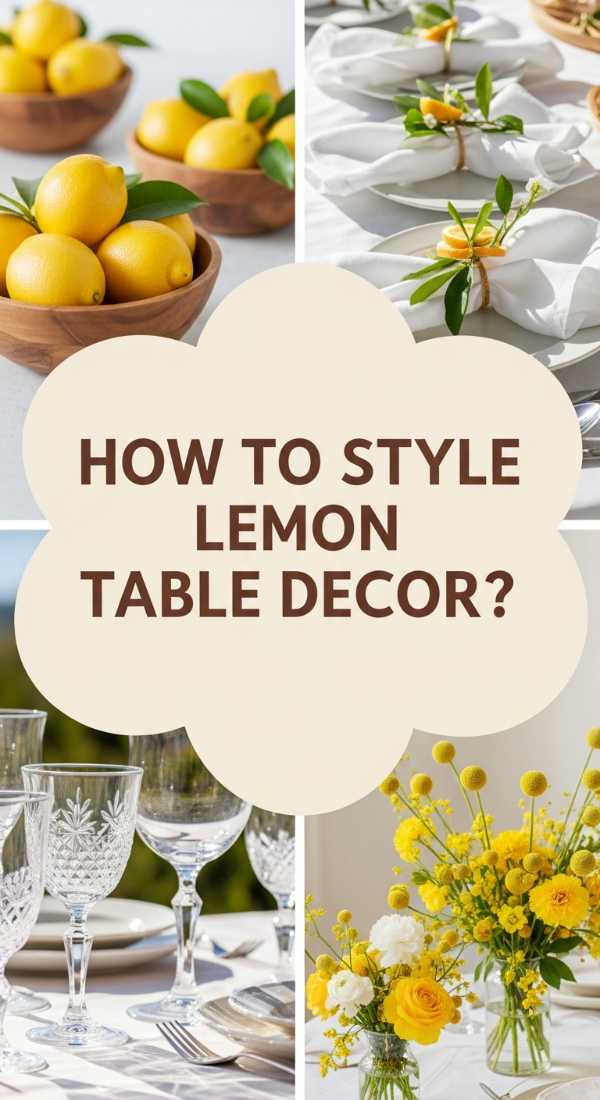
How to Arrange a Zesty Citrus Landscape for Sun-Drenched Brunch Parties
Why we love this
This setup is an absolute explosion of Mediterranean joy and vibrant energy. The sharp, refreshing aroma of sliced lemons and oranges mingles with the earthy scent of fresh rosemary sprigs, creating an atmosphere that feels like a permanent summer afternoon. We love the visual feast of bright yellows and deep greens set against crisp white linens; it’s a tactile experience where the condensation on a chilled pitcher feels as refreshing as the citrus aesthetic looks. It’s the ultimate way to bring sunshine to the table.
Essential Elements:
- Fresh lemons, limes, and grapefruits
- Eucalyptus or olive branch runners
- White linen tablecloth
- Clear glass carafes and bowls
- Taper candles in pale yellow
How to make it
- Lay a base of ironed white linen; the crispness of the fabric will make the vibrant colors of the fruit pop significantly more than a patterned cloth.
- Create a ‘living runner’ by weaving olive branches or eucalyptus down the center of the table, leaving space for plates and glassware.
- Nestle whole citrus fruits into the greenery; for added visual interest, slice a few fruits in half to reveal their juicy, geometric interiors and place them face up.
- Fill clear glass bowls with water and add sliced lemons and floating white tea lights to create a shimmering, aromatic centerpiece.
- Finish the look by placing individual sprigs of rosemary on each folded napkin, secured with a simple piece of twine for a rustic, artisanal touch.
How to Design a Midnight Oasis for Dreamy Starlit Gatherings

Why we love this
There is something deeply magical about a space designed specifically for the hours after dark. We love the way velvet cushions swallow the light, and the way the air feels cooler and more intimate under a canopy of twinkling stars. The soft crackle of a fire pit and the gentle clinking of glassware create a soundtrack for deep conversations. It’s a sensory-rich environment where the textures are soft, the lighting is amber, and the world feels small, private, and infinitely cozy.
Essential Elements:
- Outdoor floor cushions and poufs
- Low-profile fire pit or tabletop brazier
- Multiple strands of warm-toned globe lights
- Heavy knit throws for chilly nights
- Glass hurricanes with pillar candles
How to make it
- Define the ‘gathering circle’ by placing a large outdoor rug in a dark, cleared area of your yard or patio.
- Arrange low seating options like oversized weather-proof velvet cushions and wicker poufs around a central fire element to encourage a relaxed, communal vibe.
- Hang globe string lights in a ‘zig-zag’ pattern overhead, ensuring they are high enough to clear heads but low enough to create an intimate ‘ceiling’ effect.
- Group glass hurricanes of varying heights in the corners of the space; use real wax pillar candles for a flicker that mimics the stars above.
- Provide a ‘basket of warmth’ near the seating area filled with rolled-up fleece or wool blankets so guests can stay comfortable as the temperature drops.
How to Bake Artistic Commemorative Treats for Your Proudest Celebration

Why we love this
Baking is the ultimate labor of love, and there is nothing quite as satisfying as a treat that looks like a work of art. We love the silky smooth texture of Swiss meringue buttercream and the way a dusting of edible gold leaf catches the light. The scent of warm vanilla and toasted sugar wafting through the kitchen is a celebration in itself. These treats don’t just taste incredible; they serve as a beautiful, edible centerpiece that honors a special moment with every intricate detail and delicate crumb.
Essential Elements:
- High-quality vanilla bean paste
- Edible dried flowers or gold leaf
- Gel food coloring for pastel hues
- A set of varied piping tips
- Acrylic cake toppers or custom stamps
How to make it
- Bake your base (cookies or cake) a day in advance; chilling the sponge or dough makes it much easier to handle and prevents crumbs from ruining your frosting.
- Prepare a batch of Swiss meringue buttercream, whipping it until it is glossy and stiff enough to hold intricate shapes without drooping.
- Use a small offset spatula to apply a ‘crumb coat’—a thin layer of frosting that seals in the moisture—then chill for 20 minutes before applying the final, smooth layer.
- Apply edible dried flowers using sterilized tweezers, pressing them gently into the frosting in a ‘meadow’ pattern for an organic, Pinterest-style look.
- For a final touch of luxury, use a dry brush to apply tiny flakes of gold leaf to the edges of your piping or the centers of your floral arrangements.
How to Transform a Small Concrete Square for Ultimate Outdoor Zen
![]()
Why we love this
Small spaces often have the most potential for deep tranquility. We love the transformation of cold, hard concrete into a warm, rhythmic sanctuary through the use of wood, stone, and water. The sound of a small trickling fountain can mask city noise, while the feel of smooth river stones underfoot provides a grounding, spa-like experience. It’s a lesson in minimalism and intentionality—proving that you don’t need an acre of land to find your center and breathe in the fresh air.
Essential Elements:
- Interlocking wooden deck tiles
- Polished black river stones
- A small, recirculating bamboo fountain
- A single comfortable lounge chair or hammock
- Potted bamboo or tall grasses
How to make it
- Thoroughly clean the concrete surface and lay down interlocking acacia wood tiles; these snap together easily and instantly warm up the visual temperature of the space.
- Leave a 3-inch gap between the edge of the wooden tiles and the wall; fill this border with polished river stones to create a professional ‘landscaped’ drainage look.
- Place a small plug-in bamboo fountain in the corner; the sound of moving water is essential for creating an auditory ‘zen’ barrier.
- Select one high-quality, comfortable piece of furniture rather than several small ones to avoid cluttering the visual field and maintain a sense of openness.
- Position tall, slender plants like clumping bamboo in narrow rectangular planters to provide privacy and movement without taking up valuable floor real estate.
How to Curate a Retro Glamping Suite for High-End Wilderness Living

Why we love this
Retro glamping is where nostalgia meets high-end comfort. We love the juxtaposition of a rugged canvas tent with the refined elegance of mid-century modern furniture and vintage textiles. It’s the smell of old books and campfire coffee paired with the luxury of high-thread-count sheets. The vibrant colors of a 1970s-inspired palette—think avocado green and burnt orange—bring a playful, curated energy to the great outdoors, making your camping trip feel like a boutique hotel stay.
Essential Elements:
- Bell tent or vintage-style canvas wall tent
- Woven rattan furniture and side tables
- Vintage lanterns and brass accents
- Bold, geometric patterned rugs
- Portable record player and vinyl
How to make it
- Pitch your canvas bell tent on a flat, well-drained surface and use an oversized outdoor rug as a ‘sub-floor’ to keep the interior clean and insulated.
- Incorporate a real bed frame if possible, or use a high-profile air mattress hidden by a floor-length linen bed skirt to elevate the sleeping area.
- Decorate with ‘found’ objects like brass candlesticks, vintage national park posters, and wooden crates used as nightstands to lean into the retro aesthetic.
- Set the mood with a battery-operated vintage-style lantern and a portable record player; the tactile experience of vinyl is perfect for the slow-living glamping vibe.
- Hang a tiered macramé plant hanger from the center pole of the tent to bring a touch of indoor greenery and 70s flair to the wild.
How to Cultivate a Welcoming Floral Pathway for a Charming Home Entrance
Why we love this
A floral pathway is a living invitation that guides you home. We love the way the colors shift with the seasons, from the soft pastels of spring tulips to the deep, moody purples of autumn salvia. Walking through a path of blooms is a multi-sensory delight; the soft petals may brush against your ankles, while the humming of bees and the scent of nectar create a bustling, happy ecosystem. It turns the simple act of walking to the front door into a scenic journey through nature’s finest work.
Essential Elements:
- Flagstone or slate pavers
- Low-growing ‘steppable’ groundcover (like creeping thyme)
- Hardy perennial flowering bushes
- Solar path markers in a warm finish
- Natural cedar mulch
How to make it
- Lay out your path using a garden hose to visualize the curves; a winding path feels more natural and ‘English cottage’ than a straight line.
- Excavate the soil to a depth of 4 inches, lay down landscape fabric to prevent weeds, and add a layer of leveled sand before placing your flagstones.
- Plant creeping thyme or Irish moss in the gaps between the stones; these ‘steppable’ plants release a wonderful fragrance when lightly trodden upon.
- Border the path with varying heights of perennials—place shorter lobelia in front and taller lavender or foxgloves behind for a tiered ‘walled garden’ effect.
- Install low-profile solar lights every 3-4 feet, slightly staggered, to illuminate the path safely without creating a ‘runway’ look.
The Art of Living Well
Curating a Pinterest-perfect life isn’t about perfection; it’s about the small, intentional choices that make your space feel like an extension of your soul. Whether you’re planting a single jasmine vine on a tiny balcony or baking a tray of gold-flecked cookies, these moments of beauty add up to a life well-lived. Remember, your home is a canvas that is constantly evolving. Don’t be afraid to mix the old with the new, the DIY with the splurge, and the messy with the curated. Happy decorating!