

There is something magical about the way a beautifully curated food board brings everyone to the center of the table. We’ve all seen them scrolling through our feeds—those effortless, colorful spreads that look like a work of art but feel like a warm invitation to dig in. I remember the first time I set one out during a golden hour backyard gathering; the way the light hit the vibrant produce and the immediate ‘oh wow’ from my friends made me realize that this isn’t just about food, it’s about creating a moment.
Creating the viral ‘Simple Food Board’ isn’t about professional catering skills; it’s about the soul you put into the selection. It’s that perfect balance of textures, from the crunch of a fresh radish to the creamy decadence of a homemade dip, all anchored by hearty, seasonal favorites. Today, I’m sharing the ultimate guide to the components that make these boards go viral, ensuring your next summer gathering is as delicious as it is aesthetically pleasing.
10 Easy Summer Crockpot Recipes You Need to Try
Why we love this
There is a specific kind of relief that comes from knowing dinner is already taken care of while you’re out enjoying the sunshine. These slow-cooked meats, specifically a honey-garlic pulled chicken, offer a melt-in-your-mouth tenderness that contrasts beautifully with a crisp slaw on your food board. The aroma that fills your home is sweet, savory, and deeply comforting, promising a meal that feels indulgent without the heat of a standing oven. Every bite is a harmonious blend of sticky glaze and succulent protein that literally falls apart at the touch of a fork.
Ingredients
- 2 lbs boneless skinless chicken thighs
- 1/2 cup clover honey
- 1/4 cup low-sodium soy sauce
- 4 cloves minced garlic
- 1 tbsp freshly grated ginger
- 1 tsp sriracha for a subtle kick
- Green onions for garnish
How to make it
- Begin by patting your chicken thighs completely dry with paper towels to ensure the sauce adheres perfectly to the meat.
- In a medium mixing bowl, whisk together the honey, soy sauce, garlic, ginger, and sriracha until the honey is fully incorporated and the sauce is smooth.
- Place the chicken thighs in the bottom of your crockpot in a single layer if possible to ensure even cooking and maximum surface area contact with the glaze.
- Pour the prepared sauce over the chicken, using a spatula to make sure every piece is generously coated.
- Set your crockpot to ‘Low’ and cook for 6 to 7 hours. Cooking on low is the secret to that signature ‘viral’ texture; high heat can toughen the fibers, while low heat breaks down the connective tissue into pure silk.
- Once the timer is up, remove the chicken to a large bowl and shred using two forks. It should pull apart effortlessly.
- Pour the remaining liquid from the pot into a small saucepan and simmer over medium-high heat for 5-8 minutes until it reduces into a thick, glossy syrup.
- Toss the shredded chicken back into the reduced glaze and serve warm on your board alongside fresh buns or lettuce wraps.
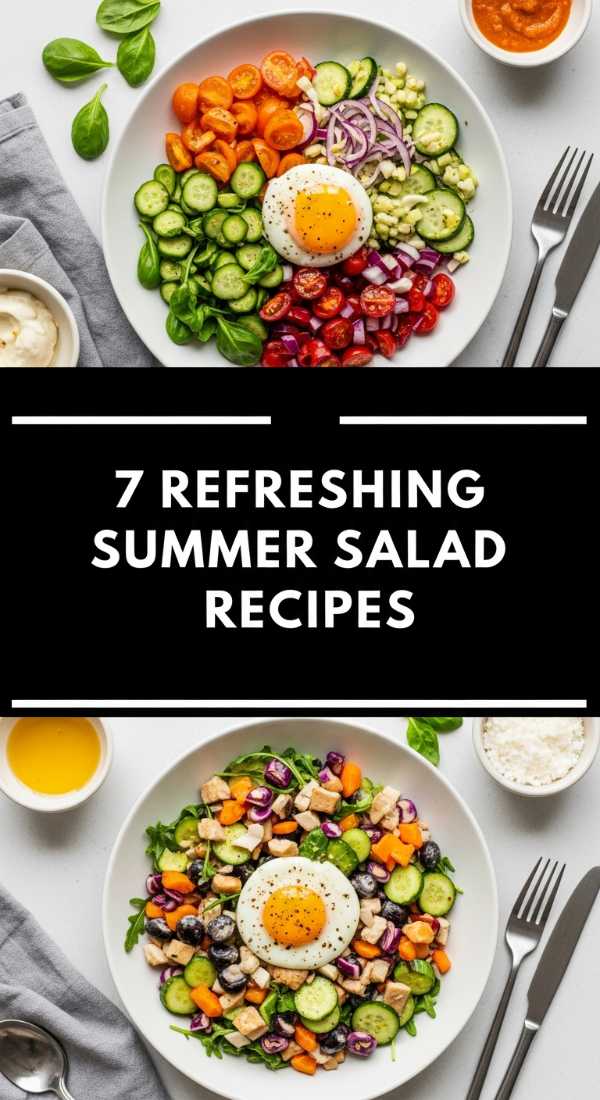
7 Best Refreshing Summer Salad Recipes for Cookouts

Why we love this
Nothing says summer quite like the crystalline crunch of a cold watermelon and feta salad. It is the ultimate sensory experience: the icy, sweet juice of the melon bursting against the creamy, salt-forward tang of the feta cheese. The addition of fresh mint provides a cooling aromatic finish that lingers on the palate, making it the perfect palate cleanser between heavier grilled items. It looks like jewels on a platter, with the bright reds and stark whites popping against the green mint leaves.
Ingredients
- 6 cups cubed seedless watermelon (chilled)
- 1 cup high-quality sheep’s milk feta cheese, crumbled
- 1/2 cup fresh mint leaves, chiffonade cut
- Juice of 2 large limes
- 2 tbsp extra virgin olive oil
- Flaky sea salt to finish
How to make it
- The key to this recipe is temperature; ensure your watermelon has been refrigerated for at least 4 hours before slicing so it retains its structural integrity and refreshing snap.
- Slice the watermelon into uniform 1-inch cubes, discarding any excess rind, and place them into a wide, shallow serving bowl to prevent the bottom layers from getting crushed.
- In a small jar, combine the lime juice and extra virgin olive oil, shaking vigorously until emulsified into a bright, zesty dressing.
- Drizzle the dressing over the watermelon cubes gently, tossing with your hands or a soft silicone spatula to avoid bruising the fruit.
- Sprinkle the crumbled feta evenly across the top; do not over-mix once the cheese is added, or the juices will turn cloudy and lose their vibrant red appeal.
- Scatter the fresh mint ribbons over the top just seconds before serving to prevent them from wilting or turning black from the acidity.
- Finish with a generous pinch of flaky sea salt to bridge the gap between the sweet fruit and savory cheese.
8 Crowd-Pleasing Cookout Side Dishes Everyone Loves

Why we love this
Mexican Street Corn (Elote) off the cob is a textural masterpiece that turns a humble side dish into the star of the board. The kernels are charred to smoky perfection, offering a slight resistance before releasing their sweet milk, all enveloped in a velvety, spiced crema. It’s messy in the best way possible—creamy, zesty, and finished with a sharp bite from the cotija cheese. The warmth of the chili powder against the cool lime juice creates a complex flavor profile that keeps everyone coming back for ‘just one more spoonful.’
Ingredients
- 4 cups charred corn kernels (fresh or frozen)
- 1/4 cup Mexican crema or sour cream
- 2 tbsp mayonnaise
- 1/2 cup crumbled cotija cheese
- 1/4 cup chopped fresh cilantro
- 1 tsp ancho chili powder
- 1 clove garlic, finely minced
How to make it
- If using fresh corn, grill the ears over high heat until charred on all sides, then carefully shear the kernels off with a sharp knife; if using frozen, sear them in a dry cast-iron skillet over high heat until deep brown spots appear.
- In a large mixing bowl, whisk together the crema, mayonnaise, minced garlic, and half of the chili powder until the base is consistent and light.
- Fold the warm corn kernels into the cream mixture while they are still hot; this allows the flavors to penetrate the corn rather than just sitting on the surface.
- Add in most of the cotija cheese and the chopped cilantro, reserving a small amount of both for the final garnish.
- Stir until every kernel is draped in the sauce, ensuring the consistency is thick enough to hold its shape on the food board.
- Transfer to a serving bowl, sprinkle with the remaining chili powder for color, and top with the leftover cheese and cilantro for a professional, layered look.
6 Healthy Summer Dinner Recipes for Hot Days

Why we love this
Lemon Herb Grilled Salmon is the epitome of light, healthful summer dining that doesn’t sacrifice a bit of luxury. The skin becomes incredibly crisp—almost like a cracker—while the interior remains a buttery, translucent pink that flakes away at the slightest pressure. The aroma of charred lemon and caramelized herbs creates an inviting, sophisticated scent that defines high-end outdoor dining. It’s clean, protein-packed, and leaves you feeling energized rather than weighed down by the summer heat.
Ingredients
- 4 salmon fillets (6 oz each), skin-on
- 3 tbsp olive oil
- 2 cloves garlic, crushed
- 1 tbsp chopped fresh dill
- 1 tbsp chopped fresh parsley
- 1 lemon, thinly sliced into rounds
- Kosher salt and cracked black pepper
How to make it
- Remove the salmon from the refrigerator 20 minutes before cooking to bring it to room temperature; this prevents the exterior from burning before the middle is cooked.
- Pat the skin side extremely dry with paper towels; moisture is the enemy of a crispy skin.
- Whisk the olive oil, garlic, and herbs together and brush the flesh side of the salmon generously with the mixture, seasoning with salt and pepper.
- Preheat your grill to medium-high (about 400°F) and oil the grates thoroughly to prevent sticking.
- Place the salmon skin-side down first. Leave it undisturbed for 5-6 minutes. You will see the color of the fish change from the bottom up; once it is cooked 3/4 of the way through, it will naturally release from the grill.
- Carefully flip the fillets and place a lemon slice on top of each. Grill for only 1-2 more minutes to sear the top.
- Remove and let rest for 3 minutes; the residual heat will finish the cooking process perfectly, leaving you with a moist, restaurant-quality result.
5 Viral Summer Dessert Recipes You’ll Love
Why we love this
The ‘S’mores Dip’ is a social media sensation for a reason: it’s the ultimate communal dessert that looks absolutely stunning in a cast-iron skillet. Imagine a sea of toasted, golden-brown marshmallows with gooey, slightly charred tops that pull away to reveal a molten lake of dark chocolate underneath. The contrast of the crunchy graham crackers dipping into that warm, velvety center is pure nostalgia. It’s sweet, smoky, and carries that specific ‘summer campfire’ feeling right to your dining table.
Ingredients
- 2 cups semi-sweet chocolate chips
- 1 bag large marshmallows
- 1 tsp coconut oil (for the chocolate)
- Graham crackers and sliced strawberries for dipping
How to make it
- Preheat your oven to 450°F or set your broiler to high.
- In a 10-inch cast iron skillet, spread the chocolate chips in an even layer across the bottom. If using a skillet, the heat retention will keep the dip melted longer.
- Place the skillet in the oven for 3-4 minutes just until the chocolate chips look shiny and have begun to melt slightly.
- Remove and quickly arrange the marshmallows on top in a dense, concentric circle pattern, packing them tightly so no chocolate is visible from above.
- Place back in the oven on the top rack. Watch it like a hawk! Marshmallows go from golden to burnt in seconds.
- Remove once the tops are a deep toasted brown and the marshmallows have expanded.
- Let it sit for 2 minutes so the chocolate continues to melt from the residual heat of the skillet, then serve immediately while the ‘pull’ is at its peak.
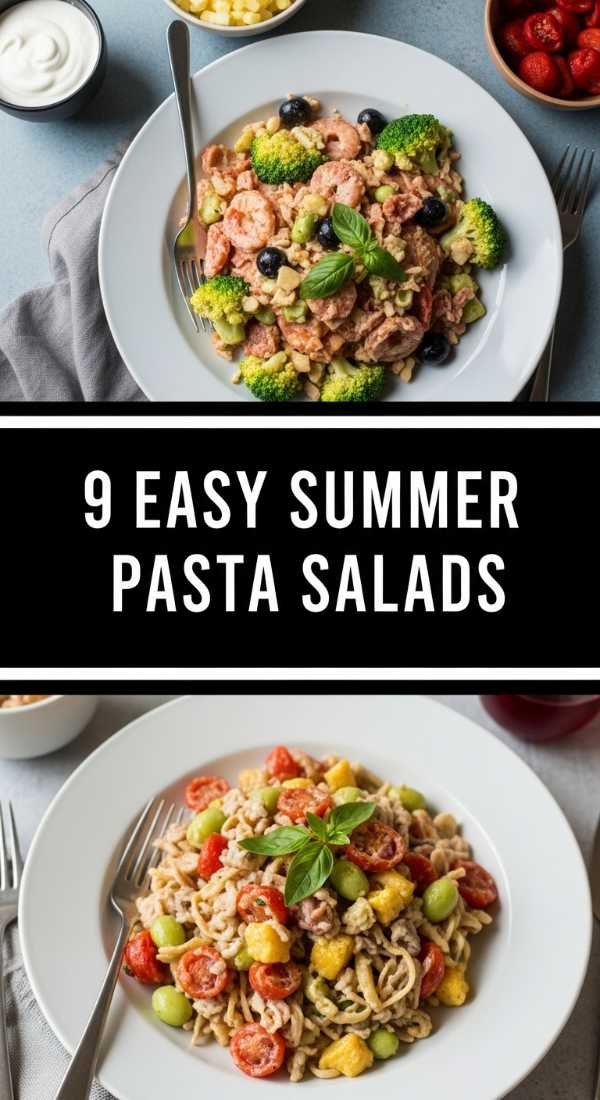
9 Easy Summer Pasta Salads for Picnics

Why we love this
This Zesty Orzo Salad is a refreshing departure from heavy, mayo-based pasta dishes, focusing instead on bright acidity and Mediterranean textures. The tiny pasta pearls carry the lemon-oregano vinaigrette into every nook and cranny, while the cucumbers and red onions provide a sharp, satisfying crunch. The aroma is dominated by fresh oregano and feta, transporting your senses to a seaside cafe. It’s a light, vibrant addition to any food board that holds up remarkably well even after hours in the sun.
Ingredients
- 1 lb orzo pasta
- 1 English cucumber, diced small
- 1 pint cherry tomatoes, halved
- 1/2 cup Kalamata olives, sliced
- 1/3 cup red onion, finely minced
- Dressing: 1/2 cup olive oil, juice of 1 lemon, 1 tsp dried oregano, salt/pepper
How to make it
- Boil the orzo in heavily salted water until it is ‘al dente’—usually about 8-9 minutes. Do not overcook, as it will continue to absorb dressing later and you want it to retain its shape.
- Drain the pasta and immediately rinse with cold water to stop the cooking process and remove excess starch, which prevents the pasta from sticking together.
- In a large bowl, whisk the dressing ingredients together until the lemon juice and oil are fully married.
- Add the cooled orzo to the dressing and toss thoroughly; doing this while the pasta is slightly damp helps the flavors penetrate better.
- Fold in the cucumber, tomatoes, olives, and onions. The colors should be vibrant and well-distributed.
- Chill in the refrigerator for at least 1 hour before serving. This ‘marination’ period is crucial as the orzo absorbs the acidity of the lemon, rounding out the flavor profile.
- Give it one final toss and a squeeze of fresh lemon just before placing it on your board to revive the gloss.
12 Quick Summer Dinner Ideas for Busy Nights

Why we love this
Shrimp Tostadas are the ultimate ‘busy night’ hero, offering a sophisticated, high-end feel with minimal effort. The shrimp are seared in minutes with a spicy lime rub, providing a snap of texture that pairs perfectly with a smooth, fatty avocado base. The sensation of the shattering corn tortilla underneath the tender seafood is incredibly satisfying. It’s a bright, citrusy meal that feels like a vacation on a plate, smelling of toasted corn and fresh lime zest.
Ingredients
- 1 lb large shrimp, peeled and deveined
- 12 corn tostada shells
- 2 ripe avocados, mashed with lime
- 1 tsp smoked paprika and 1/2 tsp cumin
- 2 cups shredded green cabbage
- Pickled red onions for topping
How to make it
- In a bowl, toss the shrimp with olive oil, paprika, cumin, and a pinch of salt until they are uniformly coated in the spices.
- Heat a heavy skillet over high heat until it is nearly smoking. This high heat is vital for getting a ‘snap’ on the shrimp without overcooking the inside.
- Sear the shrimp for 90 seconds per side until they form a ‘C’ shape and turn opaque. Remove them immediately from the heat.
- Prep your base by mashing avocados with a squeeze of lime and a pinch of salt to create a smooth, ‘glue’ like consistency for the toppings.
- Spread a thick layer of the avocado mash onto each tostada shell, ensuring it reaches the very edges.
- Top with a handful of shredded cabbage for height and crunch, followed by 3-4 spicy shrimp.
- Garnish with pickled onions for a pop of pink and a hit of acidity that cuts through the rich avocado.
10 Best Summer Party Dips and Snacks

Why we love this
Whipped Feta with Hot Honey is the dip that will disappear first from your board. It’s airy, clouds-of-cream-cheese-style texture is spiked with the salty, sharp punch of feta, creating a base that is both light and intensely flavorful. The drizzle of hot honey on top adds a sticky, spicy element that dances on the tongue, while the aroma of thyme and chili oil is absolutely intoxicating. It is the perfect companion for warm pita bread or crunchy seasonal vegetables.
Ingredients
- 8 oz feta cheese (block form in brine)
- 1/2 cup Greek yogurt
- 1/4 cup cream cheese
- 2 tbsp olive oil
- 3 tbsp honey mixed with 1 tsp chili flakes (Hot Honey)
- Fresh thyme leaves
How to make it
- Combine the feta, Greek yogurt, cream cheese, and olive oil in a food processor. Using a block of feta rather than pre-crumbled ensures a smoother, creamier whip.
- Process on high for 3-4 minutes. You want to see the texture change from grainy to a glossy, airy mousse.
- If the mixture is too thick, add one tablespoon of water or olive oil at a time until the desired ‘dip’ consistency is reached.
- Transfer to a shallow bowl and use the back of a spoon to create ‘swirls’ and ‘valleys’ in the top of the dip.
- In a small microwave-safe bowl, warm the honey and chili flakes for 20 seconds to infuse the spice.
- Drizzle the hot honey generously into the swirls you created, allowing it to pool in the center.
- Top with fresh thyme and serve with toasted baguette slices or cucumber rounds for a viral-worthy presentation.
8 Refreshing Fun Summer Drinks to Cool Down

Why we love this
The Sparking Strawberry Basil Lemonade is a visual and sensory delight that completes the aesthetic of any food board. It’s a sophisticated upgrade to a childhood classic, with the earthy, peppery notes of fresh basil balancing the sugary sweetness of muddled strawberries. Each sip is bubbly and effervescent, washing over the palate with a crisp, tart finish that is incredibly revitalizing on a 90-degree day. The fragrance of bruised basil leaves combined with citrus is the literal scent of a summer garden.
Ingredients
- 1 cup fresh strawberries, hulled
- 1/4 cup fresh basil leaves
- 1/2 cup fresh lemon juice
- 1/4 cup simple syrup
- Sparkling water or club soda
- Ice cubes
How to make it
- In a large pitcher, combine the strawberries and basil leaves. Use a muddler or the back of a wooden spoon to crush them together until the strawberries are pulpy and the basil is fragrant.
- Stir in the lemon juice and simple syrup, mixing until the base is consistent.
- Let this mixture sit in the fridge for 30 minutes; this ‘steeping’ process allows the basil oil to fully infuse into the liquid.
- When ready to serve, strain the mixture through a fine-mesh sieve if you prefer a clear drink, or leave the fruit bits for a more rustic look.
- Fill glasses with plenty of ice and fill them halfway with the strawberry-lemon base.
- Top with sparkling water and stir gently to maintain the carbonation.
- Garnish with a whole strawberry and a sprig of fresh basil to make it truly ‘Pinterest-worthy.’
7 Best Grilled Kabob Recipes for Your BBQ
[IMAGE_10]
Why we love this
Honey Sriracha Chicken Kabobs are the ultimate board-filler because they provide verticality and incredible color. The glaze caramelizes over the open flame, creating dark, sticky edges that are packed with umami and a slow-building heat. The peppers and onions grilled alongside the meat become tender-crisp and sweet, offering a juicy contrast to the charred protein. It’s a smoky, sweet, and spicy experience that smells like the quintessential summer cookout, drawing everyone toward the board the moment it lands.
Ingredients
- 1.5 lbs chicken breast, cut into 1-inch cubes
- 2 bell peppers (red and green), cut into chunks
- 1 red onion, cut into wedges
- 1/2 cup honey
- 2 tbsp Sriracha
- 1 tbsp soy sauce
- Wooden or metal skewers
How to make it
- If using wooden skewers, soak them in water for at least 30 minutes to prevent them from catching fire on the grill.
- Whisk the honey, Sriracha, and soy sauce in a small bowl. Reserve a third of the sauce for later brushing.
- Toss the chicken cubes in the remaining sauce and let marinate for at least 20 minutes in the refrigerator.
- Thread the skewers, alternating between chicken, pepper, and onion. Don’t crowd them too tightly; leaving a tiny bit of space ensures the heat can circulate and cook everything evenly.
- Preheat the grill to medium heat. You want a steady heat that will cook the chicken through without burning the honey-based glaze too quickly.
- Grill for 12-15 minutes total, turning every 3-4 minutes. During the last 2 minutes of cooking, brush the reserved sauce over the kabobs to create a thick, glossy finish.
- Remove once the chicken reaches an internal temperature of 165°F and the vegetables have beautiful char marks.
Conclusion: Your Board, Your Rules
Building a viral-worthy food board isn’t about perfection; it’s about variety and the joy of sharing. By combining these slow-cooked favorites, fresh salads, and indulgent dips, you create a tapestry of flavors that celebrate the best of the season. So grab your biggest platter, pick a few of these recipes, and get ready to be the host of the summer. Don’t forget to snap a photo before everyone dives in—your feed (and your friends) will thank you!