
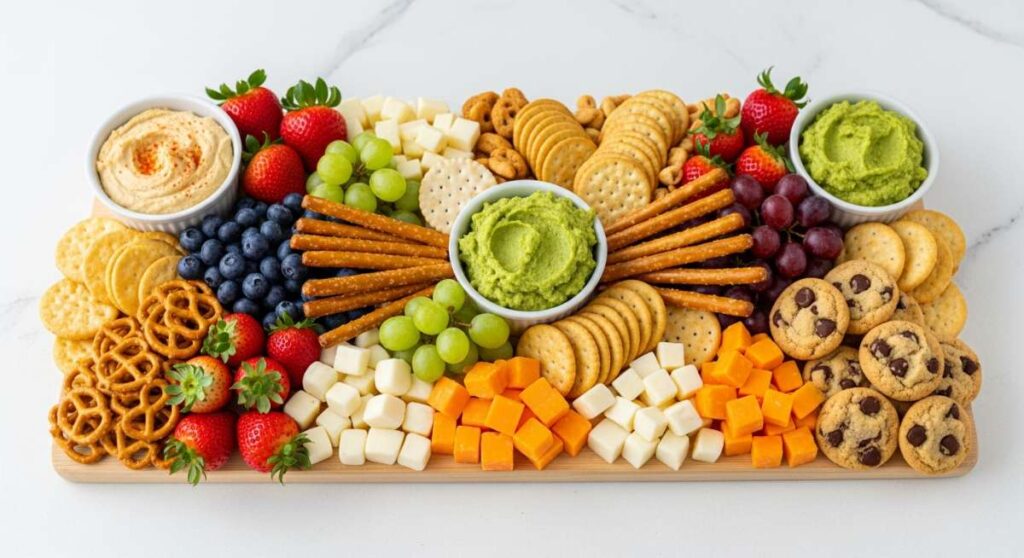
How to Build the Ultimate Viral Snack Board in Seconds
There is something magical about a table filled with colors, textures, and the hum of happy conversation. I remember the first time I hosted a summer gathering; I spent hours stressed in the kitchen while my friends laughed outside. I realized then that the secret to a truly viral, memorable party isn’t just one dish, but a ‘Viral Snack Board’—a sprawling, beautiful landscape of flavors that allows everyone to graze and enjoy. It’s about creating a moment where the food is as much a part of the decor as the flowers on the table.
This ultimate guide is my personal collection of the ten essentials that make up the perfect board. Whether you are hosting a backyard BBQ or a cozy indoor brunch, these recipes are designed to be high-impact but low-stress. We are going to layer savory grilled meats with refreshing salads, zesty dips, and sweet finishes. By the time we’re done, you won’t just have a meal; you’ll have a masterpiece that your friends won’t stop posting about. Let’s dive into the sensory delights of the ultimate summer board.
How to make watermelon salad?
Why we love this
This salad is the absolute definition of summer in a bowl, offering a cooling explosion of flavor that cuts through the heat of any afternoon. The crystalline crunch of cold watermelon meets the creamy, salty tang of crumbled feta, creating a sophisticated profile that is both sweet and savory. Fresh mint leaves add a high-note of herbal freshness, while a drizzle of lime juice brings a bright acidity that makes the whole dish sing. It is visually stunning on a board, with vibrant reds and greens that immediately draw the eye and promise a refreshing escape.
Ingredients
- 4 cups cubed seedless watermelon
- 1/2 cup crumbled feta cheese
- 1/4 cup fresh mint leaves, chiffonade
- 1/2 red onion, thinly sliced
- 2 tablespoons extra-virgin olive oil
- 1 tablespoon lime juice
- Sea salt and cracked black pepper to taste
How to make it
- Begin by chilling your watermelon for at least two hours; the temperature contrast is vital for the sensory experience. Cube the melon into uniform 1-inch squares.
- In a small bowl, whisk together the extra-virgin olive oil and fresh lime juice until emulsified. Add a pinch of sea salt, but be cautious as the feta is naturally salty.
- Thinly slice the red onion into translucent half-moons. To mellow the bite of the onion, soak the slices in ice water for 10 minutes, then pat dry before adding to the salad.
- In a large, shallow serving bowl, gently toss the watermelon cubes and onion slices with the dressing until lightly coated.
- Top the mixture with the crumbled feta and the fresh mint. Use a gentle folding motion to avoid breaking the watermelon cubes or turning the feta into a paste.
- Finish with a final crack of black pepper and serve immediately to maintain the crisp texture of the fruit.
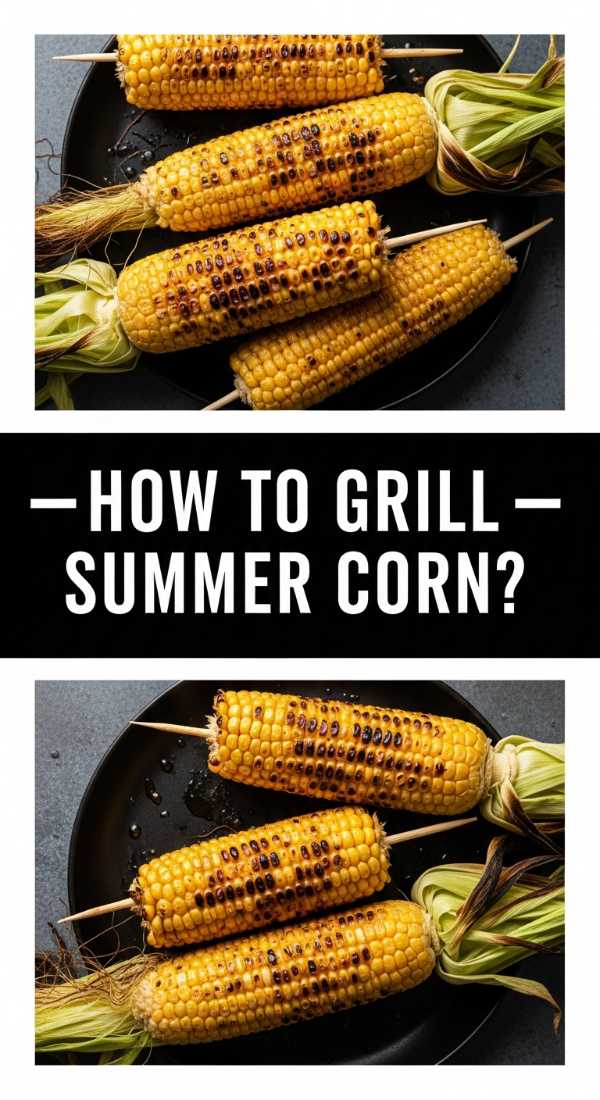
How to grill summer corn?
Why we love this
There is nothing quite like the aroma of corn husks charring over an open flame, a scent that signals the height of outdoor dining season. The kernels transform under the heat, becoming incredibly sweet and tender with smoky charred spots that provide a satisfying, slightly chewy texture. When slathered in butter and spices, each bite is a luxurious mix of creaminess and earthiness that feels deeply nostalgic and comforting. It is a rustic addition to your snack board that invites guests to get their hands a little messy in the best way possible.
Ingredients
- 6 ears of fresh sweet corn, husks removed
- 1/2 cup unsalted butter, softened
- 1 teaspoon smoked paprika
- 1/2 teaspoon garlic powder
- 1/4 cup chopped fresh cilantro
- Lime wedges for serving
- Flaky sea salt
How to make it
- Preheat your grill to medium-high heat (about 400°F). Ensure the grates are clean and lightly oiled to prevent sticking.
- While the grill heats, prepare a flavored butter by mixing the softened butter with smoked paprika and garlic powder until smooth.
- Place the shucked corn directly onto the grill grates. Close the lid and cook for about 2 to 3 minutes before turning.
- Continue rotating the corn every few minutes for a total of 10-12 minutes. You are looking for even charring and kernels that have turned a vibrant, deep yellow.
- Check for doneness by pressing a kernel; it should feel slightly soft but still have a snap. If the corn is browning too quickly, move it to a cooler part of the grill.
- Remove the corn from the heat and immediately brush generously with the prepared flavored butter. The heat from the corn will melt the butter into every crevice.
- Sprinkle with chopped cilantro and flaky salt, and serve with lime wedges for an extra zest.
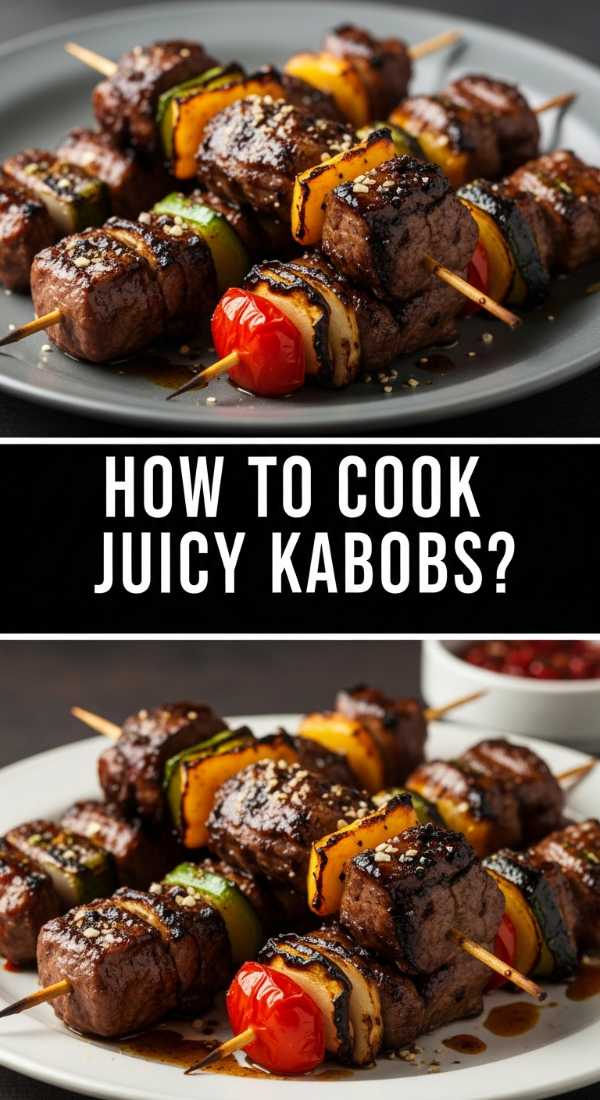
How to cook juicy kabobs?
Why we love this
Kabobs are the ultimate crowd-pleaser because they offer a complete, balanced bite of charred protein and caramelized vegetables all on one convenient skewer. The smoke from the grill infuses the meat with a deep, rugged flavor, while peppers and onions soften and sweeten, creating a harmonious blend of textures. Each skewer is like a colorful jewel on your snack board, glistening with marinade and promising a juicy, tender experience that is incredibly satisfying. They bring a festive, communal energy to the meal, making them a centerpiece that everyone reaches for first.
Ingredients
- 1.5 lbs top sirloin or chicken breast, cut into 1.5-inch cubes
- 2 bell peppers (different colors), cut into chunks
- 1 large red onion, cut into chunks
- 1 cup whole button mushrooms
- 1/2 cup soy sauce
- 1/4 cup olive oil
- 3 cloves garlic, minced
- 1 tablespoon honey
How to make it
- If using wooden skewers, soak them in water for at least 30 minutes to prevent them from burning on the grill.
- In a large bowl, whisk together soy sauce, olive oil, minced garlic, and honey to create a marinade. Reserve a small amount for brushing later.
- Add the meat cubes to the marinade and refrigerate for at least 1 hour (or up to 4 hours for maximum tenderness).
- Thread the skewers, alternating between meat and vegetables. Do not crowd the pieces too tightly; leaving a tiny bit of space allows the heat to circulate and cook everything evenly.
- Preheat the grill to medium-high. Place the kabobs on the grill and cook for 8-10 minutes for beef (medium-rare) or 12-15 minutes for chicken (internal temp of 165°F).
- Turn the skewers every 3-4 minutes to ensure a beautiful char on all sides. Use the reserved marinade to brush the kabobs during the last 2 minutes of cooking.
- Remove from the grill and let the meat rest for 5 minutes before placing them on your board to allow the juices to redistribute.
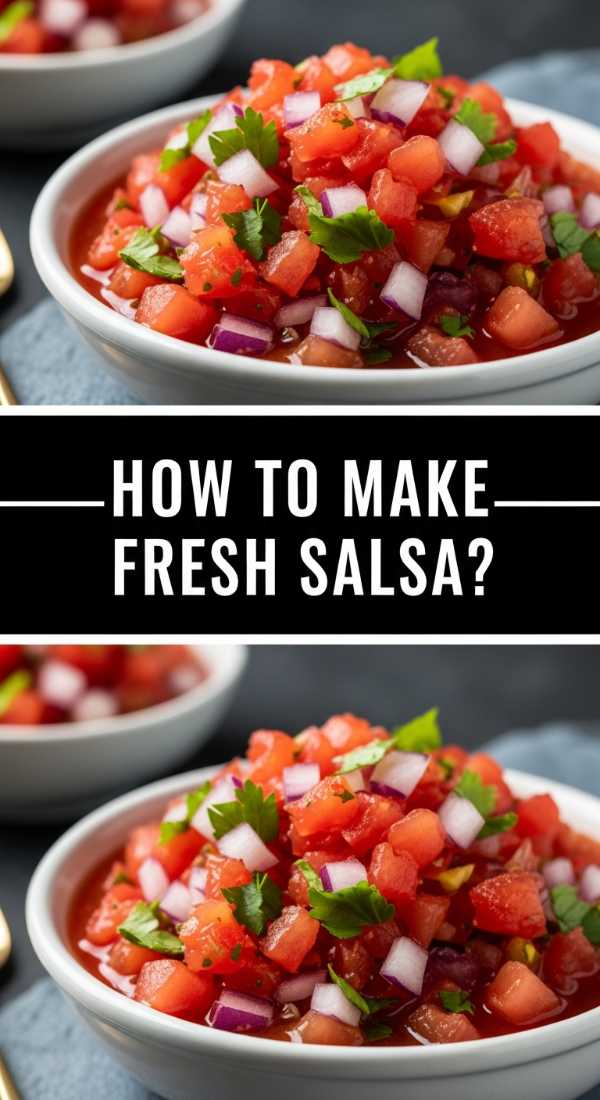
How to make fresh salsa?
Why we love this
A bowl of homemade salsa is the vibrant, pulsing heart of a snack board, offering a bright acidity that awakens the palate between richer bites. The scent of freshly chopped cilantro and pungent onions is intoxicating, promising a garden-fresh experience that store-bought versions simply cannot match. Every scoop is a celebration of texture—the softness of ripe tomatoes, the crisp bite of onion, and the subtle heat of jalapeño that lingers just long enough. It’s a versatile condiment that brings life to chips, meats, and even salads, acting as the perfect zesty bridge for all your board’s flavors.
Ingredients
- 4 large Roma tomatoes, finely diced
- 1/2 white onion, finely chopped
- 1/2 cup fresh cilantro, chopped
- 1 jalapeño, seeded and minced
- 2 cloves garlic, minced
- 2 tablespoons lime juice
- 1 teaspoon cumin
- Salt to taste
How to make it
- Start with high-quality, firm but ripe tomatoes. Dice them finely, ensuring you retain the juices as they contain a significant amount of flavor.
- Finely mince the jalapeño. If you prefer a milder salsa, ensure every seed and the internal white rib are removed, as this is where the heat lives.
- Combine the tomatoes, onion, cilantro, jalapeño, and garlic in a non-reactive glass bowl.
- Add the lime juice, cumin, and salt. Stir well to combine. The acidity of the lime juice is crucial as it ‘cooks’ the raw onion and garlic, mellowing their sharpness over time.
- Let the salsa sit at room temperature for at least 30 minutes before serving. This resting period is the most important step, as it allows the salt to draw out the tomato juices and the flavors to meld.
- Taste and adjust seasoning. You might need an extra pinch of salt or a squeeze of lime depending on the sweetness of your tomatoes.
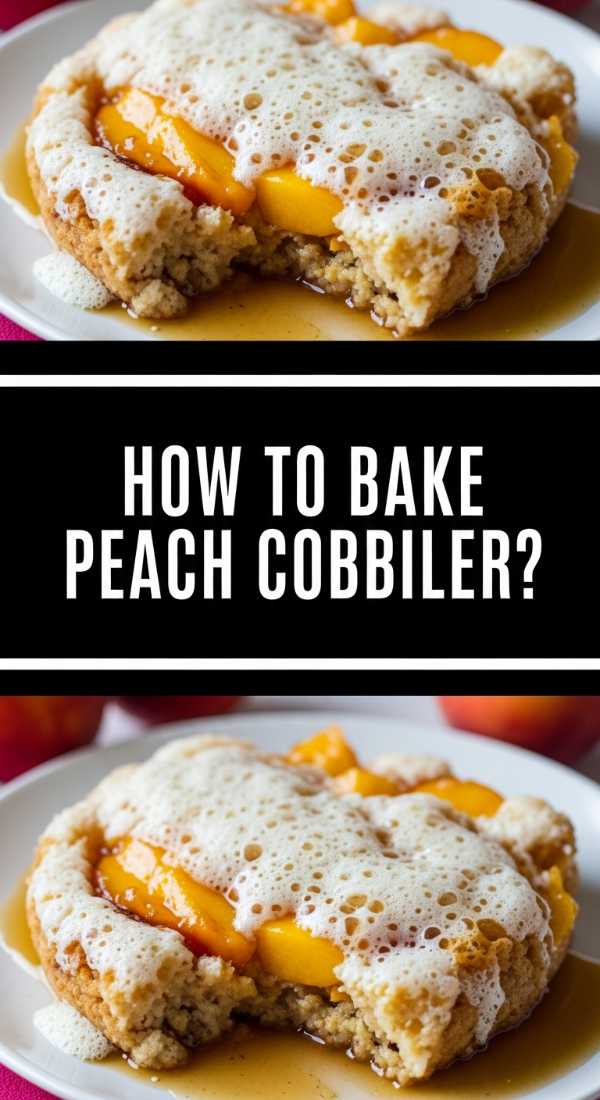
How to bake peach cobbler?

Why we love this
Peach cobbler is the soul-warming finale that every great board deserves, offering a golden, buttery crust that gives way to a bubbling sea of sweet, spiced fruit. The aroma of cinnamon and warm peaches wafting through the air is enough to make anyone feel at home, evoking memories of late summer sunsets and family gatherings. The contrast between the soft, jammy peaches and the slightly crunchy, cake-like topping creates a textural masterpiece that is best enjoyed warm. It provides a sweet, comforting anchor to the meal, ensuring your guests leave the table with a sense of pure contentment.
Ingredients
- 6 cups fresh peaches, sliced (about 2 lbs)
- 1 cup granulated sugar (divided)
- 1 cup all-purpose flour
- 1 tablespoon baking powder
- 1 teaspoon cinnamon
- 1/4 teaspoon nutmeg
- 1/2 cup unsalted butter, melted
- 1 cup whole milk
How to make it
- Preheat your oven to 375°F (190°C). Prepare the peaches by tossing them with 1/4 cup of the sugar and a pinch of cinnamon; let them macerate for 10 minutes.
- In a medium bowl, whisk together the flour, the remaining 3/4 cup of sugar, baking powder, cinnamon, and nutmeg.
- Slowly stir in the milk and melted butter until just combined. Be careful not to overmix, as this can lead to a tough, bready crust rather than a light, fluffy one.
- Pour the batter into a 9×13 inch baking dish. Do not grease the dish, as the butter in the batter will prevent sticking and create a crisp edge.
- Spoon the peaches and their accumulated juices evenly over the batter. Do not stir them in; the batter will rise up and around the fruit as it bakes.
- Bake for 40-45 minutes. You are looking for a deep golden-brown crust and fruit juices that are bubbling thickly around the edges.
- Allow the cobbler to cool for at least 15 minutes before serving. This allows the fruit sauce to thicken so it doesn’t run all over the board.
How to grill lemon chicken?

Why we love this
Lemon chicken is a masterclass in balance, pairing the light, citrusy brightness of lemon with the savory, charred depth of perfectly grilled poultry. The meat remains incredibly juicy thanks to the acidic marinade, while the skin (if using) or outer edges achieve a beautiful, herbaceous crust that crackles with flavor. It’s a versatile protein that feels light enough for a snack board but substantial enough to satisfy, providing a clean, zesty profile that refreshes the palate. The visual of charred lemon slices scattered around the chicken adds an artisanal touch that makes the board look professionally curated.
Ingredients
- 2 lbs chicken thighs or breasts
- 1/4 cup olive oil
- 1/3 cup fresh lemon juice
- 2 tablespoons lemon zest
- 3 cloves garlic, smashed
- 1 tablespoon fresh oregano, chopped
- 1 teaspoon salt
- 1/2 teaspoon cracked black pepper
How to make it
- Pound the chicken breasts to an even thickness if using, or trim excess fat from the thighs. This ensures that every piece cooks at the same rate.
- Whisk together the olive oil, lemon juice, zest, garlic, oregano, salt, and pepper in a zip-top bag or shallow dish.
- Add the chicken and marinate in the refrigerator for at least 30 minutes but no longer than 2 hours. Over-marinating in lemon juice can actually make the chicken texture mushy.
- Preheat the grill to medium heat. Oil the grates well.
- Place chicken on the grill. For breasts, cook 6-7 minutes per side. For thighs, cook 8-10 minutes per side. Do not move the chicken for the first 4 minutes to ensure a good sear.
- Use a meat thermometer to ensure the internal temperature reaches exactly 165°F (74°C). This is the key to preventing dry chicken.
- During the last 2 minutes of grilling, place some halved lemons face down on the grill until charred, then use them for a final squeeze over the meat before serving.
How to make shrimp tacos?
Why we love this
Shrimp tacos bring a playful, coastal vibe to your board, offering a snap of fresh seafood paired with creamy, crunchy, and spicy elements. The shrimp cook in minutes, turning a beautiful opaque pink and soaking up spices that provide a warm, smoky undertone to every bite. When nestled in a warm tortilla with a bit of slaw and lime crema, they represent the perfect ‘build-your-own’ element for a social board. The combination of the warm, seasoned shrimp and the cold, crisp toppings creates a sensory dynamic that is exciting, light, and endlessly customizable for your guests.
Ingredients
- 1 lb large shrimp, peeled and deveined
- 2 tablespoons taco seasoning (chili powder, cumin, garlic powder)
- 1 tablespoon olive oil
- Small corn or flour tortillas
- 2 cups shredded cabbage (slaw mix)
- 1/4 cup sour cream mixed with lime juice
- Fresh cilantro and sliced radishes for garnish
How to make it
- Pat the shrimp completely dry with paper towels. This is a professional tip to ensure they sear and brown rather than steam in their own moisture.
- Toss the shrimp in a bowl with olive oil and the taco seasoning until evenly coated.
- Heat a large cast-iron skillet or griddle over high heat. Once smoking slightly, add the shrimp in a single layer.
- Cook for only 1.5 to 2 minutes per side. The shrimp are done as soon as they turn pink and form a ‘C’ shape. Avoid ‘O’ shapes, which indicate overcooking and a rubbery texture.
- While the shrimp rest for a moment, char your tortillas directly over a gas flame or in a dry pan until they are pliable and have small brown spots.
- Assemble by placing a few shrimp in each tortilla, topping with the shredded cabbage for crunch, and drizzling with the lime crema.
- Garnish with radish slices and cilantro for a pop of color and extra texture before nesting them together on the snack board.
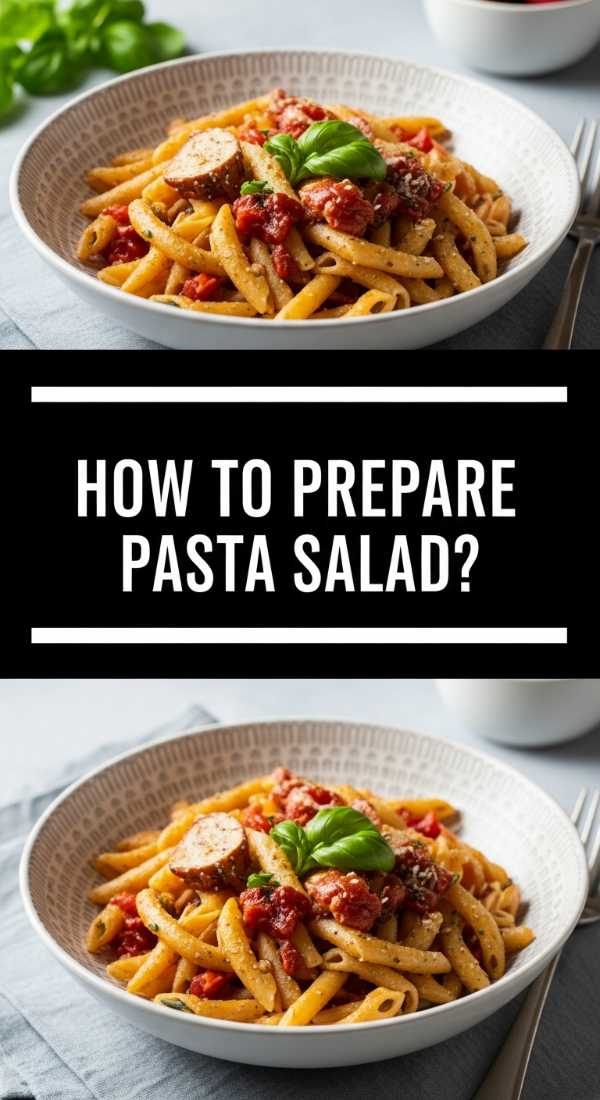
How to prepare pasta salad?

Why we love this
Pasta salad is the reliable, comforting workhorse of the snack board, providing a satisfying chew and a canvas for an array of Mediterranean flavors. Each noodle acts as a vessel for a zesty vinaigrette, while pockets of salty olives, sharp cheese, and crisp vegetables provide a delightful treasure hunt in every forkful. It’s a dish that actually improves with time, making it the perfect make-ahead element that holds up beautifully at room temperature. The glossy finish of the dressing and the varied shapes of the ingredients add a rustic, bountiful aesthetic that fills the gaps of your board with hearty goodness.
Ingredients
- 1 lb Rotini or Penne pasta
- 1 cup cherry tomatoes, halved
- 1/2 cup cucumber, diced
- 1/2 cup kalamata olives, sliced
- 1/2 cup feta or fresh mozzarella pearls
- 1/4 cup red onion, finely minced
- 1/2 cup Italian vinaigrette
- Fresh basil leaves for garnish
How to make it
- Boil a large pot of heavily salted water—it should taste like the sea. Cook the pasta until it is ‘al dente,’ which usually means 1 minute less than the package instructions.
- Drain the pasta and immediately rinse it under cold water. This stops the cooking process and removes excess starch, preventing the noodles from sticking together.
- In a large bowl, combine the cooled pasta with the tomatoes, cucumber, olives, cheese, and onion.
- Pour over the Italian vinaigrette. Start with half, toss, and let it sit for 10 minutes. The pasta will absorb the dressing, so you will likely need to add the remaining half just before serving.
- If using feta, add it last and toss gently to keep the dressing clear; if you add it too early and stir too much, the cheese will crumble and make the dressing look cloudy.
- Tear fresh basil leaves over the top just before placing the bowl on your board to ensure the herbs don’t oxidize and turn black.
How to make berry tarts?

Why we love this
These berry tarts are like little edible jewels, offering a delicate, buttery pastry shell filled with a smooth, sweet cream and topped with the tart snap of fresh berries. The visual appeal is undeniable, with the deep blues of blueberries and the vibrant reds of raspberries creating a sophisticated, high-end look for your viral board. Each bite is a harmony of textures—from the crumbly crust to the silky filling and the juicy, exploding fruit on top. They are the perfect ‘two-bite’ dessert that allows guests to indulge in something sweet without needing a plate or a fork.
Ingredients
- 1 pack pre-made mini tart shells (or shortcrust pastry)
- 1 cup heavy cream, whipped
- 4 oz cream cheese, softened
- 1/4 cup powdered sugar
- 1 teaspoon vanilla bean paste
- 2 cups mixed berries (raspberries, blueberries, blackberries)
- Apricot jam for glazing (optional)
How to make it
- If using raw pastry, blind bake your tart shells at 375°F until they are a light golden brown. Let them cool completely; a warm shell will melt the cream filling.
- In a bowl, beat the softened cream cheese with powdered sugar and vanilla bean paste until completely smooth and free of lumps.
- Gently fold the whipped heavy cream into the cream cheese mixture. This creates a filling that is stable enough to hold up but light and airy on the tongue.
- Spoon or pipe the cream filling into each cooled tart shell, filling them about 3/4 of the way to the top.
- Arrange the fresh berries on top of the cream. For a professional look, place the largest berry in the center and surround it with smaller ones.
- Optional: Melt a tablespoon of apricot jam with a teaspoon of water and lightly brush it over the berries to give them a high-gloss, bakery-style finish.
- Keep refrigerated until the moment you assemble the board to ensure the cream stays firm.
How to make cold lemonade?
[IMAGE_10]
Why we love this
Nothing quenches thirst or cleanses the palate quite like a glass of ice-cold, homemade lemonade, its sharp tartness perfectly balanced by a delicate sweetness. The scent of fresh-squeezed lemons is invigoratng, instantly lowering the perceived temperature of the room and making the meal feel even more refreshing. When served in a glass pitcher with floating lemon rounds and sprigs of mint, it becomes a functional piece of art on your snack board. It provides that essential hit of hydration that keeps guests lingering longer and enjoying every savory bite you’ve prepared.
Ingredients
- 1 cup fresh lemon juice (about 6-8 lemons)
- 3/4 cup granulated sugar (adjust to taste)
- 5 cups cold water
- 1 lemon, thinly sliced for garnish
- Fresh mint sprigs
- Plenty of ice
How to make it
- Create a simple syrup by combining the sugar and 1 cup of the water in a small saucepan. Heat over medium until the sugar is completely dissolved. Let this cool completely. This ensures your lemonade isn’t grainy.
- Squeeze your lemons until you have a full cup of juice. Strain out the seeds, but leave a little bit of the pulp for an authentic, homemade look.
- In a large pitcher, combine the lemon juice, the cooled simple syrup, and the remaining 4 cups of cold water.
- Stir vigorously to combine. Taste the mixture; if it’s too tart, add a tablespoon more of sugar dissolved in water. If it’s too sweet, add an extra squeeze of lemon.
- Add the lemon slices and mint sprigs to the pitcher. The oils from the mint will slowly infuse the drink, adding a hidden layer of coolness.
- Fill highball glasses with ice and pour the lemonade over. Do not add ice directly to the pitcher until serving time to prevent the lemonade from becoming watered down.
Conclusion
Building the ultimate viral snack board is about more than just food; it’s about the art of assembly and the joy of sharing. By combining these ten diverse recipes, you create a landscape of flavors that caters to every craving, from the smoky depth of grilled kabobs to the zesty height of fresh salsa and the sweet comfort of peach cobbler. Remember to layer your board with varying heights, use colorful garnishes, and most importantly, enjoy the process. Your guests will feel the love and effort in every bite, making your gathering a truly unforgettable event.