

Herb Gardening 101: Grow Your Own Flavorsome Oasis
There is a specific kind of magic that happens when you step into your kitchen, reach for a bunch of vibrant, fragrant herbs, and snip them directly into your cooking. It’s a sensory experience that transforms the mundane act of meal prep into a soulful ritual. I remember the first time I successfully grew a pot of sweet basil on my windowsill; the way the scent filled the room every time the sun hit the leaves felt like a warm hug from nature itself. It wasn’t just about the flavor—though that was incredible—it was about the deep satisfaction of nurturing something from a tiny seed into a culinary powerhouse.
In this guide, we are diving deep into the world of herb gardening, from the sun-drenched corners of your backyard to the smallest apartment balconies. Whether you are a seasoned green thumb or someone who has historically struggled to keep a cactus alive, I’m here to tell you that you can create your own flavorsome oasis. We’ll explore the textures of soft sage, the zesty punch of cilantro, and the woody reliability of rosemary. Together, we’ll build more than just a garden; we’ll cultivate a lifestyle of fresh flavors, sustainable living, and organic wellness that starts right at your fingertips.
How to Grow an Indoor Herb Garden for Fresh Kitchen Flavors
Why we love this
The convenience of having a living spice rack right on your countertop is unmatched, offering an immediate sensory upgrade to every meal you prepare. Imagine the bright, peppery aroma of freshly harvested basil leaves being torn over a steaming bowl of pasta, or the citrusy zing of cilantro added to a midnight taco. The leaves are soft, vibrant, and full of essential oils that store-bought, plastic-clamshell herbs simply cannot replicate. It brings a touch of the outdoors inside, softening the hard lines of a kitchen with lush greenery and a constant, refreshing fragrance that makes the heart of your home feel truly alive.
Essential Elements:
- South or West-facing window sill
- Potting mix specifically for herbs (not garden soil)
- Small pots with drainage holes and saucers
- Seedlings or organic seeds (Basil, Mint, Chives, Parsley)
- Small watering can with a narrow spout
How to make it
- Select your location by identifying a spot that receives at least 6 to 8 hours of bright, indirect sunlight daily; south-facing windows are usually the gold standard for indoor growth.
- Prepare your containers by ensuring they have adequate drainage holes; if you find a cute pot without one, use a masonry bit to carefully drill a hole in the bottom to prevent root rot.
- Fill the pots about three-quarters full with a lightweight, well-draining potting mix; avoid heavy garden soil which can compact in small containers and suffocate the delicate herb roots.
- Plant your seeds or seedlings, being careful not to bury them too deep; for seeds, a light dusting of soil over the top is usually enough, while seedlings should sit at the same level they were in their nursery pot.
- Water gently but thoroughly until water begins to trickle out of the drainage holes, then discard any excess water from the saucer to keep the roots from sitting in a swamp.
- Maintain your garden by rotating the pots a quarter-turn every few days to ensure all sides of the plant receive equal light, preventing them from becoming leggy and leaning toward the glass.
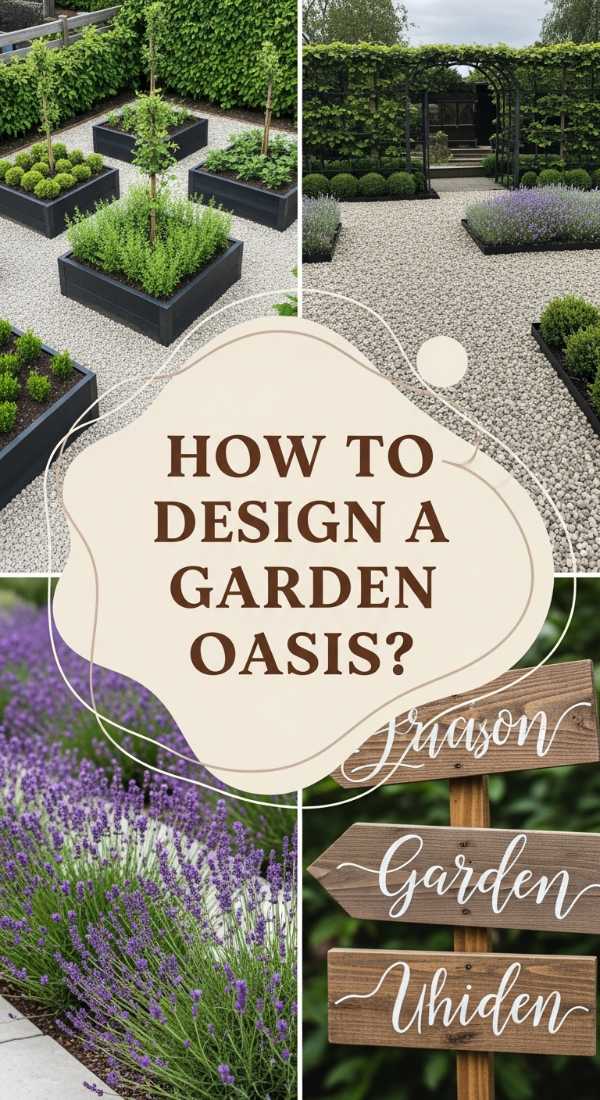
How to Plan a Herb Garden Design for a Stunning Backyard Oasis
Why we love this
A well-planned backyard herb garden is a tapestry of textures and scents that invites you to linger and breathe deeply. We love the way silver-leaved sage contrasts against the deep, dark green of rosemary, creating a visual feast that is as beautiful as it is functional. Walking through a garden path lined with creeping thyme releases a gentle, earthy perfume with every step, turning a simple stroll into a therapeutic experience. It’s about creating a sanctuary where the buzzing of pollinators meets the rustle of aromatic leaves, providing a stunning backdrop for outdoor entertaining and quiet morning coffees.
Essential Elements:
- Garden stakes and twine for layout
- Compost or aged manure for soil enrichment
- A mix of perennial and annual herbs
- Mulch (straw or cedar chips)
- Decorative edging stones or bricks
How to make it
- Map your sun exposure by observing your backyard throughout the day; most herbs require full sun, so choose a location that isn’t shaded by large trees or the house for most of the afternoon.
- Design the layout using a “thriller, filler, and spiller” approach; place tall herbs like rosemary in the back, mounding herbs like sage in the middle, and trailing herbs like oregano near the edges.
- Amend the soil by tilling in several inches of organic compost to improve drainage and nutrient profile; herbs generally prefer slightly lean soil but need good aeration to thrive.
- Install your edging or pathways first to define the space and prevent future soil compaction from walking directly on the planting beds.
- Plant your herbs according to their mature size, leaving enough space for air circulation between plants to prevent fungal issues like powdery mildew.
- Apply a thin layer of mulch around the base of the plants to retain moisture and suppress weeds, taking care not to let the mulch touch the actual stems of the herbs.
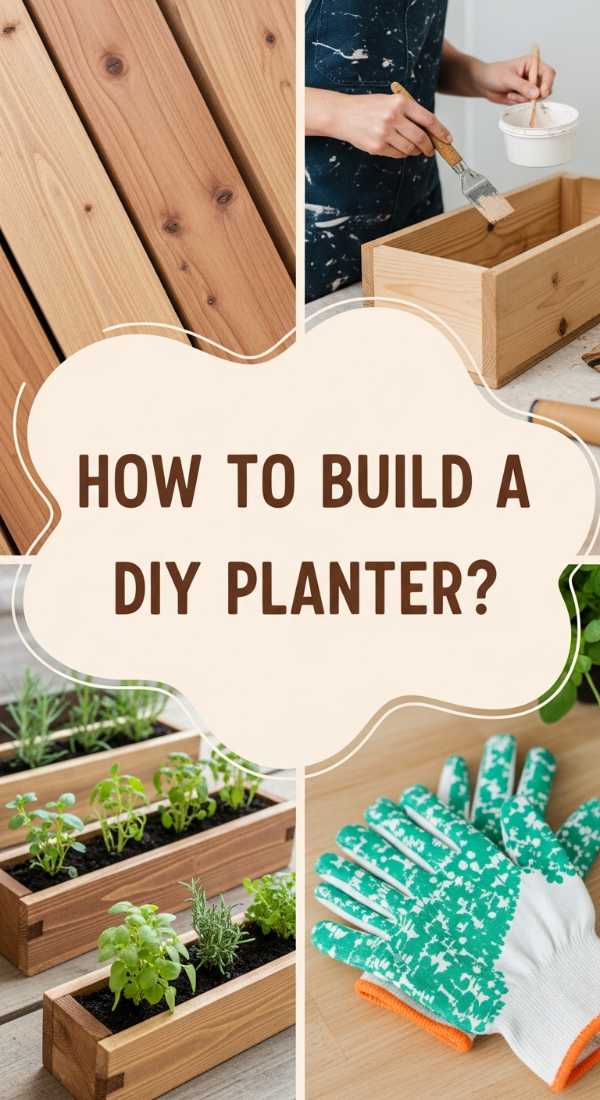
How to Build a DIY Herb Planter for Sustainable Home Cooking
Why we love this
There is a rugged, tactile satisfaction in building something with your own two hands that eventually feeds your family. A custom DIY planter allows you to tailor the size and depth to your specific needs, using sustainable materials like cedar which smells divine and resists rot naturally. The feeling of the rough wood grain under your fingers and the sight of your first seedlings popping up through the rich soil inside a box you built is incredibly grounding. It’s a step toward self-sufficiency that looks beautiful on a patio and provides a controlled environment for your most prized culinary greens.
Essential Elements:
- Untreated cedar or redwood boards
- Galvanized wood screws (rust-resistant)
- Electric drill and driver bits
- Landscape fabric for lining
- Coarse gravel for the bottom layer
How to make it
- Measure and cut your cedar boards into four sides and a base; a standard rectangular box 24 inches long by 8 inches wide and 8 inches deep is a perfect starter size for most herbs.
- Pre-drill holes along the edges of the boards to prevent the wood from splitting when you drive in the screws; this step is crucial for the longevity of your planter.
- Assemble the box by screwing the sides together and then attaching the bottom piece, ensuring you leave small 1/4-inch gaps or drill drainage holes in the base for water escape.
- Line the interior of the box with landscape fabric, stapling it to the sides; this allows water to drain out while keeping the soil from washing away through the drainage gaps.
- Add a one-inch layer of coarse gravel to the bottom of the planter to facilitate drainage before filling the rest with a high-quality potting blend.
- Finish the wood with a food-safe oil if you want to preserve the color, or let it weather naturally to a beautiful silvery-gray over time.
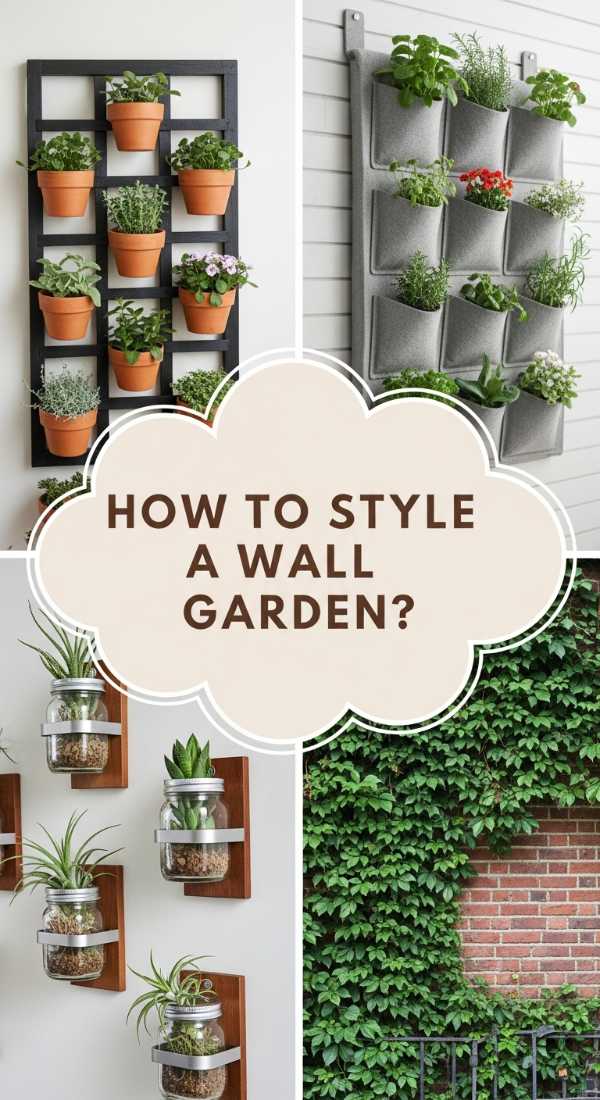
How to Style a Wall Herb Garden for Maximum Vertical Greenery
Why we love this
Vertical herb gardens are the ultimate solution for urban dwellers who want to maximize every inch of their living space while adding a stunning focal point to their decor. We love the way a wall of herbs creates a “living curtain” effect, where the different shades of green cascade down like a waterfall of flavor. The scent is elevated to nose-level, meaning you catch whiffs of lemon balm or mint as you walk past, making your home feel like a lush, tropical greenhouse. It’s an artful way to garden that turns functional plants into a breathtaking piece of wall art.
Essential Elements:
- Vertical planter pockets or mounted pots
- Sturdy wall anchors and screws
- Lightweight potting mix with perlite
- Trailing herbs (Creeping Thyme, Nasturtiums, Mint)
- A long-necked watering can or misting bottle
How to make it
- Identify a weight-bearing wall that receives sufficient light; if you’re planting indoors, consider adding a full-spectrum LED grow light strip above the installation to supplement natural sun.
- Mount your vertical system securely using heavy-duty wall anchors, as the weight of wet soil and mature plants can be significant; check with a level to ensure a professional finish.
- Fill each pocket or pot with a lightweight mix; avoid heavy soils that could put unnecessary strain on the mounting hardware.
- Arrange your plants strategically: put the most drought-tolerant herbs at the top (where it dries out faster) and those that like more moisture at the bottom where water naturally settles.
- Plant trailing varieties at the very edges so they can spill over and hide the structure of the planter, creating that seamless green wall look.
- Water from the top-down using a gentle flow, allowing the moisture to trickle through the tiers, but be sure to have a tray or waterproof barrier at the bottom to protect your floors.
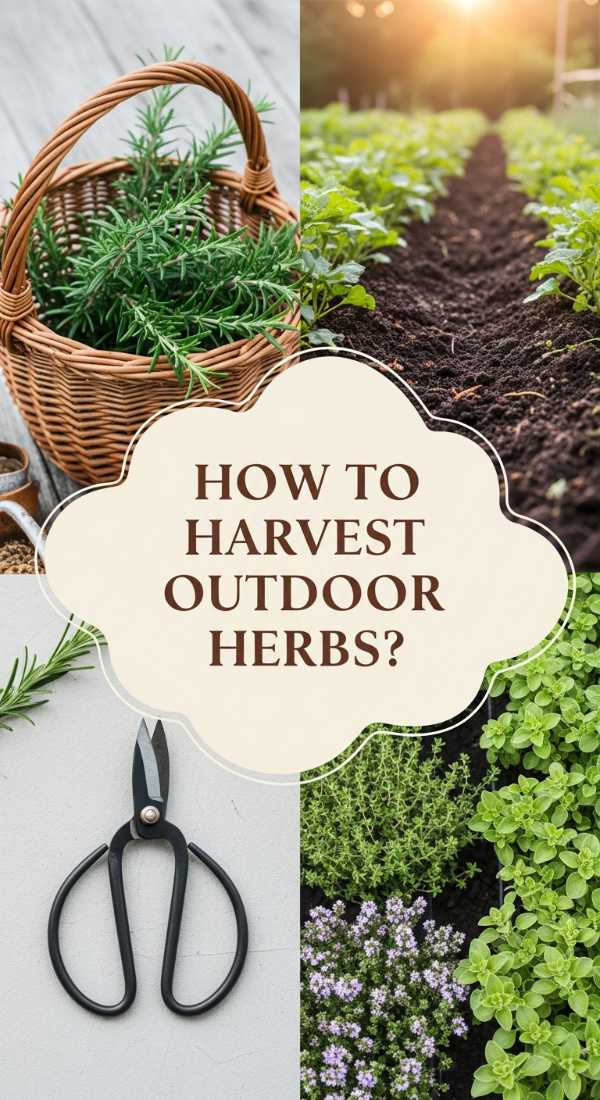
How to Cultivate an Outdoor Herb Garden for Seasonal Harvest Abundance

Why we love this
The abundance of a mid-summer outdoor herb garden is a sight to behold—overwhelming in the best way possible. We love the way the sun intensifies the flavor of oregano and rosemary, making the leaves thick and oily, perfect for drying and preserving. There’s a primal joy in the “harvest gluts” where you have so much parsley or dill that you’re forced to get creative, making jars of pesto or bundles of bouquet garni for your neighbors. It connects you to the rhythm of the seasons, teaching you when to prune, when to let go, and how to appreciate the fleeting peak of summer flavors.
Essential Elements:
- Sun-exposed plot or raised bed
- Hand trowel and pruning shears
- Slow-release organic fertilizer
- Soaker hoses or drip irrigation
- Harvesting baskets or trays
How to make it
- Prepare your outdoor site in early spring by clearing weeds and turning the soil to a depth of at least 8 inches to ensure a loose, inviting environment for new roots.
- Install a drip irrigation system or soaker hoses at the base of the plants; watering from below keeps the foliage dry and prevents the spread of soil-borne diseases.
- Apply a balanced, organic slow-release fertilizer at the time of planting to provide a steady stream of nutrients throughout the vigorous growing season.
- Practice “pinching” early and often; by removing the top inch of growth on herbs like basil and mint, you encourage the plant to grow bushier rather than tall and spindly.
- Monitor for pests like aphids or spider mites, and use a simple neem oil spray or a blast of water from the hose to keep them in check without using harsh chemicals.
- Harvest your herbs in the morning after the dew has dried but before the sun gets too hot; this is when the essential oil concentration is at its absolute highest for maximum flavor.
How to Start an Indoor Herb Garden DIY for Year Round Freshness
Why we love this
The ability to defy the seasons and grow fresh dill in the middle of a snowstorm is nothing short of a kitchen miracle. We love the cozy, glowing ambiance that a well-lit indoor garden adds to a room during the dark winter months. It’s a project that brings a sense of continuity and hope; while the world outside is dormant, your kitchen is a vibrant hub of growth. The crisp snap of a fresh chive or the bright taste of indoor-grown parsley provides a much-needed nutritional and emotional boost when the winter blues start to set in.
Essential Elements:
- Full-spectrum LED grow lights
- A programmable timer
- Self-watering pots or humidity trays
- Liquid seaweed fertilizer
- Seeds for cool-season herbs (Cilantro, Parsley, Chives)
How to make it
- Set up your grow light system, ensuring the height is adjustable; keep the lights 2 to 4 inches above the tops of the plants to prevent leggy growth without burning the leaves.
- Connect your lights to a programmable timer set for 14 to 16 hours of light a day; herbs need more “daylight” indoors than they do outside because artificial light is less intense than the sun.
- Use a humidity tray—a shallow tray filled with pebbles and water—under your pots to increase the local moisture in the air, which helps combat the drying effects of indoor heating.
- Sow seeds in small batches every two weeks (succession planting) to ensure a continuous harvest throughout the winter rather than one big boom and bust.
- Feed your herbs with a half-strength liquid organic fertilizer every two to three weeks, as indoor plants can exhaust the nutrients in their small pots quickly.
- Keep a small fan nearby to provide gentle air circulation; this strengthens the stems and prevents the stagnant air conditions that lead to mold or fungus gnats.
How to Select Herb Planter Ideas for Trendy Home Decor

Why we love this
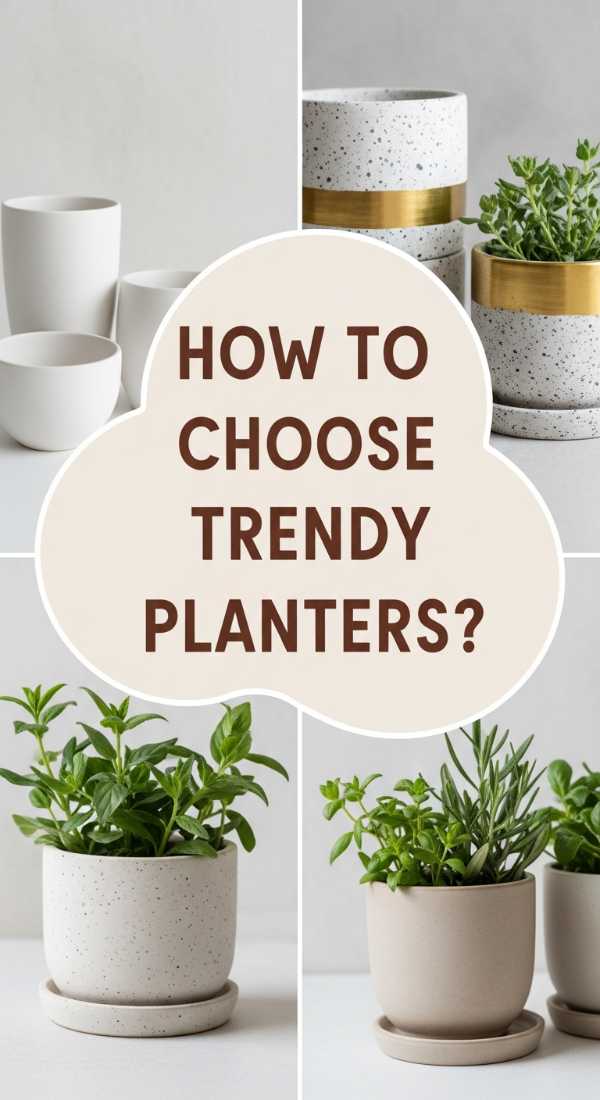
Herb gardening doesn’t have to look like a science experiment; it can be a chic extension of your interior design. We love the aesthetic versatility of herbs—the way a rustic terracotta pot adds warmth to a farmhouse kitchen, or how sleek, geometric ceramic planters can make a minimalist apartment feel sophisticated. Choosing the right vessel allows you to play with colors and textures that complement your furniture. It’s about the harmony between the organic, wild shape of the plants and the intentional, curated look of your home, proving that utility and beauty can coexist perfectly.
Essential Elements:
- Assorted decorative pots (Ceramic, Metal, Concrete)
- Internal plastic liners (if the pot isn’t waterproof)
- Gravel or charcoal for internal drainage
- Decorative moss or pebbles for top-dressing
- Matching plant labels or markers
How to make it
- Select a theme for your planters, such as “Vintage Copper” or “Modern Monochrome,” to create a cohesive look across your windowsill or shelving unit.
- If using a decorative pot without drainage, use the “double-potting” method: keep the herb in its plastic nursery liner and place that inside the pretty outer pot.
- Add a layer of horticultural charcoal at the bottom of non-draining pots to help keep the water fresh and prevent the soil from smelling sour over time.
- Top-dress the soil with a layer of white pebbles or preserved green moss; this hides the brown dirt and gives the arrangement a professional, high-end florist appearance.
- Group your planters in odd numbers (threes or fives) and vary the heights using small wooden blocks or books to create a dynamic, visually interesting display.
- Label each herb with stylish markers, such as embossed metal tags or chalkboard stakes, so guests can identify your flavorsome collection with ease.
How to Master Growing Herbs Indoors for Organic Wellness Benefits
Why we love this
Harnessing the power of herbs for wellness is a tradition as old as time, and doing it organically at home ensures your “medicine” is as pure as possible. We love the calming ritual of brewing a tea from lemon balm leaves you just picked, or the cooling sensation of a homemade peppermint salve. The soft, fuzzy leaves of organic sage and the sweet, floral scent of lavender offer a direct connection to the healing properties of the earth. It’s about more than just flavor; it’s about taking control of your health and creating a home environment that actively promotes relaxation, digestion, and mental clarity.
Essential Elements:
- Certified organic seeds and soil
- Filtered water (to avoid chlorine)
- Tea infusers and drying racks
- Mason jars for storage
- Lavender, Lemon Balm, Peppermint, and Chamomile
How to make it
- Commit to 100% organic practices by using only OMRI-listed soils and fertilizers; since you’ll be consuming these for health, you want to avoid any synthetic pesticides.
- Use filtered or dechlorinated water; simply let your tap water sit out overnight before watering your herbs to allow the chlorine to dissipate, which can be sensitive for some medicinal herbs.
- Focus on high-oil varieties; for medicinal use, you want plants that are robust and healthy, as the concentration of beneficial compounds is highest in well-nourished plants.
- Harvest for wellness by taking only what you need, focusing on the new growth which contains the most potent essential oils and antioxidants.
- Dry your herbs in a cool, dark, well-ventilated area to preserve their color and chemical properties; avoid direct sunlight during the drying process as it can degrade the oils.
- Store your dried organic herbs in airtight amber glass jars to protect them from light and air, ensuring they stay potent for your teas and tinctures for months to come.
How to Create a DIY Herb Garden for Total Kitchen Independence
Why we love this
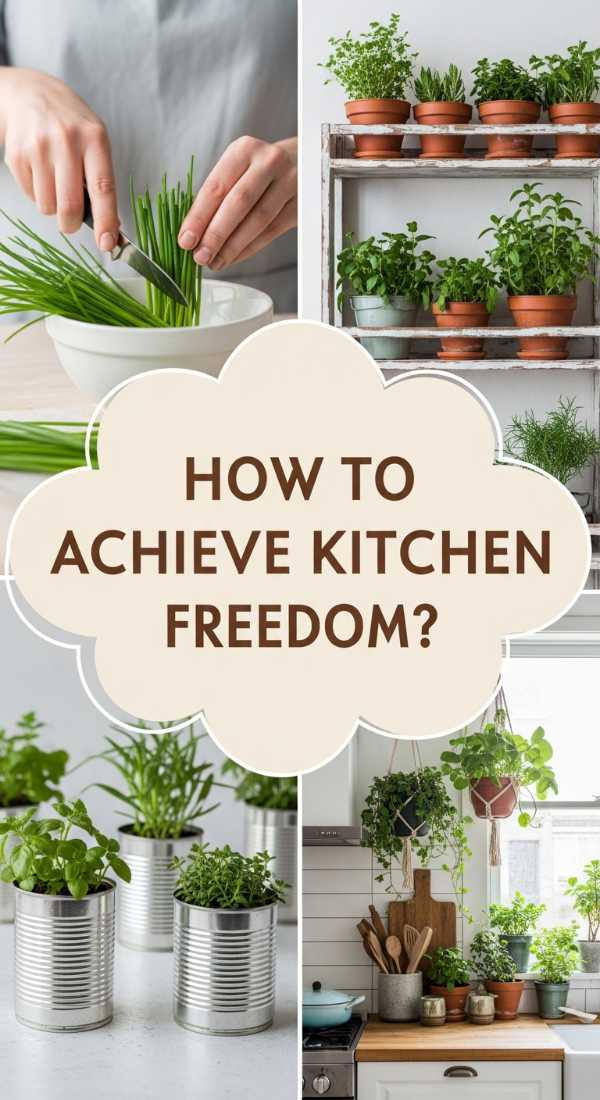
There is an incredible sense of freedom that comes with never having to buy a wilted, overpriced bunch of herbs from the grocery store ever again. We love the empowerment of kitchen independence—knowing exactly how your food was grown and having it available 24/7. The leaves are crisp, the stems are sturdy, and the flavors are intense because they haven’t spent days in a refrigerated truck. It simplifies your shopping list and encourages culinary experimentation, as you can grab a pinch of this and a sprig of that whenever inspiration strikes, without worrying about waste or cost.
Essential Elements:
- A diverse range of culinary herbs
- A dedicated harvest calendar
- Sharp kitchen shears or a herb snips
- Freezer trays for oil-herb cubes
- Compost bin for scraps
How to make it
- Analyze your most-used recipes and prioritize those herbs; if you cook a lot of Mexican food, double up on cilantro; for Mediterranean, focus on oregano and thyme.
- Implement a strict harvesting schedule to prevent your herbs from “bolting” (going to seed); once a herb flowers, the leaves often turn bitter, so keep those buds pinched back.
- Learn the correct cutting technique for each plant; for example, cut chives from the outside in, and harvest basil just above a leaf node to encourage branching.
- Process your excess harvest immediately by blending herbs with olive oil and freezing them in ice cube trays; this gives you a “fresh” herb base for soups and stews all year.
- Create a perpetual garden by taking cuttings of herbs like rosemary and mint, rooting them in water, and replanting them to replace older, woodier plants.
- Maintain a small compost bucket in your kitchen to recycle herb stems and kitchen scraps back into the garden, creating a closed-loop system of nutrition.
How to Discover Herb Garden Ideas for Every Small Space
[IMAGE_10]
Why we love this
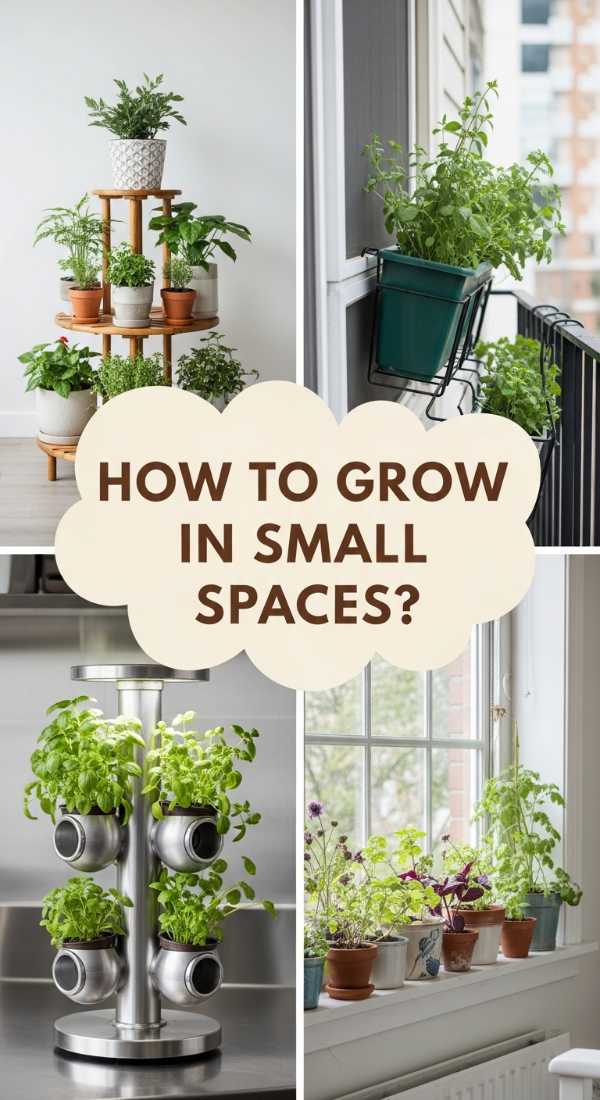
Small-space gardening is a testament to the resilience of nature and the creativity of the human spirit. We love the ingenuity of a tiered herb stand tucked into a corner or a railing planter hanging off a fire escape, proving that you don’t need a sprawling estate to be a gardener. There is something so charming about a miniature forest of thyme and rosemary thriving in a tiny footprint. It’s about making the most of what you have and finding the beauty in the small things, turning a cramped balcony or a tiny window into a lush, productive escape from the urban jungle.
Essential Elements:
- Tiered plant stands or shelving
- Over-the-railing planters
- Magnetic tins for the fridge
- Dwarf or “compact” herb varieties
- Lightweight, movable containers
How to make it
- Go vertical by using a multi-tiered ladder stand; this stacks your garden upward rather than outward, saving precious floor space on balconies or patios.
- Utilize “dead space” like the sides of cabinets or the back of a door by installing specialized herb pockets or magnetic containers for small varieties like chives.
- Choose compact or “dwarf” cultivars specifically bred for containers; for example, “Spicy Globe” basil stays in a neat, small ball shape rather than growing three feet tall.
- Use lightweight pots made of resin or fiberglass instead of heavy ceramic or stone; this makes it easier to move your garden around to follow the sun or bring it inside during a storm.
- Install a small mirrors behind your herb pots to reflect extra light onto the plants and create the illusion of a much larger, deeper green space.
- Keep it organized by grouping herbs with similar needs together, so you don’t accidentally overwater a drought-loving rosemary while trying to keep your thirsty mint happy.
Conclusion
Embarking on your herb gardening journey is one of the most rewarding gifts you can give yourself. It’s a hobby that feeds your body, calms your mind, and beautifies your home all at once. From the first tiny sprout to the giant harvests of late summer, every moment spent with your plants is a lesson in patience and the simple joys of life. Start small, be consistent with your watering, and don’t be afraid to get your hands a little dirty. Before you know it, you won’t just be a person with a few pots on a windowsill—you’ll be the creator of your own flavorsome oasis, and your kitchen will never be the same again. Happy gardening!