
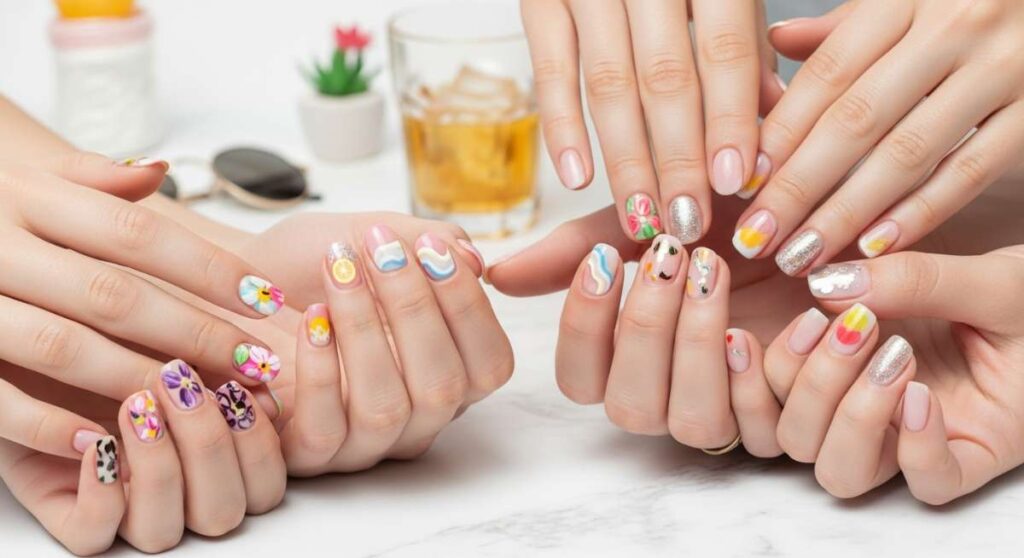
Hello Summer! The Ultimate Guide to June Manicure Trends
Hello my loves! Can you feel it? That soft, golden warmth is finally here, and I couldn’t be happier to welcome June with open arms. There is something so magical about this time of year—the days stretching longer, the scent of jasmine in the air, and that blissful feeling of shedding our winter layers for something a little more light and breezy. To me, June feels like a fresh start, a soft cloud-soft embrace that whispers of beach trips and late-night ice cream runs.
You know how much I believe that a fresh manicure is more than just a beauty routine; it’s a tiny little love letter to ourselves. It’s that pop of color that catches your eye while you’re holding your morning iced latte, reminding you that you deserve to feel beautiful and vibrant. This month, we are diving deep into the dreamiest nail trends that are taking over my feed and my heart. Whether you are a DIY queen or looking for inspiration for your next salon visit, I’ve got you covered.
5 Easy Tips for Perfect June Neon Gradients
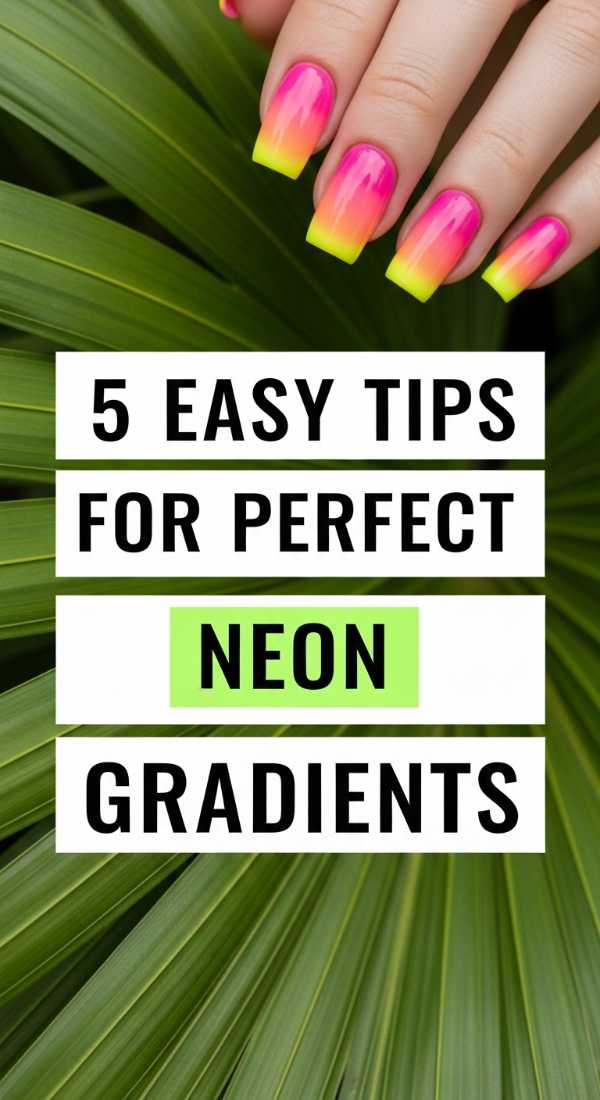
Why to love this Design:
Neon gradients are the ultimate celebration of summer energy. They remind me of those electric carnival lights and the way the sky looks just before the sun disappears. It’s a bold, happy look that instantly lifts your mood and makes your tan (real or faux!) absolutely pop against the bright, blended hues.
Essential Elements:
- Neon pink, orange, and yellow polishes
- A high-quality makeup sponge
- Liquid latex or painter’s tape for skin protection
- A crisp white base coat to make colors vibrate
How to Prepare:
- Apply a single layer of white polish to act as a canvas.
- Protect the skin around your nails with liquid latex.
- Paint stripes of your chosen neons directly onto the makeup sponge.
- Gently dab the sponge onto your nail, repeating until opaque.
- Seal it with a glossy top coat while slightly wet to help the blend.
Budget Range
- Essie ‘Feelin’ Amused’ Neon Pink – $10
- OPI ‘Summer Monday-Fridays’ Yellow – $11
- Wedge Makeup Sponges (10-pack) – $4
3 Simple Hacks for Tiger Print Summer Nails

Why to love this Design:
Animal print never truly goes out of style, but tiger stripes feel particularly fierce and fun for June. It’s a way to channel your inner goddess and add a bit of an edge to your soft summer sundresses. It’s playful, a little bit wild, and surprisingly easy to achieve at home with just a few tricks.
Essential Elements:
- A vibrant orange base color
- Black striper polish or acrylic paint
- A very fine-tipped detailing brush
- Matte top coat for a modern finish
How to Prepare:
- Paint your nails a solid, bright orange and let them dry completely.
- Use a thin brush to draw irregular, slightly wavy ‘V’ shapes from the edges inward.
- Keep the lines varied in thickness to look more organic and natural.
Budget Range
- Sally Hansen Insta-Dri in ‘Orange Zest’ – $6
- Nail Art Detailing Brushes – $8
- Black Gel Liner Polish – $9
6 Ways to Style Gold Beach Charms
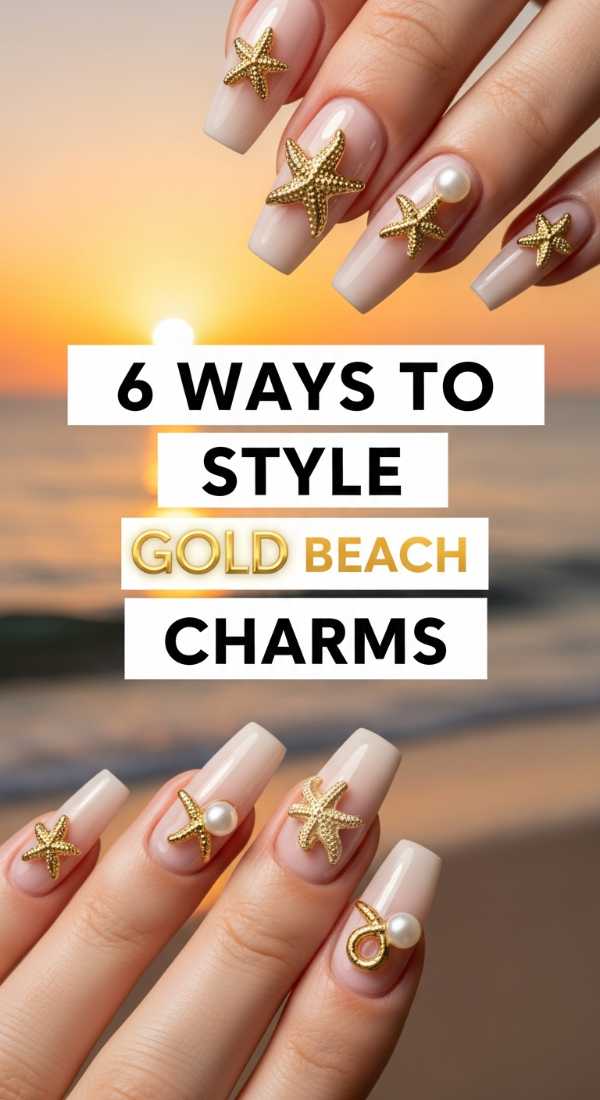
Why to love this Design:
This is for my loves who want to feel like a literal mermaid. Adding gold charms—think tiny starfish, shells, and pearls—elevates a simple manicure into a piece of jewelry. It feels luxurious, sophisticated, and perfectly curated for a seaside getaway or a poolside brunch.
Essential Elements:
- Gold metal 3D nail charms
- Strong nail glue or thick builder gel
- Tweezers for precision placement
- A neutral or sea-foam green base color
How to Prepare:
- Apply your base color and let it dry.
- Pick up your charm with tweezers and apply a tiny bead of glue to the back.
- Press firmly onto the nail for 10 seconds.
- Apply a top coat around the charm, but not over the top to keep the gold shine bright.
Budget Range
- Mixed Gold Shell & Starfish Charms (50pc) – $7
- KDS Nail Glue – $5
- Zoya ‘Fisher’ Sea-foam Polish – $12
5 Steps to Master Sunset Ombre Nails
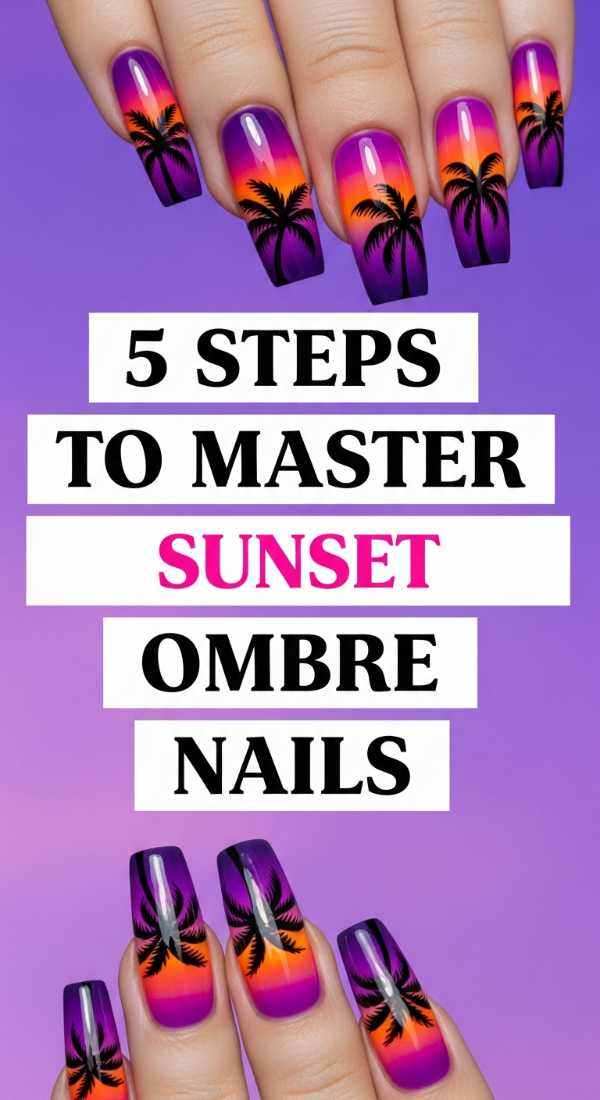
Why to love this Design:
There is nothing quite like a June sunset, is there? This design captures those soft purples, fiery oranges, and golden yellows perfectly. It’s like carrying a piece of the evening sky with you wherever you go. It’s incredibly romantic and looks stunning in photos.
Essential Elements:
- Purple, coral, and gold shimmer polishes
- Sponge applicator
- Clean-up brush and acetone
- Holographic top coat (optional)
How to Prepare:
- Start with a light peach base coat.
- Layer your colors on a sponge in the order of a sunset.
- Bounce the sponge across the nail vertically for a smooth transition.
- Repeat for depth once the first layer is dry.
- Apply top coat to meld the colors together perfectly.
Budget Range
- Holler and Glow Sunset Trio – $12
- Pure Acetone – $4
- Angled Clean-up Brush – $6
4 Techniques for 3D Seashell Nail Art
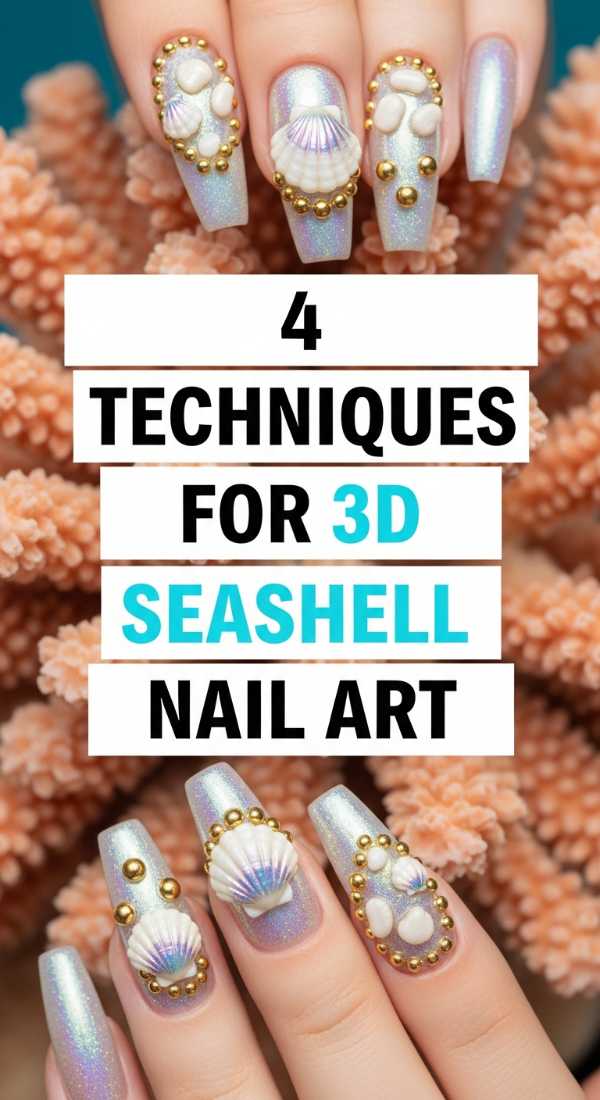
Why to love this Design:
Texture is everything this season! 3D seashell nails are so tactile and dreamy. They create a beautiful ridge effect that looks exactly like the inside of a precious shell you’d find on the shore. It’s sophisticated, whimsical, and a total conversation starter.
Essential Elements:
- Hard gel or 3D ‘pudding’ gel
- Pearl chrome powder
- UV/LED lamp
- Silicone tool or dotting tool
How to Prepare:
- Apply a pearlescent base color and cure.
- Use a thick gel to draw vertical lines that taper at the bottom.
- Cure the ridges to harden them.
- Rub pearl chrome powder over the entire nail for that iridescent finish.
Budget Range
- Beetles 3D Molding Gel – $9
- Pearl Chrome Powder – $8
- SunUV Mini Lamp – $15
7 Secrets for Long-Lasting Holiday Nails

Why to love this Design:
Nothing ruins a vacation mood like a chipped nail on day two! Mastering the art of longevity means you can swim, hike, and explore without a worry in the world. It’s all about the prep, my loves—taking that extra time to ensure your beautiful work stays put.
Essential Elements:
- High-quality dehydrator
- Acid-free primer
- Gel base and top coat
- Cuticle oil (the secret weapon!)
How to Prepare:
- Always push back cuticles and remove invisible skin on the nail plate.
- Dehydrate the nail thoroughly before applying any product.
- Cap the free edge (the very tip) with every single layer.
- Avoid hot water for at least two hours after your manicure.
Budget Range
- Modelones Dehydrator & Primer Set – $10
- Cuccio Milk & Honey Cuticle Oil – $14
- Long-wear Gel Top Coat – $12
3 Ways to Rock Y2K Tropical Nails
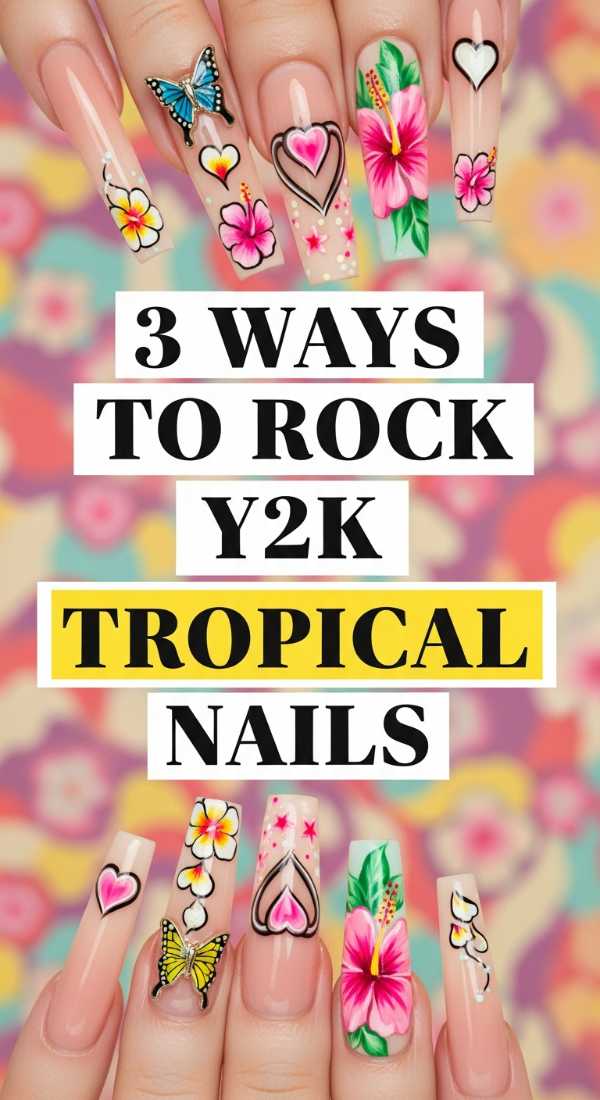
Why to love this Design:
We are going back to the early 2000s, and I am here for it! Think hibiscus flowers, bright turquoise, and sparkly accents. It’s nostalgic, youthful, and full of that ‘island girl’ energy that makes June feel so vibrant and fun.
Essential Elements:
- Turquoise and hot pink polishes
- Large dotting tool
- Silver glitter accents
- Hibiscus nail stickers or decals
How to Prepare:
- Choose a bright turquoise base.
- Apply hibiscus stickers or hand-paint flowers using a dotting tool for petals.
- Add a tiny silver rhinestone or glitter dot in the center of each flower.
Budget Range
- Holo Taco ‘Hydropower’ Turquoise – $14
- Y2K Tropical Sticker Sheet – $5
- Mixed Nail Rhinestones – $6
5 Easy Steps to a Neon French Tip
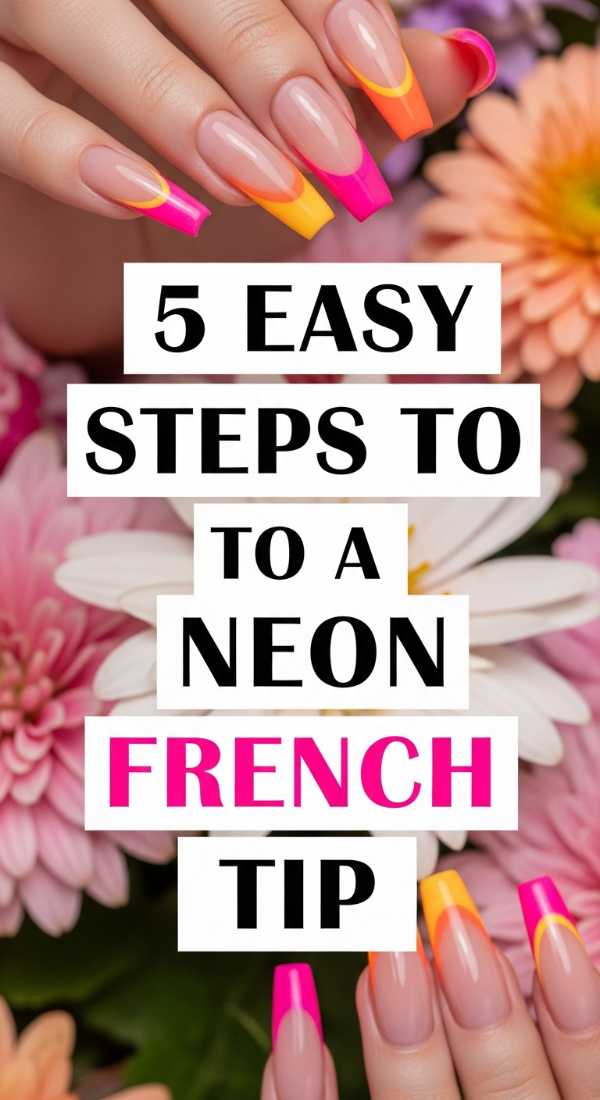
Why to love this Design:
If you love a classic look but want to spice it up for summer, the neon French tip is your best friend. It’s clean, chic, and modern. It keeps the nail looking elongated and elegant while adding that punchy pop of June color that we all crave.
Essential Elements:
- Sheer nude base polish
- Neon lime or orange polish
- French tip guide stickers or a liner brush
- Glossy top coat
How to Prepare:
- Apply two coats of your favorite sheer nude.
- Use a liner brush to map out the ‘smile line’ at the tip of the nail.
- Fill in the tip with your neon color of choice.
- Correct any wobbles with a brush dipped in acetone.
- Seal with a thick, protective top coat.
Budget Range
- Essie ‘Sugar Daddy’ Nude – $10
- China Glaze ‘Flip Flop Fantasy’ Neon – $8
- Nail Guide Stickers – $4
4 Tips for Your Summer Trip Nail Prep
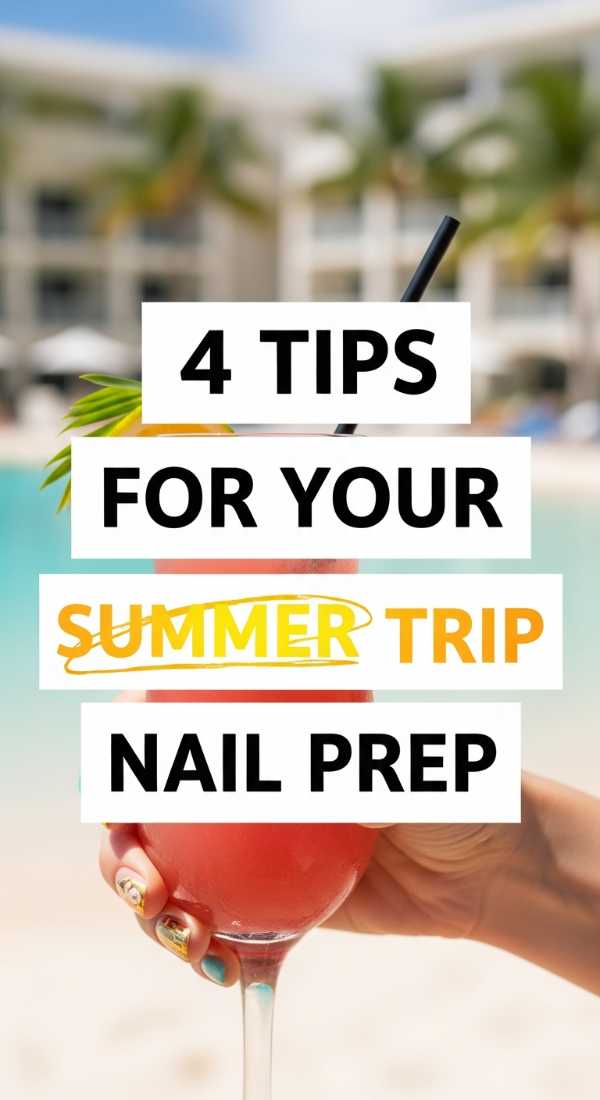
Why to love this Design:
Before you head out on your June adventures, your nails need a little spa day. Proper prep ensures your nails are strong enough to handle sand, saltwater, and sun cream. It’s the foundation of every viral nail look we’ve talked about today!
Essential Elements:
- Glass nail file (prevents peeling)
- Strengthening base coat
- Hydrating hand mask
- Travel-sized hand cream
How to Prepare:
- File nails in one direction only to prevent micro-tears.
- Use a hydrating hand mask the night before your trip.
- Keep nails at a manageable length to prevent breakage during activities.
- Apply a fresh layer of top coat every 3 days while away.
Budget Range
- Germanikure Glass Nail File – $12
- Burt’s Bees Lemon Butter Cuticle Cream – $6
- Aveeno Repairing Cica Hand Masks – $4
Conclusion
I hope this guide leaves you feeling inspired to play with color and texture this month! June is all about embracing your radiance and letting your light shine through every little detail, including your fingertips. Remember, my loves, there are no rules in art—only what makes you feel beautiful. Whether you go for a wild tiger print or a soft, pearly seashell, wear it with confidence and a smile. Stay golden, stay hydrated, and I can’t wait to see your stunning summer sets! Sending you so much love and sunshine.