
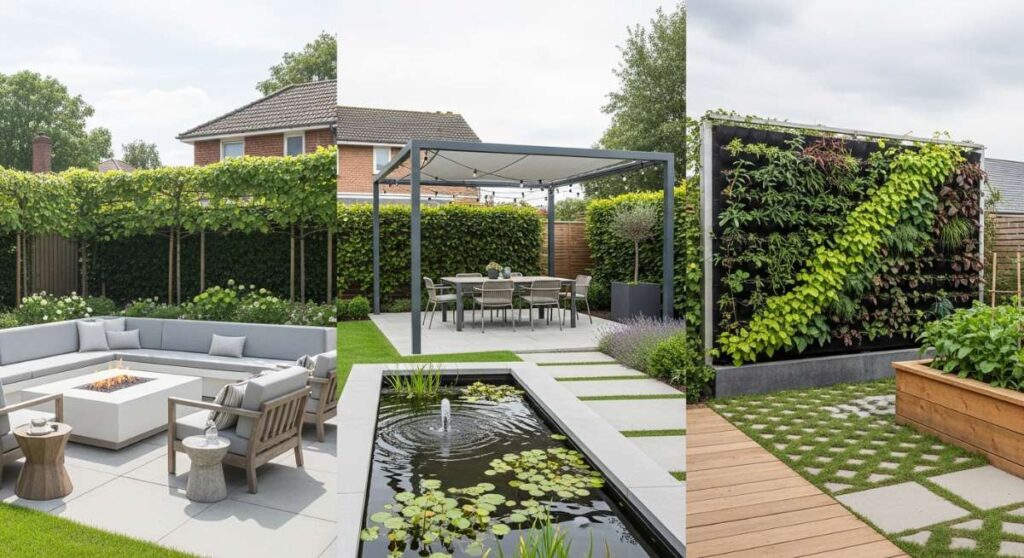
There is something almost magical about the way our outdoor spaces have become our true sanctuaries lately. Whether it is the soft golden hour light filtering through new leaves or the sound of water trickling into a handmade basin, our backyards and front porches are no longer just patches of grass—they are extensions of our souls. I have spent many mornings lately with a steaming mug of coffee, watching the garden wake up, and I realized that the trend of ‘outdoor living’ is less about aesthetics and more about how these spaces make us feel.
We are all craving that connection to nature, that tactile experience of digging in the dirt or creating a play space that sparks a child’s imagination. In this post, we are diving deep into the viral trends that are dominating our feeds, from sustainable mud kitchens to luxury spa-inspired corners. These projects are designed to be approachable yet stunning, ensuring your home becomes the ultimate retreat for every member of the family.
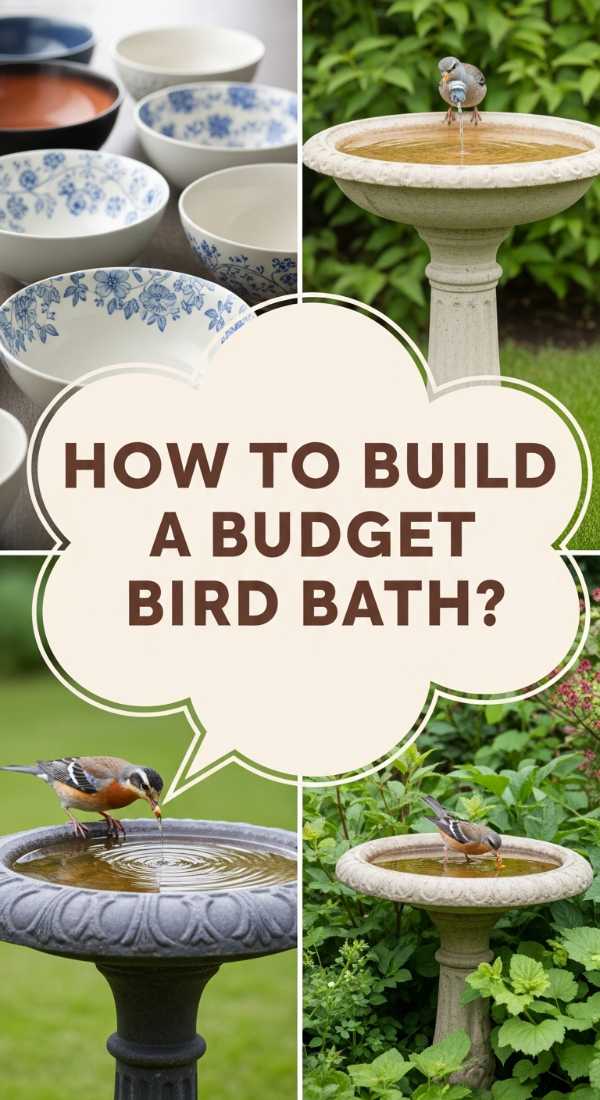
How to Build a Budget Bird Bath for a Serene Sanctuary
Why we love this
There is nothing quite like the gentle splash of a robin or the rhythmic ripple of water to transform a hectic afternoon into a moment of pure zen. This budget-friendly bird bath brings life and movement to your garden, inviting feathered friends to dance among your flowers while adding a vertical element of design. The sight of clear water reflecting the sky above and the subtle, earthy texture of the clay or stone creates a grounding focal point that smells of fresh rain and sun-warmed earth.
Essential Elements:
- Three graduated terra cotta pots (large, medium, small)
- One large terra cotta saucer (for the top)
- Outdoor-rated waterproof adhesive or silicone sealant
- Weatherproof exterior paint or spray sealer
- Smooth river stones or pebbles
- A small solar-powered fountain pump (optional for movement)
How to make it
- Clean all terra cotta pieces thoroughly with a damp cloth to ensure the adhesive bonds properly; any dust will prevent a secure hold.
- Invert the largest pot on a flat, level surface in your garden where you want the bird bath to permanently sit, as it will be heavy once assembled.
- Apply a generous ring of waterproof silicone sealant to the bottom (which is now the top) of the largest pot, then center the medium pot upside down on top of it.
- Repeat the process with the smallest pot, ensuring everything is perfectly centered and level to prevent the water from spilling unevenly.
- Apply the sealant to the bottom of the large saucer and press it firmly onto the top of the smallest pot, holding it for 60 seconds to set the initial bond.
- Allow the adhesive to cure for at least 24 hours in a dry environment before adding any water or decorations.
- Once dry, fill the saucer with fresh water and place smooth river stones inside to give birds a safe place to land and drink without slipping.
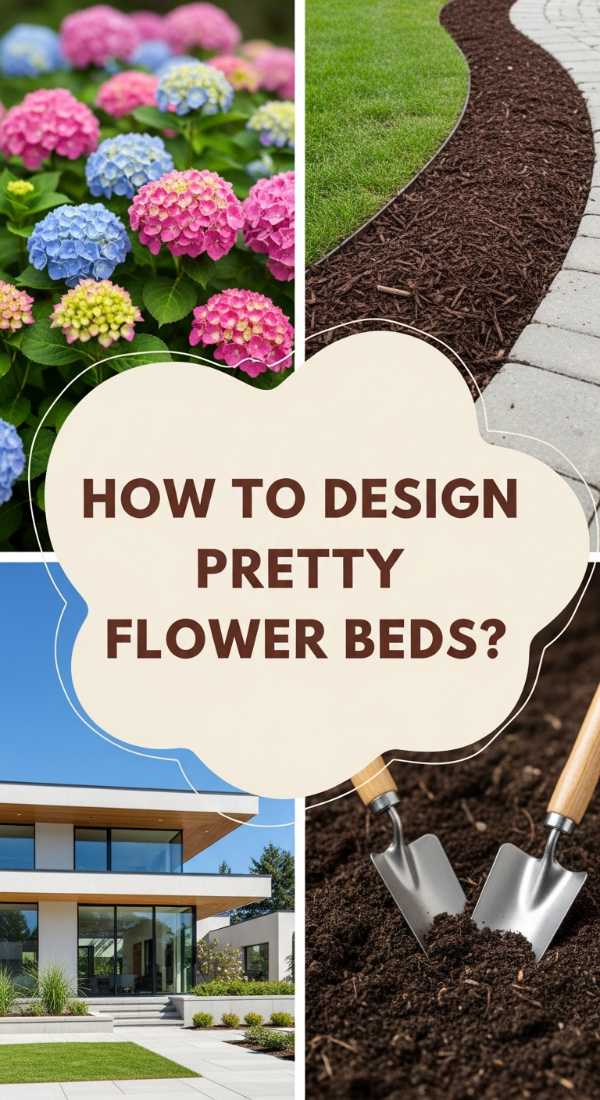
How to Design Front Yard Flower Beds for Instant Curb Appeal
Why we love this
A well-designed flower bed is like a warm hug for anyone walking up to your front door, offering a fragrant welcome that changes with the seasons. We love the way layered heights and contrasting textures—from the soft, silvery leaves of dusty miller to the vibrant, velvet petals of deep purple salvia—create a visual symphony. The scent of damp mulch and blooming jasmine in the evening air provides a sensory richness that makes coming home the best part of your day, instantly elevating your home’s personality.
Essential Elements:
- Hardwood mulch (dark brown or black for contrast)
- A mix of evergreen shrubs for structure
- Perennial flowers for seasonal color
- Professional-grade landscape fabric
- Plastic or stone edging material
- Organic compost and high-quality topsoil
How to make it
- Define the shape of your flower bed using a garden hose or spray paint, opting for gentle curves rather than harsh straight lines to create a more natural, flowing aesthetic.
- Remove all grass and weeds within the marked area using a flat spade, ensuring you dig down at least 3 inches to get all the root systems out.
- Amend the existing soil by tilling in 2-4 inches of organic compost and topsoil, which provides the nutrient-dense foundation your new plants need to thrive.
- Arrange your plants while they are still in their nursery pots; place the tallest evergreens at the back, medium perennials in the middle, and low-growing groundcovers at the front.
- Dig holes twice as wide as the root ball of each plant, gently loosen the roots, and set them into the ground so the top of the root ball is level with the soil surface.
- Install your chosen edging along the perimeter to keep the mulch contained and prevent grass from creeping back into the bed.
- Spread a 3-inch layer of hardwood mulch over the entire area, keeping it a few inches away from the stems of the plants to prevent rot, and water deeply immediately after planting.
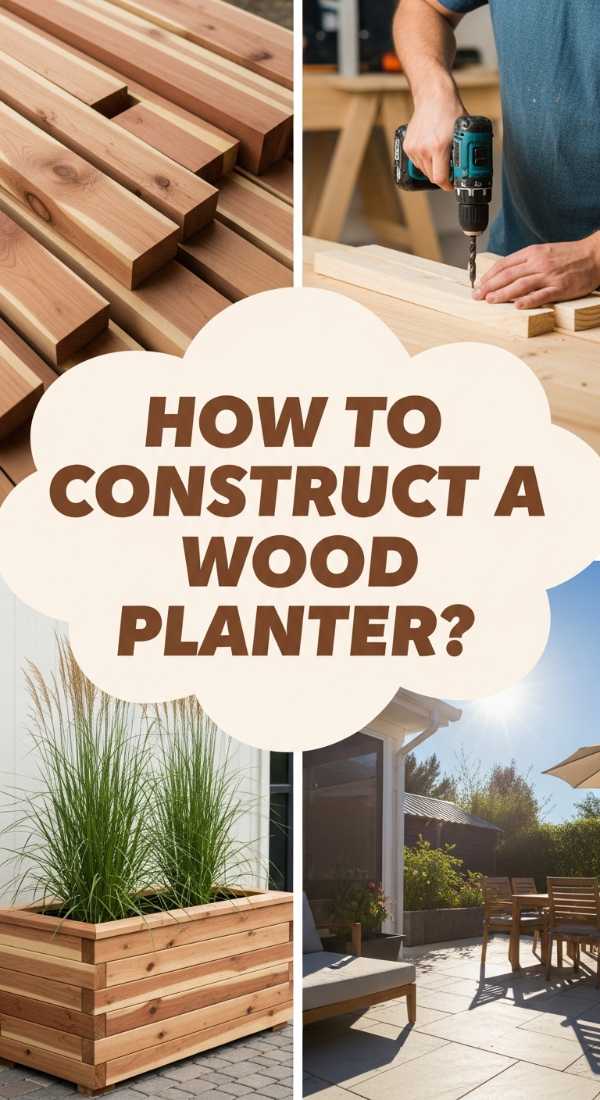
How to Construct a Wood Planter Box for Modern Garden Style
Why we love this
Modern garden design is all about clean lines and the natural warmth of wood, and these DIY planter boxes are the perfect marriage of both. The raw, cedar aroma of freshly cut lumber combined with the architectural silhouette of structured greens like snake plants or boxwoods creates a sophisticated ’boutique hotel’ vibe in your own backyard. Touching the smooth, sanded surface of the wood and seeing the intricate grain patterns under a matte sealer adds a tactile luxury that plastic pots simply cannot replicate.
Essential Elements:
- Cedar or Redwood 2x4s and 1×6 boards (naturally rot-resistant)
- Exterior-grade wood screws (3-inch and 1.5-inch)
- Wood glue (exterior-rated)
- Landscape fabric or plastic liner with drainage holes
- Power drill and miter saw
- Fine-grit sandpaper and clear outdoor wood sealer
How to make it
- Measure and cut your 2x4s into four equal lengths for the corner posts and your 1×6 boards into the desired lengths for the side panels using a miter saw for clean, 90-degree edges.
- Lay two corner posts on a flat surface and screw the first side panel boards into them, pre-drilling holes to prevent the cedar from splitting and using wood glue for extra stability.
- Continue adding side boards until you reach the desired height, then repeat the process for the opposite side of the box.
- Connect the two finished sides by screwing in the remaining side panels, creating a four-sided frame that is square and sturdy.
- Measure the interior dimensions and cut 2×4 supports to screw into the inside bottom, then lay floor slats across them, leaving 1/4-inch gaps between slats for drainage.
- Sand all exterior surfaces with 120-grit and then 220-grit sandpaper until the wood feels like silk to the touch, then apply two coats of clear sealer to preserve the color.
- Line the interior with landscape fabric to keep the soil in place while allowing excess water to escape through the bottom gaps.
How to Create an Outdoor Play Area for Happy Active Kids
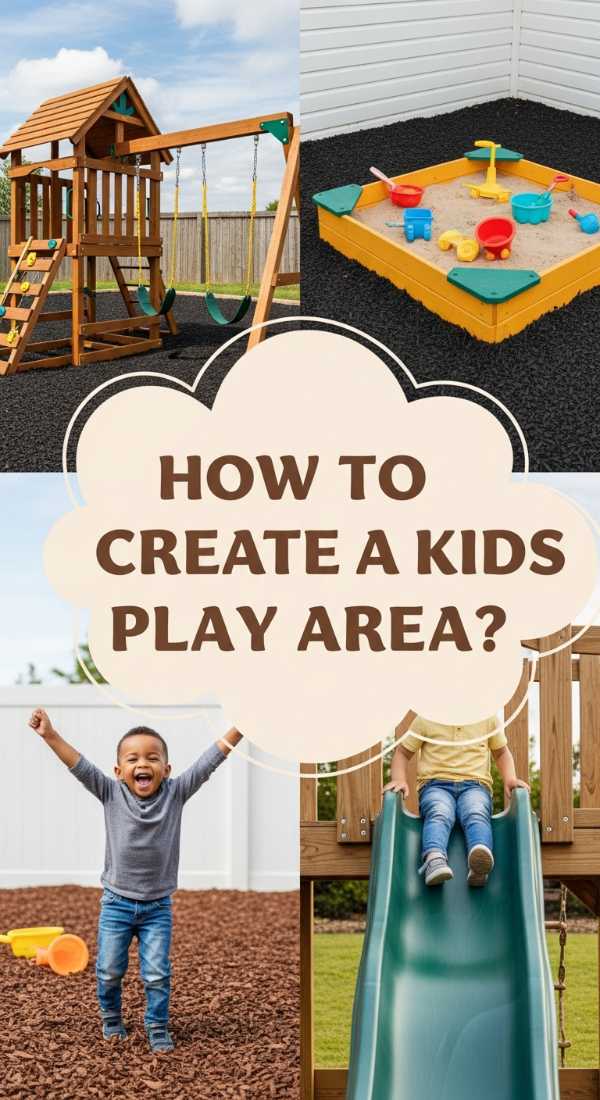
Why we love this
Watching children lose themselves in imaginative play while breathing in the fresh air is the ultimate reward for any parent. A dedicated play area provides a safe, vibrant zone where the grass feels cool under bare feet and the sound of laughter fills the air. We love how this space creates a boundary for ‘yes’—a place where jumping, running, and getting a little bit messy is not only allowed but encouraged, fostering a lifelong love for the great outdoors.
Essential Elements:
- Rubber mulch or engineered wood fiber (for impact safety)
- Landscape timbers or recycled plastic borders
- Heavy-duty landscape fabric
- Activity stations (swing set, slide, or climbing wall)
- Sun-shading elements (sail shades or umbrellas)
- Outdoor storage bins for toys
How to make it
- Select a level area of the yard that is easily visible from the house and clear it of any large rocks, debris, or tripping hazards.
- Excavate the area to a depth of 6-8 inches if you are using loose-fill surfacing like rubber mulch to ensure proper impact absorption.
- Install a sturdy border using landscape timbers, securing them with rebar stakes driven deep into the ground to keep the perimeter from shifting.
- Lay down a heavy-duty weed barrier/landscape fabric to prevent weeds from poking through and to keep the mulch from mixing with the dirt below.
- Assemble any large equipment, such as a swing set or climbing frame, according to the manufacturer’s specifications, ensuring all anchors are set in concrete or deep stakes.
- Fill the bordered area with your chosen safety surfacing, leveling it out with a rake to a consistent depth of at least 6 inches.
- Check all equipment for sharp edges or loose bolts, then add a shade sail above the most-used sections to protect little ones from UV rays during peak hours.
How to Style Mud Kitchen Accessories for Endless Sensory Exploration

Why we love this
A mud kitchen is a sensory wonderland where ‘nature’s ingredients’ become gourmet feasts. We are obsessed with the clink of stainless steel ladles against vintage pots and the satisfying squish of wet earth between fingers. It is a space that smells like pine needles and crushed mint, where children develop fine motor skills while playing with textures that range from smooth river stones to crunchy dried leaves. Styling it with beautiful, functional accessories makes it an aesthetic addition to the garden rather than just a toy.
Essential Elements:
- Stainless steel bowls and measuring cups
- Wooden spoons and spatulas
- Chalkboard for the ‘Daily Menu’
- Glass jars (for storing acorns, petals, and seeds)
- A small working pump or faucet
- Woven baskets for foraging
How to make it
- Start by organizing your accessories by material; group woods together and metallics together to create a cohesive, curated look that feels intentional.
- Mount small hooks along the backsplash of the mud kitchen to hang whisks, spoons, and colanders, keeping them within easy reach for little ‘chefs’.
- Create a ‘spice rack’ using small wooden shelves to hold clear jars filled with colorful natural items like dried lavender, yellow flower petals, and smooth gray pebbles.
- Install a large chalkboard nearby and use waterproof chalk markers to write out a menu of the day, such as ‘Mud Pie with Pinecone Sprinkles,’ to encourage literacy and roleplay.
- Place a large, shallow basin in the center of the workspace and fill it with a mix of clean potting soil and water to reach a perfect ‘batter’ consistency.
- Add a basket of ‘foraging’ tools like child-safe scissors and magnifying glasses to encourage kids to explore the rest of the garden for garnishes.
- Regularly rotate the accessories—adding vintage muffin tins or old tea kettles—to keep the sensory experience fresh and exciting for the children.
How to Arrange a Luxury Hot Tub Area for Ultimate Home Relaxation
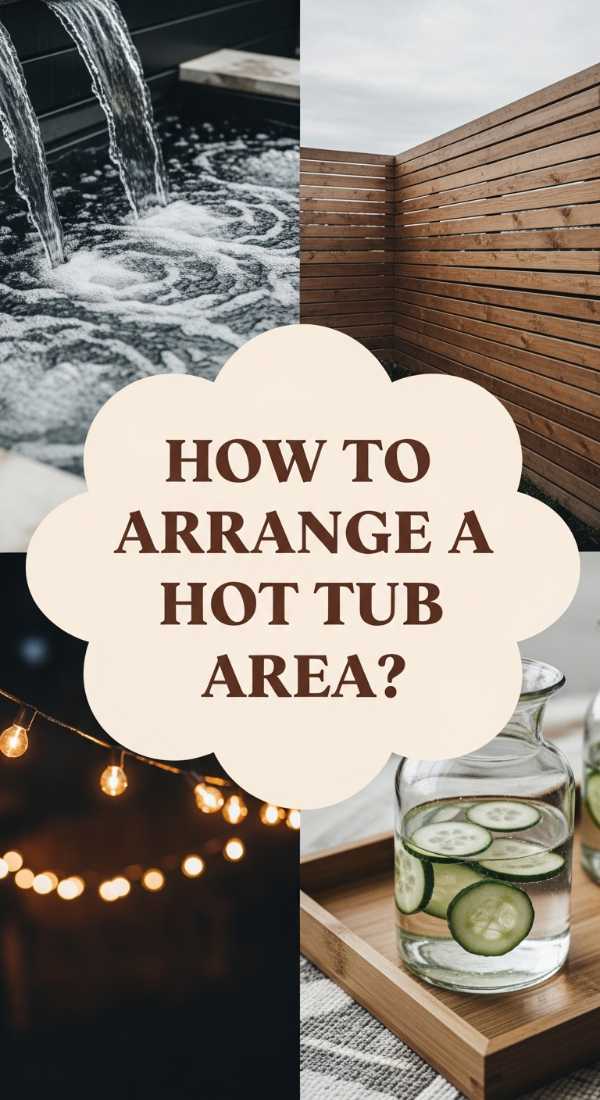
Why we love this
Imagine stepping into steaming, bubbling water while the cool night air hits your shoulders and the scent of cedar and eucalyptus wafts through the steam. A luxury hot tub area isn’t just about the tub itself; it’s about creating an atmosphere of total tranquility. We love the contrast of warm ambient lighting against the dark night sky and the plush feeling of a thick towel waiting nearby. It is the ultimate home escape that turns your backyard into a five-star spa retreat where the world simply melts away.
Essential Elements:
- Privacy screens (slatted wood or tall greenery)
- All-weather outdoor rug
- Subtle LED string lights or lanterns
- Side table for drinks and aromatic candles
- Towel rack or heated towel rail
- Potted palms or bamboo for a tropical feel
How to make it
- Position the hot tub on a reinforced concrete pad or a heavy-duty deck designed to support the significant weight of water and people.
- Surround the area with privacy screens or fast-growing evergreens like Thuja Green Giant to create an intimate, secluded atmosphere away from neighbors’ eyes.
- Layer an outdoor rug next to the tub’s steps to provide a soft, non-slip surface for wet feet and to define the ‘relaxation zone’.
- String warm-toned LED fairy lights overhead or place solar lanterns at varying heights to provide a soft glow that doesn’t overwhelm the natural starlight.
- Set up a weather-resistant side table within arm’s reach of the tub to hold a waterproof Bluetooth speaker, refreshing drinks, and essential oil diffusers.
- Incorporate oversized planters filled with lush, large-leafed plants to dampen sound and add to the ‘oasis’ aesthetic.
- Ensure a clear, well-lit path from the house to the hot tub area to make nighttime soaking safe and inviting.
How to Assemble a Pallet Mud Kitchen for Sustainable Outdoor Fun
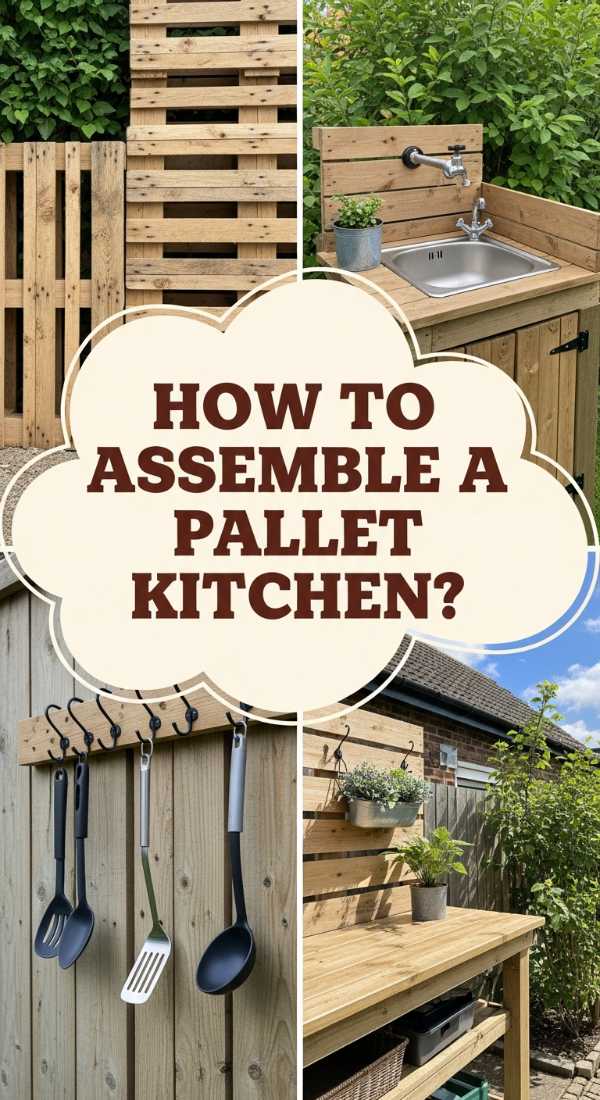
Why we love this
Upcycling is the heart of modern gardening, and a pallet mud kitchen is the gold standard of sustainable DIY. There is a rustic, farmhouse charm to the weathered wood and the sturdy, industrial feel of a repurposed pallet. We love how this project gives a second life to materials that might have been discarded, turning them into a hub of creativity. The smell of sun-baked wood and the sight of a functional ‘kitchen’ in the middle of a garden creates a whimsical, storybook atmosphere for kids and adults alike.
Essential Elements:
- Two to three clean, heat-treated (marked HT) pallets
- A plastic washbasin or old stainless steel sink
- Galvanized nails and wood screws
- Sanding block and coarse sandpaper
- Hand saw or circular saw
- Outdoor-safe wood stain or paint
How to make it
- Select pallets marked with ‘HT’ (Heat Treated) to ensure they are safe for children and free from harmful chemical pesticides used in ‘MB’ (Methyl Bromide) pallets.
- Dismantle one pallet to use the individual boards for shelving and worktops, while keeping two pallets intact to serve as the base and the vertical backsplash.
- Sand every square inch of the wood vigorously, starting with 60-grit and moving to 120-grit, until there are absolutely no splinters or rough edges.
- Secure the two base pallets together at a 90-degree angle using heavy-duty L-brackets and exterior screws to create a stable L-shaped workstation.
- Cut a hole in the top pallet board that is slightly smaller than the lip of your plastic basin, then drop the basin in to serve as the sink.
- Attach the dismantled boards to the back pallet to create shelves for jars and hooks for utensils, ensuring everything is level.
- Apply a coat of outdoor-rated stain or a fun, vibrant paint to protect the wood from the elements and give the kitchen a polished, finished look.
How to Craft a Water Table for Hours of Summer Splashing
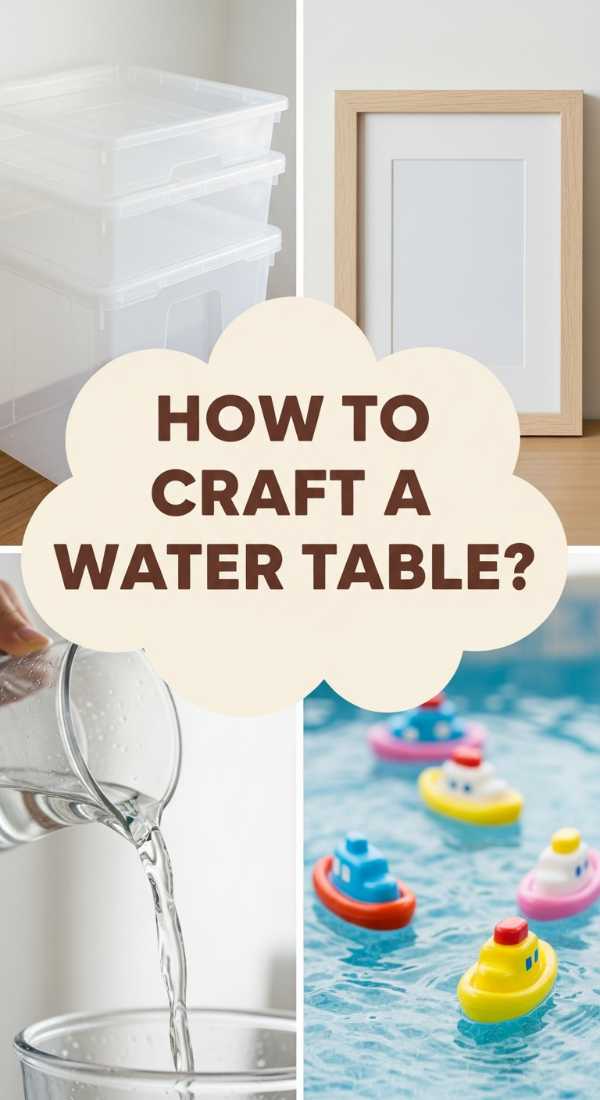
Why we love this
On a sweltering July afternoon, there is nothing more enticing than the sight of crystal-clear water shimmering in a custom-built table. This project is a life-saver for parents, providing a cool, engaging activity that keeps kids occupied for hours. We love the tactile contrast of cold water against sun-warmed skin and the rhythmic sound of pouring and splashing. It is a simple, clean, and incredibly effective way to bring the joy of a water park into the safety of your own patio.
Essential Elements:
- PVC pipes or pressure-treated 2×2 wood for the frame
- Large, deep plastic storage bins
- Waterproof adhesive
- An assortment of funnels, tubes, and water wheels
- Drain plug (optional but recommended)
- Submersible small water pump (for a ‘fountain’ effect)
How to make it
- Measure the height of your child’s waist and build a sturdy rectangular frame using PVC pipes or wood that will hold the plastic bin at that comfortable height.
- If using wood, ensure you use galvanized screws and water-resistant glue; if using PVC, use specialized PVC primer and cement for a permanent bond.
- Cut a hole in the bottom corner of the plastic bin and install a rubber-gasket drain plug, which makes cleaning and emptying the table much easier.
- Place the bin into the frame, ensuring it is snug and won’t tip when filled with heavy water and leaning children.
- Create a ‘waterfall’ feature by attaching a second, smaller bin at a higher level using PVC supports, allowing water to overflow into the main basin below.
- Add various ‘manipulatives’ like floating toys, measuring jugs, and plastic tubing secured to the sides with suction cups to create different water paths.
- Fill with fresh water and, for a fun twist, add a few drops of blue food coloring or some floating ice cubes to enhance the sensory experience.
How to Plant a Lush Front Yard for a Welcoming Home Entrance
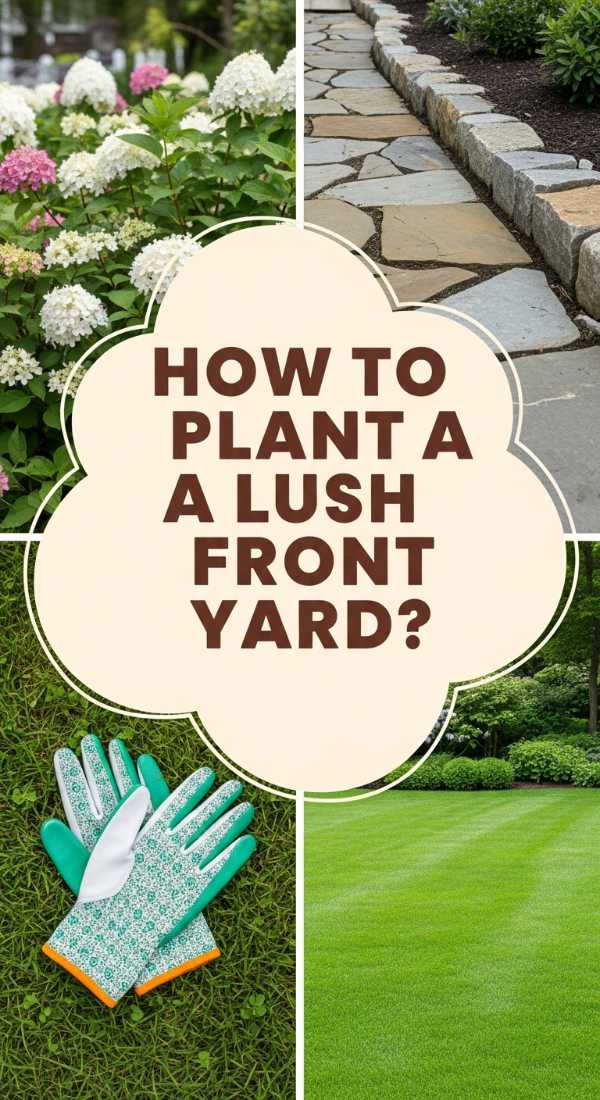
Why we love this
A lush front yard is the ultimate ‘hello’ to your neighborhood. It’s about creating layers of greenery that feel abundant and established, like an English cottage garden met with modern precision. We love the visual weight of deep green boxwoods paired with the airy, dancing stems of ornamental grasses. The earthy scent of healthy soil and the vibrant colors of blooming hydrangeas create a sense of pride and peace every time you pull into the driveway, making your home feel like a true landmark of beauty.
Essential Elements:
- Foundational evergreens (for year-round structure)
- Ornamental trees (like Japanese Maple or Dogwood)
- Groundcovers (like Pachysandra or Creeping Thyme)
- Drip irrigation kit
- Quality organic mulch
- Slow-release fertilizer
How to make it
- Start with a master plan that layers plants from tallest to shortest: place structural trees first, then mid-sized shrubs, then flowering perennials, and finally groundcovers.
- Focus on ‘mass planting’ by grouping at least three to five of the same plant species together; this creates a high-end, professional look rather than a cluttered collection.
- Incorporate various leaf shapes and colors—pair the broad, waxy leaves of hostas with the fine, feathery texture of ferns to create visual interest even when nothing is in bloom.
- Install a simple drip irrigation system before mulching to ensure deep, consistent watering that reaches the roots without wasting water through evaporation.
- Add a ‘focal point’ such as a large decorative urn, a stone boulder, or a specimen tree to draw the eye and give the garden a sense of purpose.
- Edge your lawn with a sharp spade or mechanical edger to create a crisp line between the lush plantings and the grass, which instantly makes the yard look professionally maintained.
- Finish with a thick layer of dark mulch to suppress weeds and hold in moisture, ensuring your lush greenery stays vibrant all season long.
How to Curate Backyard Play Spaces for Magic and Adventure
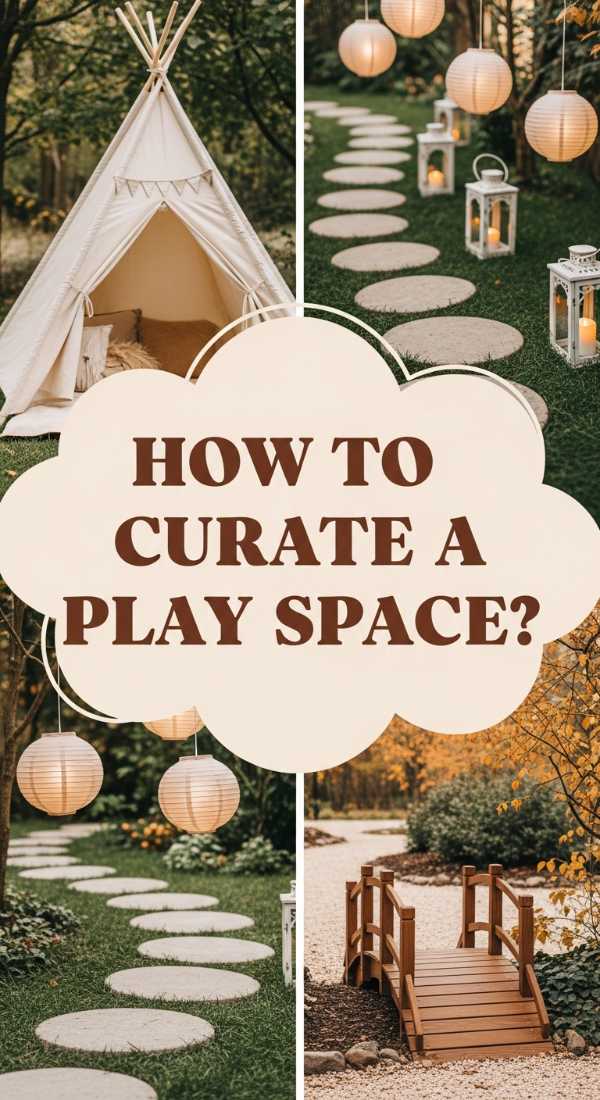
Why we love this
Magic isn’t found in a box; it’s found in the hidden corners of a backyard where imagination takes flight. We love curating spaces that feel like secret worlds—think fairy lights strung through willow branches and hidden paths made of wood slices. These spaces smell like crushed clover and sunshine, offering children a place to dream, explore, and create their own adventures. It’s about more than just equipment; it’s about creating an environment that feels alive and full of possibility, turning a standard lawn into a kingdom.
Essential Elements:
- Natural elements (willow tunnels, hollow logs, large boulders)
- Canvas teepees or ‘A-frame’ hideouts
- Stepping stones or log slices for paths
- Solar-powered fairy lights
- Bird feeders and butterfly-friendly plants
- A small ‘discovery’ table for nature finds
How to make it
- Designate ‘zones’ within the yard for different types of play, such as a quiet reading nook under a tree and a more active ‘climbing zone’ near the back.
- Create a ‘Secret Path’ using thick slices of logs or flat flagstones that wind through tall grasses or behind shrubs, leading to a hidden destination like a teepee.
- Set up a weather-resistant canvas teepee and fill the floor with outdoor cushions and a soft rug to create a cozy, magical hideout for storytelling.
- Hang solar-powered string lights in the branches above the play area so the magic can continue as the sun begins to set.
- Plant ‘sensory’ flowers like Snapdragons (which kids can ‘pop’) or Lamb’s Ear (which is incredibly soft) around the play space to engage all the senses.
- Install a low-hanging tree swing or a ‘hammock chair’ that allows children to sway gently while watching the birds and clouds.
- Include a ‘Nature Treasure Box’ where kids can store the interesting rocks, feathers, and leaves they find during their daily adventures in their enchanted backyard.
Conclusion
Transforming your outdoor space is one of the most rewarding journeys you can take as a homeowner. Whether you are building a simple bird bath to invite nature in or designing a full-scale luxury hot tub retreat, the goal is always the same: to create a place that resonates with your lifestyle and brings joy to your everyday routine. These trends are viral for a reason—they work, they look stunning, and they reconnect us with the simple pleasures of life. So, grab your gloves, pick a project, and start building your own version of garden goals today!