

From Pinterest to Reality: The Ultimate Viral Inspo Guide
We have all been there: it is 2 AM, and you are spiraling down a rabbit hole of perfectly curated boards, wondering how on earth people actually live in homes that look like a dream. It feels like there is a secret language of aesthetics that we were never taught, leaving us with a ‘saved’ folder full of inspiration but a reality that feels just a little bit too ordinary. I know that feeling of longing for a space that breathes, a home that tells a story, and a lifestyle that feels as intentional as a cinematic montage.
But here is the beautiful truth I’ve discovered: those viral moments aren’t reserved for the elite or the professional designers. They are built one small, thoughtful project at a time. Whether you are looking to overhaul your curb appeal or just want your morning coffee to feel a bit more magical in a whimsical apartment, you have the power to bridge the gap between your screen and your living room. Let’s stop scrolling and start creating—here is your ultimate guide to bringing that viral lifestyle home.
How to Create Simple Front Yard Landscaping for Instant Curb Appeal

Why we love this
There is nothing quite like the sensory explosion of a well-manicured front yard as the golden hour sun hits it. Imagine the earthy, rich aroma of fresh cedar mulch mingling with the sweet, heady scent of blooming hydrangeas. The visual contrast of crisp, defined lawn edges against the soft, billowy textures of ornamental grasses creates a rhythm that draws the eye and invites the soul to rest. It transforms a house from just a structure into a welcoming sanctuary that greets you with a breath of fresh air every time you pull into the driveway.
Essential Elements:
- Hardwood or cedar mulch
- Evergreen shrubs (like Boxwood) for year-round structure
- Perennial flowers (Lavender or Hostas)
- Stone or plastic landscape edging
- Solar-powered path lights
- Hand trowel and gardening gloves
How to make it
- Begin by defining your bed lines using a garden hose to map out organic, flowing curves; this looks more professional than rigid straight lines. Use a sharp spade to cut a clean 3-inch deep trench along the line to separate the grass from the bed.
- Clear all weeds and existing debris from the area, ensuring you pull roots to prevent regrowth. Level the soil using a metal rake, breaking up large clumps for a smooth planting surface.
- Place your tallest evergreen shrubs at the back of the bed (closer to the house) and layer smaller perennials in front. Keep plants in their nursery pots and move them around until the spacing feels balanced, leaving at least 12-18 inches for growth.
- Dig holes twice as wide as the nursery pots but no deeper. Place the plants in, backfill with a mix of native soil and organic compost, and firm the ground with your hands to remove air pockets.
- Spread a 2-to-3-inch layer of mulch across the entire bed, being careful not to pile it against the stems of the plants (this prevents rot). Finish by installing solar lights at 3-foot intervals and watering deeply until the soil is saturated.
How to Design a Productive Office Desk Setup for Your Work Cubicle

Why we love this
The modern cubicle often feels cold and clinical, but with the right setup, it can become a cockpit of inspiration and high-level focus. Picture the tactile satisfaction of a felt desk mat under your wrists and the soft, warm glow of a task lamp cutting through the harsh overhead fluorescent lights. There is a specific kind of peace that comes from a clutter-free surface where every tool has its place, and a small sprig of eucalyptus in a bud vase adds a subtle, refreshing scent that keeps your mind sharp through the afternoon slump.
Essential Elements:
- Ergonomic laptop stand or monitor riser
- Large felt or vegan leather desk mat
- Small adjustable warm-toned desk lamp
- Noise-canceling headphones
- Acrylic or wooden cable management box
- A small potted succulent or air plant
How to make it
- Clear everything off your desk and wipe it down with a microfiber cloth to create a literal and mental blank slate. Start by positioning your monitor or laptop stand directly in front of you so the top of the screen is at eye level, which prevents neck strain.
- Lay down your desk mat to define your primary work zone; this acts as a visual anchor and provides a soft surface for your forearms. Position your keyboard and mouse centrally on this mat.
- Address the cable chaos by grouping cords together with Velcro ties and hiding power strips inside a dedicated cable box. Visual clutter from wires is the biggest productivity killer in a small space.
- Place your task lamp on the side of your non-dominant hand to reduce shadows when writing. Choose a bulb with a warm temperature (around 2700K) to counter the blue light of the office.
- Add one or two personal items—no more. A single framed photo and one small plant are enough to make the space feel like yours without overwhelming the limited square footage.
How to Style Summer Table Centerpieces for Your Next Dinner Party

Why we love this
Summer dining is all about the art of the effortless gather, where the table itself feels like a celebration of the season’s bounty. The centerpiece should feel organic and alive, featuring the bright, zesty colors of sliced citrus floating in glass bowls and the wild, unconstructed beauty of field flowers. When the breeze catches the light linens and the candlelight begins to flicker against the ripening fruit, the table becomes a sensory masterpiece that encourages guests to linger, laugh, and enjoy the cooling evening air.
Essential Elements:
- Neutral linen table runner
- Assorted glass bud vases of varying heights
- Seasonal fruits (Lemons, limes, or peaches)
- Eucalyptus or olive branch sprigs
- Unscented taper candles in brass holders
- Shears for trimming stems
How to make it
- Start by draping a linen runner down the center of the table, letting it bunch slightly for a relaxed, lived-in texture rather than pulling it tight. This creates a soft foundation for your decor.
- Place three to five taper candles at irregular intervals along the runner. Using an odd number of items creates a more natural, aesthetically pleasing visual flow than even pairs.
- Intersperse your bud vases between the candles. Fill them with a mix of greenery and one or two focal blooms, like dahlias or zinnias. Cut the stems at a 45-degree angle under water to ensure they stay hydrated throughout the party.
- Incorporate your fruit by either placing whole peaches directly on the runner or slicing lemons and placing them inside larger glass vases filled with water. The citrus scent adds a layer of freshness to the air.
- Finalize the look by tucking small sprigs of herbs like rosemary or mint around the base of the vases. This fills in any “bald” spots and provides an amazing aromatic experience for your guests as they sit down.
How to Achieve a Whimsical Apartment Aesthetic for Dreamy Living

Why we love this
A whimsical apartment feels like stepping into a modern-day fairytale where the rules of rigid minimalism simply don’t apply. It is a world of soft, ethereal layers—think sheer tulle curtains catching the afternoon breeze and the magical twinkle of fairy lights reflected in ornate, vintage mirrors. The space feels light, airy, and deeply personal, filled with soft pastels and quirky accents that spark joy. It is the kind of home where you can wrap yourself in a velvet throw and feel completely disconnected from the noise of the outside world.
Essential Elements:
- Sheer or lace window treatments
- Warm-white LED fairy lights or globe lights
- Vintage-inspired ornate gold mirrors
- Pastel velvet throw pillows
- Floating bookshelves or “invisible” shelves
- Dried flower bouquets (Baby’s breath or Lavender)
How to make it
- Replace heavy blinds with sheer, floor-to-ceiling curtains. Hang the rod 4-6 inches above the window frame to create the illusion of height and allow the maximum amount of soft, diffused light to filter in.
- Layer your lighting by avoiding the “big light” (overhead fixtures). Drape fairy lights behind sheer curtains or across a bookshelf to create a soft, magical glow. Use warm-toned bulbs in all lamps to maintain a cozy, dreamlike atmosphere.
- Incorporate vintage elements by sourcing an ornate mirror. Lean it against a wall rather than hanging it; this adds to the effortless, whimsical vibe and helps bounce light around the room.
- Style your shelves with a mix of books, crystals, and small whimsical trinkets. Group items by color rather than height to create a cohesive, rainbow-like effect that feels intentional and artistic.
- Introduce texture through soft fabrics. Layer a faux-fur rug over a larger jute rug, and pile velvet pillows on the sofa. The goal is to make every surface look like a soft place to land.
How to Perfect Your Aquarium Setup for a Calming Home Oasis

Why we love this
There is a profound, meditative quality to a well-designed aquarium that acts as a living piece of art in your home. The gentle hum of the filter and the rhythmic dance of aquatic plants in the current create a focal point that lowers the heart rate instantly. Watching the vibrant, shimmering scales of fish glide through a landscape of natural driftwood and smooth river stones provides a visual escape, bringing the serene mystery of the underwater world right into your living room or bedroom.
Essential Elements:
- Glass aquarium tank (at least 10-20 gallons for stability)
- High-quality LED lighting with a “moonlight” setting
- Substrate (Aquarium soil or cleaned sand)
- Live plants (Anubias, Java Fern, or Amazon Swords)
- Natural driftwood and dragon stone
- Water conditioner and a reliable filtration system
How to make it
- Thoroughly rinse your substrate and stones in a bucket until the water runs clear to prevent a cloudy tank. Lay the substrate in the tank, sloping it from back to front (higher in the back) to create a sense of depth and perspective.
- Arrange your “hardscape”—the driftwood and stones—following the “rule of thirds.” Avoid placing the largest piece dead-center; instead, offset it to one side to create a more dynamic and natural look.
- Fill the tank about one-third of the way with conditioned water, pouring it over a saucer to avoid disturbing the substrate. Plant your live greenery using aquascaping tweezers, placing taller plants in the back and shorter ones in the foreground.
- Finish filling the tank and install your filter and heater. Set the heater to the appropriate temperature for your specific fish species (usually between 75-80°F for tropical fish).
- Let the tank “cycle” for at least 2-4 weeks before adding fish. This allows beneficial bacteria to grow, which is crucial for a healthy ecosystem. Use an LED light with a timer to simulate a natural day/night cycle, preventing excessive algae growth.
How to Master the Vintage Grandma House Aesthetic for Ultimate Coziness

Why we love this
Often called “Grandmacore,” this aesthetic is the ultimate embrace of nostalgia and slow living. It is the comforting smell of cinnamon tea and old book pages, the tactile warmth of a hand-knitted wool blanket, and the visual charm of mismatched floral china. This style celebrates the “perfectly imperfect,” where every item feels like it has a history and a soul. It’s about creating a space that feels like a permanent hug, full of soul-soothing colors and cozy nooks that invite you to put down your phone and pick up a craft.
Essential Elements:
- Floral patterned wallpaper or textiles
- Antique lace doilies and tablecloths
- Thrifted porcelain teacups and saucers
- Chunky knit or crochet throw blankets
- Dried herb bundles (Sage or Thyme)
- Wicker or rattan baskets for storage
How to make it
- Start by layering your textiles. Place a lace runner over a solid-colored wooden table, and drape multiple blankets of different textures over the back of your armchairs. The more layers, the cozier the vibe.
- Create a “curio” moment by dedicated a shelf or glass cabinet to mismatched vintage china. Don’t worry about sets; the charm lies in the variety of floral patterns and gold-rimmed edges.
- Incorporate botanical elements by hanging dried flower bundles or herbs from a simple wooden dowel or kitchen rack. This adds a rustic, farmhouse-chic touch and a subtle, natural fragrance.
- Swap out modern, sleek hardware for brass or porcelain knobs. This small change on dressers or kitchen cabinets instantly ages the piece in the best way possible.
- Focus on warm, amber lighting. Use pleated fabric lampshades which soften the light and create that classic, nostalgic glow that defines a cozy, vintage home.
How to Build Cheap Pool Decks for a Luxury Backyard Feel

Why we love this
You don’t need a sprawling estate to enjoy the luxury of a poolside lounge area; a DIY deck can elevate an above-ground pool into a high-end retreat. Picture the feeling of sun-warmed wood beneath your bare feet and the convenience of a level surface for your lounge chairs and iced drinks. It bridges the gap between the water and the yard, creating a seamless transition that makes your backyard feel like a boutique resort, all while keeping your budget firmly intact with smart material choices.
Essential Elements:
- Pressure-treated 2×4 and 2×6 lumber
- Concrete deck blocks (no digging required)
- Decking screws (3-inch, exterior grade)
- Pre-cut deck boards or pallets (sanded and treated)
- Spirit level and power drill
- Wood stain or sealant
How to make it
- Level the ground around the section of the pool where the deck will sit. Lay down landscape fabric and a thin layer of gravel to prevent weeds and ensure proper drainage under the structure.
- Place concrete deck blocks in a grid pattern, spaced about 4 feet apart. These blocks have notches that hold your 2×6 joists securely without the need for pouring concrete footings.
- Construct the outer frame using pressure-treated lumber, ensuring it is perfectly level. Use a spirit level on every side; even a slight tilt will be noticeable once the deck boards are on. Install inner joists every 16 inches for maximum stability.
- Lay your deck boards across the joists, leaving a 1/8-inch gap between them for wood expansion and water drainage. Pre-drill your holes before driving in screws to prevent the wood from splitting.
- Sand the entire surface to remove any splinters, then apply a high-quality weatherproofing stain. For a luxury look, choose a dark walnut or a soft grey finish. Add some oversized outdoor floor cushions and a solar umbrella to complete the resort vibe.
How to Plan Fall Baby Shower Themes for a Warm Celebration

Why we love this
Fall baby showers are inherently magical, wrapped in the cozy embrace of autumn’s rich palette of burnt oranges, deep plums, and golden ambers. There is something so heart-warming about celebrating new life as the world settles into its quiet season. The scent of hot apple cider and pumpkin spice fills the air, while soft textures like flannel and velvet create an atmosphere of intimate comfort. It’s a theme that feels grounded, rustic, and incredibly sophisticated, making every guest feel like they are part of a close-knit village.
Essential Elements:
- Mini pumpkins and decorative gourds
- Rustic wooden crates and slices (chargers)
- Pampas grass and dried wheat stalks
- Cozy “Cider Bar” station
- Handwritten chalkboard signage
- Plush flannel or fleece throws for guests
How to make it
- Choose a color story that moves beyond just “orange.” Think “muted harvest”: cream, sage green, and dusty terracotta. This keeps the look modern and viral-worthy.
- Create a stunning focal point with a balloon arch that incorporates dried pampas grass and eucalyptus tucked into the gaps. Use matte-finish balloons in your harvest colors for a high-end, non-plastic look.
- Set up a DIY Hot Cider or Cocoa bar. Use a slow cooker to keep the cider warm and provide cinnamon sticks, star anise, and whipped cream in glass jars. Display these on wooden crates of varying heights to create visual interest.
- For centerpieces, use hollowed-out white pumpkins as vases for seasonal blooms like mums or marigolds. Place these on wooden log slices to add a rustic, organic texture to the tables.
- Design a “cozy corner” with a basket of blankets and a sign that says “Baby, it’s getting cold outside.” This serves as both decor and a thoughtful gesture for guests if the celebration is held outdoors.
How to Decorate a Patriotic Front Porch for Summer Holidays

Why we love this
A patriotic porch is the quintessential symbol of American summer, evoking memories of neighborhood parades, cold watermelon, and firework displays. The crisp contrast of bright white wicker against deep navy blues and vibrant cherry reds creates a classic, high-energy look that feels both festive and timeless. It’s an aesthetic that celebrates community and heritage, turning your entrance into a spirited statement of pride that feels as refreshing as a glass of iced lemonade on a humid July afternoon.
Essential Elements:
- A high-quality American flag and pole
- Red, white, and blue bunting
- Large galvanized metal planters
- Red geraniums or white petunias
- Navy blue outdoor rug
- Vintage-style wooden stars or signage
How to make it
- Start with your largest visual anchor: the flag. Mount the bracket at a 45-degree angle on a porch pillar or beside the front door, ensuring it has enough clearance to flow freely in the wind without snagging.
- Hang pleated fabric bunting along the porch railing. Secure it with clear zip ties at even intervals to ensure the “swags” are uniform in depth and width. Fabric bunting looks far more expensive and viral-ready than plastic versions.
- Layer your doormats. Place a large navy-and-white striped outdoor rug down first, then layer a smaller coir mat with a patriotic greeting on top. This “doubling up” is a pro-decorator secret for a high-end look.
- Fill galvanized metal buckets with red geraniums. The silvery metal provides a rustic, industrial contrast to the vibrant red petals. Group them in sets of three at different heights near your steps.
- Add a few “Americana” accents, like a vintage red wagon or a wooden rocking chair with a star-patterned pillow. These touches make the porch feel lived-in and nostalgic rather than just a holiday display.
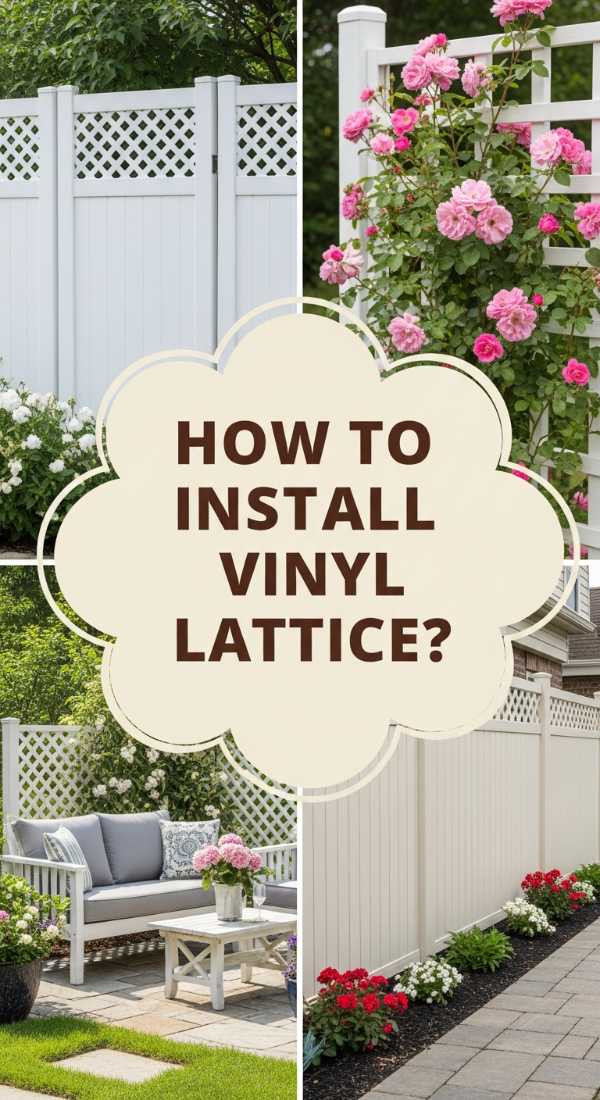
How to Install Vinyl Lattice Panels for Elegant Garden Privacy
Why we love this
Privacy doesn’t have to look like a barricade; with vinyl lattice, it becomes a sophisticated architectural feature that enhances your garden’s beauty. Imagine the elegant, crisscross shadows playing across your patio and the lush green vines of jasmine or clematis slowly weaving through the grid. It offers a sense of seclusion and intimacy while still allowing the summer breeze and dappled sunlight to filter through, transforming a generic backyard into a private, romantic garden room that feels hidden away from the rest of the world.
Essential Elements:
- 4×8 foot vinyl lattice panels
- Vinyl U-channel molding (for the edges)
- Stainless steel screws (weather resistant)
- 4×4 pressure-treated posts (if not attaching to a structure)
- Power drill and circular saw
- Climbing plants (Ivy, Clematis, or Climbing Roses)
How to make it
- Measure your space carefully and cut the vinyl lattice panels using a circular saw with a fine-tooth blade. Tip: Run the blade backward to prevent the vinyl from chipping or cracking during the cut.
- Slide the lattice panels into the U-channel molding. This molding hides the raw edges and allows the vinyl to expand and contract with temperature changes without buckling or warping.
- If attaching to an existing porch, pre-drill holes through the U-channel and into the wood posts. Do not screw through the lattice itself; the lattice should “float” slightly inside the channel to prevent cracking.
- Ensure the panels are perfectly level using a 4-foot level. If you are building a freestanding screen, set 4×4 posts in concrete 2 feet deep to provide a sturdy frame for the panels.
- Once installed, plant your climbing vines at the base of the lattice. Gently weave the initial tendrils into the bottom diamonds of the grid to encourage them to grow upward. Within one season, you’ll have a living wall of privacy.
The Final Touch: Bringing Your Vision to Life
Transforming your life from a series of saved pins to a lived reality is not about perfection; it is about the joy of the process. Each project we’ve explored today is a building block for a home and a lifestyle that feels uniquely yours. Whether it is the scent of the garden you planted with your own hands or the calming glow of a desk setup that makes work feel like a breeze, these moments of intentionality are what make a life truly viral. So, pick one project, grab your tools, and start creating the magic you’ve been dreaming of. You’ve got this!