
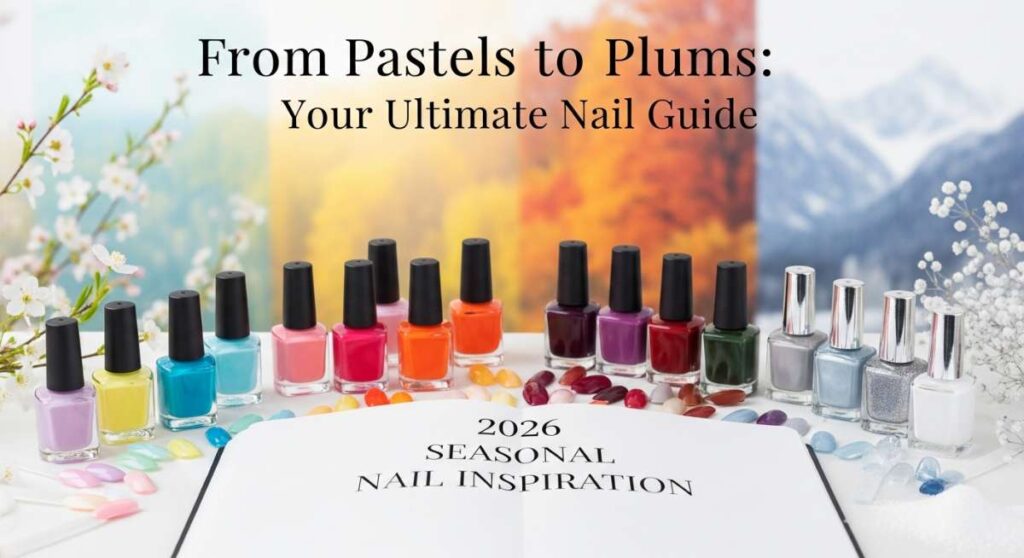
From Pastels to Plums: Your Ultimate 2026 Seasonal Nail Guide
Hello my loves! Can you believe we are already looking ahead to the beautiful palette of 2026? There is something so incredibly grounding about matching our fingertips to the shifting seasons. It’s like we’re whispering a little ‘thank you’ to the universe for every sunrise and every falling leaf. This year, I’ve been feeling a pull toward colors that don’t just look good, but make us feel something deep in our souls.
Grab your favorite matcha latte, settle into your favorite cozy nook, and let’s talk about the magic we’re going to create on our nails this year. From the softest spring blooms to the moody, mysterious depths of summer goth, we’re covering it all. This isn’t just a guide; it’s a love letter to the art of self-care and the little details that make us feel like the main character of our own stories.
Celebrate Your Milestone: 7 Easy Steps for College Graduation Nails

Why to love this Design:
Graduation is such a profound bridge between who you were and who you are becoming. This design uses soft, iridescent whites and delicate gold flakes to symbolize your bright future while keeping things sophisticated enough for that diploma hand-shake photo!
Essential Elements:
- Sheer ‘Milky’ White Polish
- Gold Leaf Flakes
- Ultra-Fine Detail Brush
- High-Gloss Top Coat
How to Prepare:
- Cleanse and shape nails into a classic almond or oval.
- Apply a nourishing base coat to protect the natural nail.
- Apply two thin layers of the milky white polish for a soft finish.
- While the second coat is tacky, use tweezers to place small gold flakes near the cuticle.
- Use a detail brush to gently press the flakes flat.
- Wait two minutes for the design to set.
- Seal with a thick, protective top coat for a glass-like finish.
Budget Range
- OPI Nail Envy Base Coat ($19)
- Essie ‘Marshmallow’ ($10)
- Amazon Gold Leaf Kit ($7)
Grounded Luxury: 5 Quick Ways to Style Taurus Birthday Nails

Why to love this Design:
Oh, my earthy Taurus loves! You deserve a look that screams ‘quiet luxury.’ These nails focus on mossy greens and soft copper accents that reflect your connection to nature and your appreciation for the finer things in life.
Essential Elements:
- Sage or Moss Green Cream Polish
- Copper Metallic Liner
- Matte Top Coat for an earthy feel
How to Prepare:
- Shape nails into a soft square to reflect Taurus’s stable nature.
- Apply a deep sage green to all ten fingers.
- Add a thin copper diagonal line across the ring finger for a subtle metallic pop.
- Optionally, keep the middle finger matte for a texture contrast.
- Finish with a cuticle oil rub to ensure that ‘Taurus glow.’
Budget Range
- Zoya ‘Sage’ Polish ($12)
- Sally Hansen Insta-Dri Copper ($6)
- Holo Taco Matte Top Coat ($11)
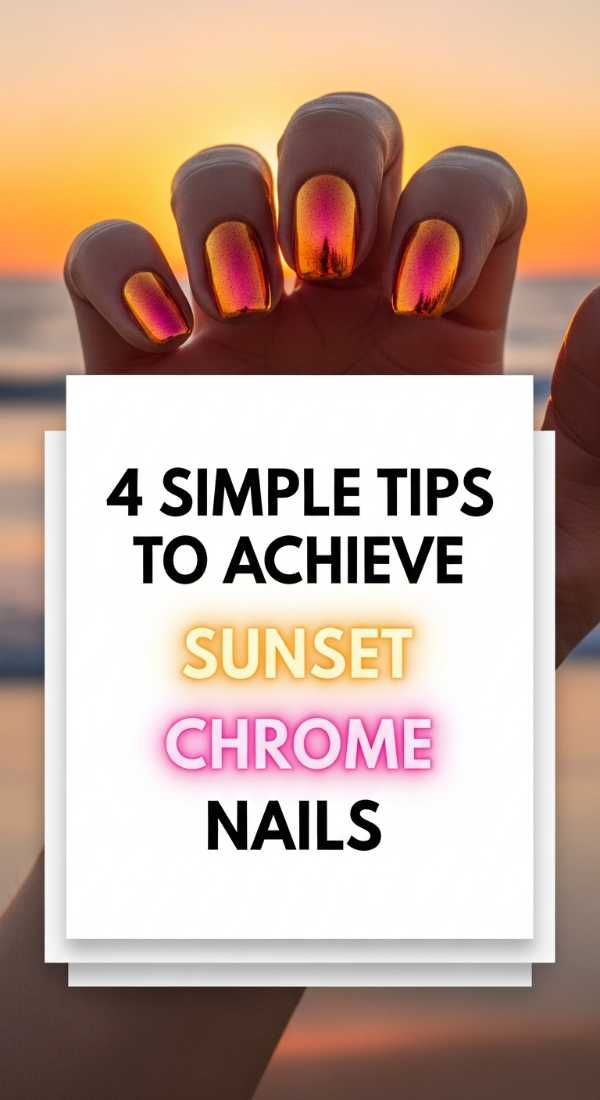
The Golden Hour Glow: 4 Simple Tips to Achieve Sunset Chrome Nails
Why to love this Design:
There is nothing quite like that last bit of light before the sun dips below the horizon. These nails capture that fleeting glow, using a chrome finish that shifts from warm orange to soft pink as you move your hands.
Essential Elements:
- Peachy-Pink Base Color
- Orange-Toned Chrome Powder
- Sponge Applicator
- No-Wipe Gel Top Coat (Required for chrome)
How to Prepare:
- Apply your peachy-pink base and cure/dry completely.
- Apply a no-wipe top coat and cure for only 30 seconds so it remains slightly ‘grippy.’
- Rub the chrome powder vigorously onto the nail with the sponge until a mirror finish appears.
- Seal immediately with another layer of top coat to lock in the shimmer.
Budget Range
- Born Pretty Chrome Powder ($8)
- Gelish No-Wipe Top Coat ($15)
- Revlon ‘Daydreamer’ ($7)
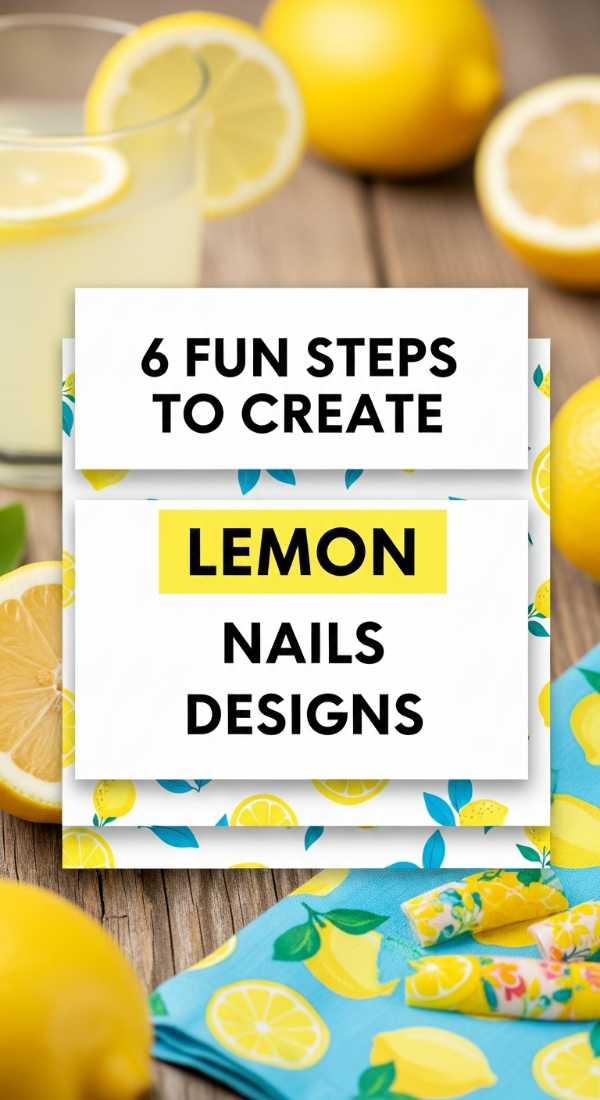
Zesty & Sweet: 6 Fun Steps to Create Lemon Nails Designs
Why to love this Design:
When life gives you lemons, put them on your nails! This design is pure sunshine and joy. It’s impossible to be in a bad mood when you look down and see these tiny, hand-painted citrus slices brightening up your day.
Essential Elements:
- Bright Yellow Polish
- White Striper Polish
- Leaf Green Polish
- Dotting Tool
How to Prepare:
- Start with a clear or light nude base.
- Use a dotting tool to create two semi-circles of yellow at the tips or sides.
- Outline the yellow ‘wedges’ with a very thin white line.
- Draw tiny white ‘segments’ inside the yellow circles.
- Add two tiny green leaves at the top of the lemon.
- Finish with a high-shine top coat to make the colors pop.
Budget Range
- Orly ‘Lemonade’ ($15)
- Beetles Nail Art Liners ($12 for a set)
- Essie ‘Grass Never Greener’ ($10)
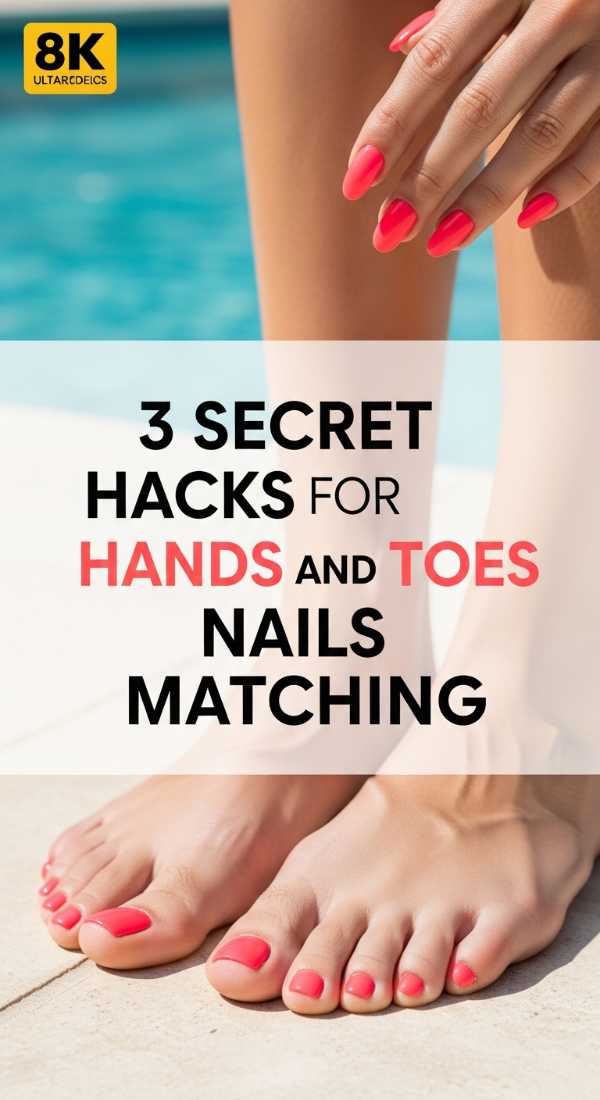
The Perfect Pair: 3 Secret Hacks for Hands and Toes Nails Matching
Why to love this Design:
Coordination is the ultimate form of being ‘put together,’ but we don’t always want an exact matchy-matchy look. These hacks help you create a cohesive story between your mani and pedi that feels intentional and artistic.
Essential Elements:
- Two Complementary Colors (e.g., Lavender and Deep Plum)
- A Shared Accent Detail (like a silver dot)
- Hydrating Foot Mask
How to Prepare:
- Use the ‘Inverted Palette’ trick: If your fingers are light with a dark accent, make your toes dark with a light accent.
- Stick to a consistent finish: If your fingernails are chrome, use a chrome powder on at least one toe nail to bridge the gap.
- Ensure the ‘weight’ of the colors is similar; don’t pair a neon yellow with a dusty pastel grey.
Budget Range
- Olive & June Mani System ($50)
- Aveeno Repairing Foot Masks ($4)
- Cote ‘No. 96’ Deep Plum ($18)
Tropical Fusion: 5 Vibrant Ways to Mix Teal and Coral Nails
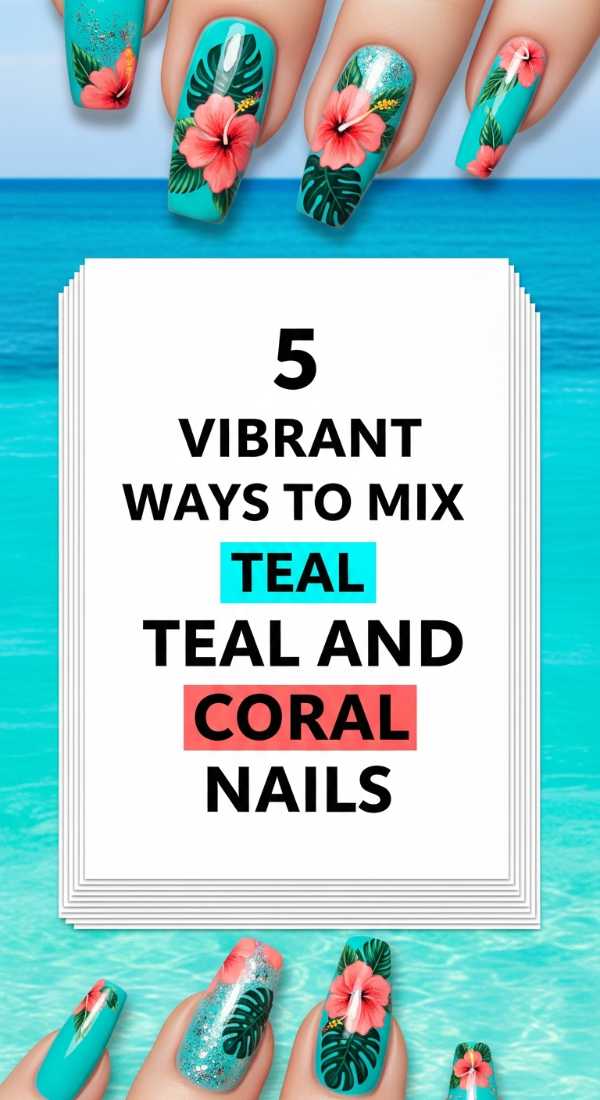
Why to love this Design:
Teal and coral are the ultimate power couple of the color wheel. One represents the cooling ocean, and the other the vibrant life within it. It’s the perfect look for a 2026 beach getaway or just bringing those vacation vibes to your desk.
Essential Elements:
- Deep Teal Polish
- Vibrant Coral Polish
- Makeup Sponge (for ombre)
How to Prepare:
- Paint your thumb, index, and pinky in solid Teal.
- Paint your middle and ring finger in solid Coral.
- For a ‘vibrant’ twist, use a sponge to dab a little coral onto the tips of the teal nails.
- Clean up the edges with an acetone-dipped brush.
- Seal with a glossy top coat.
Budget Range
- Lights Lacquer ‘Paper Snow’ & ‘Ace’ ($13 each)
- Wet n Wild Fast Dry Teal ($3)
- Beauty Secrets Acetone ($5)
Retro Revival: 8 Easy Techniques for Pucci Nails at Home
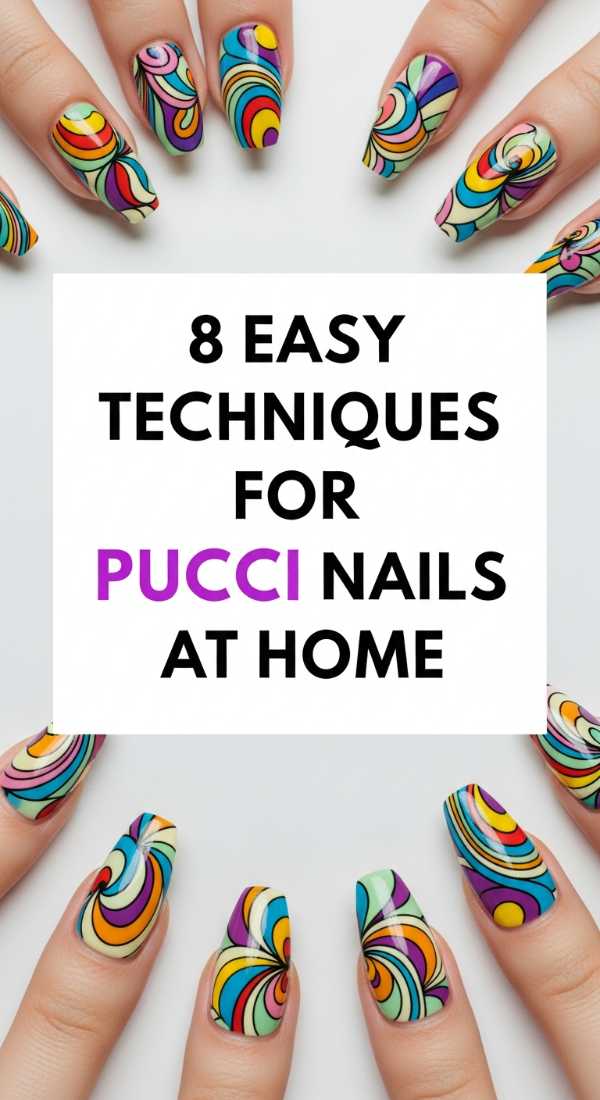
Why to love this Design:
Inspired by the iconic 60s prints, Pucci nails are all about movement, swirls, and bold color blocking. It’s a high-fashion look that feels incredibly expensive and curated, even if you did it at your kitchen table!
Essential Elements:
- 4-5 contrasting colors (Pink, Orange, Purple, White, Black)
- Fine Detail Brushes
- Nail Art Palette
How to Prepare:
- Start with a white base to make the colors vivid.
- Drop your 5 colors onto a palette.
- Using the detail brush, draw ‘organic’ blobs or swoops.
- Outline each shape with a very thin black or white line to separate the colors.
- Layer shapes so they look like they are flowing behind one another.
- Add tiny dots in the gaps.
- Wait at least 10 minutes for the layers to dry.
- Apply top coat carefully so you don’t smudge the intricate lines.
Budget Range
- Sinful Colors ‘Bold’ Collection ($2 each)
- Winstonia Detail Brush Set ($10)
- OPI ‘Black Onyx’ ($11)
Moody Magic: 4 Dark Steps to Master Summer Goth Nails
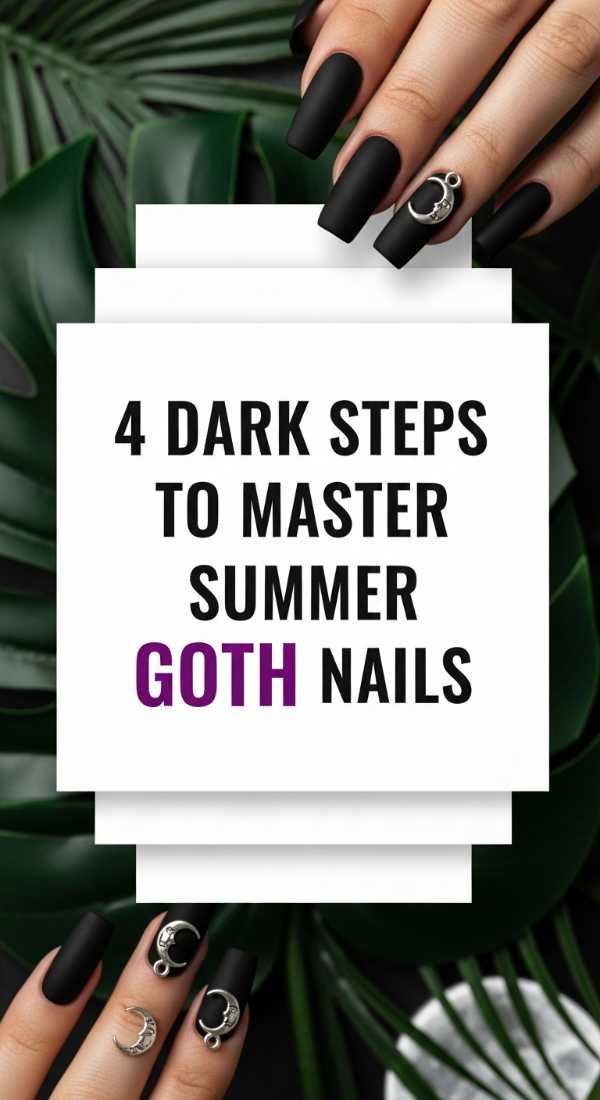
Why to love this Design:
Who says dark colors are only for winter? Summer Goth is about embracing the shadows even in the heat. It’s sheer, it’s moody, and it looks incredible with a sundress and chunky boots.
Essential Elements:
- Sheer Black ‘Jelly’ Polish
- Silver Studs or Chains
- High-Gloss Top Coat
How to Prepare:
- Apply two coats of sheer black jelly polish for a ‘smoke’ effect.
- While wet, place a single silver stud at the base of the nail.
- Add a matte top coat to every other finger for a ‘velvet’ look.
- Hydrate cuticles with a dark berry scented oil to finish the vibe.
Budget Range
- Cirque Colors ‘Spotted’ ($14)
- Manology Nail Studs ($6)
- Essie ‘Gel Couture’ Matte Top ($13)
The Inner Radiance: 6 Proven Methods for Perfect Sunset Aura Nails

Why to love this Design:
Aura nails are a visual representation of your energy! The ‘Sunset’ version uses warm oranges fading into soft violets, creating a soft, blurred circle in the center of the nail that looks like it’s glowing from within.
Essential Elements:
- Nude Base Polish
- Eyeshadow Palette (Oranges and Purples)
- Small Fluffy Blending Brush
How to Prepare:
- Apply a nude base and let it dry until it’s 90% set.
- Dip your blending brush into an orange eyeshadow.
- Gently press the shadow into the center of the nail in a circular motion.
- Add a ring of purple eyeshadow around the orange.
- Softly blend the edges so there are no harsh lines.
- Seal with a thick top coat (float the brush so you don’t smear the powder).
Budget Range
- Drugstore Eyeshadow Palette ($5)
- Seche Vite Dry Fast Top Coat ($10)
- Elf Blending Brush ($3)
Crisp & Contemporary: 5 Modern Steps for Yellow French Tip Nails
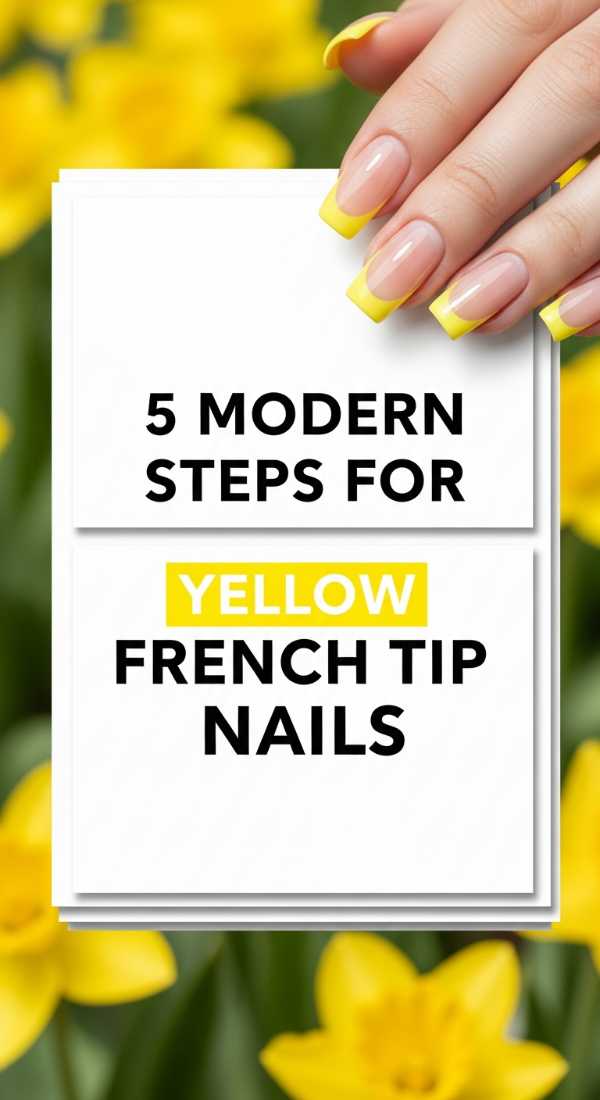
Why to love this Design:
The traditional French manicure is getting a 2026 makeover. Replacing the white tip with a zesty lemon-yellow is the perfect way to modernize a classic. It’s clean, it’s chic, and it looks amazing on shorter nails.
Essential Elements:
- Sheer Pink Base
- Neon or Pastel Yellow Polish
- French Tip Guides (Stickers)
How to Prepare:
- Apply your sheer pink base and let it dry completely.
- Place the tip guides slightly below the edge of your nail.
- Paint the exposed tip with your chosen yellow.
- Remove the sticker while the polish is still slightly wet for a clean line.
- Finish with a ‘plumping’ top coat for that salon-gel look.
Budget Range
- Manicure Guide Stickers ($4)
- China Glaze ‘Electric Daisy’ ($8)
- OPI ‘Bubble Bath’ ($11)
Embracing the Beauty of 2026
My loves, I hope this guide inspires you to take a moment for yourself this week. Whether you’re celebrating a massive achievement like graduation or just want to feel a little more ‘sunset’ in your daily life, your nails are a canvas for your joy. Remember, there are no rules in beauty—only what makes your heart feel light and your soul feel seen. I can’t wait to see which of these designs you choose to rock! Don’t forget to tag me in your ‘mani-selfies’ so I can cheer you on. Stay soft, stay bright, and keep shining!