

From Pantry to Party: The Ultimate Viral Simple Food Board Guide
There is something inherently magical about the way a gathering transforms when a shared platter hits the center of the table. It’s more than just food; it’s a conversation starter, a centerpiece of laughter, and a curated experience that invites everyone to lean in. Lately, my kitchen has become a laboratory for the ultimate viral trend: the hearty, protein-focused food board. Moving beyond just cheese and crackers, we are diving deep into the soulful, golden-brown world of perfectly prepared chicken, arranged with artistic flair.
Imagine the aroma of roasted herbs and sizzling skin wafting through your home as your friends arrive. This guide is your roadmap to creating a ‘Chicken Grazing Board’ that is as visually stunning as it is delicious. We’re taking humble pantry staples and elevating them into a party-ready feast. Whether you’re hosting a casual Sunday game night or a sophisticated outdoor brunch, these techniques will ensure every piece of chicken on your board is the star of the show.
How to bake chicken thighs

Why we love this
Baked thighs are the undisputed soul of a great food board, offering a rich, succulent flavor that white meat simply cannot match. When baked correctly, the skin transforms into a glass-like parchment of salty goodness, while the meat underneath remains incredibly tender and dripping with natural juices. The scent of rendering fat mingled with garlic and thyme fills the room, creating an atmosphere of home-cooked comfort that instantly puts guests at ease. It is the ultimate reliable protein that anchors the board with its rustic, golden-brown aesthetic.
Ingredients
- 4-6 bone-in, skin-on chicken thighs
- 2 tablespoons extra virgin olive oil
- 1 tablespoon sea salt
- 1 teaspoon cracked black pepper
- 1 teaspoon smoked paprika
- 2 sprigs fresh rosemary
How to make it
- Preheat your oven to 425°F (218°C). This high temperature is crucial for rendering the fat quickly and achieving that coveted crispy skin without overcooking the meat.
- Pat the thighs extremely dry with paper towels. Any moisture on the skin will lead to steaming rather than browning.
- Rub the olive oil over every inch of the chicken, then liberally apply the salt, pepper, and paprika, ensuring you get some under the skin as well for maximum flavor.
- Place the thighs on a wire rack set over a baking sheet. This allows hot air to circulate under the chicken, preventing a soggy bottom.
- Bake for 30-35 minutes. You are looking for an internal temperature of 165°F, but for thighs, 175°F often yields a better, more fall-off-the-bone texture.
- Let the meat rest for 5-10 minutes before placing on your board to allow the juices to redistribute through the fibers.
How to roast chicken legs

Why we love this
Chicken legs, or drumsticks, bring a wonderful sense of nostalgia and playfulness to any food board because they are the original finger food. There is a primal satisfaction in grabbing a perfectly roasted leg by the bone and biting into the juicy, dark meat that has been caramelized to perfection. They offer a beautiful vertical element to your platter design, and the way the skin tightens and browns around the bone creates a professional, catering-style look. The aroma of roasted dark meat is deep and savory, promising a satisfying bite every time.
Ingredients
- 8 chicken drumsticks
- 3 tablespoons melted butter
- 1 teaspoon garlic powder
- 1 teaspoon onion powder
- 1/2 teaspoon cayenne pepper
- Zest of one lemon
How to make it
- Set your oven to 400°F (200°C). A slightly lower temp than thighs helps the thicker leg meat cook through evenly before the skin burns.
- In a large bowl, toss the drumsticks with melted butter, lemon zest, and all the spices until they are thick with the coating.
- Line a baking tray with parchment paper for easy cleanup and arrange the legs so they aren’t touching; crowding leads to uneven browning.
- Roast for 20 minutes, then use tongs to flip each leg. This ensures the underside gets some direct heat and color.
- Roast for another 15-20 minutes. Watch for the juices to run clear when the thickest part of the leg is pierced with a knife.
- For a viral finish, broil on high for the last 2 minutes to get a ‘charred’ rotisserie look that pops against the greens on your board.
How to cook boneless thighs

Why we love this
Boneless thighs are the secret weapon of a busy hostess because they cook quickly while retaining all the luscious moisture of dark meat. They are incredibly versatile, acting as the perfect vessel for bold marinades or simple herb rubs, and they slice beautifully for elegant board presentation. The texture is velvety and smooth, lacking the toughness sometimes found in breast meat, making every forkful a decadent experience. When sliced into strips, they add a structured, professional geometry to your food board layout.
Ingredients
- 1 lb boneless, skinless chicken thighs
- 2 tablespoons avocado oil (high smoke point)
- 1 teaspoon kosher salt
- 1/2 teaspoon dried oregano
- 1/2 teaspoon cumin
How to make it
- Heat a heavy cast-iron skillet over medium-high heat. You want the pan to be shimmering hot before the meat touches it to ensure a deep sear.
- Trim any excess large pieces of fat from the thighs, then season both sides generously with salt, oregano, and cumin.
- Add the oil to the pan, then lay the thighs flat. Do not overcrowd the pan; cook in two batches if necessary to maintain the heat level.
- Press down lightly with a spatula to ensure maximum surface contact with the hot metal. Cook undisturbed for 5-6 minutes until a deep golden crust forms.
- Flip the thighs and cook for another 5 minutes. Because there is no bone, these cook much faster, so monitor closely.
- Check for an internal temperature of 165°F. Remove from the pan and let them rest on a cutting board for at least 5 minutes before slicing into strips for your board.
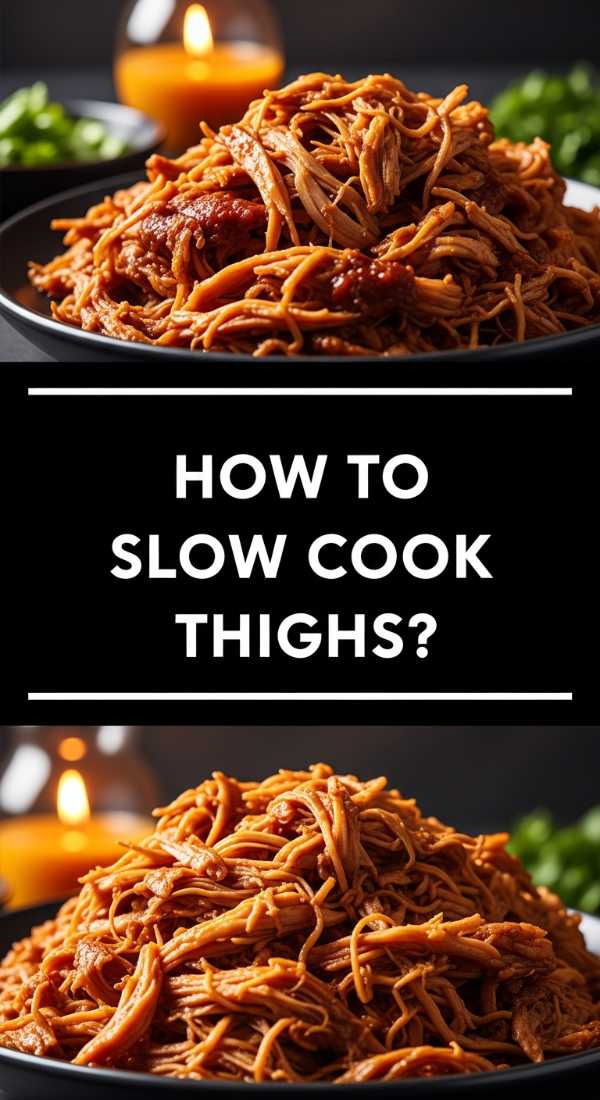
How to slow cook thighs
Why we love this
Slow-cooked thighs provide that ‘melt-in-your-mouth’ shredded texture that contrasts beautifully with the crispy elements on your food board. This method coaxes out deep, complex flavors as the meat braises in its own juices, resulting in a richness that is almost buttery in consistency. The aroma that fills the house over several hours is warm and inviting, signaling to your guests that a soulful meal is in progress. Shredded and piled high in a small bowl on your board, it serves as a delicious topping for crostini or crackers.
Ingredients
- 2 lbs bone-in chicken thighs
- 1/2 cup chicken bone broth
- 3 cloves smashed garlic
- 1 small onion, quartered
- 1 tablespoon apple cider vinegar
- Salt and pepper to taste
How to make it
- Place the onions and garlic at the bottom of your slow cooker to act as a natural ‘rack’ for the chicken.
- Season the thighs heavily on all sides with salt and pepper, then place them skin-side up on top of the aromatics.
- Pour the chicken broth and apple cider vinegar around the sides of the chicken—avoid pouring directly over the skin if you want to retain any texture.
- Cover and cook on LOW for 6-7 hours. Cooking on low is essential; high heat can toughen the fibers of the dark meat.
- Once the meat is falling away from the bone, carefully remove the thighs. You can discard the skin or crisp it up quickly in a pan.
- Shred the meat using two forks and toss with a splash of the remaining cooking liquid to keep it moist before serving in a rustic bowl on your board.
How to season chicken legs

Why we love this
Seasoning is where the personality of your food board truly shines, turning a simple ingredient into a global culinary journey. The right blend of spices creates a visual crust that is as appealing to the eye as it is to the palate, offering bursts of heat, sweetness, or earthiness. We love the way a well-seasoned leg looks nestled between bright grapes and sharp cheeses, providing a dark, textured contrast to the board’s lighter elements. It’s the difference between a meal that is just ‘food’ and a meal that is a memorable, viral-worthy event.
Ingredients
- 10 chicken drumsticks
- 2 tablespoons olive oil
- 1 tablespoon brown sugar
- 1 tablespoon chili powder
- 1 teaspoon garlic salt
- 1/2 teaspoon ground mustard
How to make it
- Begin by patting the chicken legs dry. Seasoning adheres much better to dry skin than to damp skin.
- In a small bowl, whisk together the brown sugar, chili powder, garlic salt, and ground mustard to create a uniform dry rub.
- Coat the legs lightly in olive oil; this acts as the ‘glue’ for your spice mixture and helps the heat penetrate the skin.
- Sprinkle the rub over the legs and use your hands to massage it in, ensuring every crevice is covered.
- For the best flavor, let the seasoned chicken sit in the fridge for 30 minutes before cooking. This allows the salt to penetrate the meat.
- Bake or roast as usual. The sugar in the rub will caramelize, creating a dark, sticky, and incredibly flavorful exterior that looks stunning on a platter.
How to make juicy thighs

Why we love this
The hallmark of a master cook is the ability to produce chicken that is consistently juicy and succulent, never dry or stringy. There is nothing more disappointing than a beautiful board with dry meat, so mastering the ‘juicy factor’ is essential for hosting success. A juicy thigh has a plump, glistening appearance that catches the light and promises a burst of flavor with every bite. This technique ensures that your guests are reaching for second and third helpings, mesmerized by the perfect moisture balance of the dish.
Ingredients
- 6 boneless, skin-on chicken thighs
- 1/4 cup heavy cream or full-fat yogurt (for marinade)
- 2 tablespoons lemon juice
- Salt and pepper
- Fresh parsley for garnish
How to make it
- The secret to ultimate juiciness is a brief dairy-based marinade. The lactic acid in cream or yogurt breaks down proteins gently without making them mushy.
- Whisk the cream and lemon juice together, then coat the thighs and let them marinate for at least 1 hour, or up to 4 hours.
- When ready to cook, wipe off the excess marinade but do not rinse the chicken.
- Sear the thighs in a hot pan skin-side down first to render the fat, then flip.
- Lower the heat to medium and cover the pan for the last 3-4 minutes of cooking. This ‘traps’ the steam and keeps the internal moisture from evaporating.
- Always use a meat thermometer. Pull the chicken at exactly 165°F and let it rest for 10 minutes covered loosely with foil before serving.
How to prep chicken thighs

Why we love this
Preparation is the foundation of any viral food board; it’s the quiet, focused work that happens before the party starts. Proper prep ensures that every piece of chicken is uniform in size, cooks evenly, and is free of unwanted gristle or excess fat. We love this step because it allows us to connect with the ingredients, ensuring that what we serve our friends is of the highest quality. A well-prepped thigh looks clean and professional on the board, making the entire presentation look curated and high-end rather than cluttered.
Ingredients
- Package of chicken thighs
- Sharp chef’s knife or kitchen shears
- Cutting board (dedicated for poultry)
- Paper towels
- Kosher salt
How to make it
- Start with cold chicken directly from the fridge; it is much easier to trim fat from cold meat than room-temperature meat.
- Use your shears or knife to trim away any ‘overhang’ of skin or large yellow deposits of fat. You want a clean, aerodynamic shape.
- If using bone-in, check the underside for any bone fragments or loose bits and remove them.
- Pat every piece of meat thoroughly dry on both sides. This is the most skipped step, but it is the most important for texture.
- Season with salt only at this stage and let the chicken sit on a plate for 20 minutes to reach room temperature.
- This ‘tempering’ process ensures that the center of the chicken doesn’t stay cold while the outside overcooks, leading to a perfectly even finish.
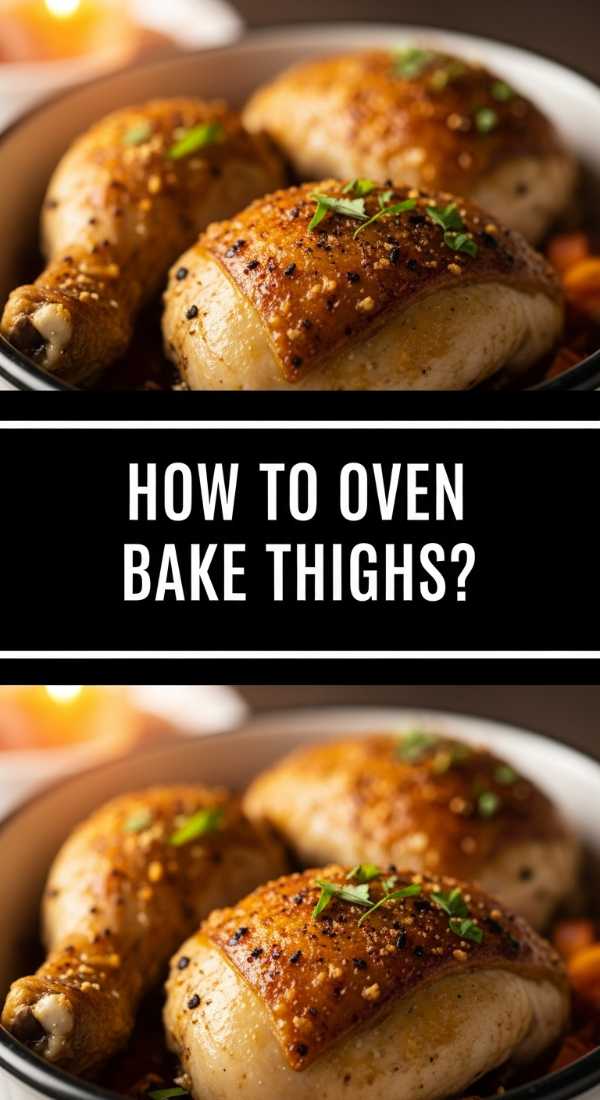
How to oven bake thighs
Why we love this
Oven baking is the most ‘hands-off’ way to achieve high-volume results, which is perfect when you’re prepping a large board for a crowd. It allows you to focus on arranging your cheeses, nuts, and fruits while the oven does the heavy lifting of creating golden-brown perfection. The consistent, dry heat of the oven creates a beautiful, even color across all pieces of chicken, making them look like a matching set on your platter. It’s a foolproof method that delivers a high-impact, professional aesthetic with minimal stress.
Ingredients
- 6-8 chicken thighs (skin-on)
- Olive oil spray
- Dried thyme
- Garlic powder
- Smoked sea salt
How to make it
- Arrange your oven racks so one is in the center and one is in the top third of the oven. Preheat to 400°F (200°C).
- Place chicken on a parchment-lined sheet. Using oil spray instead of liquid oil ensures a very thin, even coating that helps with crisping.
- Dust the chicken evenly with the thyme, garlic powder, and smoked salt from a height (the ‘salt bae’ method) to ensure even distribution.
- Bake on the center rack for 25 minutes. This provides the bulk of the cooking through the meat.
- Move the tray to the top rack for the final 5-10 minutes. The proximity to the top heating element will ‘finish’ the skin to a deep golden hue.
- Rest the chicken on the warm tray for 5 minutes before moving to your food board to keep the skin from steaming and softening.
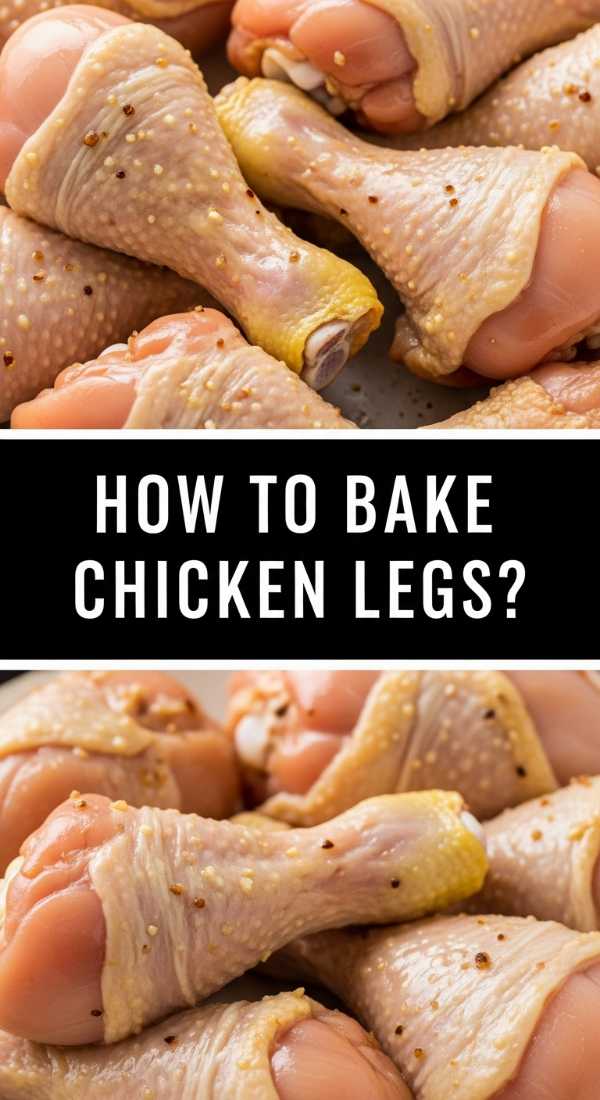
How to bake chicken legs
Why we love this
Baking chicken legs is an exercise in simple elegance, transforming a budget-friendly cut into a gourmet centerpiece. The way the meat pulls back slightly from the bone during baking creates a built-in ‘handle,’ making them the ultimate social food for guests who want to eat while they mingle. We love the glossy, lacquered look they take on when baked with a bit of oil and spice, reflecting the ambient light of a dinner party. They are sturdy, hold their heat well, and bring a wonderful rustic charm to any lifestyle-focused food spread.
Ingredients
- 8-10 fresh chicken drumsticks
- 2 tablespoons melted coconut oil (for a subtle sweetness)
- 1 tablespoon paprika
- 1 teaspoon black pepper
- 1/2 teaspoon salt
How to make it
- Preheat your oven to 425°F. The high heat is necessary to prevent the skin from becoming rubbery.
- Toss the drumsticks in a large bowl with the melted coconut oil and spices until they are fully and evenly submerged.
- Place a wire cooling rack inside a baking sheet and arrange the legs on the rack. This is key for drumsticks so they don’t sit in their own grease.
- Bake for 35 minutes without flipping. The wire rack allows enough airflow that flipping isn’t strictly necessary for a good result.
- Check the thickest part of the meat for a temperature of 170°F. Drumsticks handle higher temps well and become more tender.
- Let them cool for just 3 minutes so they are manageable to touch but still steaming when you place them on the board.
How to tenderize chicken thighs

Why we love this
Tenderizing is the ‘extra mile’ step that transforms good chicken into legendary chicken. By breaking down the tougher connective tissues, you create a texture that is so soft it practically dissolves on the tongue, creating a premium dining experience. This is especially important for food boards where guests might be eating with their hands or small appetizer forks; you want the meat to yield effortlessly. We love the process of tenderizing because it allows marinades to sink deeper into the meat, ensuring that every single fiber is infused with flavor.
Ingredients
- 1 lb boneless chicken thighs
- 1/2 cup buttermilk
- 1 tablespoon hot sauce
- Meat mallet or heavy rolling pin
- Plastic wrap
How to make it
- Place the boneless thighs between two sheets of plastic wrap. This prevents the meat from tearing and keeps your workspace clean.
- Use the flat side of a meat mallet to gently pound the thickest parts of the thigh until the entire piece is an even thickness (about 1/2 inch).
- Do not over-pound; you want to even it out, not pulverize it into a paste.
- Place the flattened thighs into a bowl with buttermilk and hot sauce. The enzymes and calcium in the buttermilk work to further soften the protein.
- Marinate for at least 2 hours. This dual-action tenderizing (physical and chemical) results in the softest chicken possible.
- Pan-sear or grill quickly. Because the meat is thinner and more tender, it will cook in about 3-4 minutes per side.
Conclusion
Creating a viral simple food board is about more than just the ingredients; it’s about the intention behind the arrangement. By mastering these chicken techniques, you’ve turned a simple protein into a versatile, high-end centerpiece that caters to every palate. From the crunch of a perfectly baked thigh to the melt-in-your-mouth tenderness of a slow-cooked drumstick, your board is now a symphony of textures and flavors. So, gather your favorite garnishes—think pickled onions, fresh herbs, and artisanal dips—and start building your masterpiece. Your next party is about to become the talk of the town!
FAQ Section
Q: Can I prepare the chicken ahead of time?
A: Absolutely! You can roast or bake the chicken up to a day in advance. To keep it board-ready, reheat it in a 350°F oven for 10 minutes to crisp the skin back up before serving.
Q: What are the best sides for a chicken-focused food board?
A: Balance the richness of the meat with acidity and crunch. I recommend quick-pickled cucumbers, a sharp honey mustard, roasted grapes, and some crusty sourdough slices.
Q: How do I keep the chicken from making the other board items soggy?
A: Always let your chicken rest on a separate plate for at least 10 minutes before placing it on the board. You can also place the chicken on a bed of sturdy greens like kale or inside small parchment paper liners to create a barrier.