
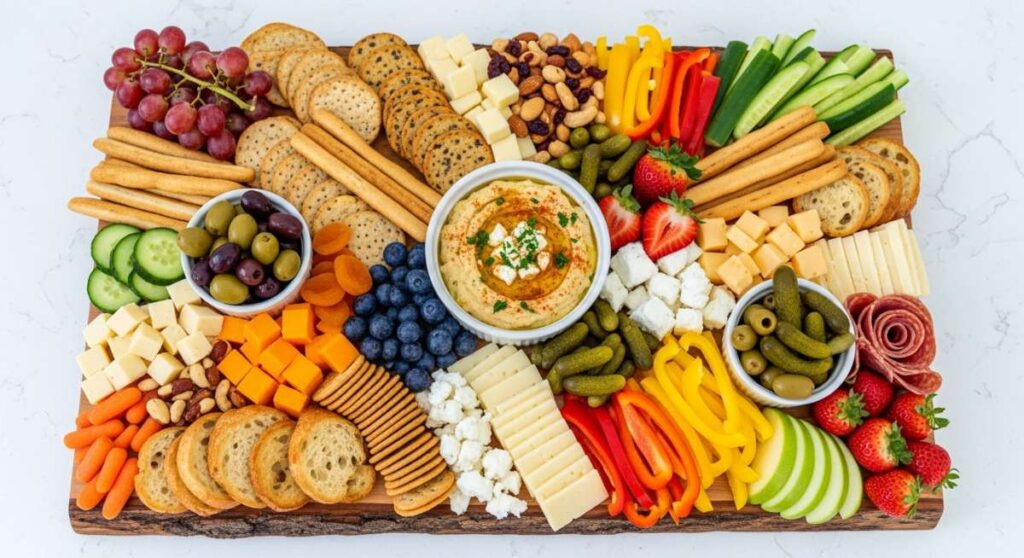
There is something inherently magical about the way a slow weekend morning unfolds when the scent of sizzling butter starts to drift through the house. It’s that golden, quiet moment before the chaos of the day begins, where the only thing on the agenda is a steaming cup of coffee and a stack of something warm and comforting. I’ve always believed that breakfast isn’t just a meal; it’s an invitation to linger, to talk, and to share. Lately, I’ve been obsessed with turning these simple morning rituals into a visual feast by creating a ‘Viral Pancake Board’ that brings everyone to the table with wide eyes and hungry hearts.
We’ve all seen those stunning grazing boards on social media, but there’s something uniquely approachable about a board centered around the humble pancake. It’s the ultimate pantry-to-party transformation. By using ingredients you likely already have—flour, eggs, milk, and a bit of sugar—you can curate a spread that looks like it belongs in a high-end boutique hotel. It’s about taking those nostalgic flavors we grew up with and presenting them with a bit of modern flair and a whole lot of love.
How to make fluffy pancakes?
Why we love this
There is nothing quite like the cloud-like texture of a truly fluffy pancake that practically melts the moment it hits your tongue. The secret lies in the gentle chemical reaction between the leavening agents and the acidity of the batter, creating tiny pockets of air that expand into a pillowy soft interior. When you pull a fork through a stack, you want to see those beautiful, airy holes that act like sponges for maple syrup. The aroma is purely nostalgic—a mix of toasted vanilla and warm flour that fills the kitchen with a sense of cozy security and home-cooked goodness.
Ingredients
- 2 cups all-purpose flour
- 2 tablespoons baking powder
- 1/2 teaspoon salt
- 2 tablespoons sugar
- 1 1/2 cups whole milk
- 1 large egg
- 4 tablespoons melted butter (slightly cooled)
- 1 teaspoon vanilla extract
How to make it
- Begin by whisking your dry ingredients—flour, baking powder, sugar, and salt—in a large bowl until perfectly aerated; this ensures no clumps and even rising.
- In a separate jug, whisk the milk, egg, melted butter, and vanilla until the egg is fully incorporated and the mixture is frothy.
- Create a well in the center of the dry ingredients and pour in the wet mixture, stirring with a silicone spatula just until combined; it is crucial to leave small lumps in the batter to prevent overworking the gluten, which would result in a tough pancake.
- Allow the batter to rest for at least 10 minutes; this lets the baking powder activate and the flour hydrate, resulting in a much taller rise.
- Heat a non-stick skillet over medium-low heat and lightly grease with a tiny bit of butter, then ladle about 1/4 cup of batter per pancake, cooking until the edges look set and the surface is covered in tiny bubbles.
- Flip gently and cook for another 1-2 minutes until the underside is a light golden brown and the center springs back when lightly pressed.
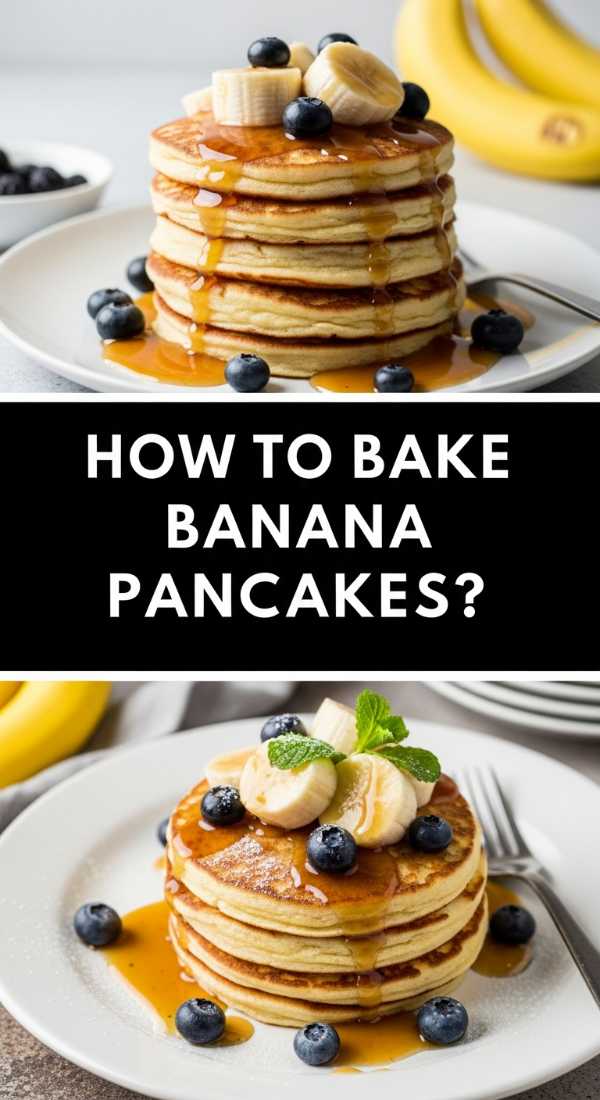
How to bake banana pancakes?
Why we love this
Baking banana pancakes brings a caramelized depth of flavor that you just can’t achieve with standard batter alone. As the natural sugars in the overripe bananas hit the heat, they develop a rich, honey-like sweetness that permeates every bite of the stack. The texture is slightly denser and more custard-like than a traditional pancake, offering a satisfying heartiness that keeps you full all morning. The scent of warm banana bread wafting from the griddle is enough to get even the deepest sleepers out of bed, promising a breakfast that feels like a decadent dessert but is packed with wholesome fruit.
Ingredients
- 2 very ripe bananas, mashed
- 1 1/2 cups all-purpose flour
- 1 tablespoon baking powder
- 1/4 teaspoon ground cinnamon
- 1 cup milk of choice
- 1 egg
- 2 tablespoons melted coconut oil
How to make it
- In a medium bowl, mash the bananas with a fork until they reach a smooth, liquid-like consistency with only a few small chunks remaining for texture.
- Whisk in the egg, milk, and melted coconut oil until the mixture is a uniform pale yellow.
- Sift the flour, baking powder, and cinnamon directly over the wet ingredients to ensure the cinnamon is evenly distributed and the flour stays light.
- Fold the ingredients together using a light hand, stopping as soon as the flour streaks disappear to maintain that tender crumb.
- Prepare your griddle or large pan by heating it over medium heat and brushing with a thin layer of oil or butter to prevent sticking.
- Pour 1/3 cup portions of the banana batter onto the heat, giving them space to spread, and cook until you see the edges begin to brown and firm up.
- Carefully flip the pancakes; because of the fruit content, they will be softer than regular pancakes, so use a wide spatula and a confident motion.
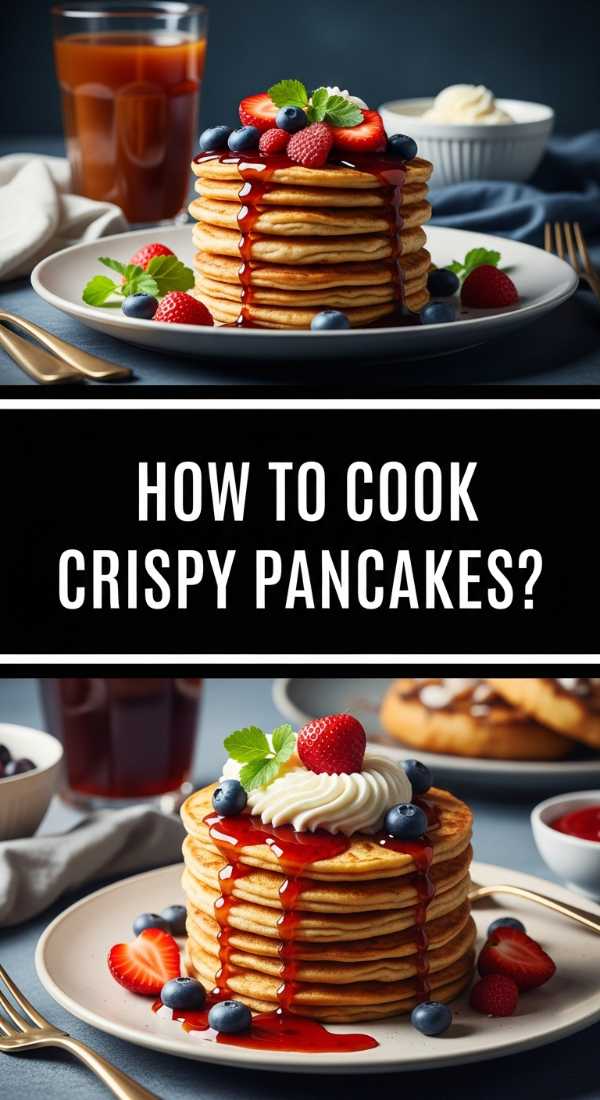
How to cook crispy pancakes?
Why we love this
The contrast between a lacy, buttery-crisp edge and a soft, steaming center is the ultimate textural experience for pancake lovers. Achieving that ‘fried’ perimeter requires a bit of heat and the right fat, resulting in a pancake that shatters slightly at the edges before giving way to a tender interior. This style of pancake feels indulgent and artisanal, reminiscent of the best diners where the griddles are well-seasoned and the butter is used generously. Each bite offers a satisfying crunch that elevates the dish from a simple breakfast to a gourmet treat that doesn’t even need syrup to shine.
Ingredients
- Standard pancake batter (from fluffy recipe)
- High-quality salted butter
- 1 tablespoon neutral oil (like grapeseed or vegetable)
How to make it
- The key to the crispy edge is the temperature and the fat; heat your heavy-bottomed skillet or cast iron pan over medium-high heat until a drop of water sizzles and dances across the surface.
- Add a combination of one teaspoon of oil and a half-tablespoon of butter for each batch; the oil raises the smoke point of the butter, allowing it to brown without burning.
- Once the butter is foaming and slightly golden, pour your batter directly into the center of the fat, which will immediately sizzle and create those desired lacy edges.
- Do not move the pancake for at least two minutes; you want the bottom to develop a deep, mahogany-brown crust that provides the structural crunch.
- When bubbles have popped and stayed open on the surface, flip the pancake into another small pat of butter to ensure the second side gets just as crispy.
- Serve immediately while the edges are at their peak crunchiness, as the steam will soften them if they are stacked too high for too long.
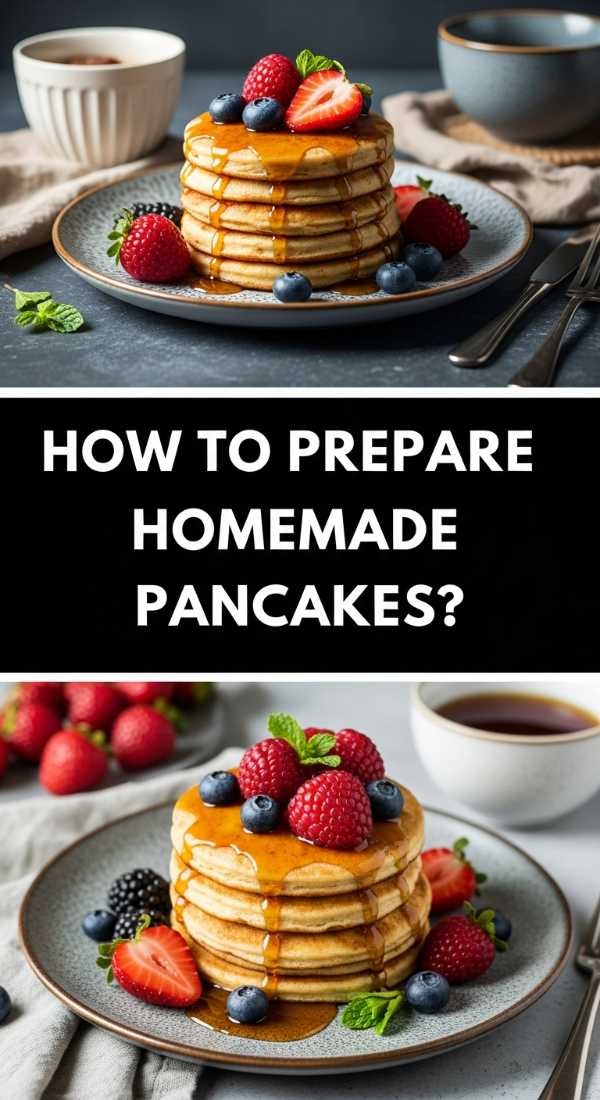
How to prepare homemade pancakes?
Why we love this
There is a quiet pride in making something from scratch, especially when it is as fundamental and beloved as a pancake. Preparing homemade pancakes allows you to control the quality of every ingredient, from the richness of the butter to the purity of the vanilla extract. It turns a chore into a craft, where you can see the batter transform from individual powders and liquids into a cohesive, velvety mixture. The flavor is noticeably cleaner and more vibrant than any boxed mix, with a subtle tang and a genuine ‘toasted’ grain flavor that provides the perfect canvas for your favorite toppings.
Ingredients
- Dry Base: Flour, Sugar, Baking Powder, Salt
- Wet Base: Whole Milk, Large Egg, Melted Butter
- Flavoring: Vanilla bean paste or extract
How to make it
- Stage your ingredients on the counter to ensure everything is at room temperature, which helps the batter emulsify more smoothly and prevents the melted butter from seizing up.
- In your largest mixing bowl, combine the dry base ingredients, using a whisk to break up any clumps in the flour and to ensure the leavening agent is perfectly distributed for an even rise.
- In a separate container, whisk the egg into the milk until the yellow streaks are gone, then slowly stream in the melted butter while whisking constantly to create a smooth emulsion.
- Pour the liquid mixture into the dry ingredients all at once and use a large metal spoon or spatula to fold the two together; focus on a ‘cut and fold’ motion rather than a circular stir to keep the air in the batter.
- Stop mixing the second the large pockets of dry flour are gone; the batter should look thick, slightly lumpy, and full of small air bubbles.
- Let the mixture sit for 5 minutes while you preheat your cooking surface to medium-low, ensuring a consistent temperature before the first drop of batter hits the pan.
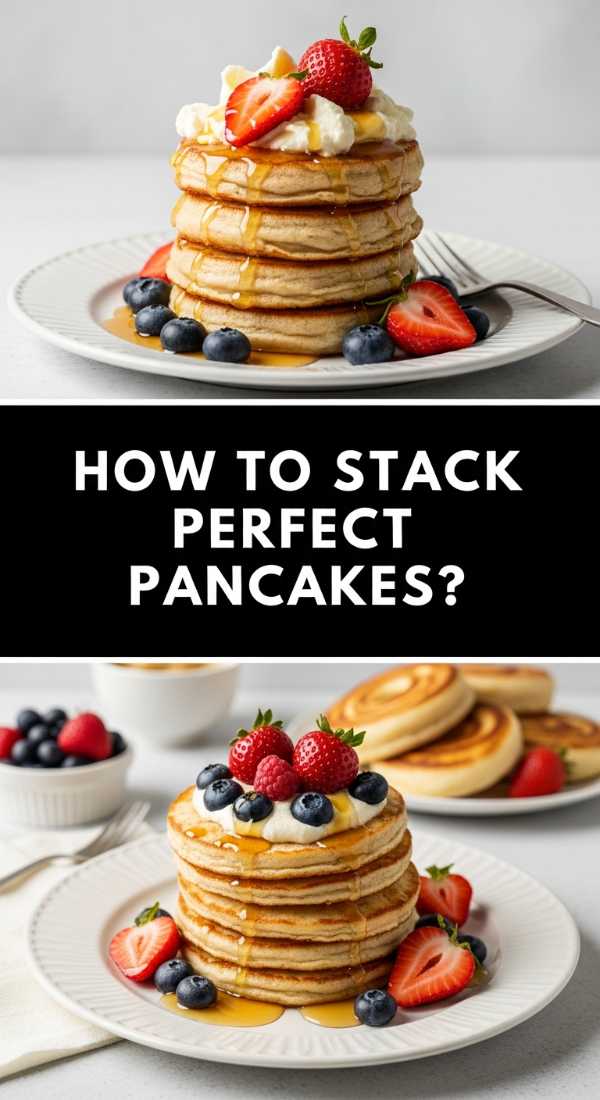
How to stack perfect pancakes?
Why we love this
The aesthetic of a tall, symmetrical stack of pancakes is arguably the most ‘viral’ part of any breakfast board. It represents abundance and warmth, looking like a culinary tower of joy that is just waiting to be topped with a melting cube of butter and a drizzle of amber syrup. A perfect stack isn’t just about height; it’s about the structural integrity and the uniform size that makes the dish look professional and intentional. There is a deep satisfaction in seeing those golden layers perfectly aligned, creating a visual rhythm that makes the heart skip a beat and the appetite soar.
Ingredients
- Evenly sized pancakes
- Cold butter cubes
- Wooden skewer (optional for height)
- Warm maple syrup
How to make it
- To ensure all pancakes are the same size, use a standardized measuring cup (like a 1/4 or 1/3 cup) to portion every single pancake onto the griddle.
- Keep the finished pancakes in a single layer on a cooling rack in a warm oven (200°F) while you finish the batch; this prevents them from getting soggy and ensures they all have the same firmness for stacking.
- Select the widest, flattest pancake for the base to provide a stable foundation for the rest of the tower.
- Layer the pancakes one by one, centering each one directly on top of the previous layer; if the stack starts to lean, you can insert a clean wooden skewer through the center to anchor them.
- Place a cold cube of butter on the very top pancake while it is still warm so it begins a slow, picturesque melt down the sides of the stack.
- Drizzle the syrup from the top center in a slow, circular motion, allowing it to coat the edges of every layer for that ‘dripping’ effect that looks incredible in photos.
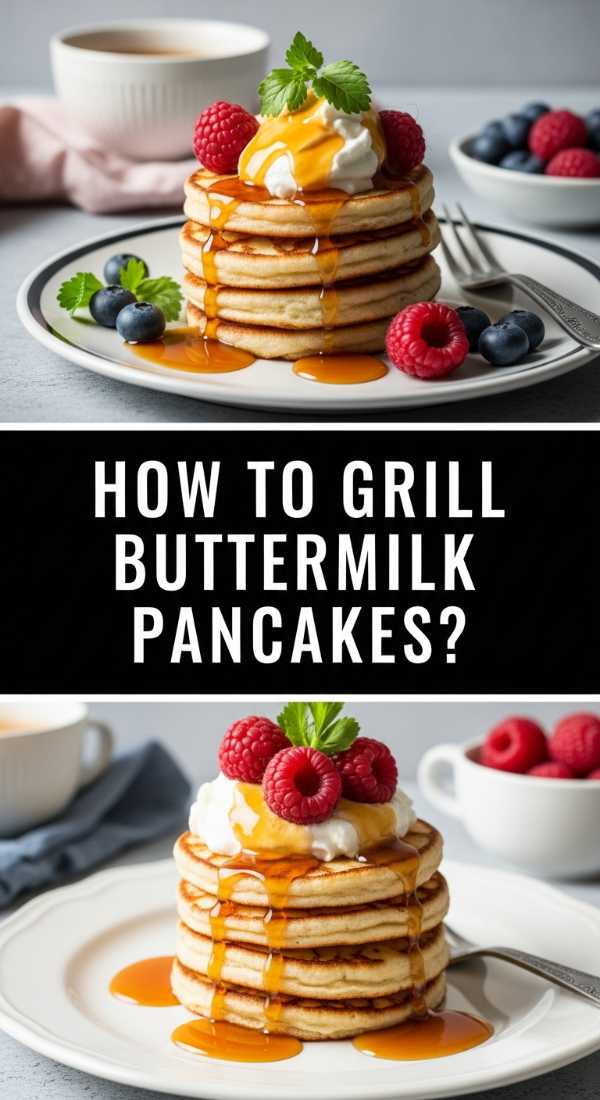
How to grill buttermilk pancakes?

Why we love this
Buttermilk pancakes offer a sophisticated tang and a superior tenderness that only this specific ingredient can provide. When grilled on a flat-top or large griddle, the buttermilk reacts with the heat to create a complex, slightly sourdough-like aroma that is incredibly appetizing. The texture is notoriously soft, almost like a sponge cake, making them the perfect vessel for absorbing fruit juices and syrups. There’s a rustic, farmhouse feeling to grilling up a huge batch of buttermilk pancakes, evoking memories of country kitchens and long, sun-drenched breakfasts with the whole family.
Ingredients
- 2 cups flour
- 2 teaspoons baking powder
- 1 teaspoon baking soda (essential for buttermilk)
- 2 cups real buttermilk
- 2 eggs
- 1/4 cup melted butter
How to make it
- Whisk the flour, baking powder, and baking soda together; the soda is vital as it reacts with the acid in the buttermilk to create a massive rise and beautiful browning.
- In another bowl, whisk the buttermilk and eggs until light and bubbly, then stir in the melted butter.
- Combine the wet and dry ingredients, stirring just until the batter comes together; buttermilk batter tends to be thicker than regular batter, so don’t be tempted to thin it out.
- Preheat your grill or griddle to a steady 375°F (190°C); if using a stove-top griddle, medium heat is usually the sweet spot.
- Lightly oil the surface rather than using butter, as the high protein in buttermilk can cause butter to burn more quickly on a large griddle surface.
- Drop the batter in large rounds and wait for the ‘volcano’ bubbles to appear—these are bubbles that pop and stay open, indicating the pancake is cooked through the middle and ready for the flip.
- Flip and grill for an additional 90 seconds until the pancake feels firm to the touch but still has a slight spring.
How to serve sweet pancakes?
Why we love this
Serving sweet pancakes is an art form that transforms a basic breakfast into a celebratory dessert-like experience. It’s about the interplay of colors and textures—the vibrant red of fresh berries, the snowy white of powdered sugar, and the deep mahogany of chocolate drizzle. When you serve a board of sweet pancakes, you are offering a curated selection of flavors that cater to every sweet tooth. The visual appeal of a fully loaded sweet pancake is undeniable, creating an instant ‘wow’ factor that makes guests feel pampered and excited to dig in. It’s the ultimate expression of food as joy.
Ingredients
- Fresh berries (strawberries, raspberries)
- Whipped cream or mascarpone
- Chocolate chips or shavings
- Honey or maple syrup
- Powdered sugar for dusting
How to make it
- Arrange your freshly cooked pancakes on a large wooden board in an overlapping ‘S’ curve to create movement and visual interest.
- Tuck small bowls of whipped cream and chocolate shavings into the curves of the pancake line to keep the board organized but accessible.
- Scatter the fresh berries around the pancakes, focusing on placing them in the ‘gaps’ to make the board look lush and overflowing.
- Using a fine-mesh sieve, dust the entire board lightly with powdered sugar; this creates a cohesive look and adds a professional finish.
- Place a small pitcher of warmed syrup or honey at one end of the board, encouraging guests to pour their own and customize their sweetness level.
- For a final touch, add a few sprigs of fresh mint or edible flowers to provide a pop of green that makes the colors of the fruit and pancakes stand out.
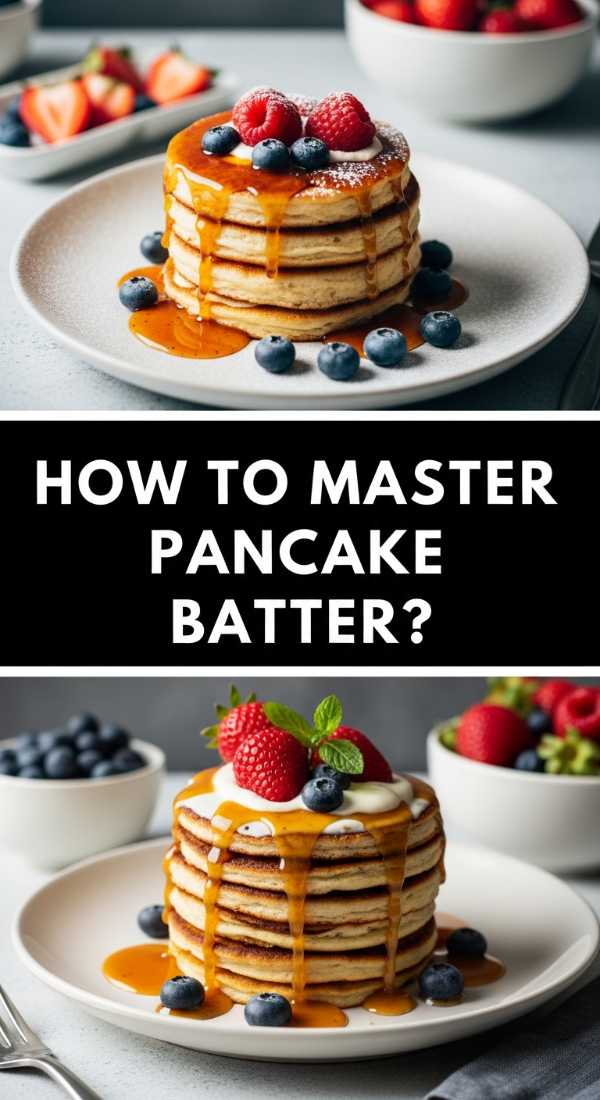
How to master pancake batter?

Why we love this
Mastering the batter is the foundational skill that separates an average cook from a pancake pro. When you understand the science of the batter—the thickness, the temperature, and the rest time—you gain the ability to produce consistent, perfect results every single time. There is a sensory pleasure in achieving that perfect ‘ribbon’ consistency, where the batter falls off the whisk in a thick but fluid stream. A well-mastered batter is full of potential, smelling of sweet cream and vanilla, and holding the promise of the perfect breakfast that is about to happen.
Ingredients
- All-purpose flour (sifted)
- Room temperature milk and eggs
- Fresh baking powder
- A pinch of nutmeg (the secret pro flavor)
How to make it
- Always sift your flour; this removes any packed-down lumps and incorporates air, which is the first step toward a light batter.
- Ensure your liquids are at room temperature; cold milk or eggs can cause melted butter to clump into small beads, leading to an uneven distribution of fat.
- When mixing, use a ‘folding’ technique: scrape the bottom of the bowl, bring the batter over the top, and turn the bowl 90 degrees, repeating until just combined.
- Check the consistency: if the batter is too thin (like water), add a tablespoon of flour; if it’s too thick (like dough), add a splash of milk until it flows slowly.
- The most critical ‘master’ step is the rest: let the batter sit for 15 to 30 minutes; this allows the gluten to relax and the air bubbles to stabilize, ensuring a tender and tall pancake.
- Before cooking, give the batter one single, gentle stir to redistribute any ingredients that may have settled during the rest period.
How to flip golden pancakes?
Why we love this
The perfect flip is the most satisfying moment of the entire cooking process—it’s the ‘reveal’ that shows off your hard work. Watching a pale, liquid circle transform into a perfectly bronzed, golden disc in a single motion is pure kitchen theater. That specific shade of golden brown isn’t just for looks; it represents the Maillard reaction, where sugars and proteins have toasted to create a rich, complex flavor profile. The sound of the spatula sliding under the edge and the soft ‘thump’ as it lands on the other side is the rhythm of a successful morning in the kitchen.
Ingredients
- Standard batter
- Thin, wide offset spatula
- Precision heat control
How to make it
- Wait for the visual cues: do not even think about flipping until you see bubbles forming in the center and, more importantly, the bubbles at the edges have popped and left tiny holes.
- Check the ‘lift’: slide your spatula about an inch under the edge and lift slightly; if the pancake holds its shape and shows a golden color, it’s ready.
- Use the right tool: a thin, flexible metal or high-heat silicone spatula is essential to slide under the pancake without pushing it around the pan.
- Position the spatula: slide it all the way under the center of the pancake to ensure the weight is balanced.
- The Flip: Use your wrist, not your whole arm; a quick, low-to-the-pan flick of the wrist is more effective and less messy than a high, dramatic toss.
- Land gently: aim to land the pancake in the same spot it started to take advantage of the heat that has already built up in that part of the pan.
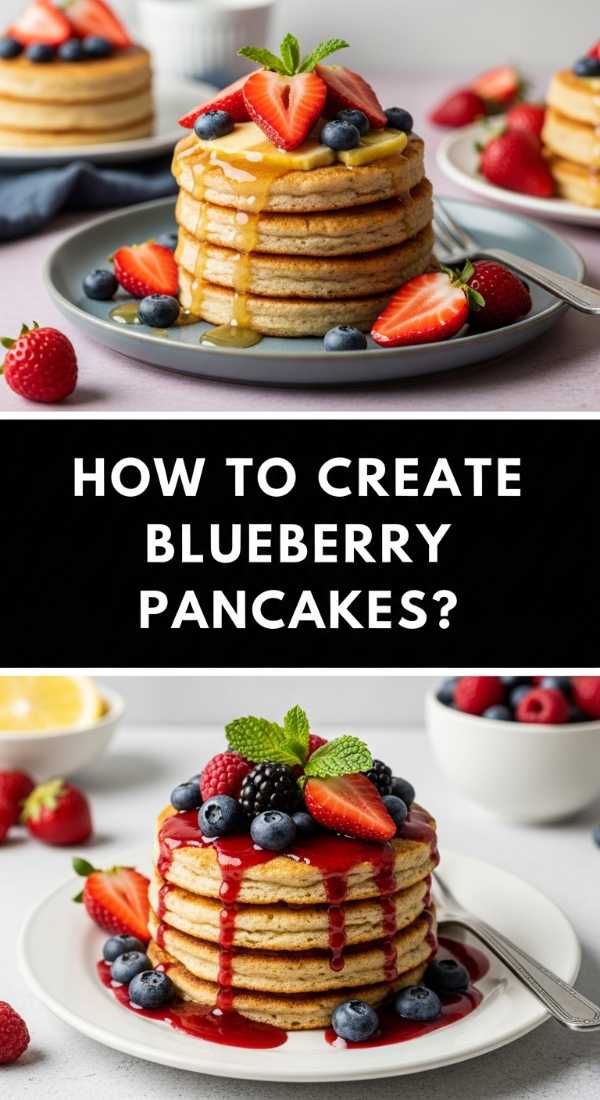
How to create blueberry pancakes?
[IMAGE_10]
Why we love this
Blueberry pancakes are a classic for a reason: they offer bursts of tart, jammy juice that cut through the richness of the buttery batter. As the berries heat up, they soften and release their deep purple nectar, creating beautiful marbled patterns within the gold of the pancake. The smell of warm berries is intoxicatingly sweet and summery, making even a cold winter morning feel a bit brighter. There is something deeply comforting about the combination of fruit and grain, offering a fresh, vibrant element that makes the breakfast feel complete and wholesome.
Ingredients
- Pancake batter
- 1 cup fresh or frozen blueberries
- Zest of half a lemon
- Extra flour (for dusting berries)
How to make it
- Toss your blueberries in a teaspoon of flour before adding them; this light coating prevents the berries from sinking to the bottom and stops the juice from bleeding into the batter and turning it gray.
- Fold the lemon zest into your main batter first; the citrus brightness perfectly complements the sweetness of the berries.
- Instead of mixing the berries into the large bowl of batter, drop them individually onto the pancakes once they are already on the griddle; this ensures even distribution and prevents purple streaks.
- Use about 5-7 berries per pancake, pressing them lightly into the wet batter with the back of a spoon so they stay in place during the flip.
- When you flip, be prepared for a bit of sizzling as the berries make direct contact with the pan; this caramelizes the fruit and creates a ‘jammy’ exterior.
- Cook for the standard 1-2 minutes on the second side, and serve with a little extra lemon zest on top for a fresh, professional look.
Conclusion
Creating a viral pancake board is more than just a culinary trend; it’s a way to bring people together over the simplest of pleasures. By mastering these different techniques—from the fluffiness of the batter to the art of the perfect flip—you transform your kitchen into a space of creativity and warmth. Whether you’re serving a crowd or just treating yourself on a Tuesday, these tips ensure that every stack is a masterpiece. So, grab your whisk, heat up your griddle, and let the morning magic begin!