
Hello, my loves! You know those evenings when the sun has dipped below the horizon, the house is finally quiet, and suddenly, a little whisper of a sweet craving begins to tickle your heart? I’ve spent so many nights searching through the pantry, hoping for a miracle, and that’s exactly how the ‘Instant Sweet Cravings Board’ was born—a magical, curated collection of tiny joys that come together in a flash.
Think of this as a soft, sugary embrace for your soul. It’s not about spending hours in a hot kitchen or following complicated techniques; it’s about using what you already have to create a spread that feels like a celebration. Whether you’re hosting a last-minute girl’s night or just treating yourself after a long day, these little bites of heaven are here to remind you that you deserve a bit of sweetness in your life, right here and right now.
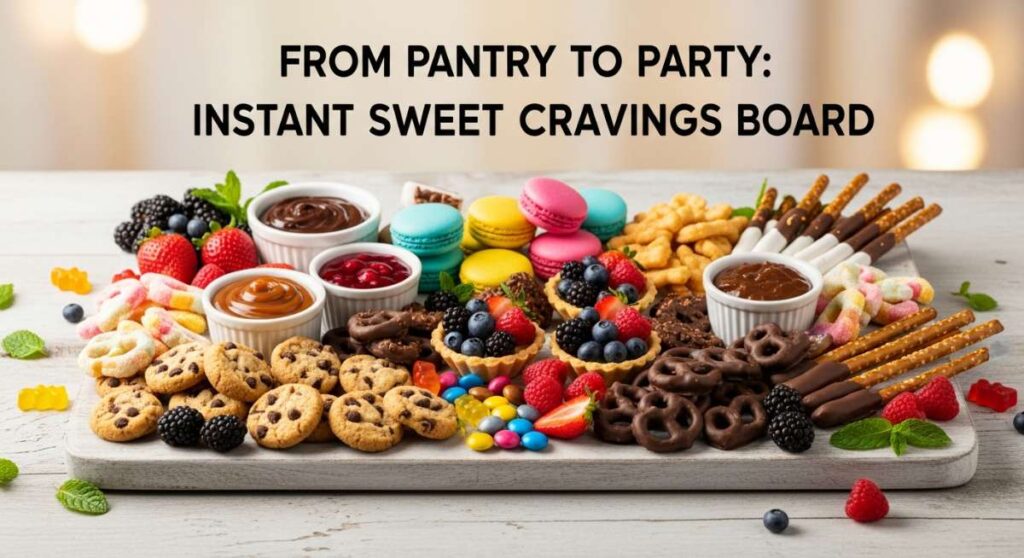
Let’s dive into my favorite little secrets for building a board that sparkles with flavor and warmth. From gooey cakes that take sixty seconds to the creamiest fudge you’ve ever tasted, these recipes are designed to be quick, easy, and utterly irresistible. Gather your prettiest platters and your favorite mugs, because we are about to turn your pantry staples into a party that you and your favorites will never forget.
Unbelievable Gooey Chocolate Mug Cake Secret

Why we love this
This little gem is the ultimate warm hug in a mug for those moments when only chocolate will do. It is incredibly moist, deeply decadent, and has a secret gooey center that feels like a professional bakery made it just for you. Every spoonful is a silky, rich experience that melts away the stress of the day in an instant. It’s the perfect foundation for our cravings board because it’s fast, hot, and serves as a beautiful centerpiece for sharing.
Ingredients
- 4 tablespoons all-purpose flour
- 3 tablespoons granulated sugar
- 2 tablespoons unsweetened cocoa powder
- 1/2 teaspoon baking powder
- 3 tablespoons whole milk
- 1 tablespoon vegetable oil
- 1 tablespoon chocolate chips
- A splash of vanilla extract
How to make it
- Find your favorite ceramic mug and whisk together the flour, sugar, cocoa powder, and baking powder until there are no lumps left.
- Slowly pour in the milk, vegetable oil, and vanilla extract, stirring gently until the batter becomes smooth and glossy like liquid velvet.
- Drop the chocolate chips right into the center of the batter; they will sink and create that magical, molten gooey core we all dream about.
- Microwave on high for about 70 to 90 seconds, being careful not to overcook it so the texture stays light and airy rather than rubbery.
- Let it rest for one minute to set, then dust with powdered sugar or top with a tiny dollop of whipped cream before placing it on your board.
Silky Smooth Peanut Butter Fudge Without Baking

Why we love this
There is something so nostalgic and comforting about the combination of salt and sugar found in a perfect piece of fudge. This version is a game-changer because it requires zero time over a hot stove and sets up beautifully with a texture that is like eating a cloud. It’s rich, nutty, and provides that satisfying density that every dessert board needs to feel truly complete and indulgent. You will find yourself reaching for ‘just one more’ square until the entire batch has vanished into thin air.
Ingredients
- 1 cup creamy peanut butter
- 1/2 cup unsalted butter, softened
- 1 teaspoon pure vanilla extract
- 2 cups powdered sugar, sifted
- A pinch of sea salt for topping
How to make it
- In a medium microwave-safe bowl, combine the creamy peanut butter and the softened butter, heating them in 30-second intervals until they are fully melted.
- Stir the mixture vigorously until it is completely homogenous and shiny, then fold in the vanilla extract to add that beautiful aromatic depth.
- Gradually add the sifted powdered sugar one cup at a time, mixing until the dough becomes thick, slightly stiff, and loses its oily sheen.
- Press the mixture into a small parchment-lined square tin, smoothing out the top with the back of a spoon to create a perfectly flat surface.
- Place it in the freezer for 15 minutes to firm up quickly, then slice into tiny, bite-sized squares and sprinkle with a touch of sea salt.
Creamy Berry Cheesecake Mousse No Bake Recipe

Why we love this
Sometimes you need a dessert that feels light, airy, and sophisticated without the heavy lifting of a traditional baked cheesecake. This mousse is a vibrant burst of fruitiness that cleanses the palate and adds a gorgeous pop of color to your sweet cravings board. It’s velvety smooth and possesses that signature cheesecake tang that pairs so wonderfully with fresh, sun-ripened berries. This is the dish that makes your guests feel like they are dining at a high-end bistro in the heart of Paris.
Ingredients
- 8 oz cream cheese, softened to room temperature
- 1/2 cup powdered sugar
- 1 cup heavy whipping cream
- 1/2 cup fresh raspberries or strawberries, mashed
- 1 teaspoon lemon zest
How to make it
- In a large mixing bowl, beat the softened cream cheese and powdered sugar together until the mixture is light, fluffy, and completely free of any lumps.
- In a separate chilled bowl, whip the heavy cream until stiff peaks form, ensuring it stays cold so the volume remains high and stable.
- Gently fold the whipped cream into the cream cheese mixture using a spatula, being careful not to deflate the air that gives it its mousse-like texture.
- Swirl in the mashed berries and the lemon zest, creating beautiful pink streaks throughout the white cream for a stunning visual effect.
- Spoon the mixture into small shot glasses or ramekins and chill for at least ten minutes before serving them alongside some crisp graham crackers.
Warm Cinnamon Roll Mug Cake In Minutes

Why we love this
Nothing says comfort quite like the scent of warm cinnamon and brown sugar wafting through the air on a cozy evening. This mug cake captures the essence of a labor-intensive cinnamon roll but delivers that gooey, spiced satisfaction in under five minutes. It’s the perfect companion for a cup of tea or coffee, offering a soft crumb and a sweet glaze that drips down the sides. It adds a rustic, home-baked feel to your board that makes everyone feel instantly at ease and loved.
Ingredients
- 1/4 cup all-purpose flour
- 1 tablespoon brown sugar
- 1/4 teaspoon cinnamon
- 1/4 teaspoon baking powder
- 3 tablespoons milk
- 1 tablespoon melted butter
- For glaze: 2 tablespoons powdered sugar mixed with 1 teaspoon milk
How to make it
- Whisk the flour, baking powder, and milk in a mug until a thick batter forms, ensuring the bottom corners are well-mixed and no dry pockets remain.
- In a tiny separate bowl, mix the melted butter, brown sugar, and cinnamon together to create a fragrant, sandy paste for the swirl.
- Drop spoonfuls of the cinnamon mixture onto the batter and use a toothpick or knife to gently swirl it into the cake for that classic marbled look.
- Microwave on high for about 50 to 60 seconds, watching closely as it rises so it doesn’t overflow the rim of your favorite mug.
- While it is still steaming hot, drizzle the simple powdered sugar glaze over the top so it melts into the warm crevices of the cake.
Rich Oreo Truffles Without Any Baking

Why we love this
These truffles are the ultimate crowd-pleaser because they look incredibly professional while being secretly one of the easiest treats to assemble. They are dense, chocolatey, and have a delightful crunch from the cookie bits that makes every bite an absolute texture sensation. Because they are bite-sized, they are perfect for grazing, allowing you to enjoy the richness of a truffle without feeling overwhelmed. They bring a touch of elegance and decadence to the board that bridges the gap between simple snacks and gourmet candy.
Ingredients
- 1 standard package of Oreo cookies (about 36 cookies)
- 8 oz cream cheese, softened
- 12 oz white or dark melting chocolate
- Optional: Extra cookie crumbs for topping
How to make it
- Place the Oreo cookies into a food processor and pulse until they are reduced to fine, sandy crumbs without any large chunks remaining.
- Add the softened cream cheese to the crumbs and pulse again until the mixture forms a dark, heavy dough that pulls away from the sides.
- Roll the dough into small, one-inch balls using your palms, then place them on a tray lined with parchment paper to keep them from sticking.
- Melt your chocolate in the microwave in short bursts, then dip each ball into the chocolate using a fork to ensure a smooth, even coating.
- Place the truffles back on the parchment and sprinkle with extra crumbs while the chocolate is still wet, then chill until the shell is snappy and firm.
Molten Nutella Lava Cake Microwave Hack

Why we love this
For my hazelnut lovers, this lava cake is a dream come true that feels far more complicated than it actually is to prepare. The center is a pool of warm, liquid Nutella that spills out the moment your spoon breaks the surface, creating a truly dramatic dessert moment. It’s rich, nutty, and satisfies that deep chocolate craving with a sophisticated flavor profile that appeals to both kids and adults. It is the king of quick-fix desserts, turning a few basic ingredients into a masterpiece of texture and warmth.
Ingredients
- 1/4 cup Nutella (plus 1 extra tablespoon for the center)
- 1 large egg
- 2 tablespoons all-purpose flour
- A pinch of salt
- Optional: Toasted hazelnuts for garnish
How to make it
- In a small bowl or mug, whisk the egg and the 1/4 cup of Nutella together until the mixture is completely smooth and well-incorporated.
- Gently fold in the flour and a tiny pinch of salt, stirring only until the white streaks of flour disappear to keep the cake tender.
- Pour the batter into a greased ramekin or mug, then drop the remaining tablespoon of Nutella right into the very center of the mixture.
- Microwave for about 55 to 65 seconds; the top should look set and slightly matte while the center remains soft and a bit jiggly.
- Let it cool for just a minute so you don’t burn your tongue, then invert it onto a plate or serve it directly from the mug with a spoon.
Zesty Lemon Tart No Bake Method

Why we love this
A cravings board needs a little bit of sunshine to balance out the heavy chocolate, and these no-bake lemon tarts are the perfect citrusy highlight. They are incredibly bright, tangy, and refreshing, offering a crisp contrast to the softer, creamier elements of your dessert spread. The golden crust provides a satisfying crunch that complements the silky lemon filling, making every mouthful a balanced dance of flavors. It’s a wonderful way to bring a light, summery feel to your table regardless of what the weather is like outside.
Ingredients
- 1 cup graham cracker crumbs
- 4 tablespoons melted butter
- 1 can (14 oz) sweetened condensed milk
- 1/2 cup fresh lemon juice
- 1 teaspoon lemon zest
How to make it
- Mix the graham cracker crumbs with the melted butter in a small bowl until the texture resembles wet sand that holds its shape when squeezed.
- Press the mixture firmly into the bottoms of individual muffin tins or small tart molds, creating a solid base for your zesty lemon filling.
- In a separate bowl, whisk together the sweetened condensed milk, lemon juice, and zest until the mixture naturally thickens into a creamy custard.
- Pour the lemon mixture over the prepared crusts, smoothing the tops with a knife to ensure a beautiful, professional-looking finish for your board.
- Chill the tarts in the refrigerator for at least 30 minutes to allow the filling to set properly before popping them out of their molds.
Perfect Golden Salted Caramel Popcorn Trick

Why we love this
Every great board needs a bit of ‘munchability,’ and this salted caramel popcorn is the ultimate snackable addition that everyone will keep picking at. It combines the crunch of perfectly popped corn with a rich, buttery caramel coating that has just enough salt to keep things interesting. It fills the gaps between your larger desserts beautifully and provides a different sensory experience that keeps the palate excited and engaged. Once you try this quick homemade version, you’ll never want to go back to the store-bought bags ever again.
Ingredients
- 6 cups popped popcorn (plain)
- 1/2 cup butter
- 1/2 cup brown sugar
- 1/2 teaspoon vanilla extract
- 1/4 teaspoon sea salt
How to make it
- Place your popped corn in a very large bowl, making sure to remove any unpopped kernels that might be hiding at the very bottom.
- In a small saucepan over medium heat, melt the butter and brown sugar together, stirring constantly until the mixture begins to bubble and thicken.
- Remove the pan from the heat and quickly stir in the vanilla and salt; the mixture will bubble up slightly, which is exactly what we want.
- Immediately pour the hot caramel over the popcorn and toss it quickly with two large spoons to ensure every single piece is evenly coated.
- Spread the popcorn out on a piece of parchment paper to cool and harden for five minutes, then break up any large clumps before serving.
Single Serving Banana Bread Mug Cake

Why we love this
For those times when you have one lonely, overripe banana sitting on the counter, this mug cake is the most delicious way to find closure. It has all the soul-warming flavor of a classic loaf of banana bread but is ready in a fraction of the time with almost zero cleanup. It’s dense, moist, and naturally sweet, providing a wholesome element to your cravings board that feels like a cozy breakfast turned into a dessert. It’s the kind of treat that makes your kitchen smell like a homey, sun-drenched morning in the countryside.
Ingredients
- 1 ripe banana, mashed thoroughly
- 3 tablespoons all-purpose flour
- 1 tablespoon maple syrup or honey
- 1/4 teaspoon baking powder
- A dash of cinnamon
- 1 tablespoon chopped walnuts or pecans
How to make it
- In a microwave-safe mug, mash the banana with a fork until it becomes a smooth liquid consistency with as few lumps as possible.
- Add the flour, maple syrup, baking powder, and cinnamon directly into the mug and stir until everything is well-blended and smells amazing.
- Fold in the chopped walnuts to add a bit of texture and healthy fats, which helps the cake feel more substantial and satisfying.
- Microwave on high for about 90 seconds; the cake should look firm on top and have pulled away slightly from the sides of the mug.
- Let it sit for two minutes to allow the structure to set, then serve it warm with a tiny pat of butter or a drizzle of honey.
Safe Edible Chocolate Chip Cookie Dough

Why we love this
We all know the best part of baking cookies is sneaking a taste of the dough, and this recipe lets you do just that without any of the worries. It is buttery, sugary, and packed with chocolate chips, capturing that raw, nostalgic flavor that brings out the inner child in everyone who tries it. Because it is meant to be eaten raw, the texture is perfectly gritty and soft, making it an ideal dip or a standalone scoop. It’s a playful, fun addition to your board that always sparks a conversation and a lot of happy smiles.
Ingredients
- 1/2 cup softened butter
- 1/2 cup brown sugar
- 1 cup all-purpose flour (heat-treated for safety)
- 1 tablespoon milk
- 1/2 cup mini chocolate chips
- 1/2 teaspoon vanilla extract
How to make it
- First, heat-treat your flour by microwaving it in 30-second intervals until it reaches 160°F to ensure it is completely safe for raw consumption.
- In a mixing bowl, cream together the softened butter and brown sugar until the mixture is light, fluffy, and the sugar has mostly dissolved.
- Stir in the vanilla extract and the milk, then gradually add the heat-treated flour until a thick, recognizable cookie dough consistency forms.
- Fold in the mini chocolate chips by hand, ensuring they are distributed evenly so every single bite is filled with little bursts of chocolate.
- Serve the dough in small scoops or as a center dip surrounded by pretzels or fruit slices for a fun and interactive board experience.
Wrapping Up Our Sweet Journey
Creating an ‘Instant Sweet Cravings Board’ is about more than just food; it’s about making time for the things that bring us joy and sharing that light with others. I hope these recipes find a permanent home in your kitchen and that they help you turn an ordinary evening into something truly special. Remember, my loves, that you don’t need a special occasion to celebrate—the fact that you’re here, right now, is more than enough reason to enjoy something sweet. Until next time, keep your hearts full and your pantries ready for a little magic!