
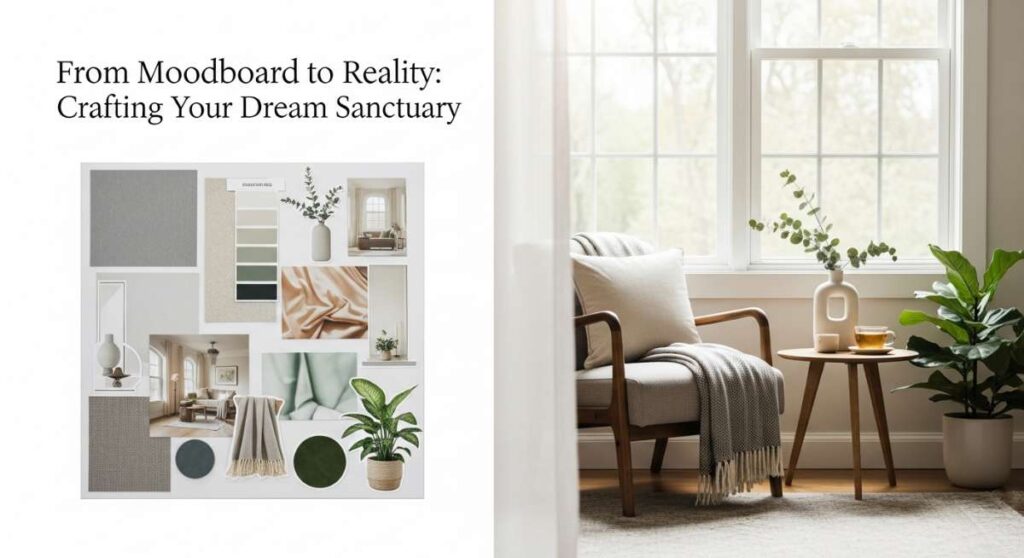
From Moodboard to Reality: Crafting Your Dream Sanctuary
We’ve all been there—lost in a late-night scroll through Pinterest, pinning image after image of sun-drenched breakfast nooks, glowing garden paths, and perfectly organized home offices. There’s a certain ache in looking at those beautiful spaces and then glancing back at our own lived-in, slightly chaotic corners. But what if I told you that the gap between your moodboard and your reality isn’t as wide as it seems? Creating a sanctuary isn’t about a total demolition; it’s about the intentional layers of light, texture, and soul that make a house feel like a haven.
In this guide, I’m pulling back the curtain on those ‘dream life’ aesthetics to show you exactly how to manifest them in your own space. We’re moving beyond just looking at the pretty pictures and diving into the tactile, sensory-rich process of building a home that breathes. Whether you’re looking to transform your backyard into a tropical escape or finally organize your digital life to reclaim your peace of mind, these steps are designed to turn your inspiration into a tangible, beautiful reality. Let’s roll up our sleeves and start creating.
How to Create a Glowing Garden Pathway for Magical Summer Evenings

Why we love this
There is a profound, soul-stirring magic in walking through a garden that glows under the moonlight, where the scent of damp earth meets the sweet fragrance of night-blooming jasmine. We love how the cool, smooth texture of river stones feels beneath bare feet, grounding you to the earth while the soft, ethereal hum of solar LEDs creates a trail of stardust. It turns a simple backyard into a luminous sanctuary, making every evening stroll feel like a scene from a dream where the world slows down and the only thing that matters is the gentle glow guiding you home. It’s an experience that engages every sense, from the visual sparkle to the quiet crunch of gravel underfoot.
Essential Elements:
- Luminescent ‘glow-in-the-dark’ gravel or pebbles
- Warm-toned solar-powered stake lights
- Landscape fabric (weed barrier)
- Flagstone or large slate pavers
- Steel or plastic edging
- Pea gravel for filler
How to make it
- Begin by marking your path using a garden hose or spray paint to create a natural, winding curve; avoid straight lines for a more organic, whimsical feel.
- Excavate the area to a depth of about 4 inches, ensuring the ground is level and compacted to prevent future shifting.
- Lay down a heavy-duty landscape fabric to suppress weeds, securing it with landscape staples every 12 inches along the edges.
- Install your edging material along the perimeter to keep your stones contained and create a crisp transition between the path and the lawn.
- Position your large flagstones first, spacing them about a stride’s length apart to act as the primary walking surface.
- Fill the gaps between the flagstones with a mixture of standard pea gravel and luminescent pebbles, ensuring the glow-pebbles are concentrated on the surface where they can ‘charge’ in the sun.
- Space your solar stake lights approximately 3 feet apart, alternating sides of the path to create a balanced, ambient wash of light rather than a harsh runway effect.
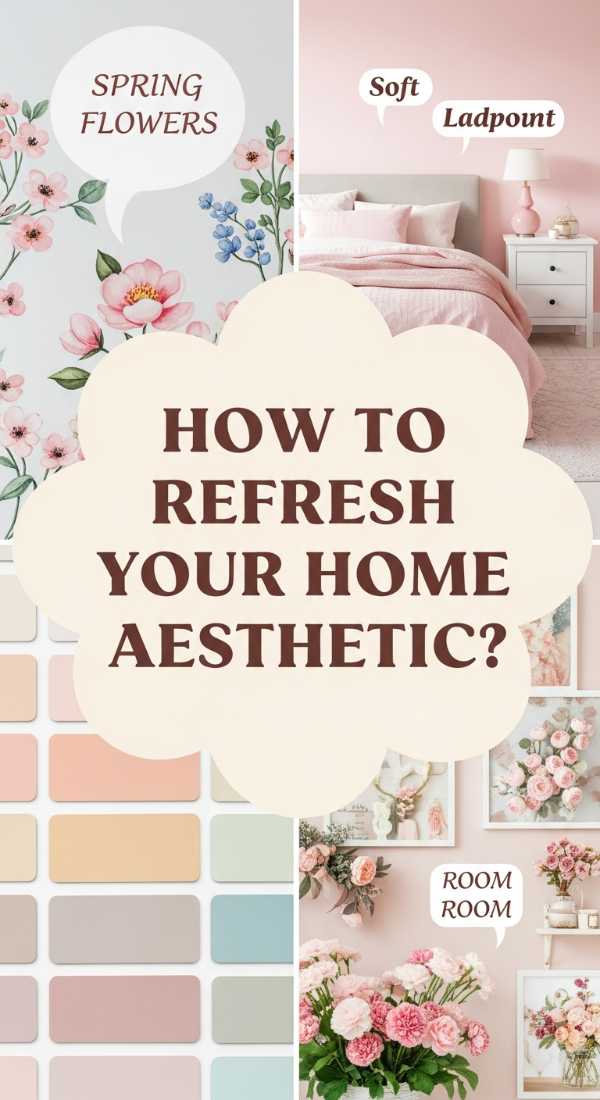
How to Refresh Your Home Aesthetic for a Cheerful Vibe
Why we love this
Refreshing your home is like taking a deep, restorative breath after a long winter; it clears the stagnant energy and invites a sense of playfulness back into your daily routine. We are obsessed with the way a crisp linen throw feels against the skin or the zesty, uplifting aroma of a citrus-based candle wafting through a sunlit room. It’s about the visual rhythm of bright whites mixed with pops of buttery yellow and sage green, creating a tactile environment that feels both energized and serene. When you refresh your space, you’re not just changing the decor; you’re curated a mood that makes every morning feel like a fresh start.
Essential Elements:
- Sheer linen or cotton curtains
- Live indoor plants (Fiddle leaf fig or Pothos)
- Lightweight, textured throw pillows
- Natural wood or rattan accents
- A signature citrus or floral home fragrance
- Mirror gallery wall
How to make it
- Start with a ‘clutter audit’ by removing everything from your surfaces to see the ‘bones’ of the room; this allows you to reintroduce items with intention.
- Swap out heavy, dark drapes for sheer, light-filtering fabrics that allow natural sunlight to bounce off the walls, instantly making the room feel larger and more vibrant.
- Incorporate ‘living’ decor by placing large-leafed plants in corners and trailing vines on high shelves to introduce movement and oxygenate the air.
- Layer your textiles by mixing textures—think a chunky knit cotton throw over a smooth linen sofa—to add depth without adding visual ‘noise.’
- Position mirrors opposite windows to double the amount of natural light in the room and create the illusion of an open, airy sanctuary.
- Introduce a consistent color palette of 3-4 soft, cheerful tones throughout the room to create a cohesive and calming visual flow.
How to Style a Tropical Glamping Retreat for a Relaxing Getaway

Why we love this
The essence of a tropical glamping retreat lies in the juxtaposition of raw nature and high-end comfort, where the rustle of palm fronds serves as your soundtrack and the air smells of sea salt and coconut oil. We love the decadent feel of high-thread-count sheets inside a rugged canvas tent, creating a cozy cocoon that feels miles away from civilization. The texture of woven seagrass rugs underfoot and the warm, amber flicker of lanterns create a rich, sensory experience that mimics the luxury of a private island. It’s the ultimate way to disconnect from the digital world while still indulging in the tactile pleasures of a boutique hotel.
Essential Elements:
- Large bell tent or heavy-duty canvas wall tent
- Memory foam mattress or high-quality air bed
- Bamboo or teak bedside tables
- Solar-powered Moroccan lanterns
- Portable outdoor fire pit
- Citronella incense and tropical florals
How to make it
- Choose a level, well-drained site with a natural windbreak, such as a cluster of trees, to protect your tent structure.
- Erect the tent according to the manufacturer’s instructions, ensuring the canvas is taut and the ventilation flaps are positioned to catch the afternoon breeze.
- Lay down a large, durable outdoor rug inside the tent to provide a soft barrier between the ground and your living space.
- Center your bed as the focal point, using a proper bed frame or a stack of pallets to elevate the mattress away from any potential ground moisture.
- Layer the bed with moisture-wicking linens and a heavy duvet for cooler nights, topping it with decorative pillows in botanical prints.
- Set up a ‘wash station’ outside the tent with a copper basin and fresh eucalyptus branches for a spa-like sensory touch.
- Hang string lights around the perimeter of the tent and place lanterns at the entrance to create a welcoming, safe glow as the sun sets.
How to Design Low Maintenance Curb Appeal for a Welcoming Entrance

Why we love this
There is nothing quite like the feeling of pride that washes over you as you pull into your driveway and see a home that looks polished, intentional, and effortlessly beautiful. We love the clean, architectural lines of ornamental grasses paired with the earthy, rich scent of fresh cedar mulch that greets you at the door. The visual contrast between sleek, modern hardware and the soft, billowing textures of drought-resistant lavender creates a sensory balance that is both sophisticated and inviting. It’s the art of the first impression—a way to tell the world that your home is a place of order and beauty, without requiring a weekend of yard work to maintain it.
Essential Elements:
- Perennial ornamental grasses (e.g., Fountain grass)
- Black or dark grey mulch
- Modern oversized house numbers
- Sleek, matte black mailbox
- Coordinated ceramic planters
- Drought-tolerant shrubs (e.g., Boxwood or Juniper)
How to make it
- Define your planting beds with clean, deep edges using a half-moon edger to separate the lawn from the mulch, which instantly creates a professional look.
- Select ‘perennial’ plants that are native to your zone, as these require significantly less water and will return year after year without replanting.
- Group plants in odd numbers (3s or 5s) and vary the heights to create visual interest and a sense of abundance.
- Apply a 3-inch layer of dark mulch to suppress weeds and retain soil moisture; the dark color provides a high-contrast backdrop that makes green foliage ‘pop.’
- Update your ‘jewelry’—swap out dated gold or brass door handles and house numbers for modern, high-contrast hardware in matte black or brushed nickel.
- Place a pair of large, symmetrical planters on either side of the door, filling them with evergreen shrubs that look great in all four seasons.
How to Build a Luxury Backyard Spa for the Ultimate Staycation

Why we love this
Imagine stepping out of your back door and into a world where the air is thick with the scent of cedar and eucalyptus, and the only sound is the gentle bubble of warm water. We love the tactile sensation of smooth, sun-warmed wood decking beneath our feet and the rhythmic steam rising into the cool evening air. A luxury spa is the pinnacle of the ‘sanctuary’ lifestyle, offering a physical and mental escape that rejuvenates the spirit. It’s about that decadent feeling of heavy, plush towels, the glow of amber lighting, and the absolute silence that allows you to finally hear your own thoughts.
Essential Elements:
- Cedar-clad hot tub or soaking tub
- Redwood or composite decking
- Privacy slats or bamboo fencing
- All-weather outdoor speakers
- Heated towel rack (outdoor rated)
- Essential oil diffuser for outdoor use
How to make it
- Prepare a reinforced concrete pad or a heavy-duty deck frame capable of supporting the significant weight of a filled tub (approx. 3,000+ lbs).
- Hire a licensed electrician to install the necessary 220V wiring and a dedicated sub-panel to ensure your spa meets local safety codes.
- Enclose the area with 6-foot privacy screens made of horizontal cedar slats, which provide seclusion while still allowing airflow.
- Install ‘step-up’ decking around the tub to create a seamless, built-in look and provide a safe surface for entering and exiting.
- Integrate low-voltage LED strip lighting under the deck lips and steps to provide a soft, non-glare safety glow for nighttime use.
- Set up a dedicated ‘toweling station’ nearby with a waterproof cabinet for storing robes and a tray for herbal tea or cucumber water.
- Add a perimeter of aromatic plants like rosemary and jasmine to naturally scent the steam rising from the water.
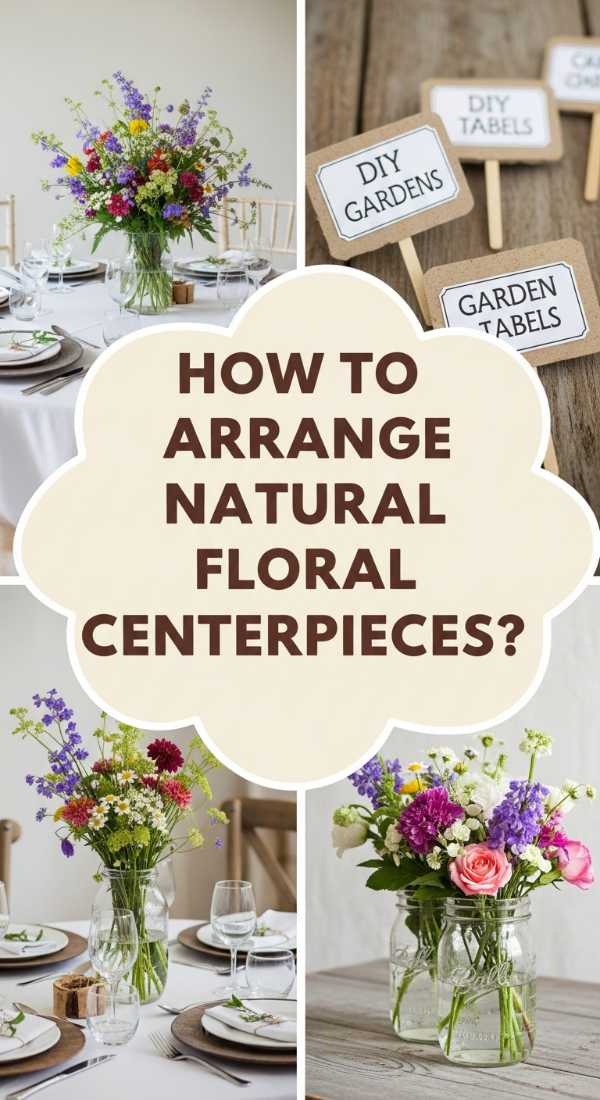
How to Arrange Natural Floral Centerpieces for a Whimsical Dinner Party
Why we love this
A table topped with wild, flowing florals instantly transforms a simple meal into an enchanted gathering where the air smells of crushed stems and sweet nectar. We love the ‘perfectly imperfect’ aesthetic of centerpieces that look like they were gathered from a meadow just moments ago, with varied heights and textures that invite guests to lean in closer. The velvet touch of a rose petal against the jagged edge of a eucalyptus leaf creates a sensory richness that sparks conversation and joy. It’s a whimsical, fleeting beauty that reminds us to savor the moment, the company, and the meal in front of us.
Essential Elements:
- Low-profile ceramic or glass bowls
- Floral frog (kenzan) or chicken wire
- Primary ‘focal’ flowers (Peonies, Dahlias)
- Secondary ‘filler’ flowers (Queen Anne’s Lace, Chamomile)
- Trailing greenery (Jasmine vine, Eucalyptus)
- Sharp floral shears
How to make it
- Prepare your vessel by placing a floral frog at the bottom or crumpling a piece of chicken wire inside to create a grid that will hold the stems in place.
- Fill the bowl with cool water and a drop of floral preservative; ensure no leaves will be submerged, as they cause bacteria growth.
- Start by ‘greening’ the base, inserting trailing vines and broad leaves to establish the overall shape and width of the arrangement.
- Insert your largest, most beautiful ‘focal’ flowers at varying heights, angling some toward the viewer and some slightly away for a natural look.
- Tuck in ‘filler’ flowers to bridge the gaps between the focal blooms, ensuring you maintain an airy, asymmetrical silhouette.
- Add ‘floaters’—thin, delicate stems like Cosmos or Grasses—that sit higher than the rest to create movement and a sense of ‘wildness.’
- Spin the arrangement as you work to ensure it looks beautiful from every seat at the table.
How to Organize Your Digital Space for Better Daily Productivity

Why we love this
There is a hidden, quiet anxiety in a cluttered desktop and a thousand unread emails that we often overlook, but clearing that digital noise feels like a weight lifting off your chest. We love the visual calm of a minimalist desktop background—perhaps a soft, grainy photo of a mountain range—and the satisfying ‘click’ of dragging a finished project into its permanent folder. Organizing your digital world creates a mental ‘aroma’ of clarity and focus, allowing you to move through your workday with a sense of mastery rather than being overwhelmed. It’s the modern version of a clean, well-lit workshop where every tool has its place and every thought has room to grow.
Essential Elements:
- Cloud storage subscription (Google Drive, Dropbox)
- Desktop organizer wallpaper
- Batch-processing software or browser extensions
- Password manager
- External hard drive for ‘deep’ archiving
- Digital ‘inbox’ folder
How to make it
- Conduct a ‘Digital Purge’ by deleting any files on your desktop that haven’t been opened in 30 days; move everything else into a folder named ‘To Sort.’
- Establish a strict file-naming convention (e.g., YYYY-MM-DD_ProjectName_Version) to make the search function your best friend.
- Create a hierarchy of no more than five main folders (e.g., Work, Personal, Finances, Photos, Archive) to keep your primary directory clean.
- Use a ‘Desktop Organizer’ wallpaper with designated zones for ‘To-Do,’ ‘In Progress,’ and ‘Reference’ to visually categorize your active files.
- Unsubscribe from every retail newsletter that doesn’t bring you joy; use a tool like ‘Unroll.me’ to batch this process and reclaim your inbox.
- Set a ‘Digital Sunset’ ritual where you close all tabs and clear your ‘Downloads’ folder at the end of every workday to start fresh the next morning.
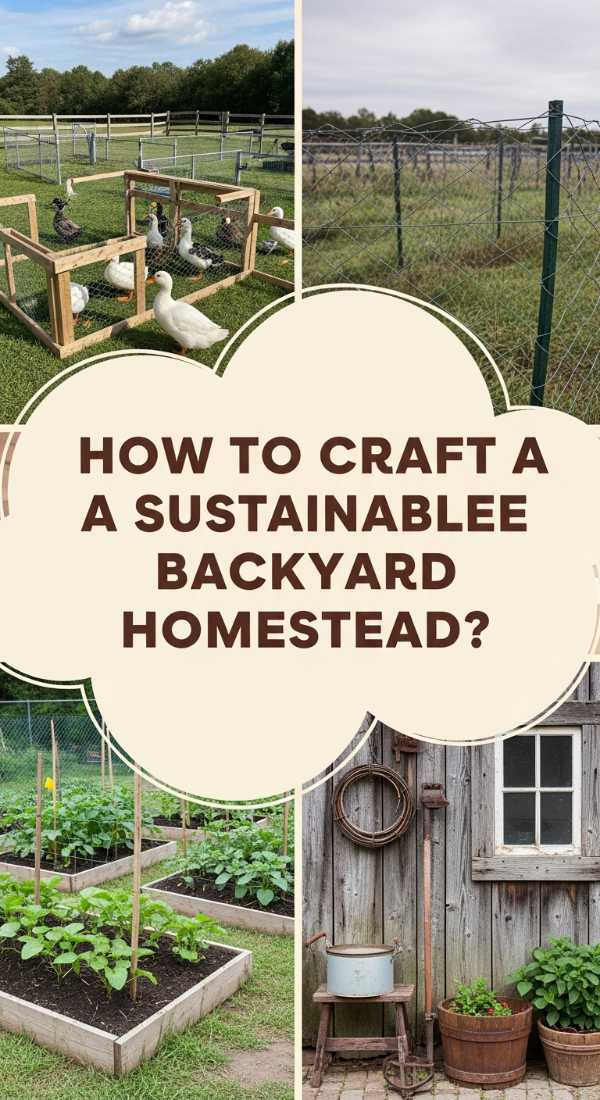
How to Craft a Sustainable Backyard Homestead for Happy Farm Animals
Why we love this
The backyard homestead is a symphony of earthy textures and wholesome sounds, from the soft ‘cluck-cluck’ of content hens to the rough, sun-warmed wood of a handmade coop. We love the tactile ritual of gathering warm, smooth eggs in the morning and the way the air smells of fresh hay and dried lavender used for nesting. It’s a lifestyle that grounds you in the seasons, teaching patience and providing a deep sense of connection to the food on your plate and the creatures in your care. There is a rustic, heartfelt beauty in a homestead that feels both industrious and incredibly peaceful—a true sanctuary for both humans and animals.
Essential Elements:
- Predator-proof chicken coop or hutch
- Galvanized steel feeding and watering troughs
- High-quality organic feed and oyster shell grit
- Hemp or pine shavings for bedding
- Hardware cloth (not chicken wire) for fencing
- Compost bin for waste management
How to make it
- Design your coop with at least 4 square feet of indoor space and 10 square feet of outdoor ‘run’ space per bird to ensure a stress-free environment.
- Install hardware cloth buried 12 inches into the ground around the perimeter to prevent burrowing predators like foxes or raccoons from entering.
- Position the coop in a spot that receives morning sun but provides afternoon shade to help the animals regulate their body temperature.
- Implement a ‘deep litter’ system using hemp bedding, which naturally composts and provides warmth during the winter while keeping smells at bay.
- Create ‘enrichment’ zones with dust baths (a mix of sand and wood ash) and hanging vegetable treats to keep your animals active and engaged.
- Establish a daily routine of morning release/feeding and evening lock-up to build trust and ensure the safety of your flock.
How to Paint a Modern Deck for a Sophisticated Outdoor Living Room

Why we love this
A freshly painted deck in a sophisticated, moody hue like charcoal or deep navy serves as the perfect ‘rug’ for your outdoor living room. We love the way the satin finish feels smooth underfoot and how it provides a sharp, clean contrast against the vibrant green of the lawn and the soft glow of string lights. The aroma of fresh paint signifies a renewal, turning a weathered, greyed wood surface into a high-end designer space that feels like an extension of your interior. It’s a visual anchor that makes your outdoor furniture look more expensive and your evening cocktails feel like a special event at a rooftop lounge.
Essential Elements:
- High-quality solid color deck stain or ‘deck paint’
- Long-handle paint rollers with 1/2 inch nap
- Synthetic bristle brushes for ‘cutting in’
- Oxygen bleach deck cleaner
- Pressure washer (optional but recommended)
- Painter’s tape and drop cloths
How to make it
- Thoroughly clean the wood using an oxygen bleach solution to kill mold and strip away old, failing finish; let the wood dry for at least 48 hours.
- Lightly sand any rough spots or ‘fuzz’ that rose during the cleaning process to ensure a professional, smooth-to-the-touch finish.
- Use a brush to ‘cut in’ the paint between individual deck boards and in corners where a roller cannot reach.
- Apply the first coat of solid stain using a roller, working in the direction of the wood grain and covering 2-3 boards at a time to avoid ‘lap marks.’
- Wait at least 24 hours (or as specified by the manufacturer) before applying a second coat; this second layer is crucial for achieving that opaque, modern look.
- Avoid furniture placement for at least 72 hours to allow the paint to fully cure and prevent peeling or sticking.
How to Decorate a Seasonal Front Porch for a Festive Neighborhood Feel
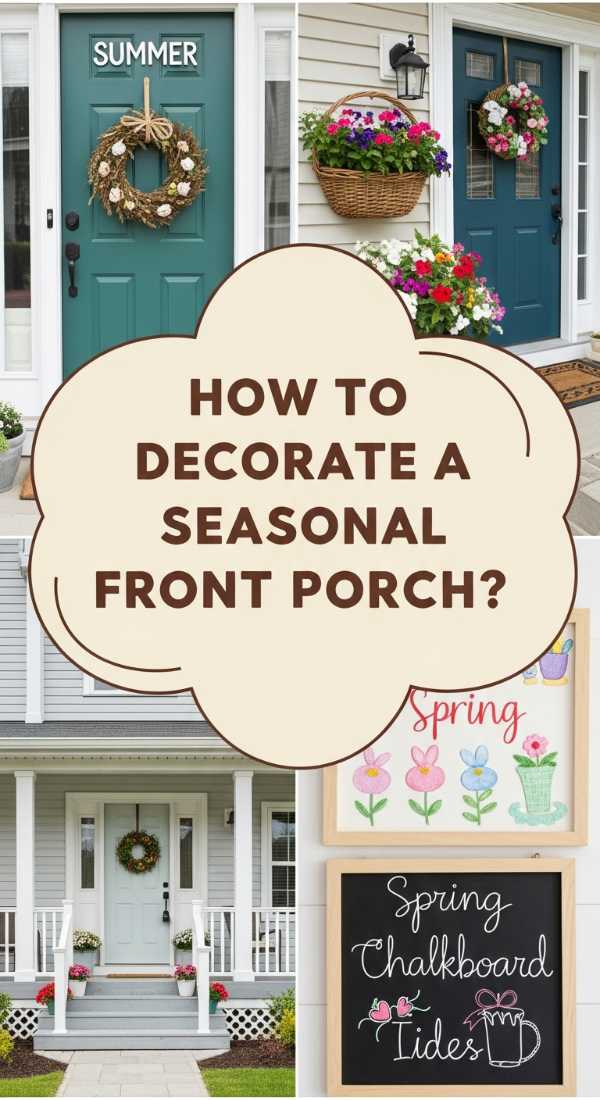
Why we love this
The front porch is your home’s handshake with the neighborhood, and decorating it for the seasons is a way to share joy with everyone who passes by. We love the crunchy texture of dried corn stalks in the fall or the crisp, piney scent of a fresh balsam wreath in the winter that catches the wind every time the door opens. The visual layers of stacked pumpkins, glowing lanterns, and a plush new welcome mat create a sensory experience that says ‘you are welcome here.’ It’s about the warmth of a flickering candle in a storm lantern and the way a well-decorated porch makes the whole street feel a little more like a community.
Essential Elements:
- A statement seasonal wreath
- Varying sizes of lanterns with LED candles
- Multi-height plant stands or crates
- Coordinated welcome mat and layering rug
- Seasonal organic elements (Pumpkins, Mums, Evergreen boughs)
- Outdoor-rated string lights
How to make it
- Start by cleaning the entire porch area—sweep the ceiling for cobwebs and wash the front door to provide a clean canvas for your decor.
- Choose a focal point, usually the door, and hang a large wreath that incorporates the season’s textures (e.g., dried wheat for autumn, eucalyptus for spring).
- Create ‘vignettes’ on either side of the door using the ‘Rule of Three’: use items of varying heights, such as a tall lantern, a medium pumpkin, and a small potted plant.
- Layer your rugs—place a larger, patterned outdoor rug (like a buffalo check or stripe) underneath a smaller coir ‘Welcome’ mat for a designer look.
- Use ‘fillers’ to add volume; tuck moss, pinecones, or hay into the gaps between your larger items to make the display feel lush and intentional.
- Set your LED candles on a timer so the porch automatically glows at dusk, providing a consistent, welcoming light for your neighborhood.
Conclusion
Turning your dream sanctuary from a digital moodboard into a physical reality is one of the most rewarding journeys you can take. It’s not about perfection; it’s about creating a space that supports your life, fuels your creativity, and offers a soft place to land at the end of the day. By focusing on sensory details—the scent of your garden, the texture of your linens, the clarity of your digital space—you build a home that doesn’t just look good, but feels good. Start with one project this weekend, and watch how your space begins to breathe along with you.