
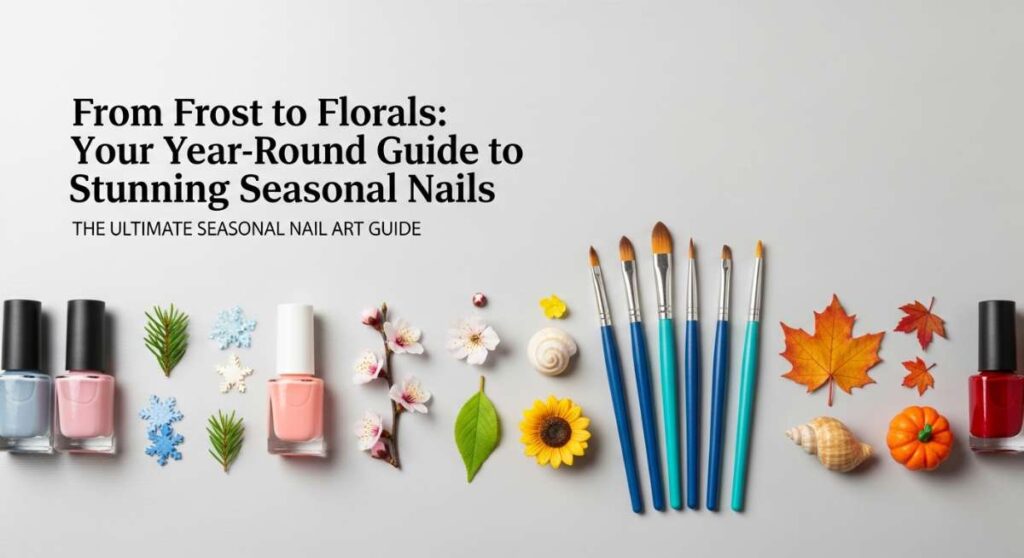
From Frost to Florals: Your Year-Round Guide to Stunning Seasonal Nails
Hello, my loves! There is something so incredibly soul-soothing about the ritual of painting our nails. As the seasons shift and the air changes its scent, our fingertips become a canvas for the world’s transformation. It’s like a little secret we carry with us—a spark of joy every time we type on a keyboard or reach for a steaming cup of tea. Whether you’re shaking off the winter chill or basking in the golden glow of summer, I want to help you feel that soft, radiant confidence that comes with a fresh manicure.
In this cozy space today, we’re exploring everything from the gentle blossoms of spring to the high-energy vibes of summer. Think of this as your personal invitation to play, to experiment, and to embrace the beautiful colors that make your heart sing. I’ve gathered my favorite secrets and inspirations just for you, my darlings, so let’s dive into this world of color together.
5 Easy Steps for Funky Spring Nails
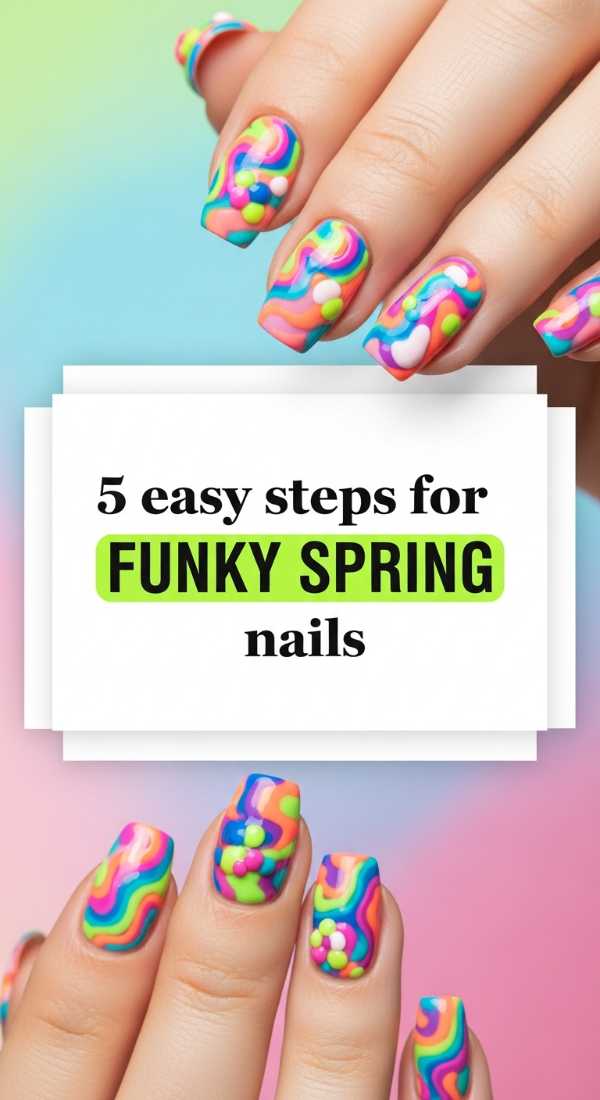
Why to love this Design:
Spring is the season of rebirth, and there is no better way to celebrate than with a touch of funkiness! This design is all about breaking the rules with soft pastels and playful shapes that mirror the whimsical energy of a garden in bloom.
Essential Elements:
- Pastel lavender and mint polish
- A fine-tip nail art brush
- Irregular blob shapes
- Glossy top coat
How to Prepare:
- Cleanse and shape nails into a soft oval.
- Apply a sheer nude base coat for a natural look.
- Paint organic, mismatched blobs in different pastel shades on each nail.
- Add tiny white dots or stars using a toothpick.
- Seal with a high-shine top coat for that ‘fresh rain’ glow.
Budget Range
- Essie ‘Mint Candy Apple’ ($10)
- Zoya ‘Abby’ Lavender ($12)
- Nail Art Brush Set ($6)
4 Simple Ways to Style Red Prom Nails
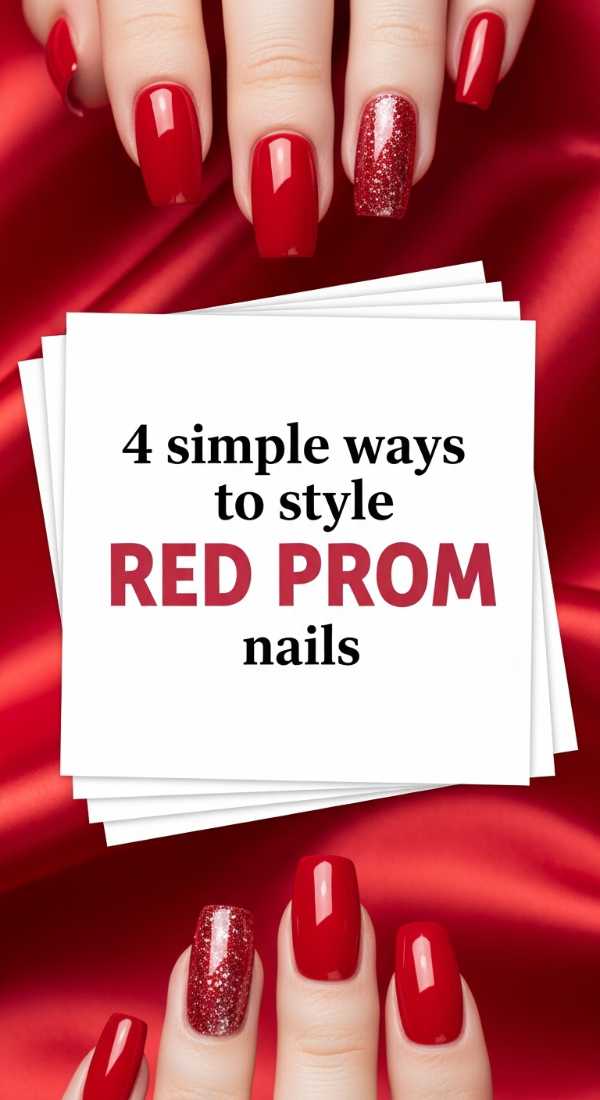
Why to love this Design:
Prom is a night of magic and red is the color of passion and timeless elegance. Styling red nails for your big night adds a bold, classic touch that feels sophisticated and empowering all at once.
Essential Elements:
- True crimson red polish
- Matte top coat (optional)
- Silver or gold rhinestones
- Gold leaf flakes
How to Prepare:
- Option 1: Go for a classic high-gloss finish for a Hollywood vibe.
- Option 2: Apply a matte top coat for a modern, velvet-like texture.
- Option 3: Create a red-to-black ombre for a dramatic, moody effect.
- Option 4: Add a single rhinestone at the base of your ring finger for subtle sparkle.
Budget Range
- OPI ‘Big Apple Red’ ($11)
- Sally Hansen Matte Top Coat ($7)
- Nail Rhinestone Kit ($8)
7 Must-Try Nail Colors for Spring

Why to love this Design:
Finding the perfect shade is like finding the perfect flower. These seven colors are handpicked to reflect the soft, airy, and rejuvenating spirit of springtime transitions.
Essential Elements:
- Soft Peach Fuzz
- Matcha Green
- Buttercup Yellow
- Dusty Rose
- Cornflower Blue
- Periwinkle
- Cloud White
How to Prepare:
- Buff your nails to create a smooth surface.
- Apply two thin coats of your chosen spring hue.
- Ensure you cap the free edge to prevent chipping.
Budget Range
- Olive & June ‘BP’ ($9)
- Holt ‘Matcha’ ($15)
- Revlon ‘Candid’ ($6)
6 Quick Tips for Sunflower Nail Art
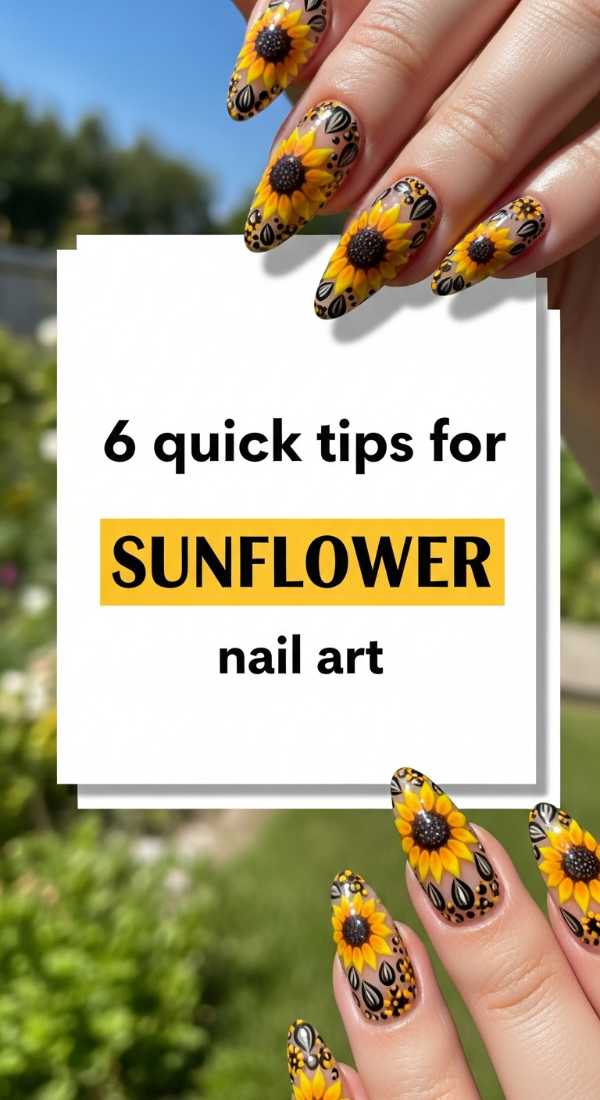
Why to love this Design:
Sunflowers are nature’s way of smiling at us. They represent loyalty and longevity, making them a beautiful, sunshine-filled choice for anyone wanting to carry a bit of light on their hands.
Essential Elements:
- Bright yellow polish
- Chocolate brown center color
- A dotting tool
- Green leaf accents
How to Prepare:
- Start with a clear or sky-blue base.
- Place a large brown dot for the flower center.
- Drag small yellow teardrop shapes outward from the center.
- Add tiny black dots inside the brown center for texture.
- Paint a small green leaf at the base of the flower.
- Use a matte sealer for a rustic, farmhouse feel.
Budget Range
- Orly ‘Danielle’s Mirror’ ($12)
- Nail Dotting Tool Set ($5)
- Sinful Colors ‘Yellow’ ($3)
3 Secrets to Making Simple Funky Nails
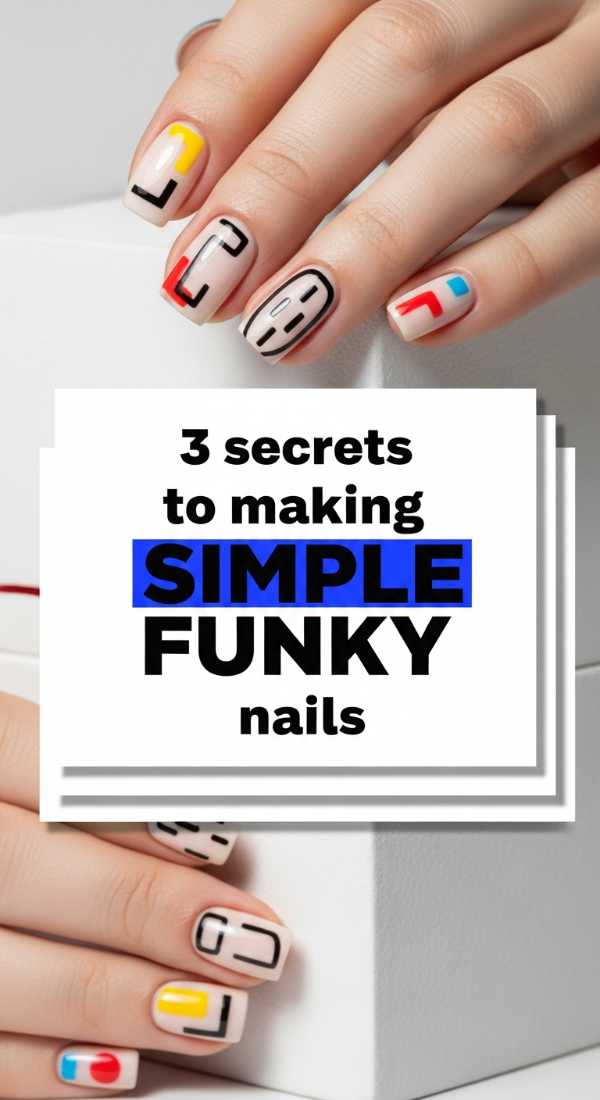
Why to love this Design:
Sometimes less is more, even when you’re going for a ‘funky’ vibe. These secrets allow you to achieve a professional, artistic look without needing a degree in fine arts!
Essential Elements:
- Negative space
- Contrasting primary colors
- Geometric tape
How to Prepare:
- Secret 1: Use ‘negative space’ by leaving half the nail bare for a modern architectural look.
- Secret 2: Use striping tape to create sharp, crisp lines between clashing colors.
- Secret 3: Mismatch your hands—use the same colors but different patterns on each hand.
Budget Range
- Washi/Striping Tape ($4)
- Wet n Wild ‘Color Icon’ ($2)
- Base Strengthener ($8)
5 Steps to Achieve Hot Coral Nails
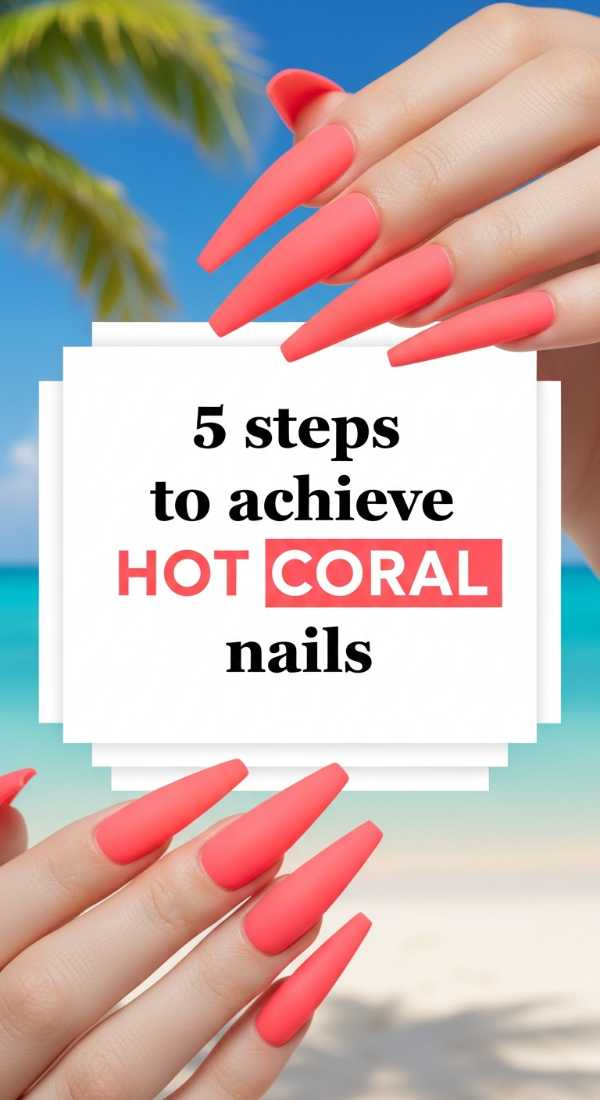
Why to love this Design:
Hot coral is the ultimate bridge between spring and summer. It’s vibrant, energetic, and looks absolutely stunning against every skin tone, making your hands look instantly sun-kissed.
Essential Elements:
- Neon coral polish
- White base coat (to make the neon pop)
- Moisturizing cuticle oil
How to Prepare:
- Apply one layer of white polish to act as a ‘primer’ for the neon.
- Apply two layers of the hot coral, waiting for each to dry.
- Use a cleanup brush dipped in acetone for perfect edges.
- Add a thick layer of ‘plumping’ top coat for a gel-like finish.
- Massage cuticle oil generously to keep the skin glowing.
Budget Range
- China Glaze ‘Flip Flop Fantasy’ ($8)
- Seche Vite Top Coat ($9)
- Cuccio Cuticle Oil ($10)
8 Gorgeous Looks for Almond Nail Inspo Spring
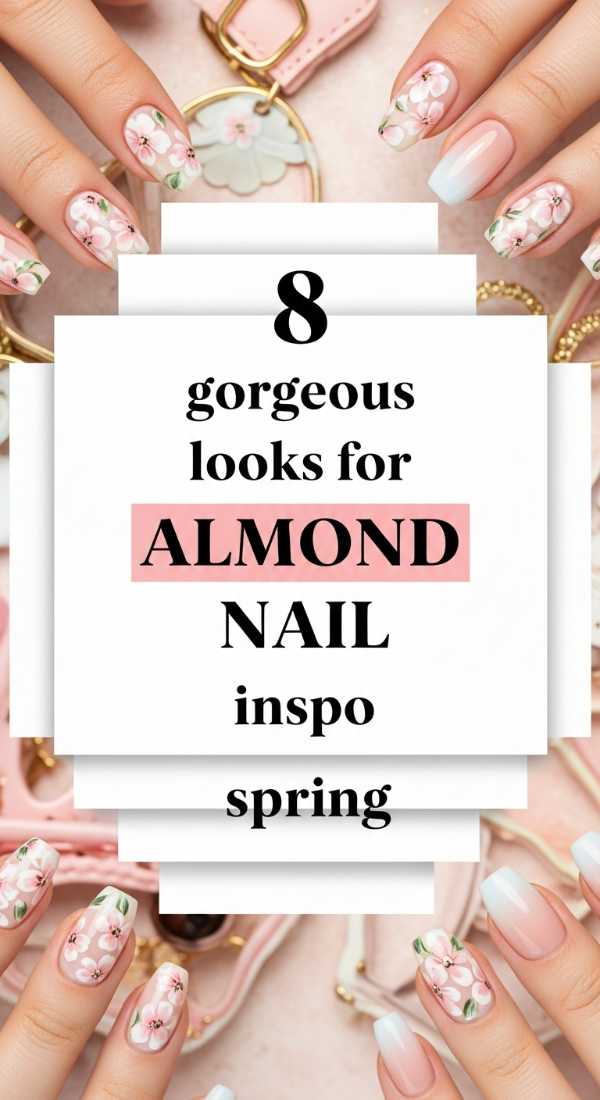
Why to love this Design:
The almond shape is incredibly flattering, elongating the fingers and providing a sophisticated silhouette. This season, almond nails are the perfect canvas for delicate, feminine art.
Essential Elements:
- Almond-shaped tips (natural or extensions)
- Sheer pinks
- Pearl pigments
How to Prepare:
- Try a ‘glazed donut’ chrome finish over a lilac base.
- Incorporate micro-French tips in a vibrant pastel yellow.
- Add pressed dried flowers to a clear builder gel.
- Use a marble effect with white and soft grey.
- Experiment with ‘aura’ nails using a sponge for a gradient glow.
- Try a velvet magnetic polish in sage green.
- Add a single ‘evil eye’ detail for protection and style.
- Finish with a shimmering ‘fairy dust’ topper.
Budget Range
- Nailene Almond Press-ons ($7)
- Pearl Powder ($5)
- Dried Nail Flowers ($6)
4 Steps for the Perfect Baseball Nails Design Mom
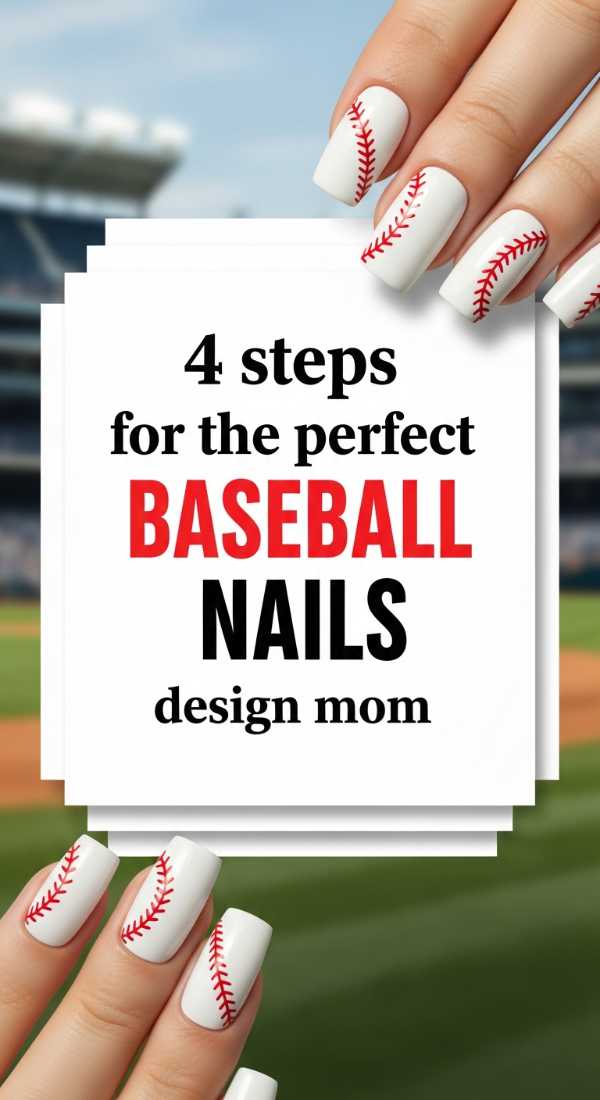
Why to love this Design:
For all the amazing baseball moms cheering from the sidelines, this design is for you! It’s a sweet, spirited way to support your favorite player while keeping your style game strong.
Essential Elements:
- Opaque white polish
- Red striper pen or fine brush
- Patience and team spirit!
How to Prepare:
- Paint your nails a crisp, clean white.
- Using a red striper, draw two curved lines on either side of the nail.
- Add tiny ‘V’ shapes along those lines to mimic the stitching of a baseball.
- Seal with a durable top coat to withstand all that cheering and clapping!
Budget Range
- Sally Hansen ‘White On’ ($5)
- Red Nail Art Pen ($4)
- Top Coat ($6)
10 Fresh Ideas for Summer Nail Inspo
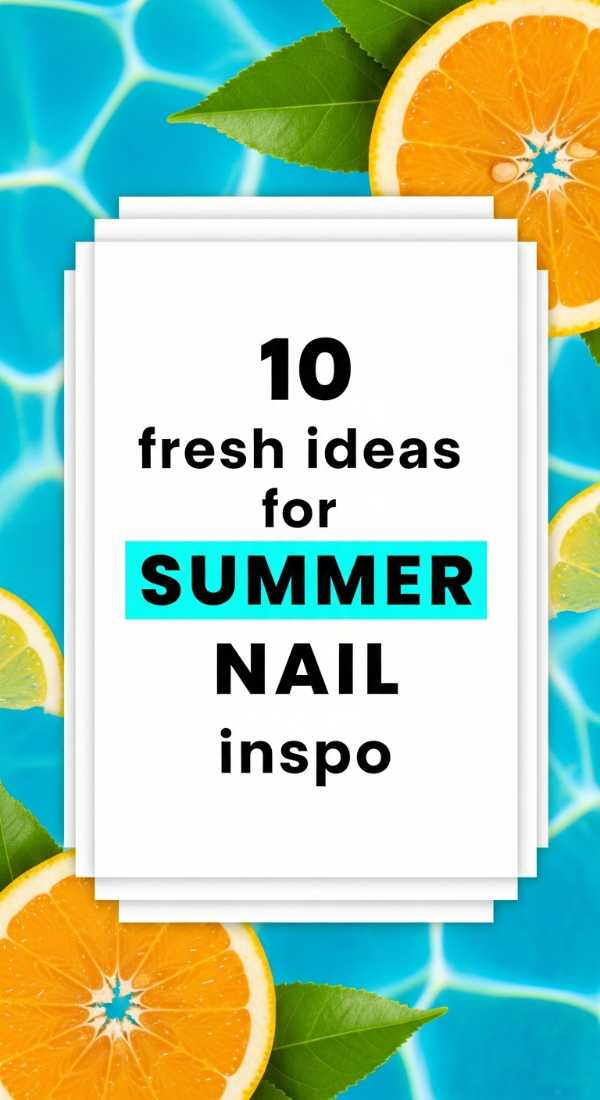
Why to love this Design:
Summer is all about fruit, sun, and sand! These ideas are designed to bring that vacation feeling straight to your fingertips, no matter where you are.
Essential Elements:
- Fruit decals (watermelons, lemons)
- Glitter for sand texture
- Ocean blue gradients
How to Prepare:
- Mismatched fruit: A different fruit on every finger.
- Iridescent ‘mermaid’ scales using stencils.
- Sunset gradients using orange, pink, and purple.
- Clear nails with gold leaf ‘sunlight’ accents.
- Neon animal prints.
- 3D ‘water droplet’ effects using thick builder gel.
- Palm tree silhouettes against a white background.
- Tie-dye swirls.
- Turquoise stone marbling.
- Simple, clean ‘milk’ nails for a refreshed beach look.
Budget Range
- Summer Decal Pack ($5)
- Neon Polish Set ($15)
- Builder Gel ($12)
3 Techniques for Butter Yellow Nails Chrome
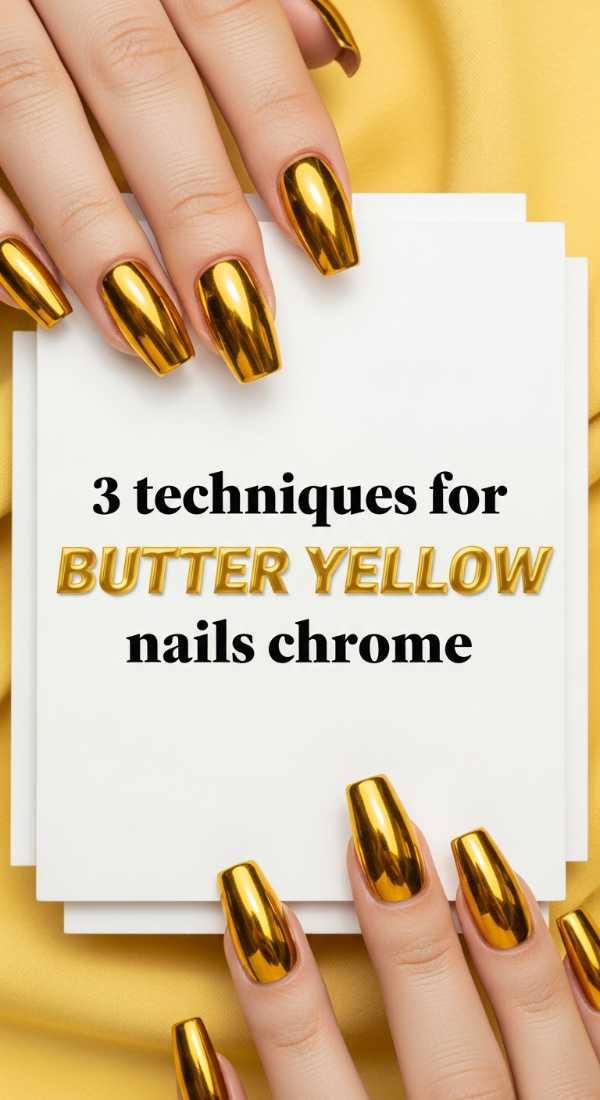
Why to love this Design:
Butter yellow is the ‘it’ color right now. It’s creamy, soft, and when paired with a chrome finish, it looks like liquid sunshine. It’s the ultimate sophisticated-meets-trendy look.
Essential Elements:
- Butter yellow cream polish
- No-wipe top coat
- Gold or yellow chrome powder
How to Prepare:
- Technique 1: The ‘Halo’ effect—apply chrome only to the tips of a yellow base.
- Technique 2: Full saturation—burnish chrome powder over the entire nail for a metallic sheen.
- Technique 3: The ‘Matte-Metallic’ mix—chrome accents over a matte yellow base for contrast.
Budget Range
- Essie ‘Hay There’ ($10)
- Chrome Powder ($6)
- UV Lamp (for no-wipe top coat) ($20)
Embrace Your Inner Glow
As we transition from the crisp winter air into the blooming warmth of the months ahead, I hope you find a moment to treat yourself to one of these designs. Remember, my loves, beauty isn’t about perfection; it’s about the joy of expression. Whether you’re wearing baseball stitches for your kiddo or rocking butter yellow chrome just for you, let your nails be a reflection of the light you carry inside. Stay radiant!