
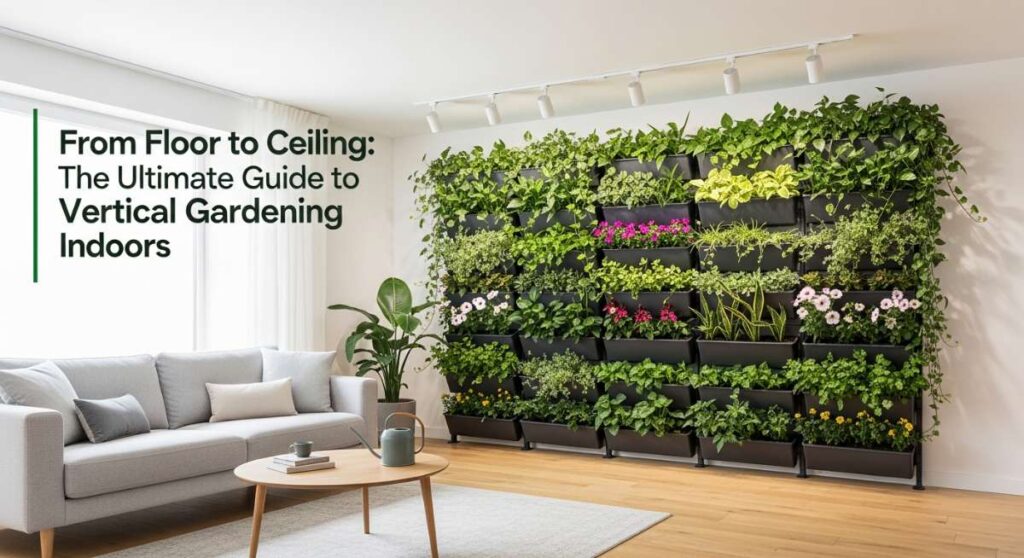
From Floor to Ceiling: The Ultimate Guide to Vertical Gardening Indoors
There is a specific kind of magic that happens when you step into a room that feels like a living, breathing sanctuary. For years, I struggled to find that perfect balance between ‘decorated’ and ‘alive’ until I looked up. We often forget that our walls are a blank canvas not just for paint, but for the lush, vibrant textures of nature itself. Moving your garden from the windowsill to the vertical plane transforms a house into a botanical cathedral, elevating your mood and purifying the air you breathe while you sleep, work, and dream.
Imagine waking up to the soft rustle of ivy leaves or the sweet, earthy scent of damp moss right in your living room. Vertical gardening isn’t just about saving space—though it’s a lifesaver for those of us in cozy apartments—it’s about creating an immersive experience. It’s about the tactile joy of running your fingers over velvet-soft Philodendron leaves and the visual feast of emerald greens, neon chartreuse, and deep burgundies cascading down your walls like a silent, slow-motion waterfall. Let’s dive into how you can turn your vertical spaces into a masterpiece of living art.
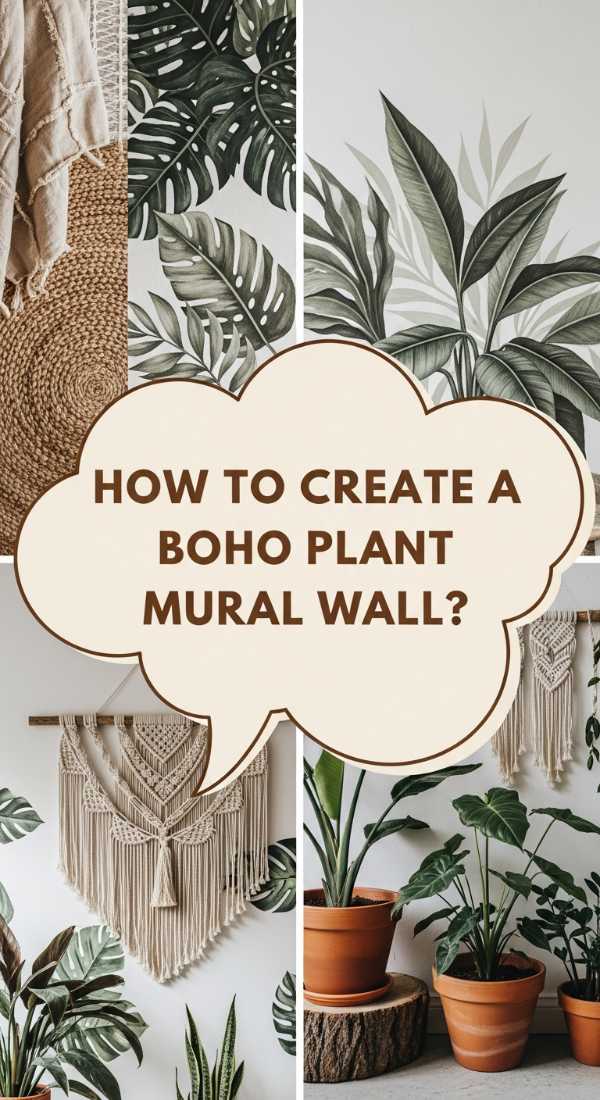
How to Create a Lush Plant Mural Wall for Instant Boho Vibes
Why we love this
This approach captures the wild, untamed spirit of a jungle canopy, bringing a sense of organic movement and effortless cool to any room. We love the way the long, trailing vines of Pothos and Tradescantia create a tapestry of texture that softens hard corners and introduces a soothing, rhythmic flow. The sensory experience is unparalleled; the air feels cooler and more oxygenated, while the sight of varying leaf shapes creates a visual depth that standard wallpaper simply cannot replicate. It feels like a warm hug from Mother Nature herself, perfect for a barefoot, tea-drinking afternoon.
Essential Elements:
- High-quality wall-mounted felt pockets or a modular living wall system.
- A variety of trailing plants: Marble Queen Pothos, Heartleaf Philodendron, and String of Hearts.
- Lightweight, moisture-retentive potting mix (coco coir based).
- Waterproof backing or a vapor barrier to protect your drywall.
- Liquid seaweed fertilizer for monthly feeding.
How to make it
- Begin by installing a waterproof membrane, such as a thick plastic sheet or a specialized PVC board, directly onto your wall to prevent moisture damage. Ensure this layer extends at least 2 inches beyond the perimeter of your plant pockets.
- Mount your vertical pocket system using heavy-duty anchors. Use a spirit level to ensure the rows are perfectly horizontal; even a slight tilt will affect how water drains from the top pockets to the bottom.
- Prepare your plants by gently removing them from their nursery pots and loosening the root balls. If the roots are tightly coiled (root-bound), use clean shears to make three or four shallow vertical cuts to encourage outward growth.
- Fill the bottom third of each pocket with your potting mix. Place the plant inside, angling it slightly forward so the foliage drapes naturally over the edge. Add more soil and press down firmly to eliminate air pockets, which can dry out roots.
- Water the wall starting from the top row using a narrow-spout watering can. Watch for the ‘saturation point’—the moment water begins to drip from the drainage holes of the top pockets into the ones below. Stop once the bottom pockets feel damp to the touch.
- Allow the mural to ‘settle’ for 48 hours without direct sunlight to reduce transplant shock. You’ll know it’s thriving when you see new, light-green ‘growth tips’ appearing on the vines within 14 days.
How to Design a Stunning Gallery Wall with Plants for Elegant Living Spaces

Why we love this
This style bridges the gap between high-end interior design and horticulture, offering a sophisticated way to display greenery as formal art. There is something incredibly refined about seeing a delicate fern or a structural air plant encased in a sleek, metallic or wooden frame. The contrast between the rigid, architectural lines of the frames and the soft, feathery textures of the plants creates a dynamic tension that draws the eye. It turns your living space into a curated exhibition where the ‘art’ literally grows and changes with the seasons, providing a fresh perspective every single day.
Essential Elements:
- Shadow box frames or deep-set picture frames with the glass removed.
- Tillandsia (Air Plants) or preserved Reindeer Moss for a low-maintenance version.
- Decorative wire or clear fishing line for securing plants.
- Gold, brass, or matte black accents for the frames.
- A spray bottle for fine-mist hydration.
How to make it
- Select an odd number of frames (3, 5, or 7) in varying sizes to create a balanced but asymmetrical layout. Lay them out on the floor first to find a configuration that feels harmonious and fills the wall space evenly.
- If using live Air Plants, attach a small loop of coated copper wire to the back of the frame. Gently nestle the base of the Tillandsia into the loop, ensuring it is secure but not crushed. Avoid using glue, as it can damage the plant’s delicate tissues.
- For a more ‘lush’ look, line the back of the shadow box with a layer of preserved moss. Use a hot glue gun (sparingly) to adhere the moss to the backing board, then pin your live air plants on top of the moss bed using ‘U’ shaped floral pins.
- Mount the frames on the wall using heavy-duty picture hangers. Space them at least 3 inches apart to allow for airflow, which is critical for preventing rot in air plants.
- Maintenance is a ‘prep and mist’ process. Twice a week, use a fine-mist sprayer to hydrate the plants until they appear vivid green. Once a month, remove the plants from the frames and soak them in room-temperature filtered water for 20 minutes to deeply hydrate the core.
- Visual cue for ‘doneness’: The plants should look plump and silver-green. If the tips of the leaves begin to curl inward or turn brown, increase the misting frequency immediately.
How to Style a Serene Plant Mural Wall for a Peaceful Morning Sanctuary

Why we love this
Creating a sanctuary requires a palette that calms the central nervous system, and nothing does this better than the soft, silvery greens of Eucalyptus and the velvet leaves of Micans. This setup is designed for those quiet morning moments—the smell of fresh coffee mingling with the crisp, medicinal scent of live greens. The texture here is all about softness; think fuzzy stems, matte leaves, and delicate fronds that catch the morning light. It creates a cocoon-like environment that muffles external noise and grounds your energy before the busy day begins.
Essential Elements:
- A wall-mounted wooden trellis or a series of minimalist hooks.
- Aromatic plants: Lemon Button Ferns, Blue Star Ferns, and Eucalyptus branches.
- Ceramic wall planters in soft, muted tones (sage, cream, or terracotta).
- A humidity monitor (hygrometer) to ensure the sanctuary stays lush.
- Micro-LED fairy lights for a soft, evening glow.
How to make it
- Identify the ‘light path’ in your room. This sanctuary wall should be placed where it receives soft, indirect morning light (East-facing windows are ideal). Avoid harsh afternoon sun which can scorch delicate fern fronds.
- Install your trellis or hooks using a staggered grid pattern. This allows the plants to grow into the negative space, creating a more natural, ‘overgrown’ look that feels peaceful rather than rigid.
- Pot your plants in ceramic wall vessels that feature a built-in reservoir. This ensures a consistent moisture level, which is vital for ferns. Use a mix of 50% potting soil and 50% orchid bark to allow for maximum aeration.
- Arrange the ‘scent’ plants at shoulder height. When you walk past, the slight movement of air will release the natural oils from the Eucalyptus or Lemon Ferns, providing an immediate aromatherapy benefit.
- Carefully weave the longer stems of climbing plants through the trellis. Use soft garden twine to tie them loosely; never tie them tight enough to indent the stem.
- Check the ‘doneness’ by touching the soil daily. It should feel like a wrung-out sponge. If the leaves of the Blue Star Fern feel crispy, immediately increase the humidity in the room using a dedicated humidifier or a pebble tray.
How to Arrange a Modern Gallery Wall with Plants for a Fresh Minimalist Look

Why we love this
Minimalism doesn’t have to be cold; when paired with the right plants, it becomes a celebration of form and structure. We love the clean, sharp lines of white geometric planters against a stark wall, punctuated by the bold, upright blades of Snake Plants or the sculptural ‘Swiss Cheese’ leaves of a Monstera Adansonii. It’s a look that feels incredibly organized and intentional, providing a sense of mental clarity. The sensory appeal is in the contrast—the smooth, cold ceramic against the thick, waxy leaves that feel almost like architectural sculptures themselves.
Essential Elements:
- Uniform white or matte black geometric wall planters.
- Structural plants: Sansevieria (Snake Plant), Zamioculcas zamiifolia (ZZ Plant), and Hoya Kerrii.
- A laser level for precision mounting.
- Cactus and succulent soil mix for fast drainage.
- Decorative white river stones to top the soil.
How to make it
- Use a laser level to project a perfectly straight line across your wall. Minimalist design relies on precision; even a half-inch misalignment will ruin the ‘clean’ aesthetic. Mark your drill holes exactly 12 inches apart for a grid layout.
- Drill and insert wall anchors. For ceramic planters, which are heavy when wet, ensure the anchors are rated for at least 15 lbs each to prevent wall failure.
- Prepare your plants by ensuring they are in well-draining inner pots that fit perfectly inside the decorative wall planters. This ‘cachepot’ method allows you to remove the plants for watering in the sink, keeping your walls bone-dry.
- Place a 1-inch layer of decorative white river stones on top of the soil. This serves two purposes: it hides the dirt for a cleaner look and helps retain a small amount of moisture for the roots while preventing gnats.
- When arranging the plants, place the tallest, most structural plants (like Snake Plants) in the top row and the trailing, softer plants (like Hoyas) in the bottom row to create a visual ‘weight’ that grounds the wall.
- Watering should be infrequent. For Snake and ZZ plants, wait until the soil is completely dry (test with a moisture meter or a wooden skewer). Visual cue: if the ZZ plant leaves look wrinkled, it’s time for a deep drink.
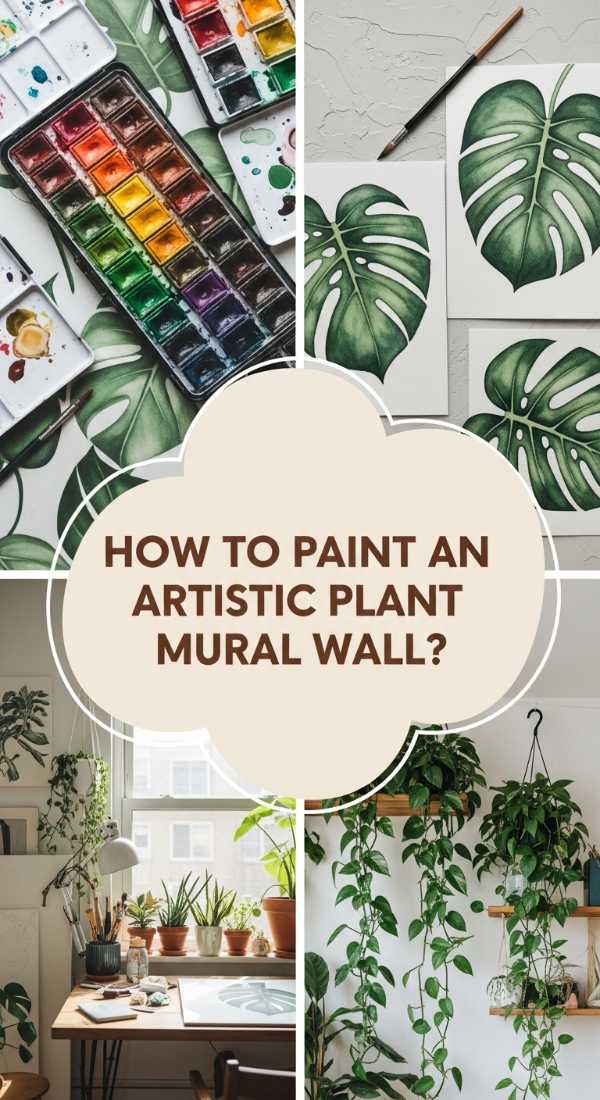
How to Paint an Artistic Plant Mural Wall for Total Creative Inspiration
Why we love this
This is where your inner artist meets your inner gardener. By combining a painted mural with living elements, you create a 3D masterpiece that literally pops off the wall. We love the creative freedom of painting abstract shapes or giant tropical leaves on the wall and then using live plants to represent the ‘real’ version of those shapes. It’s vibrant, energetic, and a total conversation starter. The feeling is one of pure inspiration—like living inside a high-end art gallery where the exhibits are constantly evolving and growing.
Essential Elements:
- Non-toxic, low-VOC interior paint in bold colors (terracotta, deep teal, or mustard).
- Wall-mounted ‘ring’ holders for standard terracotta pots.
- Plants with high visual impact: Calathea Ornata, Maranta (Prayer Plant), and Croton.
- Fine-detail paint brushes and a painter’s sponge.
- Waterproof sealant for the painted areas behind the pots.
How to make it
- Sketch your design on the wall using a light pencil. Think of large, sweeping arcs or geometric ‘color blocks’ that will frame where the plants will sit. A popular choice is to paint a ‘shadow’ or a larger version of the plant leaf behind where the pot will hang.
- Apply your paint in thin, even coats. Use a sponge to create a ‘stucco’ texture if you want an earthy, Mediterranean feel. Allow the paint to cure for at least 72 hours before mounting hardware.
- Apply a clear, matte waterproof sealant over the painted area where the pots will be located. This prevents any accidental splashes from staining your artwork during watering.
- Install the metal ring holders. These are best because they allow you to easily lift the pots in and out. Ensure they are screwed into studs or high-quality anchors.
- Choose plants with colorful foliage to match your paint. If you painted a deep teal background, a Calathea with pink stripes will look electric.
- To maintain, wipe the leaves of the plants with a damp cloth once a week. This keeps the colors vibrant and allows the plant to photosynthesize efficiently. Visual cue for health: The Prayer Plant leaves should ‘fold up’ at night; if they stop moving, check the light levels.
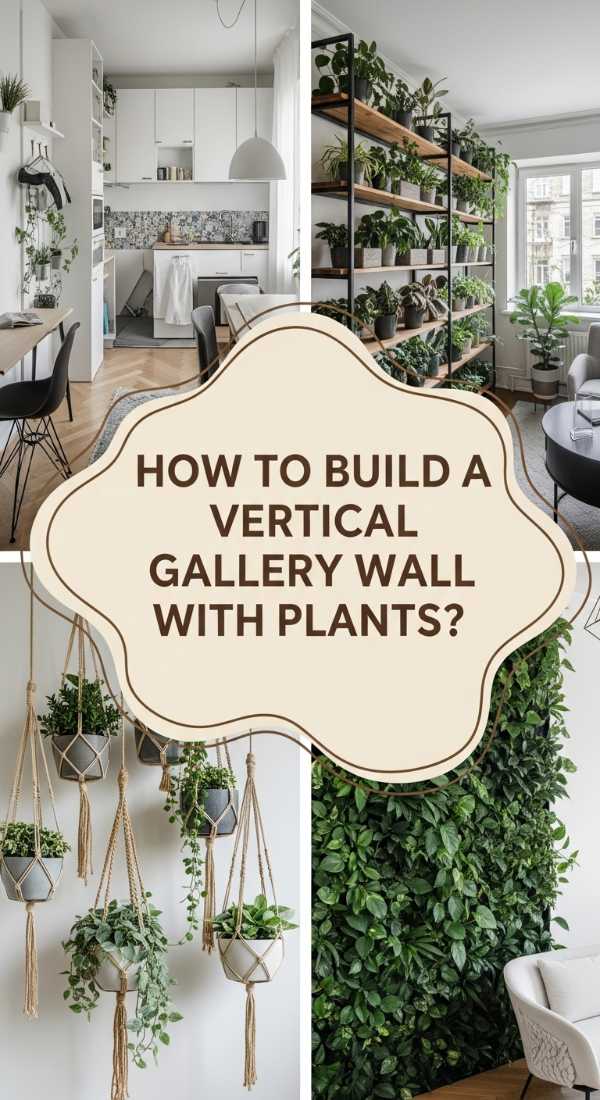
How to Build a Vertical Gallery Wall with Plants for Small Apartment Magic
Why we love this
When floor space is at a premium, you have to think vertically. This setup is the ultimate ‘space hack,’ utilizing the often-ignored space above doors or in narrow hallways. We love how it draws the eye upward, making low ceilings feel much higher and cramped rooms feel expansive. The sensory experience is one of ‘nesting’—surrounding yourself with life without sacrificing a single square inch of walking space. It’s practical, beautiful, and transforms a ‘box’ into a lush, layered home that feels twice its actual size.
Essential Elements:
- A floor-to-ceiling tension pole system with adjustable plant arms.
- Lightweight plastic or resin pots to keep the weight load low.
- Airy, voluminous plants: Spider Plants, Asparagus Ferns, and Boston Ferns.
- S-hooks and lightweight chains for height adjustment.
- Self-watering wicks to simplify maintenance in high-to-reach spots.
How to make it
- Position the tension pole in a corner or next to a window. Tighten the mechanism until the pole is completely immobile. Test it by giving it a firm tug; it shouldn’t budge.
- Space the adjustable arms at different heights and angles. To create the illusion of more space, place more arms near the top of the pole and fewer near the bottom. This ‘top-heavy’ look draws the gaze upward.
- Use Asparagus Ferns on the higher levels. Their feathery, cloud-like texture doesn’t block light from reaching the plants below.
- Install self-watering wicks in each pot. Run a cotton cord from the soil down into a water reservoir at the bottom of the pot. This is crucial for high plants that are difficult to reach with a watering can daily.
- For the ‘small apartment’ look, keep the color palette of the pots monochromatic. All-white pots against a white wall make the plants look like they are floating in mid-air.
- Visual cue: If the Spider Plant starts producing ‘babies’ (runners), you’ve nailed the environment! Let them hang down to add to the vertical drama.
How to Accentuate a Cozy Plant Mural Wall for the Warmest Reading Nook

Why we love this
There is nothing more comforting than curling up with a book under a canopy of green. This setup focuses on creating a ‘wrap-around’ effect, where the plants curve with the corner of the wall to embrace you. The texture is soft and inviting, featuring the fuzzy leaves of a Panda Plant or the cascading silkiness of a Creeping Fig. The air in a reading nook like this feels noticeably different—fresher, quieter, and more humid, which is great for your skin and lungs while you get lost in a story for hours.
Essential Elements:
- Corner-mounted floating shelves or ‘L’ shaped brackets.
- Large-leafed ‘canopy’ plants: Monstera Deliciosa or a Fiddle Leaf Fig (small).
- Trailing ‘curtain’ plants: String of Bananas or Variegated Ivy.
- Warm-toned amber grow lights to supplement natural light.
- A plush velvet chair and a chunky knit throw to complete the nook.
How to make it
- Install floating shelves in a staggered ‘staircase’ pattern around the corner of your nook. Ensure the lowest shelf is at least 20 inches above your seating to avoid bumping your head.
- Place your largest plant on the highest shelf in the very corner. This creates the ‘apex’ of your green canopy. A Monstera is perfect here as its large leaves will naturally tilt toward the light, creating a natural roof.
- Line the edges of the shelves with trailing plants. As they grow, use small, clear command clips to guide the vines along the wall, ‘training’ them to frame your seating area like living curtains.
- Integrate amber-hued grow lights. Standard grow lights can be harsh and blue; amber-toned ones provide the spectrum plants need while maintaining a cozy, candle-lit vibe in the evening.
- Add a small decorative mister on a side table. Misting the plants while you read adds to the sensory experience and keeps the ‘curtain’ plants from getting crispy tips.
- Visual cue for ‘doneness’: The nook should feel semi-enclosed. If you can see too much of the wall, add more trailing Ivy to fill the gaps.
How to Curate a Vintage Gallery Wall with Plants for Old World Charm

Why we love this
This style is for the soul that loves history and character. By using aged terracotta, weathered wood, and antique brass vessels, you create a garden that feels like it’s been there for decades. We love the ‘patina’ of this look—the salty white crust on old pots, the dark grain of reclaimed wood, and the classic, heirloom feel of plants like Maidenhair Ferns and English Ivy. It smells of old books and damp earth, providing a sense of timelessness and stability in a fast-paced world.
Essential Elements:
- Thrifted antique brass bowls, silver pitchers, or wooden crates.
- Heirloom plant varieties: Maidenhair Fern, Wax Plant (Hoya Carnosa), and Rex Begonia.
- Heavy-duty ornate iron brackets.
- Charcoal chips (to prevent sour soil in vessels without drainage).
- Distressed wood planks for mounting.
How to make it
- Source vintage vessels from thrift stores. If a vessel doesn’t have drainage (like a brass bowl), you must add a 2-inch layer of horticultural charcoal at the bottom before adding soil. This ‘sweetens’ the soil and prevents root rot from standing water.
- Mount a large piece of reclaimed wood horizontally on your wall using lag bolts. This acts as the ‘gallery rail’ for your vintage pieces.
- Attach your vintage vessels to the wood using leather straps or decorative iron rings. The contrast between the dark wood and the metallic brass creates an instant ‘Old World’ feel.
- Choose ‘moody’ plants. The Rex Begonia, with its dark purple and silver metallic leaves, perfectly complements the vintage aesthetic.
- Maidenhair Ferns are the crown jewel here, but they are finicky. They require ‘goldilocks’ conditions—not too bright, not too dry. Place them in the center of the gallery where they are shielded from drafts.
- Visual cue: The brass should develop a natural patina over time from the moisture. This is a sign of a ‘living’ gallery. If the Begonia leaves lose their shimmer, move the gallery 12 inches closer to a light source.
How to Incorporate a Tropical Plant Mural Wall for an Indoor Island Escape

Why we love this
Why wait for a vacation when you can live in the tropics? This mural wall is all about maximalism—big leaves, bold patterns, and a riot of different shades of green. We love the way a Bird of Paradise or a large Philodendron can dominate a wall, making the room feel humid, lush, and exotic. The sensory experience is intense; the sound of large leaves brushing against each other and the sight of massive, perforated foliage makes you feel like you’ve been transported to a Balinese villa. It’s an instant energy booster!
Essential Elements:
- A sturdy wall-mounted wood or bamboo trellis.
- Giant-leafed plants: Monstera Deliciosa, Bird of Paradise (Strelitzia), and Philodendron Gloriosum.
- Velcro plant ties (soft side) for securing large stems.
- Large-scale self-watering wall planters.
- A powerful ultrasonic humidifier nearby.
How to make it
- Secure a heavy-duty bamboo trellis to the wall. Because tropical plants can become very heavy, ensure the trellis is anchored into at least two wall studs.
- Start with your ‘anchor’ plant at the base. A Bird of Paradise in a large floor pot provides the height needed to start the mural.
- Mount large-scale wall planters above the floor plant. Use Philodendron varieties that have a ‘climbing’ habit. As they grow, use soft Velcro ties to attach the thick stems to the trellis.
- Tropical plants love humidity (at least 60%). Place a humidifier directly below the wall. The rising mist will be trapped by the large leaves, creating a localized microclimate.
- Clean the leaves bi-weekly with a mixture of water and a drop of neem oil. This gives them a professional ‘island glow’ and prevents pests like spider mites that thrive in indoor heating.
- Timing and Doneness: Tropical walls take time to ‘fill in.’ Expect a 6-month growth period before the trellis is fully hidden. You’ll know it’s successful when the Monstera starts producing ‘aerial roots’—long, brown vine-like structures that reach for the floor.
How to Elevate a Hanging Gallery Wall with Plants for Airy Aesthetic Flow
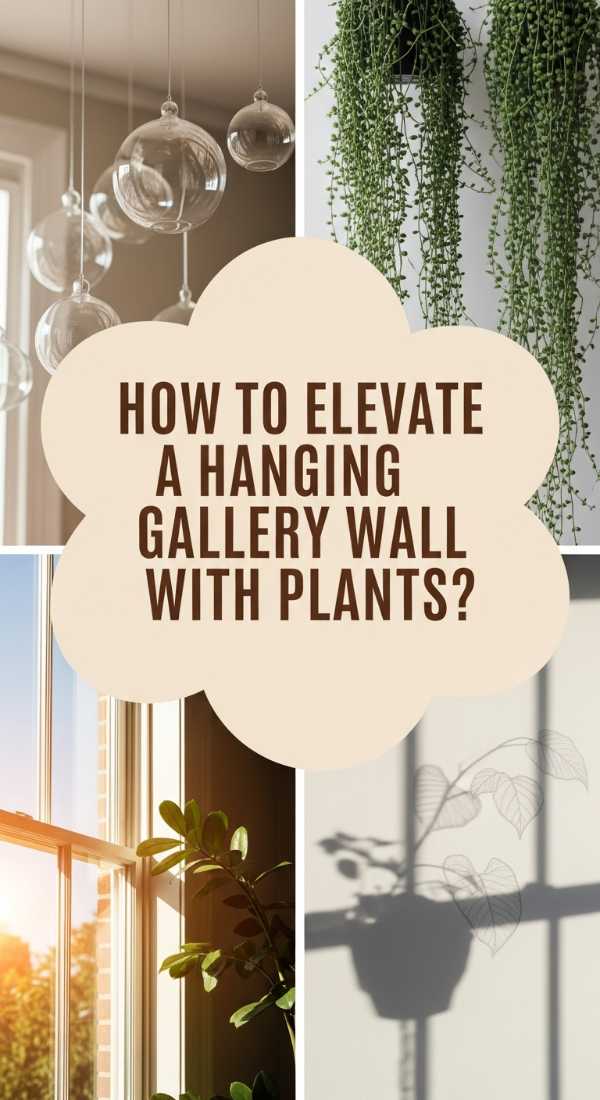
Why we love this
There is a unique lightness to a hanging gallery; it feels like the plants are dancing. By suspending your greenery from the ceiling at various heights, you create a 3D forest that you can actually walk through. We love the way the light filters through the leaves of a hanging Pothos or a Burro’s Tail, casting moving shadows on the floor. It’s an airy, ethereal look that feels modern and whimsical at the same time. The gentle sway of the pots in a light breeze adds a layer of kinetic art to your home.
Essential Elements:
- Ceiling hooks (swivel hooks are best).
- Macrame plant hangers or minimalist wire cables.
- Lightweight pots: Fiberglass or thin-walled ceramic.
- Trailing succulents and vines: Burro’s Tail, String of Pearls, and Lipstick Plant.
- An extendable reach watering wand.
How to make it
- Locate the ceiling joists using a stud finder. Never hang plants from just the drywall, as the weight of wet soil will eventually pull the hook out. Screw heavy-duty swivel hooks directly into the joists.
- Vary the lengths of your hangers. Use a ‘V’ formation (shorter on the sides, longer in the middle) to create a sense of intentional design. Macrame hangers add a boho touch, while thin black wire cables keep it modern.
- Choose ‘overflow’ plants. The Burro’s Tail is spectacular for this, as its heavy, grape-like clusters will hang straight down, creating a stunning vertical line.
- To water, use an extendable watering wand attached to a pressurized sprayer. This allows you to reach high pots without a ladder.
- Visual cue for ‘doneness’: The bottom of the lowest pot should be at least 6 feet from the floor to allow people to walk underneath without bumping into them, unless it is positioned over a piece of furniture.
- Visual health check: If ‘String of Pearls’ look like deflated peas, they are thirsty. If they are bright green and plump, they are perfectly hydrated.
Conclusion
Vertical gardening is more than just a home decor trend; it is a profound way to reconnect with the rhythms of nature within our own four walls. Whether you choose the structured elegance of a framed gallery wall or the wild, untamed beauty of a tropical mural, you are building a living ecosystem that rewards you with cleaner air, a calmer mind, and a more beautiful home. Don’t be afraid to start small—one trailing vine can be the beginning of your very own indoor forest. Your walls are waiting to come to life!