

Hello, my loves! There is something so magical about finding that one recipe that stops your scroll and makes your heart skip a beat. We have all been there—lost in a sea of beautiful food photos, dreaming of the aromas and the first bites of something truly special. Today, I am pulling back the curtain on our most-loved viral food board to share the gems that have truly changed the game in my kitchen.
This collection isn’t just about ‘trends’; it is about finding those soul-soothing flavors that turn a regular Tuesday into a celebration of life and nourishment. Whether you are looking for a light, keto-friendly dinner or a show-stopping dessert that looks like it belongs in a wildflower meadow, I have gathered the very best right here for you. Let’s dive into these kitchen treasures together, like we’re sitting around my farmhouse table with a warm cup of tea.
Heavenly Fresh Strawberry Cake Secret

Why we love this
This cake is like a soft, pink cloud of summer joy that melts the moment it touches your tongue. We have discovered that the secret to that intense, natural strawberry flavor is all in a homemade reduction that avoids any artificial syrups or dyes. It feels so incredibly special to serve a dessert that is as pure and radiant as a sunny afternoon in the berry patch. Your friends will absolutely swoon over the delicate crumb and the way the fresh fruit shines through every single bite.
Ingredients
- 2 cups fresh strawberry puree (reduced to 1/2 cup)
- 3 cups cake flour, sifted
- 1 1/2 teaspoons baking powder
- 1/2 teaspoon baking soda
- 1 cup unsalted butter, softened
- 2 cups granulated sugar
- 4 large eggs, room temperature
- 1 tablespoon vanilla bean paste
- 1/2 cup whole milk
How to make it
- Begin by simmering your strawberry puree in a small saucepan over medium heat for about 20 minutes until it reduces to a thick, concentrated 1/2 cup of liquid; let this cool completely before using.
- Preheat your oven to 350°F and prepare two 9-inch cake pans with parchment paper and a light coating of butter and flour.
- In a large bowl, cream together the softened butter and sugar until the mixture is pale, light, and incredibly fluffy, which usually takes about five minutes of high-speed mixing.
- Add the eggs one at a time, followed by the vanilla bean paste and the cooled strawberry reduction, ensuring everything is fully incorporated.
- Alternately fold in the sifted dry ingredients and the milk, starting and ending with the flour mixture, then divide the batter between the pans and bake for 30-35 minutes until a tester comes out clean.
Low Carb Keto Dinner Ideas

Why we love this
Finding a dinner that feels indulgent while staying true to your low-carb lifestyle is like finding a hidden treasure in the kitchen. These recipes focus on zesty lemons, rich garlic butters, and vibrant vegetables that leave you feeling light and energized rather than weighed down. It is all about the art of substitution—using fresh zucchini or cauliflower to create a canvas for bold, savory flavors that satisfy every craving. Eating well becomes an act of self-love when the food on your plate is this beautiful and nourishing.
Ingredients
- 4 large zucchini, spiralized into noodles
- 1 pound large shrimp, peeled and deveined
- 4 tablespoons grass-fed butter
- 3 cloves garlic, minced
- 1 teaspoon red pepper flakes
- Fresh parsley, chopped
- 1 lemon, juiced and zested
- 1/2 cup grated parmesan cheese
How to make it
- Start by spiralizing your zucchini and placing the noodles on a paper towel to drain any excess moisture, ensuring your final dish isn’t watery.
- In a large skillet over medium-high heat, melt two tablespoons of butter and sauté the shrimp until they are pink and opaque, then remove them and set aside.
- Add the remaining butter to the same pan along with the minced garlic and red pepper flakes, cooking until the aroma fills your kitchen with warmth.
- Toss the zucchini noodles into the garlic butter for just two minutes until they are slightly softened but still have a gentle bite.
- Return the shrimp to the pan, add the lemon juice, zest, and a generous handful of parmesan, tossing everything together until the sauce is silky and coats every strand.
Authentic Homemade Sushi Techniques

Why we love this
There is a profound sense of peace that comes from the rhythmic process of preparing your own sushi rolls at home. Mastering the delicate balance of seasoned rice and fresh fillings allows you to bring the elegance of a high-end sushi bar into your own dining room. It is a beautiful way to connect with your food and your loved ones as you roll, slice, and share these bite-sized pieces of art. Once you learn the secret of the perfect rice texture, you will feel like a true culinary artist in your own right.
Ingredients
- 2 cups Japanese short-grain sushi rice
- 2 1/2 cups water
- 1/4 cup rice vinegar
- 2 tablespoons sugar
- 1 teaspoon salt
- Nori sheets (dried seaweed)
- Sashimi-grade tuna or salmon
- Cucumber and avocado, thinly sliced
- Pickled ginger and wasabi for serving
How to make it
- Rinse the sushi rice under cold water repeatedly until the water runs completely clear, then cook it with the measured water in a rice cooker or stovetop.
- While the rice is still hot, gently fold in a mixture of rice vinegar, sugar, and salt using a wooden paddle, being careful not to mash the delicate grains.
- Place a sheet of nori on a bamboo rolling mat and spread a thin, even layer of the seasoned rice over it, leaving a small border at the top.
- Arrange your thin strips of fish, cucumber, and avocado in a line across the center of the rice.
- Using the mat as a guide, roll the sushi tightly away from you, apply a little water to the edge of the nori to seal it, and slice into clean rounds with a very sharp, damp knife.
The Famous Dumpling Lasagna Mashup

Why we love this
This dish is the ultimate example of how kitchen creativity can lead to something absolutely legendary and comfort-inducing. By layering savory frozen dumplings with rich marinara and melted cheese, you create a fusion that is both unexpected and deeply familiar. It is the kind of meal that brings a smile to everyone’s face, offering a playful twist on two beloved classics in one bubbling pan. Every bite is a delightful surprise of textures that will have your family asking for this ‘mashup’ every single week.
Ingredients
- 1 bag (20-24 oz) frozen pork or vegetable potstickers
- 24 oz jar of your favorite marinara sauce
- 2 cups shredded mozzarella cheese
- 1 cup ricotta cheese
- 1/2 cup grated parmesan
- 1 tablespoon Italian seasoning
- Fresh basil for garnish
- 1/2 cup water
How to make it
- Preheat your oven to 375°F and spread a thin layer of marinara sauce on the bottom of a 9×13 inch baking dish.
- Arrange half of the frozen dumplings in a single layer over the sauce, followed by dollops of ricotta and half of the remaining marinara.
- Add a second layer of the remaining dumplings and top with the rest of the sauce and the 1/2 cup of water to help the dumplings steam and cook through.
- Sprinkle the mozzarella, parmesan, and Italian seasoning over the top, then cover the dish tightly with aluminum foil.
- Bake for 30 minutes, then remove the foil and bake for another 15 minutes until the cheese is golden and bubbly, garnishing with fresh basil before serving.
Better Cottage Cheese Lunch Hacks

Why we love this
If you have ever thought of cottage cheese as a dated diet food, these viral hacks are here to completely change your perspective. By whipping it into a silky-smooth consistency, it becomes a decadent base for both savory and sweet toppings that feel like a gourmet treat. It is a protein-packed powerhouse that keeps you fueled through the afternoon while satisfying your craving for something creamy and rich. These little adjustments turn a humble tub of cheese into a luxurious lunch experience that you will genuinely look forward to.
Ingredients
- 1 cup full-fat cottage cheese
- 1 thick slice of sourdough bread
- 1 tablespoon hot honey
- 2 tablespoons crushed toasted walnuts
- 1/2 cucumber, thinly sliced
- A pinch of flaky sea salt
- Fresh dill or chives
How to make it
- Place the cottage cheese in a small food processor or blender and pulse until it is completely smooth and resembles a thick, whipped cream.
- Toast your sourdough bread until it is golden and sturdy enough to hold the generous toppings you are about to add.
- Spread the whipped cottage cheese thickly over the warm toast, creating little decorative swirls with the back of your spoon.
- Top with the sliced cucumbers, crushed walnuts, and a sprinkle of fresh herbs for a bright, crunchy contrast.
- Finish with a generous drizzle of hot honey and a pinch of flaky sea salt to bring all the flavors together in a perfect sweet and savory harmony.
Ultimate Sweet Potato Taco Bowls

Why we love this
These taco bowls are like a vibrant, edible rainbow that fills your body with vitamins and your heart with pure happiness. The roasted sweet potatoes add an earthy sweetness that pairs perfectly with the smoky spices and the brightness of fresh lime. It is a wonderful way to meal prep for the week, as the flavors only get better when they have a little time to mingle together. Each bowl is a celebration of plant-based goodness that never feels like a compromise on flavor or satisfaction.
Ingredients
- 2 large sweet potatoes, cubed
- 1 can black beans, rinsed and drained
- 1 cup frozen corn, roasted
- 2 cups cooked quinoa or brown rice
- 1 ripe avocado, sliced
- 1 teaspoon smoked paprika
- 1/2 teaspoon cumin
- Lime wedges and fresh cilantro
- Creamy chipotle dressing
How to make it
- Toss your cubed sweet potatoes with olive oil, smoked paprika, cumin, and salt, then roast at 400°F for about 25 minutes until tender and caramelized.
- While the potatoes roast, warm the black beans in a small pot with a splash of water and a pinch of salt.
- Prepare your base of quinoa or rice and divide it into bowls, creating a cozy foundation for the rest of the ingredients.
- Arrange the roasted sweet potatoes, beans, corn, and avocado slices in beautiful sections over the grain base.
- Garnish with a mountain of fresh cilantro, a squeeze of lime, and a drizzle of chipotle dressing for a bowl that looks as good as it tastes.
Traditional Southern Jambalaya Recipe

Why we love this
There is nothing quite like the comforting, soul-warming aroma of a traditional jambalaya simmering on the stove on a chilly evening. This recipe captures the essence of Southern hospitality, combining smoked meats and the ‘holy trinity’ of vegetables into a single, magnificent pot. It is a dish meant for sharing, full of history and deep, complex spices that tell a story with every savory spoonful you take. Bringing this to your table feels like a big, warm hug from a dear friend who knows exactly what you need.
Ingredients
- 1 lb andouille sausage, sliced
- 1 lb boneless chicken thighs, cubed
- 1 lb large shrimp, peeled
- 1 large onion, diced
- 1 green bell pepper, diced
- 2 stalks celery, chopped
- 3 cloves garlic, minced
- 2 cups long-grain white rice
- 4 cups chicken broth
- 2 tablespoons Cajun seasoning
How to make it
- In a large Dutch oven, brown the sliced andouille sausage and chicken cubes until they have a beautiful golden crust, then remove and set aside.
- Sauté the onion, bell pepper, and celery in the remaining fat until they are soft and translucent, then stir in the garlic and Cajun seasoning.
- Add the dry rice to the pot and stir for a minute to toast the grains, ensuring they absorb all those wonderful aromatic oils.
- Pour in the chicken broth, return the sausage and chicken to the pot, bring to a boil, then reduce heat and simmer covered for about 20 minutes.
- Once the rice is tender, gently fold in the raw shrimp and cover for another 5 minutes until the shrimp are pink and perfectly cooked by the residual heat.
Perfectly Baked Tilapia Seasoning
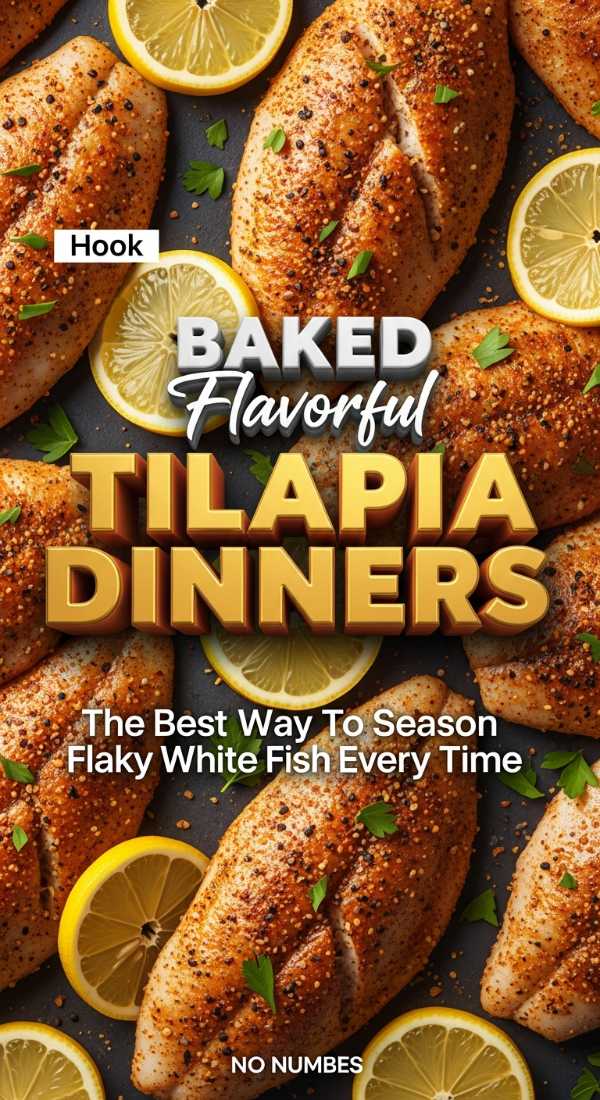
Why we love this
Baked tilapia is the ultimate secret weapon for those busy weeknights when you want a meal that is elegant, healthy, and incredibly fast. Our signature seasoning blend creates a savory, golden crust that seals in the moisture, making the fish flake beautifully under your fork. It is a light and refreshing option that pairs perfectly with almost any side dish, from roasted asparagus to a simple garden salad. You will love how easy it is to achieve professional-level results with just a few pantry staples and a little love.
Ingredients
- 4 tilapia fillets
- 1 teaspoon paprika
- 1/2 teaspoon garlic powder
- 1/2 teaspoon onion powder
- 1/2 teaspoon dried oregano
- 1/4 teaspoon black pepper
- 2 tablespoons olive oil
- 1 lemon, sliced into rounds
- Fresh parsley for garnish
How to make it
- Preheat your oven to 400°F and line a baking sheet with parchment paper for the easiest cleanup you’ve ever had.
- Pat your tilapia fillets completely dry with a paper towel, which is the secret to getting that perfect texture and preventing steaming.
- Brush both sides of each fillet with olive oil, then generously sprinkle with the combined spice mixture of paprika, garlic, onion, and oregano.
- Place a lemon slice on top of each fillet and bake for 12-15 minutes, depending on the thickness of the fish, until it flakes easily with a fork.
- Remove from the oven, garnish with a sprinkle of fresh parsley, and serve immediately while the flavors are at their most vibrant.
Enchanting Wildflower Cupcake Designs

Why we love this
Turning a simple cupcake into a miniature garden is one of the most therapeutic and rewarding ways to spend an afternoon in the kitchen. These wildflower designs use soft, muted buttercream colors and delicate piping techniques to create a bouquet that you can actually eat. They bring a touch of whimsy and enchantment to any celebration, making every guest feel like they have been invited to a secret garden party. It is a beautiful reminder that food can be a form of art that nourishes both the eyes and the soul.
Ingredients
- 12 of your favorite vanilla cupcakes, cooled
- 2 cups stiff vanilla buttercream frosting
- Gel food coloring (sage green, dusty rose, soft yellow)
- Piping bags and assorted tips (leaf tip, small round tip, petal tip)
- Edible gold pearls or sprinkles
How to make it
- Divide your buttercream into three bowls and tint them with the gel food coloring to create your palette of soft, nature-inspired hues.
- Using the petal tip, pipe a series of small, overlapping strokes starting from the outer edge of the cupcake and working your way toward the center to create a blooming flower.
- Switch to a small round tip and add tiny dots of yellow or gold pearls in the very center of your floral creation for a realistic touch.
- Use the leaf tip and the sage green frosting to tuck small, delicate leaves underneath the petals, giving the design depth and movement.
- Repeat the process with different colors and patterns on each cupcake to create a diverse and enchanting wildflower meadow effect.
The Fluffiest King Cake Guide

Why we love this
Baking a King Cake is a tradition filled with anticipation, color, and the pure joy of the Carnival season brought right into your home. This guide focuses on a high-hydration dough that results in a crumb so light and airy it feels like biting into a sweet, cinnamon-scented cloud. The process of braiding the dough and decorating it with vibrant sugars is a festive ritual that brings family together in the kitchen. It is more than just a cake; it is a celebration of history and a delicious way to ring in the season.
Ingredients
- 1 package (0.25 oz) active dry yeast
- 1/2 cup warm water (110°F)
- 1/2 cup warm milk
- 1/2 cup granulated sugar
- 1/3 cup melted butter
- 1 teaspoon salt
- 1 large egg
- 4 cups all-purpose flour
- 1 tablespoon ground cinnamon mixed with 1/2 cup brown sugar
- Purple, green, and gold sanding sugars
How to make it
- Dissolve the yeast and one tablespoon of sugar in the warm water and let it sit for about 10 minutes until it becomes frothy and active.
- In a large bowl, mix the yeast mixture with the warm milk, melted butter, egg, remaining sugar, and salt before gradually adding the flour to form a soft dough.
- Knead the dough on a floured surface for about 8 minutes until it is smooth and elastic, then let it rise in a warm place for about an hour.
- Roll the dough into a large rectangle, spread the cinnamon-sugar mixture over it, and roll it up tightly like a jelly roll before shaping it into an oval ring.
- Bake at 350°F for 25-30 minutes, then once cooled, glaze with a simple powdered sugar icing and decorate with the iconic purple, green, and gold sugars.
Conclusion
I hope these recipes bring as much light and flavor to your home as they have to mine! There is something so special about the way a shared meal can connect us, and I can’t wait to hear which of these viral hits becomes a new favorite in your household. Remember, the best ingredient you can ever add to a dish is a little bit of love and a dash of your own unique spirit. Happy cooking, my loves!
Frequently Asked Questions
How do I store the strawberry cake to keep it moist?
The best way to keep your strawberry cake fresh is to wrap it tightly in plastic wrap and store it in an airtight container at room temperature for up to two days, or in the fridge for up to five days.
Can I use frozen shrimp for the low-carb dinner?
Absolutely! Just make sure to thaw them completely and pat them dry with a paper towel before sautéing so they get that beautiful golden sear instead of steaming in the pan.
Where can I find more ideas like these?
You can follow our Viral Food Ideas Board on social media! We update it weekly with the latest trends and soul-soothing recipes that our community is currently obsessed with.