
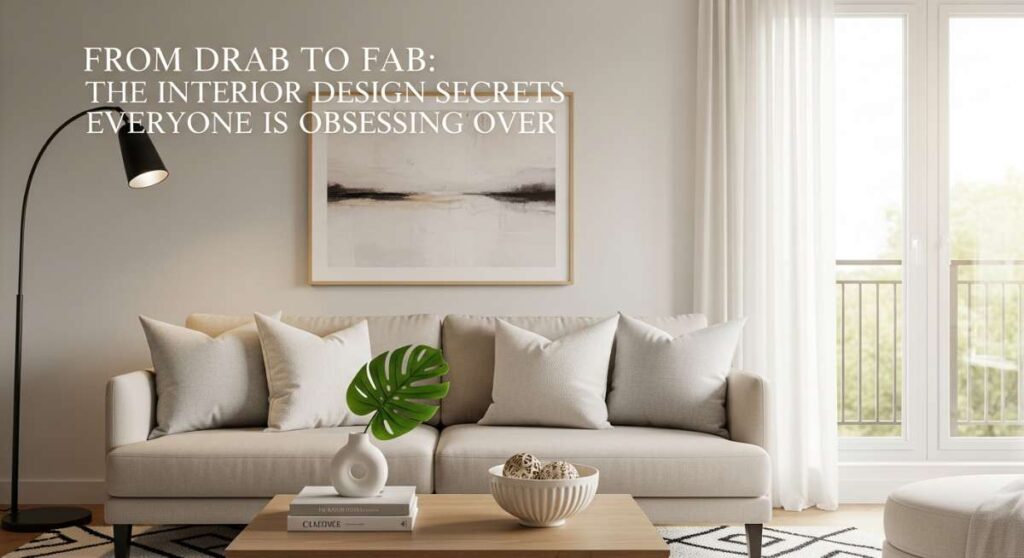
Have you ever walked into a room and felt an immediate sense of peace, or stepped onto a porch that felt like a warm hug? We’ve all been there—scrolling through endless feeds of perfect homes, wondering how they manage to make every corner look so curated yet lived-in. The truth is, creating a ‘fab’ home isn’t about having a massive renovation budget; it’s about the intentional, small shifts that breathe life into your everyday spaces.
Today, I’m pulling back the curtain on the design secrets that are currently taking the internet by storm. From the way you arrange your morning coffee station to the secret of a perfectly private backyard, these are the transformations that turn a ‘meh’ house into a viral-worthy sanctuary. It’s time to stop waiting for your ‘dream home’ and start building it, one beautiful detail at a time.
How to Master Simple Landscaping for Instant Curb Appeal
Why we love this
There is nothing quite like the feeling of pulling into your driveway and being greeted by a lush, well-manicured landscape that reflects your personal style. It’s the first impression your home makes on the world, and a little bit of greenery goes a long way in creating a welcoming atmosphere. We love the smell of fresh cedar mulch and the tactile experience of soft petals under our fingertips as we prune. It transforms a house from a structure into an inviting estate, giving you a boost of pride before you even turn the key in the lock.
Essential Elements:
- Dark hardwood or cedar mulch for contrast
- Natural stone or brick edging materials
- A mix of perennial shrubs and seasonal annuals
- Low-voltage LED path lighting
- A clean-cut lawn edge
How to make it
- Start by defining your garden beds. Use a garden hose to map out organic, flowing curves rather than rigid straight lines for a more professional look.
- Use a sharp spade to cut a clean 3-inch deep trench along your marked lines to create a distinct edge between the grass and the soil.
- Remove all weeds and old debris from the bed. Amend the soil with high-quality organic compost, mixing it in at least 6 inches deep to ensure your plants have the nutrients they need to thrive.
- Place your larger ‘anchor’ shrubs toward the back and smaller, colorful annuals in the front. Dig holes twice as wide as the root balls, place the plants, and firm the soil around them.
- Apply a 2-to-3-inch layer of mulch across the entire bed. This suppresses weeds, retains moisture, and provides that ‘high-end’ dark contrast that makes plant colors pop.
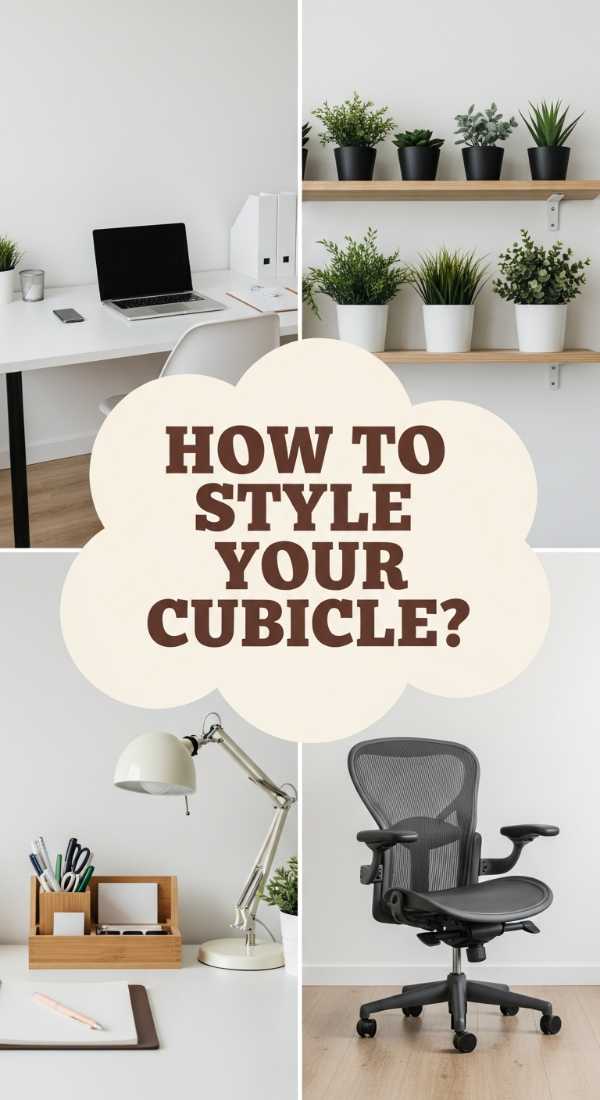
How to Personalize Your Work Cubicle for a Joyful Office Life

Why we love this
We spend a huge portion of our lives at our desks, so why should it feel like a sterile cage? Personalizing your cubicle is about reclaiming your headspace and surrounding yourself with things that spark creativity and calm. Imagine the soft glow of a small desk lamp replacing the harsh overhead fluorescent hum, and the soft texture of a felt desk mat under your wrists. It’s about creating a ‘micro-home’ that keeps your spirits high even during the most demanding deadlines, making your 9-to-5 feel like a curated experience.
Essential Elements:
- Peel-and-stick fabric wallpaper or contact paper
- Small desk lamp with warm-toned bulb
- Personalized framed photos or art prints
- Small potted succulents or low-light plants
- Ergonomic and aesthetic desk accessories
How to make it
- Clear everything off your desk. Use a microfiber cloth and a gentle cleaner to sanitize all surfaces, providing a fresh canvas for your design.
- Measure your cubicle walls and apply peel-and-stick wallpaper. If your walls are fabric-based, use decorative upholstery pins to secure light art prints or a mood board.
- Swap out the standard office lighting. Place a small, stylish lamp in a corner to create a warm ‘zone’ that reduces eye strain and makes the space feel cozy.
- Organize your tech. Use cable clips to hide messy wires and place a large desk mat down to define your primary workspace and add a soft texture.
- Add ‘life’ with a plant like a Snake Plant or Pothos that survives in office lighting. Finish by adding 2-3 personal items that make you smile, like a favorite mug or a travel souvenir.
How to Style Your Tech Setup for a Visual Audio Vibe

Why we love this
In our digital age, your tech setup is the cockpit of your life, and it should look as good as it performs. We are obsessed with the ‘Visual Audio Vibe’—a trend that blends high-fidelity sound with stunning light displays. Imagine the rhythmic pulsing of ambient backlighting synced to your favorite lo-fi beats, and the sleek, tactile feel of premium aluminum components. It creates an immersive atmosphere that makes gaming, editing, or even just browsing feel like a futuristic, luxury experience that engages all your senses simultaneously.
Essential Elements:
- Smart RGB LED strips (Govee or Philips Hue)
- Acoustic foam panels in geometric shapes
- High-quality bookshelf speakers or studio monitors
- Monitor light bar for eye comfort
- Minimalist headphone stand
How to make it
- Install RGB light strips along the back edge of your desk and behind your monitor. Position them so the light reflects off the wall for a soft, diffused glow rather than a harsh direct beam.
- Mount acoustic panels on the wall directly in front of your seating position. Arrange them in a honeycomb or staggered pattern to act as both a sound dampener and a visual art piece.
- Position your speakers at ear level, angled slightly toward your head. Use foam isolation pads underneath them to prevent vibrations from rattling your desk.
- Manage your cables ruthlessly. Use a cable management tray under the desk to keep all power bricks and cords off the floor, creating a clean, floating look.
- Set your lighting software to ‘Music Sync’ mode. This allows the LEDs to react to the audio frequencies, turning your room into a dynamic visual representation of your music.
How to Build an Affordable Deck for a Luxurious Pool Feeling
Why we love this
You don’t need a built-in concrete pool to enjoy a five-star resort feeling in your own backyard. An affordable, well-constructed wooden deck can transform an above-ground pool or a simple patio area into a high-end retreat. We love the feeling of warm, sun-soaked wood under bare feet and the way a deck provides a dedicated stage for summer memories. It’s about creating levels in your outdoor space, providing a clean, splinter-free area to lounge, tan, and host cocktail hours that feel incredibly upscale without the massive price tag.
Essential Elements:
- Pressure-treated lumber for the frame
- Cedar or composite decking boards
- Decking screws with corrosion-resistant coating
- Concrete deck blocks for a ‘floating’ foundation
- Outdoor stain or sealant in a modern ‘teak’ or ‘driftwood’ shade
How to make it
- Level the ground where the deck will sit. Lay down landscaping fabric and a layer of gravel to prevent weeds from growing underneath your structure.
- Position concrete deck blocks in a grid pattern. These blocks hold your 4×4 posts and 2×6 joists, allowing you to build a ‘floating’ deck without digging deep post holes.
- Construct the outer frame using pressure-treated 2x6s. Ensure the frame is perfectly square by measuring the diagonals—they must be equal.
- Install internal joists every 16 inches on center. This provides the necessary support so the deck boards don’t flex when you walk on them.
- Lay your decking boards, using spacers to maintain a consistent 1/8-inch gap for drainage. Screw them down securely, sand any rough edges, and apply two coats of high-quality stain once the wood is dry.
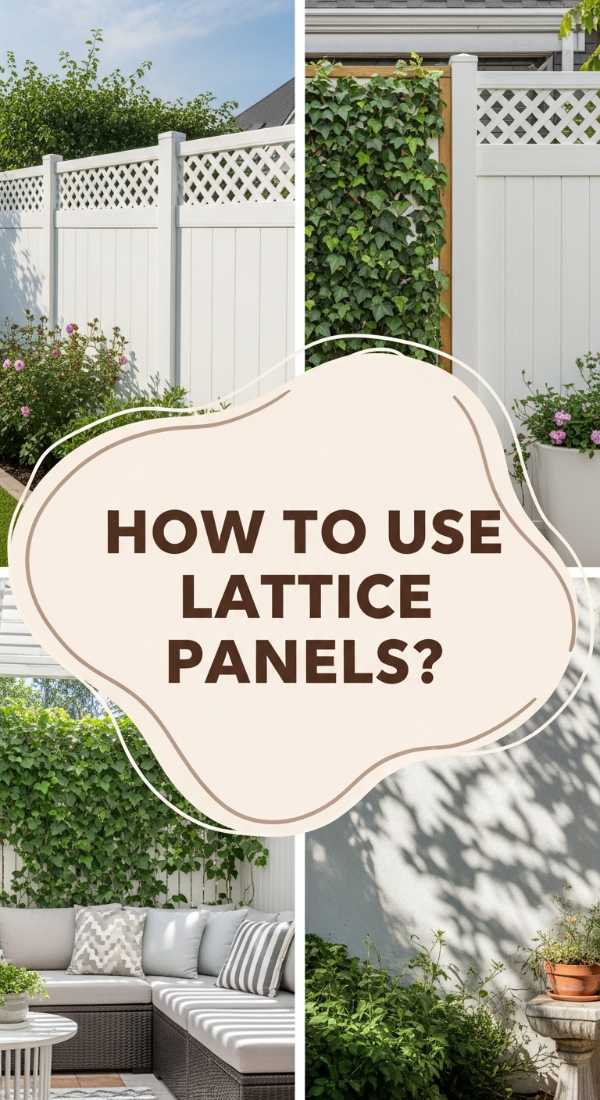
How to Add Vinyl Lattice Panels for a Private Outdoor Sanctuary

Why we love this
Privacy is the ultimate luxury, especially in suburban areas where neighbors are close. Vinyl lattice panels are a game-changer because they provide a delicate, airy screen that blocks prying eyes without making you feel boxed in. We love the way sunlight filters through the diamond patterns, creating beautiful shadows on your patio. It’s the perfect backdrop for climbing jasmine or ivy, which adds a layer of lush green texture and a heavenly scent to your private sanctuary, making your backyard feel like a hidden garden in the heart of the city.
Essential Elements:
- Heavy-duty vinyl lattice sheets (white or wood-grain)
- Matching vinyl U-channel molding for the edges
- Pressure-treated 4×4 posts for support
- Stainless steel screws
- Climbing plants like Clematis or Honeysuckle
How to make it
- Determine the perimeter of your privacy screen and install your support posts. Ensure they are anchored deep enough (usually 2 feet) to withstand wind resistance.
- Cut your vinyl lattice sheets to size using a circular saw with a fine-toothed blade. Remember that vinyl expands and contracts with the temperature, so leave a small gap inside your frames.
- Slide the lattice into the U-channel molding. This gives the edges a finished, professional look and hides any slightly uneven cuts.
- Attach the framed lattice panels to your posts using stainless steel screws. Pre-drill the holes slightly larger than the screw to allow for that thermal expansion.
- Plant your climbing vines at the base. Gently weave the initial tendrils into the lattice to encourage them to grow upward and create a living wall of greenery.
How to Arrange Summer Centerpieces for a Gorgeous Dinner Table

Why we love this
A great centerpiece is the heartbeat of a dinner party; it sets the tone for the entire evening. Summer arrangements should feel effortless, bright, and slightly wild. We love the juxtaposition of structured citrus fruits—like sliced lemons or limes—against the soft, pillowy heads of hydrangeas or peonies. The aroma of fresh herbs tucked into the flowers, like mint or basil, adds a culinary sensory layer that makes guests feel instantly relaxed and pampered. It’s the difference between ‘just eating’ and ‘hosting an event.’
Essential Elements:
- Low-profile glass or ceramic vases
- Fresh seasonal flowers (Hydrangeas, Zinnias, Sunflowers)
- Whole and sliced citrus fruits
- Fresh herbs for scent and texture
- Unscented tea light candles
How to make it
- Start with a clean vase and fill it with room-temperature water mixed with flower food. For a ‘fruit look,’ place a smaller glass inside a larger one and slide citrus slices into the gap between the two.
- Create a base of greenery. Use eucalyptus or large leaves to establish the shape and width of your centerpiece, ensuring it stays low enough so guests can see each other across the table.
- Add your ‘focal’ flowers. Group your largest blooms in odd numbers (3 or 5) to create visual balance and a sense of abundance.
- Fill in the gaps with smaller ‘filler’ flowers and sprigs of fresh herbs. This adds different heights and textures, making the arrangement look like it was freshly plucked from a meadow.
- Scatter tea light candles or small votives around the base of the vase. The flickering light will reflect off the glass and fruit, creating a magical, warm glow as the sun sets.
How to Detail a Patriotic Porch for a Heartwarming Home Entrance
Why we love this
There is a timeless, nostalgic charm to a patriotic porch that goes far beyond a single holiday. It’s about celebrating community and heritage with a palette of crisp navy, bright white, and bold red. We love the way a heavy cotton flag ripples in a summer breeze and the classic look of a navy blue rocking chair against a white-painted porch. It’s a design style that feels sturdy, honest, and incredibly welcoming, evoking memories of lemonade on the porch and fireflies at dusk. It’s an instant way to make your home feel like a pillar of the neighborhood.
Essential Elements:
- High-quality embroidered American flag
- Navy and white striped outdoor pillows
- Red geraniums in classic white planters
- Bunting or fans for the porch railing
- Vintage-style lanterns or Edison bulbs
How to make it
- Start by deep-cleaning your porch. Power wash the floor and wipe down the railings to ensure your colors pop against a clean backdrop.
- Mount a high-quality flag bracket near your front door. Ensure the flag is hung at a 45-degree angle and is high enough that it doesn’t touch the ground or any bushes.
- Anchor your seating area with textiles. Place navy blue or star-patterned cushions on your chairs and add a durable outdoor rug in a neutral jute or coordinating stripe.
- Incorporate ‘living’ red. Plant vibrant red geraniums or petunias in white ceramic pots and place them symmetrically on either side of the door or on the steps.
- Hang pleated bunting along the top rail of your porch. Secure it with zip ties for a crisp, taut look that won’t sag over time, creating that classic ‘small-town’ festive aesthetic.
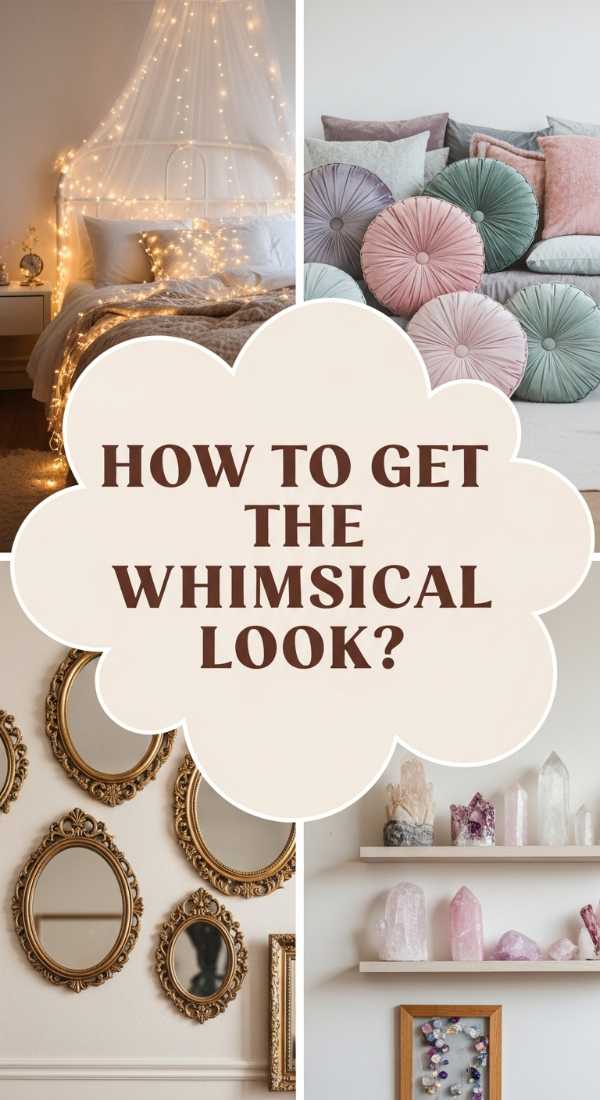
How to Design a Whimsical Apartment for an Enchanting Living Experience

Why we love this
Whimsical design is all about breaking the rules and letting your inner child lead the way. It’s a style that prioritizes joy, wonder, and a touch of the unexpected. We love the ethereal glow of fairy lights draped over a canopy bed, and the way a curved, velvet sofa in a dusty rose or sage green feels like a hug. It’s about mixing textures—soft faux fur, iridescent glass, and polished brass—to create a space that feels like it’s pulled straight from a modern fairy tale. In a whimsical apartment, every corner is a conversation starter and a source of pure enchantment.
Essential Elements:
- Warm-toned fairy lights or ‘curtain’ lights
- Curved furniture with soft, plush fabrics
- Botanical or celestial-themed wall art
- Hanging macramé or indoor swings
- Assorted vintage mirrors to reflect light
How to make it
- Choose a soft, dreamy color palette. Think pastels, creamy whites, and pops of gold. Paint an accent wall in a soft lavender or use a whimsical floral wallpaper.
- Layer your lighting. Avoid using the big ‘hospital’ overhead light. Instead, use a combination of floor lamps with silk shades, string lights, and candles to create a soft, hazy atmosphere.
- Incorporate ‘floating’ elements. Use floating shelves to display oddities and treasures, or hang plants from the ceiling in tiered macramé holders to draw the eye upward.
- Mix your patterns. Don’t be afraid to pair a striped rug with floral pillows; the key is to keep them in the same color family to ensure the ‘chaos’ feels intentional and curated.
- Add a ‘wow’ piece. Whether it’s a velvet shell chair, a disco ball in a sunny window, or a gallery wall of antique mirrors, every room needs one item that feels truly magical.
How to Plan a Stunning Aquarium for a Tranquil Room Energy

Why we love this
An aquarium is more than just a pet habitat; it is a living piece of art that brings the tranquil energy of the underwater world into your living room. We love the rhythmic, silent dance of colorful fish through lush green aquatic plants and the gentle, hypnotic sound of bubbling water. It acts as a natural humidifier and a visual anchor that lowers the heart rate and clears the mind. It’s a sensory masterpiece that changes every day, providing a window into a serene, liquid universe that makes your home feel like a high-end spa.
Essential Elements:
- Rimless glass tank for a modern look
- High-PAR LED lighting for plant growth
- Natural substrate (aquasoil) and dragon stone
- Live aquatic plants (Anubias, Java Fern, Moss)
- A quiet, high-efficiency canister filter
How to make it
- Place your tank on a perfectly level, reinforced stand away from direct sunlight (to prevent algae). Layer 2-3 inches of nutrient-rich aquasoil at the bottom, sloping it upward toward the back to create depth.
- Arrange your ‘hardscape’ using stones or driftwood. Follow the ‘rule of thirds’—don’t place your main feature exactly in the center; instead, offset it to one side for a more natural, dynamic look.
- Carefully plant your greenery using long tweezers. Place taller background plants like Valisneria in the rear and low-growing ‘carpeting’ plants in the foreground.
- Fill the tank slowly with dechlorinated water, pouring it over a saucer so you don’t disturb your careful landscaping. Install your filter and heater, setting it to the appropriate temperature for your future fish.
- ‘Cycle’ the tank for at least 2-4 weeks. This allows beneficial bacteria to grow. Only after the water parameters are stable should you introduce your fish, acclimating them slowly to their new, beautiful home.
How to Optimize Your Small Workspace for a Focused Mindset
[IMAGE_10]
Why we love this
A small workspace doesn’t have to mean a cluttered mind; in fact, a compact ‘power-nook’ can often lead to deeper focus than a sprawling office. We love the efficiency of a space where everything is within arm’s reach, curated with precision. There is something incredibly satisfying about a clean, minimalist desk where the only things present are the tools of your craft and a single, inspiring object. It’s about engineering your environment to remove distractions, using vertical space to keep your horizons clear and your productivity levels soaring.
Essential Elements:
- Wall-mounted pegboard for vertical storage
- Monitor arm to free up desk real estate
- Wireless peripherals (keyboard and mouse)
- Under-desk drawer or organizer
- Noise-canceling headphones
How to make it
- Elevate your tech. Use a monitor arm to lift your screen to eye level. This not only improves your posture but clears the ‘footprint’ of the monitor stand, giving you back valuable desk space.
- Utilize the walls. Install a pegboard or floating shelves above your desk. Store your pens, notebooks, and headphones here rather than letting them clutter your primary work surface.
- Go wireless wherever possible. A wireless keyboard and mouse eliminate the visual noise of tangled cords, making the small space feel much larger and more modern.
- Create a ‘lighting zone.’ Use a slim LED desk lamp with adjustable color temperatures. Use cool blue light for deep work sessions and warm amber light for creative brainstorming.
- Implement a ‘one-in, one-out’ rule. In a small space, clutter accumulates fast. At the end of every work day, clear your desk of everything except the essentials to ensure you start the next morning with a focused mind.
The Transformation Journey
Turning your home from ‘drab to fab’ is a journey of a thousand small, beautiful choices. Whether you are planting a single hydrangea or reimagining your entire tech setup, the goal is to create a space that reflects the best version of yourself. These viral secrets aren’t about perfection; they are about passion and the joy of creating a sanctuary that you love coming home to every single day.
Frequently Asked Questions
Check out some of the most common questions about these lifestyle upgrades.