
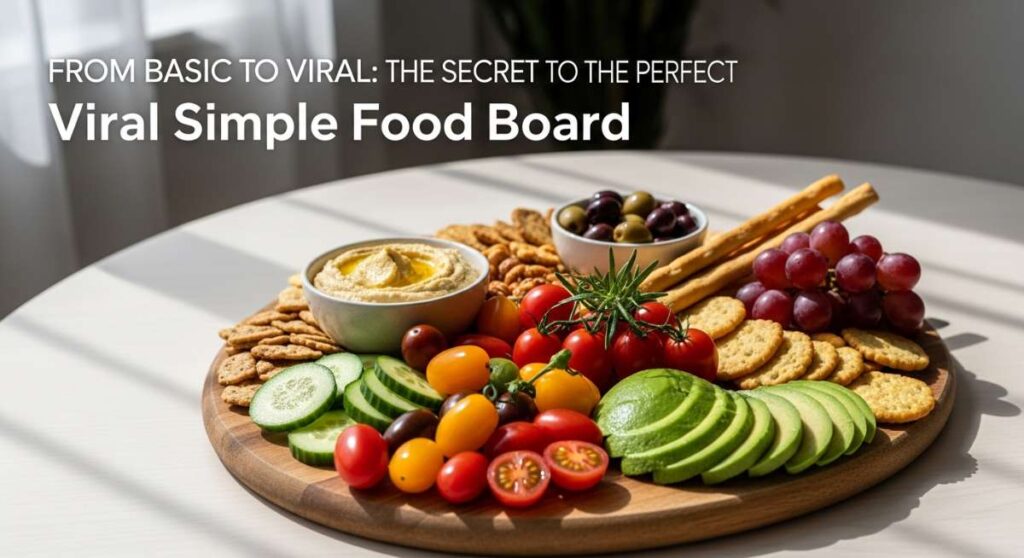
We have all been there—standing in the kitchen with a fridge full of ingredients but no idea how to make them look as magical as those aesthetic boards we see scrolling through our feeds. There is a certain kind of alchemy that happens when you stop seeing food as just fuel and start seeing it as a way to connect, to slow down, and to celebrate the season. It’s about more than just a recipe; it’s about the feeling of the sun on your back and the smell of fresh basil hitting a warm countertop.
Today, I’m sharing my secrets for taking your everyday meals from basic to viral-worthy. We are diving into a collection of dishes that are as beautiful to look at as they are to eat, focusing on fresh, vibrant ingredients and simple techniques that yield high-impact results. Grab your favorite wooden board and let’s get into the heart of summer entertaining.
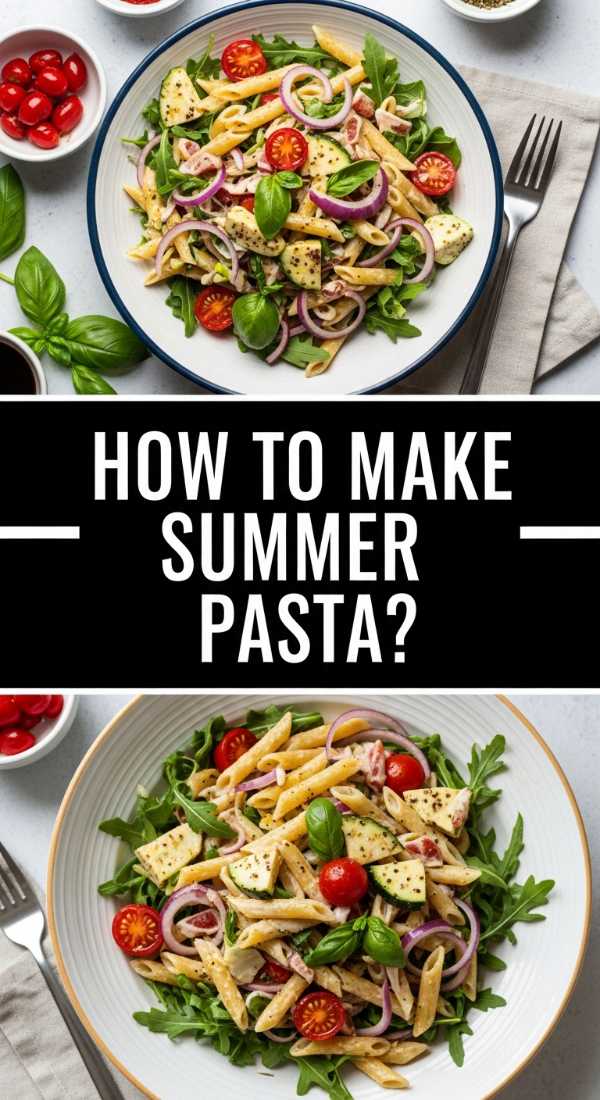
How to make summer pasta salad?
Why we love this
This summer pasta salad is the ultimate crowd-pleaser, offering a symphony of textures and bright, zesty flavors that dance on the tongue. There is something incredibly satisfying about the way the rotini spirals catch the tangy vinaigrette, ensuring every bite is bursting with the aroma of fresh oregano and garlic. The crisp snap of cucumbers paired with the creamy, salty crumbles of feta creates a mouthfeel that is both refreshing and indulgent. It’s the kind of dish that tastes like a backyard party in July, evoking memories of long afternoons spent with good friends and even better food.
Ingredients
- 16 oz Rotini pasta
- 1 pint Cherry tomatoes, halved
- 1 English cucumber, diced
- 1/2 cup Kalamata olives, sliced
- 1/2 Red onion, finely minced
- 6 oz Feta cheese, crumbled
- 1/2 cup Extra virgin olive oil
- 1/4 cup Red wine vinegar
- 1 tbsp Dried oregano
- Salt and pepper to taste
How to make it
- Bring a large pot of heavily salted water to a rolling boil. The water should taste like the sea to properly season the pasta from the inside out.
- Add the rotini and cook until just shy of al dente, usually about 8-9 minutes. You want the pasta to have a firm bite so it doesn’t get mushy after absorbing the dressing.
- Drain the pasta and immediately rinse it under cold running water. This stops the cooking process and removes excess starch, preventing the noodles from sticking together.
- In a small glass jar or bowl, whisk together the olive oil, red wine vinegar, oregano, salt, and pepper until the dressing is fully emulsified and thickened.
- In a large mixing bowl, combine the cooled pasta with the tomatoes, cucumbers, olives, and red onion. Pour the dressing over the top and toss gently with large spoons until every piece is coated.
- Fold in the feta cheese last to keep the crumbles intact. Refrigerate for at least 30 minutes before serving to allow the flavors to meld together perfectly.
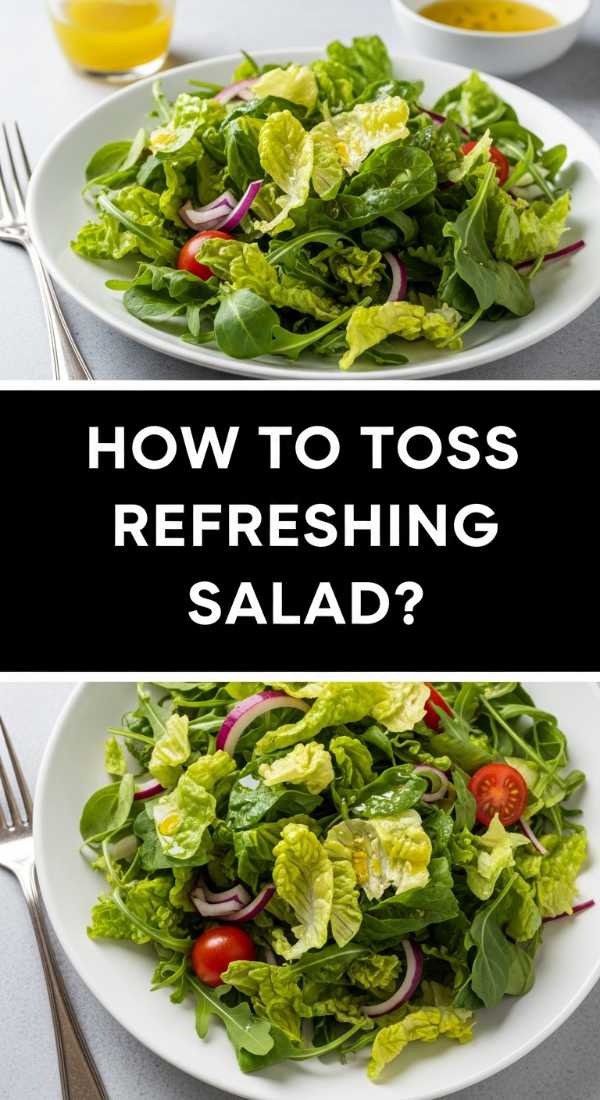
How to toss refreshing salad?
Why we love this
There is an art to a truly refreshing salad that goes beyond just throwing leaves into a bowl; it’s about the delicate balance of acidity and crunch. We love the way a light coating of citrus-infused oil highlights the peppery notes of fresh arugula without weighing it down or making it soggy. The aroma of freshly cracked black pepper and shaved parmesan fills the air, creating a sensory experience that feels elevated yet effortlessly simple. It’s the perfect palate cleanser that leaves you feeling energized and nourished, like a cool breeze on a humid afternoon.
Ingredients
- 5 oz Baby arugula or mixed spring greens
- 1 Lemon, juiced and zested
- 3 tbsp High-quality olive oil
- 1/2 cup Shaved Parmesan cheese
- 1/4 cup Toasted pine nuts
- Flaky sea salt
- Freshly cracked black pepper
How to make it
- Begin by chilling your serving bowl in the refrigerator for 10 minutes; a cold bowl helps keep the greens crisp and vibrant during the tossing process.
- In a small ramekin, whisk the lemon juice and olive oil together vigorously until the mixture is slightly opaque and well-combined.
- Place your greens into the chilled bowl. Drizzle half of the dressing over the leaves, using your hands or light bamboo tongs to lift and turn the greens.
- Avoid pressing down on the leaves; you want to maintain the airy volume of the salad. Add more dressing only if needed, ensuring the leaves are glistening but not swimming in oil.
- Sprinkle the lemon zest, toasted pine nuts, and shaved parmesan over the top. The zest adds a punch of essential oils that boosts the citrus aroma.
- Finish with a generous pinch of flaky sea salt and cracked pepper right before serving to maintain the integrity of the textures.
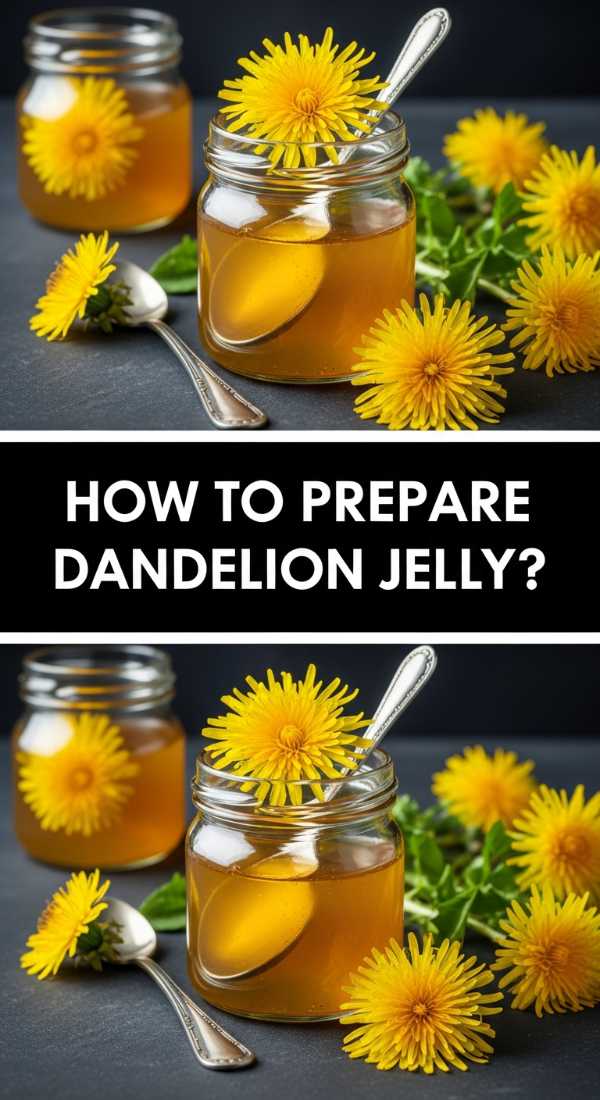
How to prepare dandelion jelly?
Why we love this
Dandelion jelly is a hidden gem of the foraging world, offering a flavor profile that is strikingly similar to light, floral honey with a hint of lemon. The process of picking the golden blossoms and transforming them into a shimmering, amber-colored preserve is deeply grounding and nostalgic. As the jelly simmers on the stove, your kitchen fills with a sweet, meadow-like scent that feels like capturing sunshine in a jar. It’s a beautiful, translucent addition to any food board, providing a conversation piece that is as delicious as it is unique.
Ingredients
- 2 cups Dandelion petals (yellow parts only)
- 4 cups Boiling water
- 2 tbsp Lemon juice
- 1 box (1.75 oz) Powdered pectin
- 4 cups Granulated sugar
How to make it
- Harvest fresh dandelions and carefully pull the yellow petals away from the green base. It is vital to remove all green parts, as they carry a bitter flavor that will ruin the jelly.
- Place the petals in a heat-proof jar and pour the boiling water over them. Let this steep for at least 2 hours, or overnight in the fridge, to create a potent dandelion “tea.”
- Strain the liquid through a fine-mesh sieve or cheesecloth, pressing on the petals to extract every drop of flavor. You should have about 3-4 cups of golden liquid.
- Pour the liquid into a large heavy-bottomed pot and stir in the lemon juice and the powdered pectin. Bring the mixture to a full rolling boil over high heat, stirring constantly.
- Add the sugar all at once. Continue stirring and bring it back to a boil that cannot be stirred down. Boil hard for exactly 1-2 minutes.
- Skim off any foam from the surface with a metal spoon. Ladle the hot jelly into sterilized jars, leaving 1/4 inch of headspace, and process in a water bath or let cool completely to set.
How to cook quick dinner?
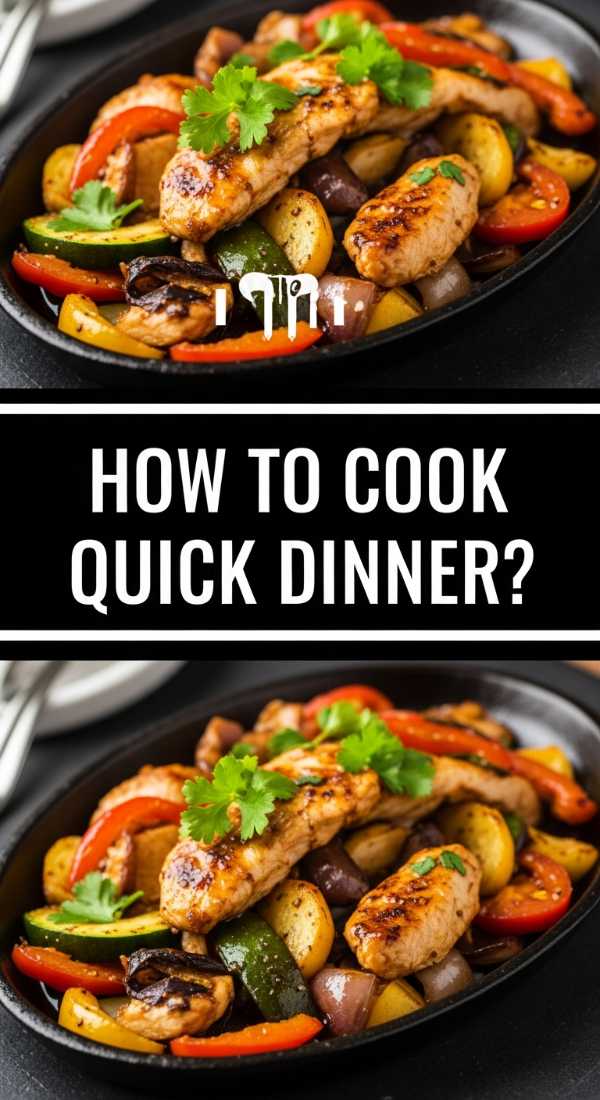
Why we love this
The beauty of a quick dinner lies in the ability to create something deeply satisfying without the stress of a long prep time. We love the transformation of simple, store-bought staples into a vibrant, Mediterranean-inspired flatbread that feels like a gourmet treat. The smell of warming naan bread mixed with the savory notes of rotisserie chicken and roasted peppers creates an instant sense of comfort. It’s a meal that respects your time while still delivering a complex array of flavors and a beautiful visual presentation that looks great on a wooden board.
Ingredients
- 2 pieces of Naan or flatbread
- 1 cup Shredded rotisserie chicken
- 1/2 cup Hummus
- 1/4 cup Jarred roasted red peppers, sliced
- 1/4 cup Sliced cucumbers
- Fresh parsley for garnish
- Tzatziki sauce for drizzling
How to make it
- Preheat your oven or a dry skillet to medium-high heat. Place the naan inside for 2-3 minutes until it is warm, pliable, and slightly charred on the edges.
- Spread a thick, even layer of hummus across the base of the warm bread, reaching almost to the edges to act as the “glue” for your toppings.
- Layer the shredded chicken over the hummus. If the chicken is cold, you can flash-heat it in a pan with a splash of chicken broth to keep it moist.
- Top the chicken with the sliced roasted red peppers and cucumbers, distributing them evenly for a pop of color and a mix of textures.
- Drizzle the tzatziki sauce in a zigzag pattern across the flatbread. This adds a cool, creamy element that balances the savory chicken.
- Garnish with freshly chopped parsley and cut into wedges using a pizza cutter for an easy-to-share board addition.
How to pack camping meals?

Why we love this
There is nothing quite like the smoky, charred aroma of a meal cooked over an open flame under the stars. Packing camping meals is all about the anticipation of that outdoor experience—the sizzle of the foil pack and the hearty, rustic flavors of sausage and potatoes. These meals are designed to be rugged yet delicious, providing the fuel you need for a day of adventure while keeping cleanup to a minimum. The way the juices from the vegetables mingle with the spices inside the foil creates a concentrated, savory steam that is pure magic when opened.
Ingredients
- 4 Smoked sausages, sliced
- 2 large Russet potatoes, cubed small
- 2 Bell peppers, chopped
- 1 Onion, sliced
- 2 tbsp Olive oil
- 1 tbsp Cajun seasoning or garlic herb blend
- Heavy-duty aluminum foil
How to make it
- At home, prep all your ingredients by chopping the sausages and vegetables into uniform, bite-sized pieces to ensure even cooking over the unpredictable heat of a campfire.
- In a large bowl, toss everything together with the olive oil and seasoning until well-coated. This pre-seasoning allows the flavors to penetrate the potatoes.
- Tear off four large sheets of heavy-duty aluminum foil. Divide the mixture evenly into the center of each sheet.
- Fold the long sides of the foil together and crimp them tightly. Fold the ends in to create a completely sealed, leak-proof pouch.
- Store these pouches in your cooler. When ready to cook, place them on a grate over hot coals (avoid direct high flames to prevent burning) for 20-25 minutes.
- Flip the packets halfway through using tongs. You will know they are done when the potatoes are fork-tender and the sausage has a nice sear.
How to organize meal prep?
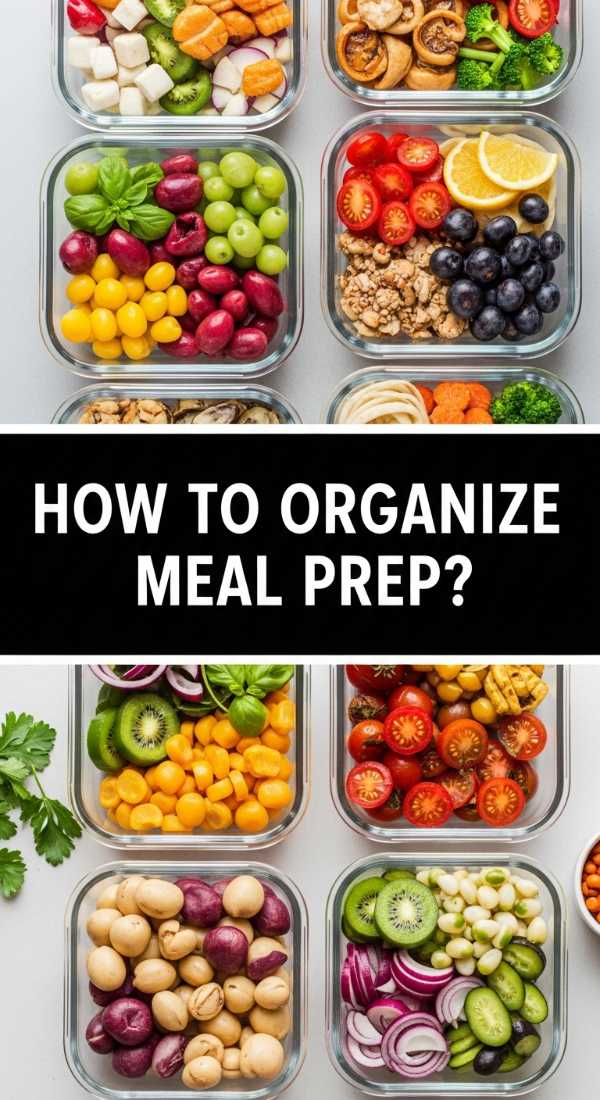
Why we love this
Organized meal prep is the ultimate gift to your future self, turning the chaos of a busy work week into a series of calm, delicious moments. There is a deep satisfaction in seeing rows of colorful glass containers filled with nutrient-dense ingredients like fluffy quinoa, roasted sweet potatoes, and vibrant kale. The visual appeal of a well-prepped fridge is undeniable, but the real joy comes from the ease of assembly and the knowledge that you’re fueling your body well. It’s about creating a sustainable rhythm that makes healthy eating feel like a luxury rather than a chore.
Ingredients
- 2 cups Dry quinoa (cooked)
- 3 large Sweet potatoes, cubed and roasted
- 1 bunch Kale, stemmed and chopped
- 2 cans Chickpeas, rinsed and dried
- 1 cup Tahini dressing
- Assorted glass meal prep containers
How to make it
- Dedicate a two-hour block on a Sunday for “batch cooking.” Start by boiling the quinoa in vegetable broth for added depth of flavor, then fluffing it with a fork.
- Roast your sweet potatoes and chickpeas on separate sheet pans at 400°F. The potatoes should be caramelized and soft, while the chickpeas should be slightly crunchy.
- Massage your chopped kale with a teaspoon of olive oil and a pinch of salt for 2 minutes. This breaks down the tough fibers, making it tender and easier to digest.
- When assembling your containers, follow the “wet-to-dry” rule: if you aren’t storing dressing separately, put the heartiest ingredients (like chickpeas) on the bottom and greens on top.
- Divide the quinoa, potatoes, and kale among your containers in neat sections. This visual organization makes the meal more appetizing when you open it later.
- Seal the containers tightly and store them at eye level in the fridge. Prepare your dressing in small jars so you can add it right before eating to keep everything fresh.
How to blend fruit salad?
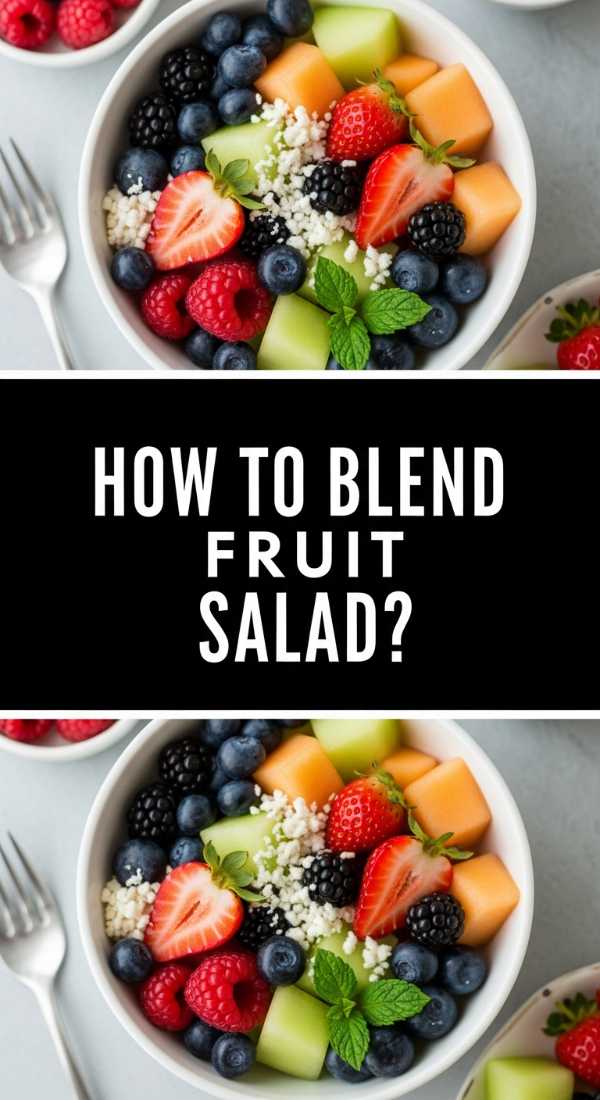
Why we love this
A perfectly blended fruit salad is a masterclass in natural sweetness and vibrant aesthetics. We love the way a simple honey-lime glaze transforms standard fruit into a glistening, jewel-toned centerpiece that captures the essence of summer. The aroma of fresh mint leaves being tossed with ripe berries and succulent melon is intoxicatingly fresh. It’s the kind of dish that appeals to everyone, offering a refreshing, hydrating crunch that cleanses the palate and provides a burst of vitamin-rich energy in every spoonful.
Ingredients
- 1 small Watermelon, cubed
- 1 pint Strawberries, hulled and sliced
- 1 cup Blueberries
- 2 Kiwis, peeled and sliced
- 2 tbsp Honey or Agave
- 1 Lime, juiced
- 1/4 cup Fresh mint, chiffonade
How to make it
- Select fruit that is at the peak of ripeness. Cut the larger fruits like watermelon and kiwi into uniform cubes or slices to ensure a balanced mix in every bite.
- In a small bowl, whisk the lime juice and honey together until smooth. This glaze prevents the fruit from browning and adds a beautiful glossy sheen.
- Place all the fruit into a large, clear glass bowl. This allows the vibrant colors to shine through, which is key for a viral-worthy presentation.
- Drizzle the honey-lime glaze over the fruit and use a large silicone spatula to gently fold the mixture. Be careful not to bruise the delicate berries.
- Add the fresh mint just before serving. Tossing the mint too early can cause it to wilt and turn dark from the acidity of the lime.
- For an extra touch of style, serve the salad inside a hollowed-out watermelon half or garnish with edible flowers like pansies or marigolds.
How to style summer dinner?

Why we love this
Styling a summer dinner is where the magic really happens, turning a simple meal into an unforgettable experience. We love the play of light against textured linens and the way a few scattered herbs or edible flowers can make a board feel like a work of art. The goal is to create a look that is “perfectly imperfect”—a relaxed, inviting atmosphere that encourages guests to dig in and linger over conversation. It’s about using the natural beauty of the food itself to dictate the decor, resulting in a table that feels organic, warm, and deeply soulful.
Ingredients
- Wooden serving boards of various sizes
- Linen napkins in earthy tones
- Fresh herbs (rosemary, thyme, basil)
- Unscented tea light candles
- Twine or natural ribbon
How to make it
- Start with a clean, large wooden board as your canvas. Place your largest bowls or main dishes first to establish “anchor points” on the table.
- Layer in your secondary items, filling the gaps with smaller finger foods. Use the principle of height—put taller items like breadsticks or wine glasses toward the back.
- Incorporate “movement” by arranging items in curves or diagonals rather than stiff rows. This makes the board look more bountiful and less clinical.
- Add pops of color using fresh herbs tucked between cheeses or fruits. The green foliage adds a professional, lush look to the entire spread.
- Use linen napkins to add texture. Don’t fold them too neatly; a loose, casual drape feels more appropriate for a breezy summer evening.
- Light unscented candles just as the sun starts to set. The warm glow will catch the oils in the food and create a cozy, inviting ambiance that guests will love.
How to season summer veggies?

Why we love this
Seasoning summer vegetables is about amplifying the incredible flavors that nature has already provided. We love the transformation that happens in a hot oven or on a grill, where a drizzle of balsamic and a sprinkle of garlic can turn humble zucchini and corn into something extraordinary. The smell of caramelizing sugars and charred edges is the quintessential scent of summer cooking. These veggies provide a savory, earthy contrast to the sweeter elements of a food board, offering a complexity of flavor that keeps you coming back for more.
Ingredients
- 2 Zucchinis, sliced into rounds
- 3 ears of Corn, shucked and halved
- 1 lb Asparagus, woody ends trimmed
- 3 tbsp Olive oil
- 1 tbsp Balsamic glaze
- 2 cloves Garlic, minced
- 1 tsp Smoked paprika
- Sea salt to taste
How to make it
- Preheat your grill or oven (to 425°F). High heat is essential for achieving those flavorful charred bits without overcooking the interior of the vegetables.
- In a large bowl, whisk together the olive oil, minced garlic, and smoked paprika. The paprika adds a subtle wood-fired flavor even if you’re cooking indoors.
- Toss the vegetables in the oil mixture until every surface is covered. Do not salt them yet; adding salt too early can draw out moisture and prevent proper browning.
- Arrange the vegetables in a single layer on a sheet pan or grill grate. Avoid overcrowding, which causes the vegetables to steam rather than roast.
- Cook for 10-15 minutes, turning once, until the edges are golden brown and slightly crisp.
- Remove from heat and immediately drizzle with the balsamic glaze and a generous sprinkle of sea salt. The heat will slightly thicken the glaze, creating a savory syrup.
How to prep camping breakfast?

Why we love this
A camping breakfast prepared in a cast-iron skillet is the ultimate morning ritual, combining the crisp morning air with the comforting sizzle of bacon and eggs. We love the way the heavy iron retains heat, creating perfectly golden hashbrowns and eggs with lacy, crisp edges. The aroma of woodsmoke mixing with brewing coffee and frying sausage is enough to wake even the deepest sleeper. It’s a hearty, soul-warming meal that celebrates the simplicity of outdoor living, making even the most basic ingredients feel like a feast fit for royalty.
Ingredients
- 6 Eggs (pre-cracked into a mason jar)
- 4 strips of thick-cut Bacon
- 2 cups Frozen hashbrowns (thawed)
- 1/2 cup Shredded cheddar cheese
- 1 Green onion, sliced
- Butter for the pan
How to make it
- Preparation is key: crack your eggs into a mason jar at home and whisk them slightly. This saves space in the cooler and eliminates the risk of broken shells at the campsite.
- Place your cast-iron skillet over the campfire grate or a portable stove. Start with the bacon; the rendered fat will provide the flavor and non-stick surface for the rest of the meal.
- Once the bacon is crispy, remove it and set it aside on a paper towel. Leave about two tablespoons of the bacon drippings in the pan.
- Add the hashbrowns to the hot fat. Spread them into an even layer and leave them undisturbed for at least 5-7 minutes to develop a deep, golden crust.
- Push the potatoes to one side and add a pat of butter to the empty half. Pour in the eggs from the mason jar, scrambling them slowly over medium-low heat.
- Top everything with the shredded cheese and crumbled bacon. Cover the skillet with a lid or foil for 1 minute to melt the cheese, then garnish with green onions and serve.
The Art of the Final Board
Building a viral-worthy food board isn’t just about following recipes; it’s about the intention you bring to the table. When you take the time to season your veggies perfectly, to toss your salad with care, and to arrange your spread with an eye for color and texture, you are creating an environment where people feel seen and cared for. Remember that the best boards are the ones that get messy because people are actually enjoying them. So, go ahead—mix those colors, layer those flavors, and enjoy the beautiful, delicious results of your hard work. Happy hosting!