
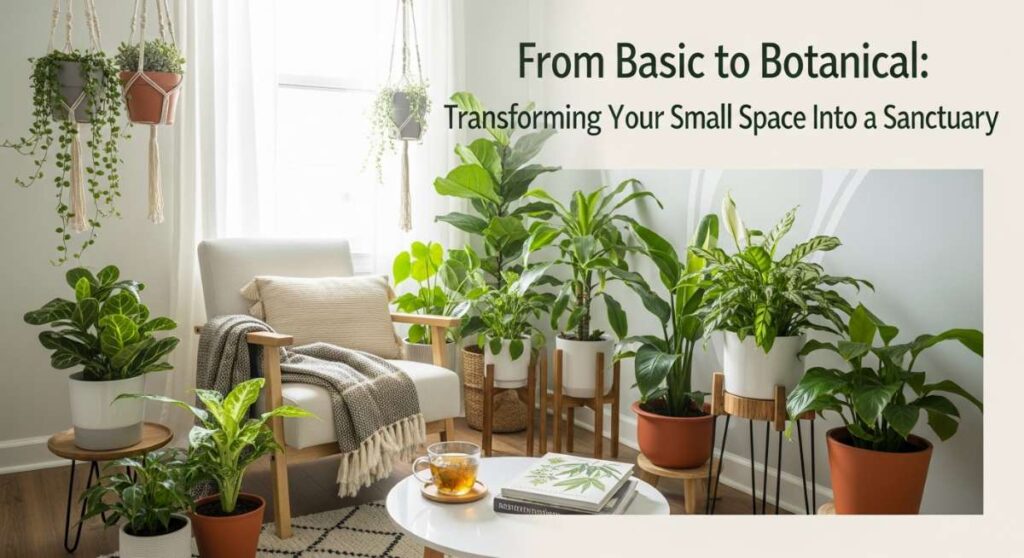
Have you ever walked into your home after a long day and felt your shoulders immediately drop—not from relief, but from the weight of a space that just doesn’t feel like you? We’ve all been there, staring at that blank apartment wall or the patchy front yard, dreaming of a sanctuary that mirrors the peace we crave in our souls. Our homes should be more than just a place to store our stuff; they should be living, breathing extensions of our creativity and a soft place to land when the world gets a little too loud.
The journey from ‘basic’ to ‘botanical’ isn’t about a massive renovation budget or hiring a professional designer. It’s about the small, intentional shifts: the way sunlight hits a terracotta pot, the nostalgic scent of a vintage lace tablecloth, or the crackle of a fire pit under a starlit sky. It’s about curating a lifestyle that feels as good as it looks on a Pinterest board, but with the lived-in warmth that only a true home can provide.
Today, we’re diving deep into ten transformative ways to elevate your everyday environment. From the whimsy of a boho garden to the cozy nostalgia of a ‘grandma-core’ living room, these tips are designed to help you reclaim your space. Grab a cup of herbal tea, let’s get inspired, and start turning those ‘someday’ dreams into your current reality.
How to Curate Simple Front Yard Landscaping for Instant Curb Appeal

Why we love this
There is nothing quite like the feeling of pulling into your driveway and being greeted by a lush, intentional landscape that whispers a warm welcome. We love this approach because it focuses on texture and symmetry, using the earthy scent of fresh cedar mulch and the vibrant pops of perennial greens to create a visual handshake with the neighborhood. Imagine the soft rustle of ornamental grasses against a crisp, clean walkway; it creates a sensory experience that feels both grounded and sophisticated, instantly elevating your mood before you even turn the key in the lock.
Essential Elements:
- Hardy boxwood shrubs for structural evergreen borders
- A thick layer of organic cedar or hemlock mulch
- Natural stone or brick edging for clean definition
- A mix of perennial flowers like lavender or salvia for seasonal color
- Low-voltage LED path lighting for evening ambiance
How to make it
- Begin by clearing all weeds and debris from your target area, ensuring you dig down at least two inches to remove root systems completely.
- Define your garden beds using a flexible garden hose to layout soft, organic curves or a string line for sharp, modern rectangles; use an edger tool to cut a clean 3-inch deep trench along these lines.
- Improve your soil quality by tilling in a 2-inch layer of high-quality compost, ensuring the earth is loose and nutrient-rich to support new root growth.
- Position your largest ‘anchor’ plants (like shrubs or small trees) first, spacing them according to their mature width to avoid overcrowding in future years.
- Dig holes twice as wide as the root ball but no deeper, ensuring the top of the root flare is level with the soil surface to prevent trunk rot.
- Backfill the holes firmly to remove air pockets and water each plant deeply immediately after installation to settle the soil.
- Spread a 3-inch layer of mulch over the entire bed, keeping it a few inches away from the base of plant stems to allow for proper air circulation.
How to Design a Whimsical Apartment Aesthetic for Dreamy Living

Why we love this
Transforming a standard rental into a whimsical wonderland is the ultimate act of creative rebellion. We love this look because it prioritizes magic over minimalism, layering soft, sheer fabrics that catch the golden hour light and surrounding you with the comforting presence of indoor vines. The air feels lighter when filtered through hanging ferns, and the gentle glow of fairy lights against a pastel-toned wall creates an ethereal atmosphere that makes every evening feel like a scene from a fairytale. It’s about creating a soft, tactile world where your imagination can truly run wild.
Essential Elements:
- Sheer floor-to-ceiling curtains in cream or soft blush
- Trailing plants like Pothos or String of Pearls for vertical greenery
- Layered vintage rugs with intricate, faded patterns
- Warm-toned fairy lights or ‘Edison’ bulb strings
- Macramé wall hangings and botanical art prints
How to make it
- Identify your ‘light zones’ by observing where the sun hits throughout the day; place your most dramatic trailing plants in high-light corners to create a natural, growing canopy.
- Install tension rods or Command hooks to hang sheer curtains high and wide, extending them past the window frame to create an illusion of height and a softer, diffused light.
- Layer your floor space by placing a large, neutral jute rug as a base and topping it with a smaller, colorful vintage rug at an offset angle for a bohemian, lived-in feel.
- Integrate lighting at three different heights: use floor lamps for mid-level glow, string lights along the ceiling perimeter, and small candles or lanterns on side tables.
- Curate a ‘gallery wall’ of botanical sketches and pressed flowers, using mismatched thrifted frames painted in a cohesive palette like sage green and antique gold.
- Incorporate ‘living’ decor by training vines to grow along bookshelves or curtain rods using small clear clips to guide their path.
How to Organize an Office Desk Setup for Productive Work Days

Why we love this
A cluttered desk is a cluttered mind, and there is a profound sense of peace that comes with a perfectly organized workspace. We love this setup because it balances cold functionality with warm, organic elements—think the smooth touch of a wooden desk organizer paired with the invigorating scent of a fresh eucalyptus sprig. When every tool has a home and your tech is tucked away neatly, the mental friction of starting work vanishes, leaving you in a state of ‘flow’ where productivity feels effortless and the environment actually fuels your creative energy.
Essential Elements:
- An ergonomic monitor riser to maintain eye-level alignment
- Cable management boxes or sleeves to hide unsightly wires
- A small, low-maintenance desk plant like a snake plant or succulent
- Ceramic or wooden trays for sorting small stationery items
- A high-quality desk mat in leather or felt for tactile comfort
How to make it
- Clear everything off your desk and wipe the surface with a non-static cleaner to create a literal and metaphorical clean slate.
- Place your monitor directly in front of you, about an arm’s length away, ensuring the top third of the screen is at eye level to prevent neck strain.
- Route all power cables through a central management box under the desk, using zip ties or Velcro straps to bundle wires together so they disappear from view.
- Designate a ‘zone’ for active tasks on your dominant hand side, keeping only your current notebook and a single pen within immediate reach.
- Use small trays to categorize ‘like with like’—one for tech accessories, one for writing tools—to prevent the dreaded junk drawer effect on your desktop.
- Introduce a botanical element in the ‘far corner’ to provide a visual break and improve air quality without encroaching on your physical workspace.
How to Decorate a Summer Front Porch for Sunny Welcomes

Why we love this
The front porch is the transition between the busy world and your private sanctuary, and decorating it for summer is like giving your house a refreshing glass of lemonade. We love the sensory mix of crisp striped outdoor pillows, the rhythmic creak of a rocking chair, and the sweet, heavy perfume of blooming petunias in the midday heat. It’s an invitation to slow down, to sit with a book as the sun sets, and to enjoy the gentle breeze. It creates a space that isn’t just a walkway, but a destination for summer memories.
Essential Elements:
- Weather-resistant wicker or wooden seating
- Bold, striped or floral outdoor throw pillows
- Large terracotta or glazed ceramic planters
- A natural fiber doormat with a welcoming message
- A ceiling fan or stylish standing mister for temperature control
How to make it
- Deep clean the porch floor and railings using a power washer or stiff brush to remove winter grime and pollen buildup.
- Establish a seating arrangement that encourages conversation, such as two chairs angled toward each other with a small ‘drinks table’ in between.
- Choose a color palette based on one ‘hero’ piece (like a rug or pillow) and repeat those three colors across your planters and decor for a cohesive look.
- Pot up a mix of ‘thriller, filler, and spiller’ plants: a tall center plant (thriller), bushy mid-range flowers (filler), and trailing vines (spiller) to create lush, full containers.
- Anchor the space with an outdoor-rated rug that is large enough for the front legs of all furniture pieces to rest upon.
- Add a final touch of hospitality with a tray featuring a pitcher and glasses, suggesting a space that is ready for a guest at any moment.
How to Create a Hippie Garden with Boho Decor for Zen Vibes

Why we love this
A hippie garden is a soulful, unregimented space where nature is allowed to be a little bit wild and you are allowed to be completely yourself. We love the eclectic energy here—the sight of colorful wind chimes dancing in the breeze, the soft texture of outdoor floor cushions on the grass, and the earthy aroma of damp soil mixed with burning incense. It’s a sanctuary for meditation and ‘barefoot’ living, where the boundary between the indoors and outdoors blurs into a kaleidoscope of colors, patterns, and living energy that feels incredibly grounding.
Essential Elements:
- An abundance of wildflowers and ‘unstructured’ planting beds
- Weatherproof floor cushions and low-slung wooden benches
- Upcycled containers like old tin buckets or painted tires
- Dreamcatchers, wind chimes, and crystal suncatchers
- A dedicated meditation or yoga spot with a gravel or sand base
How to make it
- Select a secluded corner of your yard and clear a circular area, layering it with pea gravel or a thick outdoor rug to define your ‘zen zone.’
- Plant a ‘chaos garden’ by scattering native wildflower seeds in tilled earth, allowing them to grow in their natural, interspersed patterns rather than strict rows.
- Integrate vertical interest by hanging prisms and beaded curtains from tree branches, which will cast rainbows across the garden as the sun moves.
- Upcycle old furniture by painting it in vibrant, saturated hues like turquoise or marigold, then distressing the edges for a vintage, lived-in feel.
- Install a small water feature, like a solar-powered bamboo fountain, to introduce the soothing sound of running water to drown out neighborhood noise.
- Place large crystals or smoothed river stones around the base of your favorite plants to act as ‘energy anchors’ and visual focal points.
How to Build a Cheap She Shed for a Private Creative Escape

Why we love this
Every woman needs a room of her own, and the ‘She Shed’ is the ultimate DIY dream for finding your creative spark. We love this project because it proves that luxury doesn’t have to be expensive; it’s about the scent of fresh cedar, the quiet privacy of four walls tucked away in the garden, and the joy of a dedicated space for painting, writing, or just ‘being.’ Using salvaged materials gives the space a story and a soul, making it feel like a secret clubhouse for your adult self—a place where the clock stops and inspiration begins.
Essential Elements:
- A basic wooden shed kit or a repurposed garden structure
- Reclaimed windows or French doors for natural light
- Battery-powered or solar lighting for an off-grid feel
- Insulation and simple plywood wall cladding
- Thrifted furniture like an old desk and a cozy armchair
How to make it
- Level the ground using a base of compacted gravel and pressure-treated 4×4 skids to ensure your shed stays dry and stable.
- Assemble your shed kit or frame your structure, prioritizing the installation of at least two windows to allow for cross-ventilation and maximum daylight.
- Seal all exterior seams with a high-quality silicone caulk and apply two coats of exterior-grade paint or wood stain to protect against the elements.
- Install rolls of fiberglass or wool insulation between the wall studs, then cover with thin plywood sheets or beadboard for a finished interior look.
- Paint the interior walls a bright, reflective white to make the small space feel expansive and airy.
- Source a ‘statement’ door from a local architectural salvage yard and paint it a bold, cheerful color like coral or mint to give the shed personality.
- Finish with a small battery-operated space heater or fan to extend the use of your escape through the changing seasons.
How to Embrace Vintage Grandma House Aesthetic for Cozy Nostalgia

Why we love this
Often called ‘Grandmacore,’ this aesthetic is a warm hug in design form. We love it because it celebrates the imperfect, the handmade, and the sentimental. Imagine the smell of cinnamon and old books, the feel of a heavy knitted throw blanket against your skin, and the visual delight of floral wallpapers and mismatched china. It’s a rejection of the ‘sad beige’ trend in favor of a space that feels curated over a lifetime, filled with items that have stories to tell and a sense of enduring comfort that makes you want to stay for tea forever.
Essential Elements:
- Floral patterned wallpaper or textiles
- Antique lace doilies and embroidered linens
- A collection of mismatched vintage teacups and saucers
- Solid wood furniture with curved silhouettes and ‘patina’
- Dried flower bouquets and botanical illustrations
How to make it
- Start by visiting local thrift stores or estate sales to find ‘hero’ pieces like a tufted velvet armchair or a dark wood hutch.
- Apply a floral peel-and-stick wallpaper to a single accent wall or the back of a bookshelf to introduce that signature ‘cottage’ pattern.
- Layer your textiles: place an embroidered runner over a wooden table, and drape handmade crochet blankets over the backs of sofas and chairs.
- Display ‘collections’ in groups—arrange five or six vintage glass bottles or brass candlesticks together on a mantel to create a curated, nostalgic vignette.
- Replace modern hardware like plastic knobs with antique brass or porcelain pulls to give generic furniture a vintage soul.
- Introduce the scent of ‘home’ by keeping a bowl of dried lavender or potpourri on the coffee table, a classic hallmark of the aesthetic.
How to Plan Fall Baby Shower Themes for an Autumnal Celebration

Why we love this
There is a unique sweetness to celebrating a new life during the season of harvest. We love a fall baby shower for its palette of burnt oranges, deep creams, and sage greens, which mirror the changing leaves outside. The atmosphere is naturally cozy—think the tactile warmth of flannel napkins, the rustic charm of mini pumpkins used as place cards, and the comforting aroma of hot apple cider. It feels less like a formal event and more like a gathering of the village, rooted in nature and the cozy anticipation of a new beginning.
Essential Elements:
- A color palette of copper, terracotta, and soft oatmeal
- Natural decor like pumpkins, acorns, and dried wheat stalks
- A ‘Cider Bar’ with cinnamon sticks and caramel dip
- Cozy seating with plaid blankets and floor pillows
- Customized wooden signage and Kraft paper accents
How to make it
- Create a ‘Welcome’ station at the entrance with a large wooden crate filled with pumpkins and a chalkboard sign announcing the baby’s ‘due season.’
- Set the table with a burlap runner and use white ‘baby boo’ pumpkins as place card holders by cutting a small slit in the stem to hold a name card.
- Build a DIY photobooth backdrop using a copper pipe frame draped with eucalyptus vines and a sheer fabric in a warm, earthy tone.
- Serve a ‘harvest-inspired’ menu featuring mini quiches, apple tarts, and a hot beverage station with slow-cooker cider and cocoa.
- Arrange centerpiece bouquets using dried pampas grass, cotton stems, and seasonal mums for a long-lasting, rustic floral look.
- For a sentimental activity, have guests write ‘wishes for the little pumpkin’ on wooden leaf cutouts and hang them on a decorative ‘giving tree.’
How to Install a Fire Pit on a Sloped Yard for Cozy Nights

Why we love this
A sloped yard shouldn’t stop you from enjoying the magic of an evening bonfire. We love this project because it turns a ‘problem’ area into a dramatic, multi-level feature that feels like a private amphitheater for starlight. There is a deep, primal satisfaction in the smell of woodsmoke and the visual of flickering flames against a stone backdrop. Building into a slope creates a natural ‘hug’ around the fire, making the seating area feel incredibly intimate and protected from the wind—the perfect spot for s’mores and deep conversations.
Essential Elements:
- A heavy-duty steel or cast iron fire pit bowl
- Retaining wall blocks or natural fieldstone for leveling
- Crushed stone or pea gravel for a safe, non-flammable base
- Comfortable Adirondack chairs or built-in stone seating
- Landscape fabric to prevent weed growth under the gravel
How to make it
- Mark a circle 8-10 feet in diameter on the slope where you want the center of the fire pit to be.
- Excavate the high side of the slope, digging into the hill to create a flat ‘shelf’; use the removed dirt to fill and level the lower side of the circle.
- Build a semi-circular retaining wall on the high side of the cut using interlocking wall blocks to hold back the earth and prevent erosion.
- Install a sturdy border of stones or pavers around the entire perimeter of the circle to contain your base material.
- Lay down heavy-duty landscape fabric over the flattened area, then fill with 3-4 inches of leveling sand followed by a top layer of pea gravel.
- Place the fire pit in the dead center, ensuring it is perfectly level; test this by placing a bubble level across the rim of the pit.
- Arrange your seating on the newly leveled ‘patio,’ ensuring chairs are at least 3 feet away from the edge of the fire pit for safety.
How to Style Summer Table Centerpieces for Refreshing Dinner Parties
[IMAGE_10]
Why we love this
Summer dining is all about lightness and the bounty of the garden. We love a centerpiece that doesn’t just sit there but actually contributes to the ‘vibe’ of the meal. Using floating candles in glass bowls filled with citrus slices creates a visual coolness that counters the summer heat, while the addition of fresh herbs like mint or basil adds a subtle, refreshing fragrance to the air. It’s a simple way to make an outdoor dinner feel like a Mediterranean vacation—bright, breezy, and effortlessly elegant.
Essential Elements:
- Clear glass cylinders or wide-mouth bowls
- Fresh citrus slices (lemons, limes, and oranges)
- Floating white tea lights or pillar candles
- Bundles of fresh herbs like rosemary, mint, or thyme
- Linen napkins in neutral or ocean-inspired tones
How to make it
- Fill three glass cylinders of varying heights with filtered water, leaving about two inches of space at the top.
- Thinly slice citrus fruits and slide them down the sides of the glass so they press against the interior wall for a ‘wallpapered’ fruit look.
- Submerge a few sprigs of fresh mint or eucalyptus in the water to add a green, botanical dimension.
- Gently place a floating candle on the surface of the water in each cylinder, ensuring the wick remains dry.
- Line the center of the table with a simple linen runner and place the cylinders in a cluster or a straight line down the middle.
- Scatter extra citrus halves and loose herb leaves directly on the runner around the base of the vases to create a ‘growing’ effect.
- Light the candles just as the sun begins to set to transition the table from a bright daytime look to a glowing, romantic evening atmosphere.
Conclusion: Your Sanctuary Awaits
Transforming your space from ‘basic’ to ‘botanical’ isn’t a race; it’s a slow, beautiful evolution of your personal style. Whether you’re leveling a sloped yard for a fire pit or simply adding a few vintage teacups to your shelf, every small change is a step toward a home that truly nourishes your soul. Remember, the best sanctuaries are the ones that reflect the people living in them—imperfect, growing, and full of life. So, take these ideas, make them your own, and enjoy the process of building your dream life, one corner at a time.