

Fresh Tips: The Only Spring & Summer 2024 Nail Guide You’ll Ever Need
Hello, my loves! As the world begins to wake up and the air turns from a chilly bite to a soft, sun-drenched embrace, there is something so magical about refreshing our look. Spring and summer aren’t just seasons; they are feelings of renewal, and what better way to celebrate than with a fresh set of nails that make you feel like the goddess you are?
I’ve spent the last few weeks sipping iced lattes and scouring the latest trends to bring you a guide that feels like a warm hug for your hands. Whether you’re a fan of minimalist chic or you want to channel your inner baddie, there is a little sparkle here for everyone. Let’s dive into these trends together, shall we?
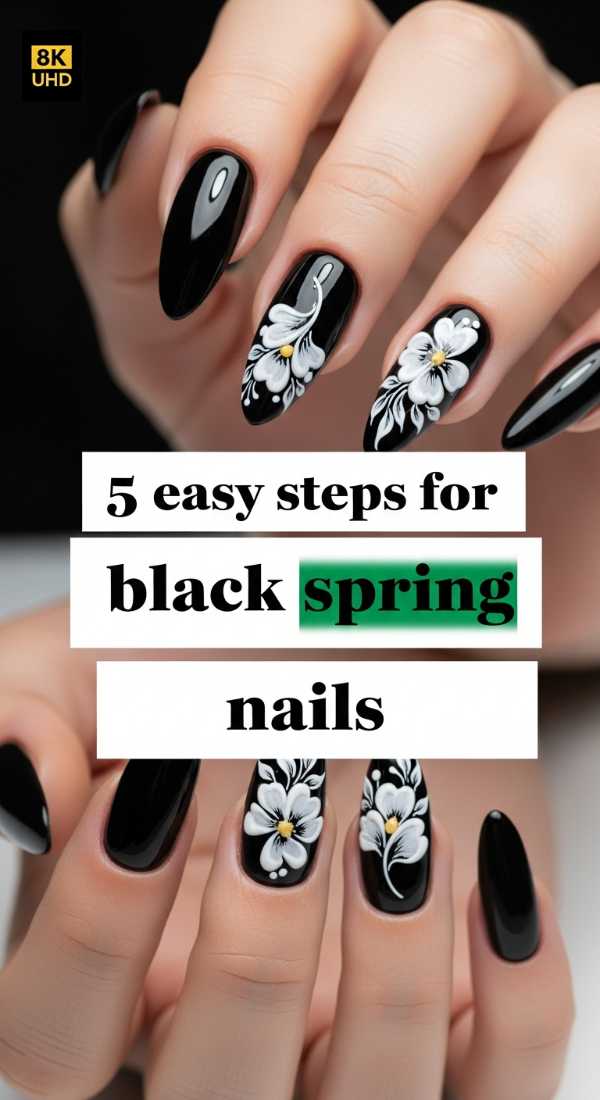
5 Easy Steps for Black Spring Nails
Why to love this Design:
There is something so poetic about wearing black in the spring. It’s like a little nod to the moody winter we left behind, reimagined with a sheer, soft-as-silk finish that feels totally fresh and unexpectedly light. It provides a stunning contrast against the blossoming flowers around you.
Essential Elements:
- Sheer ‘jelly’ black polish
- Fine-tipped detail brush
- Nourishing cuticle oil
- High-gloss top coat
How to Prepare:
- Gently shape your nails into a soft almond or oval.
- Apply a very thin, translucent layer of black ‘jelly’ polish.
- Use a detail brush to add tiny, delicate white dots or floral outlines.
- Seal the look with a high-shine top coat to give it that glass-like finish.
- Massage cuticle oil into your skin for that healthy, hydrated glow.
Budget Range
- OPI ‘Black Onyx’ – $11.49
- Holo Taco ‘One-Coat Black’ – $13.00
- Sally Hansen Insta-Dri Top Coat – $6.00
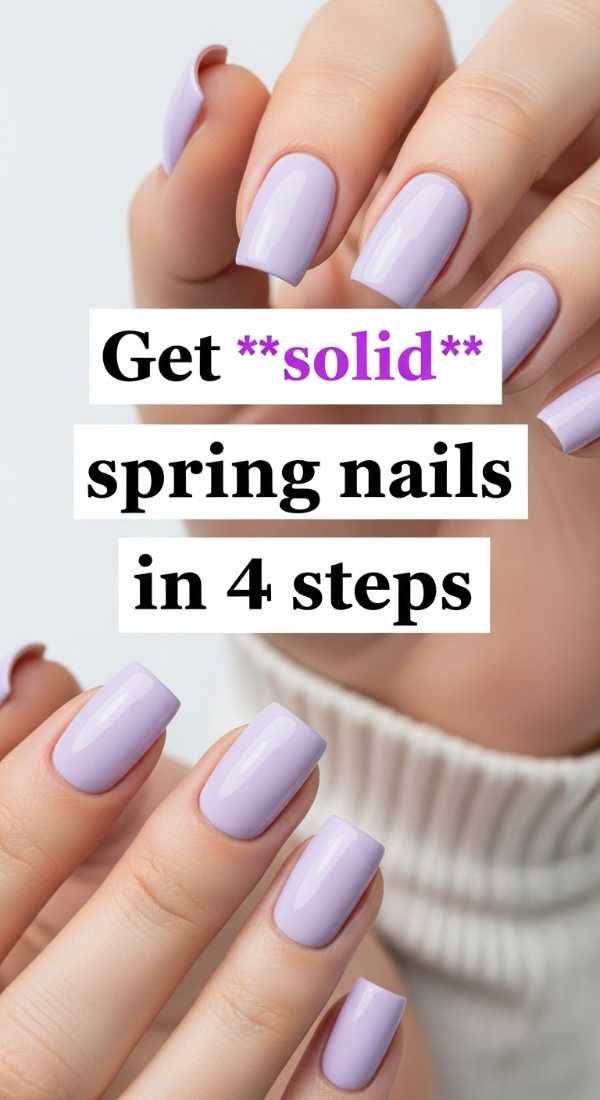
Get Solid Spring Nails in 4 Steps
Why to love this Design:
Sometimes, my sweets, the simplest things are the most beautiful. Solid, creamy tones reflect that quiet confidence we’re all leaning into this season. It’s effortless, timeless, and goes with every single outfit in your spring wardrobe.
Essential Elements:
- Pastel cream polish
- Buffing block
- Base coat
- Quick-dry spray
How to Prepare:
- Buff the nail surface until it’s perfectly smooth.
- Apply a sticky base coat to prevent chipping.
- Paint two thin, even layers of your favorite solid pastel.
- Finish with a quick-dry spray to get you back to your day instantly.
Budget Range
- Essie ‘Ballet Slippers’ – $10.00
- Zoya ‘Abby’ – $12.00
- Olive & June Nail Buffer – $5.00
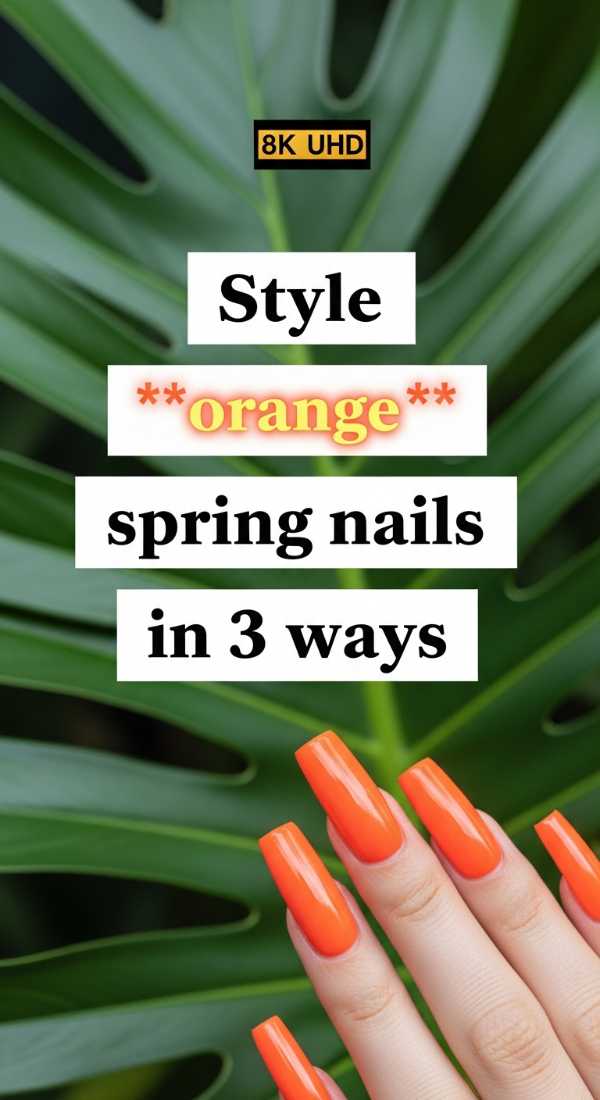
Style Orange Spring Nails in 3 Ways
Why to love this Design:
Orange is the color of pure joy! Whether it’s a soft peach or a vibrant sunset hue, these ways to style it will have you feeling the warmth immediately. It’s the ultimate pick-me-up for those drizzly April afternoons.
Essential Elements:
- Peach or Coral polish
- Matte top coat
- Gold nail tape
How to Prepare:
- The Ombre Way: Blend orange into a nude base using a makeup sponge.
- The Minimalist Way: Paint a crisp orange French tip over a clear base.
- The Velvet Way: Use a matte top coat over a bright coral for a sophisticated, soft-touch finish.
Budget Range
- Essie ‘Tart Deco’ – $9.00
- Lights Lacquer ‘Paper Plane’ – $13.00
- Gold Striping Tape Set – $7.00
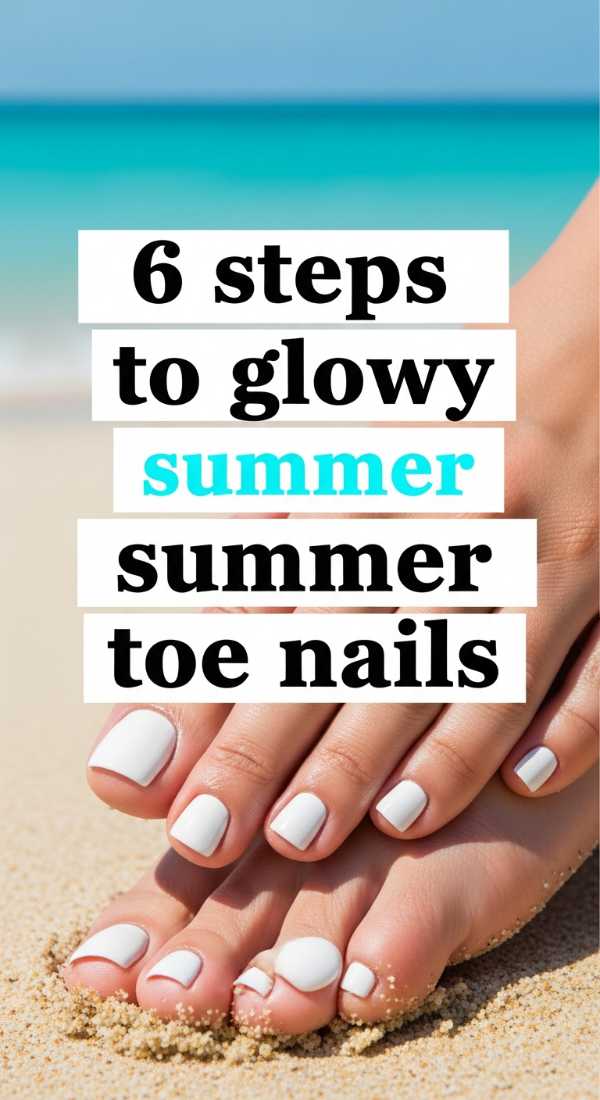
6 Steps to Glowy Summer Toe Nails
Why to love this Design:
Let’s get those toes sandal-ready with a glow that mimics the shimmering ocean at sunset. It’s all about that healthy, iridescent finish that makes you feel like a mermaid every time you step onto the sand.
Essential Elements:
- Exfoliating scrub
- Pearly iridescent polish
- Foot mask
- Hydrating serum
How to Prepare:
- Soak your feet in warm water with sea salt.
- Exfoliate thoroughly with a sugar scrub.
- Apply a hydrating foot mask for 15 minutes.
- Trim and square off the nails.
- Apply two coats of a pearly, glow-from-within polish.
- Finish with a hydrating serum around the cuticles.
Budget Range
- Tree Hut Shea Sugar Scrub – $10.49
- Dior Nail Glow – $30.00
- LUSH ‘Lemony Flutter’ Cuticle Butter – $14.00
Create Baddie Spring Nails in 7 Steps

Why to love this Design:
For when you’re feeling bold and unstoppable! This baddie aesthetic is all about length, drama, and that ‘I just stepped out of a salon’ perfection. It’s the ultimate confidence booster for your next big night out.
Essential Elements:
- Extra-long coffin tips
- Nail glue
- Rhinestones
- Electric nail file
How to Prepare:
- Prep the natural nail by removing all oils.
- Size and glue your extra-long tips securely.
- Shape them into a sharp coffin or stiletto.
- Apply a vibrant, pigment-rich base color.
- Use a builder gel to secure rhinestones at the base of the nail.
- Add a ‘chrome’ powder finish for extra shine.
- Seal everything with a thick, protective top coat.
Budget Range
- Apres Gel-X Kit – $100.00
- Beetles Nail Glue – $8.00
- Mixed Rhinestone Wheel – $9.00
4 Ways to Master Black Spring Nails
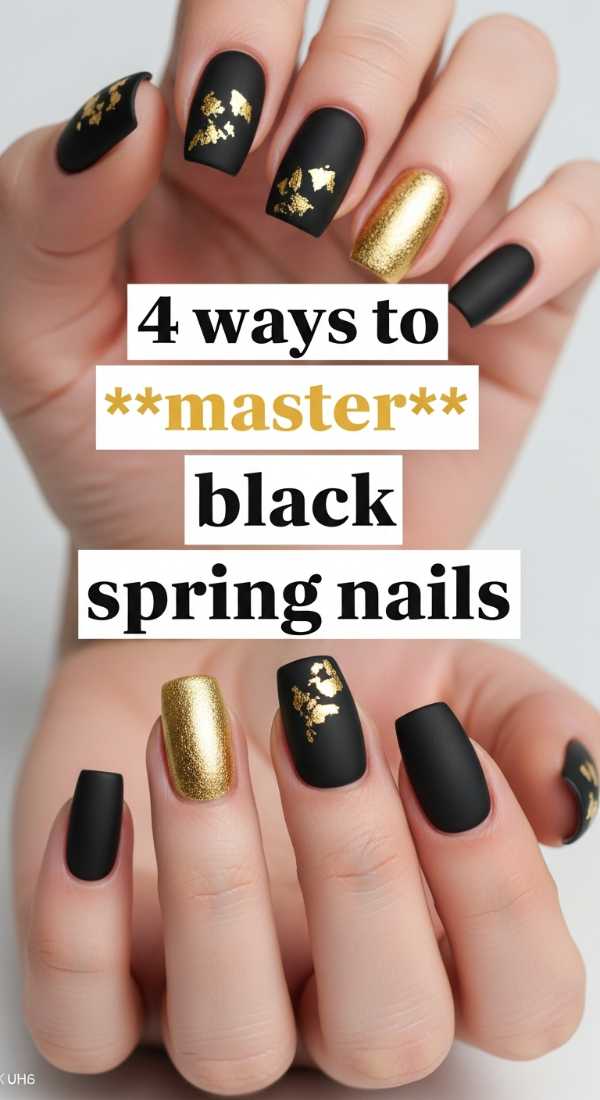
Why to love this Design:
Mastering black for spring isn’t just about painting them dark; it’s about the artistry of negative space and delicate textures that breathe life into the shade. It’s edgy, sophisticated, and surprisingly airy.
Essential Elements:
- Matte and Glossy top coats
- Dotting tool
- Striper brush
How to Prepare:
- The Marble Effect: Swirl black and white polish together while wet.
- Negative Space: Paint only the bottom half of the nail for a modern look.
- Polka Dots: Use a dotting tool to create dainty black dots on a nude base.
- The French Twist: A matte black base with a glossy black tip.
Budget Range
- Orly ‘Liquid Vinyl’ – $15.00
- Nail Art Brushes Set – $12.00
- Essie Matte About You – $11.00
3 Secrets for Solid Spring Nails
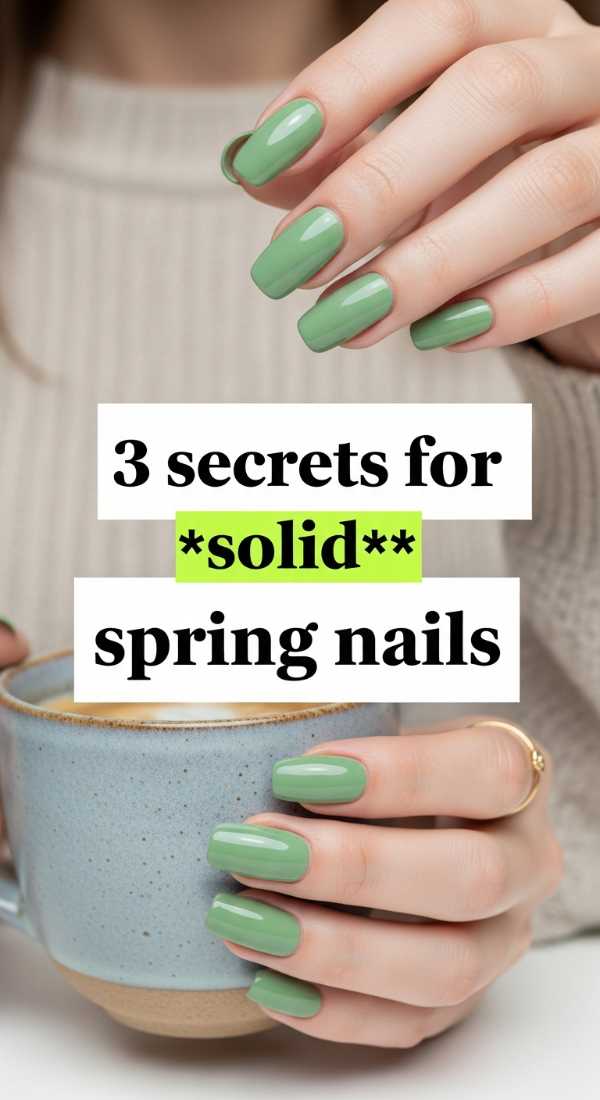
Why to love this Design:
The secret to a perfect solid mani isn’t just the color—it’s the foundation and the little tricks that keep it looking salon-fresh for weeks. It’s the ultimate ‘clean girl’ aesthetic that feels so polished and put-together.
Essential Elements:
- High-quality primer
- Ridge filler
- Edge-capping brush
How to Prepare:
- Always use a ridge filler to create a perfectly flat canvas for the solid color.
- Apply very thin layers; three thin coats are always better than one thick one.
- ‘Cap the edge’ by running the brush along the very tip of the nail to prevent chipping.
Budget Range
- Londontown Kur Ridge Filler – $20.00
- CND Stickey Base Coat – $13.00
- Seche Vite Dry Fast Top Coat – $9.95
5 Steps to Neon Orange Spring Nails

Why to love this Design:
Neon orange is a total mood booster! It’s loud, it’s proud, and it’s the ultimate accessory for those long, sun-drenched weekend brunches. It looks absolutely stunning against a summer tan.
Essential Elements:
- White base polish (for pop)
- Neon orange lacquer
- UV protection top coat
How to Prepare:
- Apply one coat of solid white polish first (this makes the neon scream!).
- Apply the first layer of neon orange over the white.
- Add a second layer of neon for full saturation.
- Use a UV-resistant top coat to prevent the color from fading in the sun.
- Moisturize with a citrus-scented oil to match the vibe.
Budget Range
- Zoya ‘Paz’ – $12.00
- China Glaze ‘Flip Flop Fantasy’ – $9.00
- Orly White Base – $15.00
Prep Summer Toe Nails in 4 Steps

Why to love this Design:
Before we even think about polish, let’s talk about the canvas. Prepping your feet is the ultimate act of self-love before a big summer outing. It makes any color look ten times more expensive.
Essential Elements:
- Pumice stone
- Epsom salts
- Cuticle remover gel
How to Prepare:
- Soak with Epsom salts to soften the skin and relax the muscles.
- Use a pumice stone on heels and calluses while the skin is damp.
- Apply cuticle remover gel and gently push back the proximal fold.
- Dehydrate the nail plate with alcohol before applying any base coat.
Budget Range
- Dr Teal’s Epsom Salt – $6.00
- Blue Cross Cuticle Remover – $7.00
- Maryton Pumice Stone – $8.00
Design Baddie Spring Nails in 6 Steps
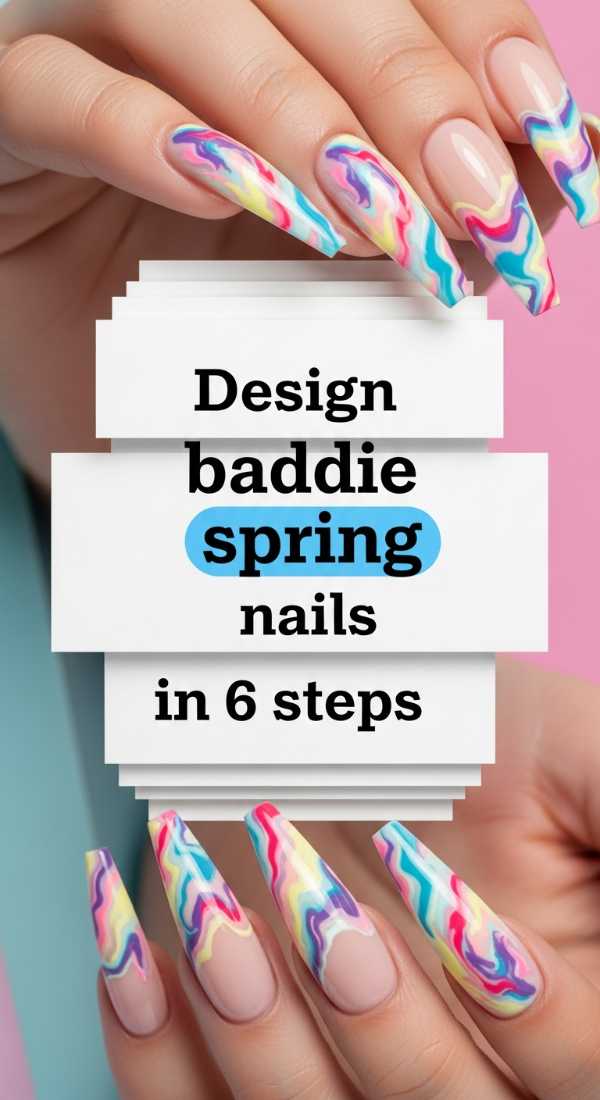
Why to love this Design:
Design is where your personality shines through, my loves. These baddie designs incorporate swirls and chrome to make sure your hands are doing all the talking while you sip your iced matcha.
Essential Elements:
- Chrome powder
- Gel liner pens
- LED lamp
How to Prepare:
- Apply a neutral gel base and cure under the lamp.
- Use a liner pen to draw abstract, ‘baddie’ swirls in white or silver.
- Rub chrome powder over the cured swirls for a metallic pop.
- Brush off excess powder carefully.
- Apply a gel top coat and cure for 60 seconds.
- Finish with a heavy-duty hand cream for a luxe feel.
Budget Range
- SUNUV LED Nail Lamp – $25.00
- Arrtx Gel Liner Set – $18.00
- Born Pretty Chrome Powder – $10.00
Conclusion
And there you have it, my darlings! The ultimate roadmap to making your nails the star of the show this Spring and Summer. Remember, whether you choose a quiet solid tone or a high-drama baddie look, the most important element is that it makes YOU feel beautiful. Take that time for yourself, light a candle, and enjoy the ritual of the mani. I can’t wait to see which look you choose!