

Forget Charcuterie: This Simple Viral Food Board is the New Party Essential
I’ll be the first to admit it: I was a charcuterie girl through and through. There’s something about a perfectly marbled salami and a wedge of brie that feels like peak adulthood. But lately, my feed—and my dinner table—has been taken over by something even better. We’re moving past the cheese and crackers and embracing the ‘Everything Board’—a lifestyle hack that turns everyday meals into a beautiful, interactive social event that actually fills you up.
Imagine a warm Saturday afternoon where you aren’t stuck in the kitchen while your guests mingle. Instead, you’re laying out a vibrant spread of deconstructed favorites that invite everyone to build their own perfect plate. It’s effortless, it’s gorgeous, and it’s the viral trend that is finally making hosting feel like a breeze again. Whether you’re hosting a backyard bash or just trying to survive a Tuesday, these food board components are your new secret weapon.
How to make chicken caesar wraps?

Why we love this
There is nothing quite like the crunch of a chilled romaine leaf paired with the creamy, umami-rich depth of a high-quality Caesar dressing. These wraps are the ultimate crowd-pleaser because they feel incredibly light yet satisfyingly hearty, offering a cooling sensation on a hot day. The aroma of freshly grated parmesan cheese and the savory scent of grilled chicken strips create an inviting atmosphere that makes everyone reach for seconds. It’s a textural masterpiece, blending the soft pull of a flour tortilla with the snappy freshness of garden vegetables.
Ingredients
- 4 Large flour tortillas
- 2 Large heads of Romaine lettuce, chopped
- 2 Cups grilled chicken breast, sliced into strips
- 1/2 Cup Caesar dressing (creamy style)
- 1/4 Cup shaved Parmesan cheese
- 1/2 Cup sourdough croutons, crushed
- 1 Teaspoon cracked black pepper
- 1/2 Lemon, juiced
How to make it
- Begin by preparing your chicken. If not using pre-cooked strips, season raw chicken breast with salt and pepper and sear in a skillet over medium-high heat for 6-7 minutes per side until the internal temperature reaches 165°F and a golden crust forms.
- Let the chicken rest for at least 5 minutes before slicing; this ensures the juices stay inside the meat for a moist wrap.
- In a large mixing bowl, toss the chopped Romaine lettuce with half of the Caesar dressing and the lemon juice. Use tongs to ensure every leaf is lightly coated but not soggy.
- Warm your flour tortillas in a dry pan for 30 seconds per side or in the microwave for 10 seconds. This makes them pliable and prevents tearing during the rolling process.
- Lay a tortilla flat and spread a thin layer of the remaining dressing in the center. Layer a generous handful of the dressed lettuce, followed by several strips of chicken, shaved parmesan, and the crushed croutons for added crunch.
- Fold the sides of the tortilla inward, then roll from the bottom up, tucking the filling tightly as you go. Slice diagonally to reveal the vibrant green and gold interior.
How to make summer pasta salad?

Why we love this
Summer pasta salad is the quintessential side dish that often steals the spotlight from the main course. It is a kaleidoscope of colors—vivid red tomatoes, bright green cucumbers, and dark purple olives—all tied together by a zesty, herbaceous vinaigrette. The way the pasta absorbs the dressing over time makes each bite an explosion of tangy flavor that balances the richness of grilled meats. It’s the kind of dish that tastes even better the next day, making it a functional and beautiful addition to any food board.
Ingredients
- 1 lb Rotini or Fusilli pasta
- 1 Cup cherry tomatoes, halved
- 1 English cucumber, diced
- 1/2 Red onion, finely minced
- 1/2 Cup Kalamata olives, sliced
- 1/2 Cup Feta cheese, crumbled
- 1/4 Cup fresh parsley, chopped
- 1/2 Cup Italian vinaigrette (olive oil, red wine vinegar, dried oregano, garlic)
How to make it
- Boil a large pot of heavily salted water. Add the pasta and cook until ‘al dente’—usually 1 minute less than the package directions suggest. The pasta should have a slight bite to it so it doesn’t get mushy after soaking in dressing.
- Drain the pasta and immediately rinse it under cold running water. This stops the cooking process and removes excess starch, which prevents the pasta from sticking together.
- In a small jar or bowl, whisk together your olive oil, red wine vinegar, minced garlic, and oregano until emulsified. Taste and adjust with salt and pepper as needed.
- In a large bowl, combine the cooled pasta with the tomatoes, cucumber, red onion, and olives. Pour 3/4 of the dressing over the top and toss thoroughly to ensure even distribution.
- Gently fold in the crumbled feta and fresh parsley to maintain their texture and color.
- Cover and refrigerate for at least 2 hours before serving. Just before placing on your food board, add the remaining dressing to refresh the flavors and give it a glossy, appetizing sheen.
How to grill steak kabobs?

Why we love this
There is a primal joy in the scent of charred beef and caramelized vegetables hitting the hot grill. Steak kabobs bring a sophisticated edge to your food board, offering bite-sized portions of luxury that are easy for guests to grab and enjoy. The contrast between the tender, juicy medium-rare steak and the slightly blackened, sweet bell peppers creates a complex flavor profile that satisfies the deepest savory cravings. It’s a sensory experience that combines the smoke of the fire with the brightness of fresh produce.
Ingredients
- 1.5 lbs Sirloin steak or Ribeye, cut into 1.5-inch cubes
- 2 Large bell peppers (mixed colors), cut into squares
- 1 Large red onion, cut into chunks
- 8 oz Whole button mushrooms
- 1/4 Cup soy sauce
- 2 Tablespoons olive oil
- 2 Garlic cloves, minced
- 1 Tablespoon Worcestershire sauce
How to make it
- In a zip-top bag, combine the soy sauce, olive oil, minced garlic, and Worcestershire sauce. Add the steak cubes, seal, and marinate in the refrigerator for at least 1 hour, or up to 4 hours for maximum tenderness.
- If using wooden skewers, soak them in water for at least 30 minutes to prevent them from burning on the grill.
- Thread the skewers, alternating between steak, pepper, onion, and mushroom. Leave a tiny bit of space between items so the heat can circulate and cook everything evenly.
- Preheat your grill to medium-high heat (about 400°F). Lightly oil the grates to prevent sticking.
- Place the kabobs on the grill. Sear for 3-4 minutes per side. For a perfect medium-rare, look for an internal steak temperature of 135°F. The vegetables should be tender with charred edges.
- Remove from the grill and let the meat rest for 5 minutes on a platter covered loosely with foil before serving to allow the juices to redistribute.
How to make refreshing cocktails?

Why we love this
A signature cocktail is the heartbeat of a summer food board, providing a cold, clinking glass of liquid sunshine to accompany the meal. We love a citrus-forward, herbaceous drink like a Mint Lime Fizz because it cleanses the palate between bites of savory food. The visual of condensation beading on a glass filled with crushed ice and vibrant green mint leaves is instantly cooling. The aroma of slapped mint and fresh-squeezed lime zest awakens the senses and sets a celebratory tone for the entire gathering.
Ingredients
- 2 oz White Rum or Vodka (optional)
- 1 oz Fresh lime juice
- 3/4 oz Simple syrup
- 6-8 Fresh mint leaves
- Club soda or sparkling water
- Ice (crushed preferred)
- Lime wheels for garnish
How to make it
- Place the fresh mint leaves and simple syrup in a sturdy glass or cocktail shaker. Use a muddler to gently press the mint—don’t shred it, just release the essential oils.
- Add the lime juice and your choice of spirit. If making a mocktail, simply double the lime and syrup.
- Fill the glass or shaker with ice. If using a shaker, shake vigorously for about 15 seconds until the outside feels frosty.
- Strain the mixture into a highball glass filled with fresh crushed ice. Crushed ice melts faster, slightly diluting the drink to a perfect, refreshing consistency.
- Top with chilled club soda, stirring gently with a long spoon to pull the mint flavors from the bottom to the top.
- Garnish with a slapped sprig of mint (slapping it against your hand releases the scent) and a thin lime wheel on the rim for a professional touch.
How to make summer desserts?

Why we love this
A dessert board should feel like a celebration of the season’s harvest, and nothing beats the rustic charm of a Mixed Berry Galette. The buttery, flaky pastry crust yields to a bubbling, jammy center of strawberries and blueberries that are at their peak sweetness. We love this because it’s less fussy than a traditional pie but carries all the same nostalgic, comforting flavors. The scent of vanilla and baking fruit wafting through the house creates an irresistible invitation to the table, finishing the meal on a high, sugary note.
Ingredients
- 1 Refrigerated pie crust (or homemade shortcrust)
- 3 Cups mixed berries (strawberries, blueberries, raspberries)
- 1/4 Cup granulated sugar
- 1 Tablespoon cornstarch
- 1 Teaspoon vanilla extract
- 1 Egg (for egg wash)
- 1 Tablespoon coarse sparkling sugar
How to make it
- Preheat your oven to 400°F and line a large baking sheet with parchment paper to prevent sticking and catch any fruit drips.
- In a medium bowl, gently toss the berries with granulated sugar, cornstarch, and vanilla extract. The cornstarch is crucial as it thickens the juices as they bake, preventing a soggy crust.
- Roll out the pie crust on the parchment paper into a 12-inch circle. It doesn’t have to be perfect; the rustic edges are part of the charm.
- Mound the fruit mixture in the center of the crust, leaving a 2-inch border all around the edges.
- Fold the edges of the crust over the fruit, pleating it as you go. The center should remain open, showing off the vibrant berries.
- Brush the crust with a beaten egg wash and sprinkle generously with coarse sparkling sugar for a golden, crunchy finish.
- Bake for 25-30 minutes until the crust is deeply golden and the fruit filling is bubbling thick. Let it cool for at least 15 minutes to set before slicing.
How to make picnic sides?

Why we love this
No food board is complete without a creamy, tangy Honey Mustard Coleslaw. It provides the essential ‘crunch’ factor that cuts through the richness of grilled steaks or wraps. The combination of shredded cabbage and a sweet-yet-sharp dressing offers a refreshing mouthfeel that keeps the palate excited. It’s a nostalgic picnic staple reimagined with a brighter flavor profile, making it a versatile side that bridges the gap between different elements on your board. Its crisp texture and cool temperature make it incredibly satisfying on a humid afternoon.
Ingredients
- 4 Cups shredded cabbage mix (green and purple)
- 1/2 Cup shredded carrots
- 1/2 Cup mayonnaise
- 2 Tablespoons Dijon mustard
- 1 Tablespoon honey
- 1 Tablespoon Apple cider vinegar
- 1/2 Teaspoon celery seed
How to make it
- In a small mixing bowl, whisk together the mayonnaise, Dijon mustard, honey, apple cider vinegar, and celery seed. The celery seed adds a subtle, earthy undertone that defines a classic picnic slaw.
- Place the shredded cabbage and carrots into a large bowl. For the best texture, ensure the cabbage is sliced into very thin ribbons.
- Pour the dressing over the vegetables and toss with large spoons or tongs until every strand is evenly coated.
- Cover the bowl and let it sit in the refrigerator for at least 30 minutes. This ‘resting’ period allows the vinegar to slightly soften the cabbage while the flavors meld together.
- Give it a final toss before serving. If the slaw has released too much liquid, drain a small amount from the bottom to keep the board neat and the texture crisp.
How to make healthy snacks?

Why we love this
Healthy snacks on a board serve as the perfect ‘connective tissue’ between larger items, and Roasted Red Pepper Hummus with crudités is the gold standard. The smoky, velvety texture of the hummus is a delight to dip into, especially when paired with the snap of raw sugar snap peas or carrot sticks. We love how this adds a boost of plant-based protein and fiber to the spread, ensuring that guests feel energized rather than sluggish. The vibrant orange hue of the dip adds a pop of color that makes the whole board look professionally styled.
Ingredients
- 1 Can (15 oz) chickpeas, drained and rinsed
- 1/2 Cup roasted red peppers (from a jar)
- 2 Tablespoons Tahini
- 2 Tablespoons Lemon juice
- 1 Garlic clove
- 1/2 Teaspoon smoked paprika
- 2 Tablespoons Olive oil
- Assorted raw vegetables (cucumbers, peppers, carrots)
How to make it
- Place the chickpeas, roasted red peppers, tahini, lemon juice, garlic, and smoked paprika into a food processor.
- Process on high for 1-2 minutes until the mixture begins to look smooth.
- While the motor is running, slowly drizzle in the olive oil. This emulsifies the dip, creating that signature silky, airy texture.
- If the hummus is too thick, add 1 tablespoon of cold water at a time until you reach your desired consistency.
- Taste and add salt or more lemon juice as needed. The acidity of the lemon should balance the earthiness of the tahini.
- Transfer to a small bowl, create a swirl on top with a spoon, and drizzle with a little extra olive oil and a pinch of paprika before placing it in the center of your vegetable array.
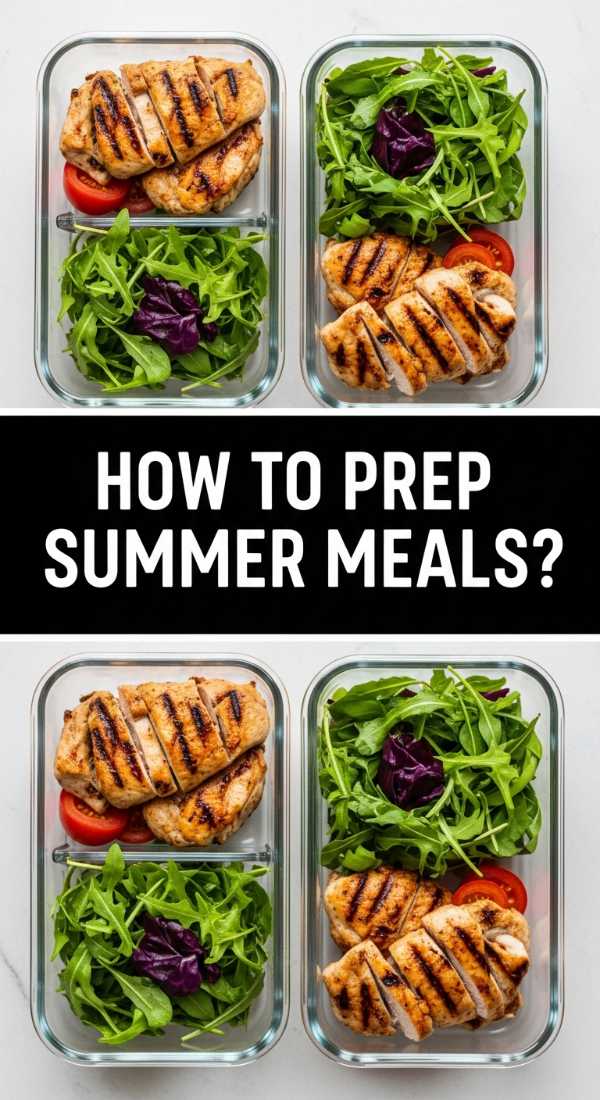
How to prep summer meals?
Why we love this
Meal prepping for a summer food board is all about the ‘Prep Once, Eat Twice’ philosophy, and Lemon Herb Quinoa is the ultimate base. It’s light, fluffy, and carries the bright, aromatic notes of fresh parsley and mint, making it feel like a gourmet addition rather than a chore. We love it because it can be served warm, cold, or at room temperature, making it the most flexible item on your board. Its nutty flavor and pearly texture provide a sophisticated foundation for grilled veggies or proteins, making your lifestyle feel curated and organized.
Ingredients
- 1 Cup dry quinoa
- 2 Cups chicken or vegetable broth
- 1 Lemon (zested and juiced)
- 2 Tablespoons extra virgin olive oil
- 1/4 Cup fresh herbs (parsley, mint, or cilantro)
- 1/4 Cup toasted pine nuts (optional)
How to make it
- Rinse the quinoa thoroughly in a fine-mesh strainer under cold water for 30 seconds. This removes ‘saponin,’ a natural coating that can make quinoa taste bitter.
- In a medium saucepan, combine the quinoa and broth. Bring to a vigorous boil, then reduce the heat to low, cover, and simmer for 15 minutes.
- Once the liquid is absorbed and the quinoa looks translucent with a small ‘tail’ visible, remove from heat. Let it sit, covered, for 5 minutes. This steaming phase is the secret to fluffy grains.
- Fluff the quinoa with a fork. While it’s still warm, stir in the olive oil, lemon juice, and lemon zest. The warmth helps the grains absorb the flavors more deeply.
- Allow the quinoa to cool to room temperature before folding in the fresh chopped herbs and toasted pine nuts. Adding herbs to hot quinoa can cause them to wilt and lose their bright green color.
How to make summer salads?

Why we love this
The Watermelon Feta Salad is the undisputed king of summer salads because it plays with the ‘sweet and salty’ dynamic so perfectly. The cold, dripping juiciness of the watermelon against the creamy, sharp tang of feta cheese is a revelation for the taste buds. We love the way the fresh mint leaves add a cooling aftertaste, making this the most refreshing dish on the board. It’s visually stunning, with the deep pink of the melon contrasting against white cheese and green herbs, instantly elevating the aesthetic of your entire party spread.
Ingredients
- 4 Cups seedless watermelon, cubed
- 1/2 Cup Feta cheese, cubed or crumbled
- 1/4 Cup fresh mint leaves, torn
- 1/2 Red onion, very thinly sliced
- 1 Tablespoon Balsamic glaze
- 1 Tablespoon Extra virgin olive oil
- Pinch of sea salt
How to make it
- Chill your watermelon in the refrigerator for at least 4 hours before prepping. A room-temperature watermelon salad loses that ‘refreshing’ impact.
- Cube the watermelon into uniform 1-inch pieces and place them in a large, shallow serving bowl. A shallow bowl prevents the bottom pieces from getting crushed.
- Soak the sliced red onions in a bowl of ice water for 10 minutes, then drain and pat dry. This removes the ‘bite’ of the onion, leaving only the crunch and mild flavor.
- Scatter the onions and feta cheese over the watermelon cubes.
- Drizzle with the olive oil and a very light sprinkle of sea salt. The salt actually draws out the sweetness of the fruit.
- Just before serving, scatter the torn mint leaves over the top and drizzle with the thick balsamic glaze. Don’t toss too aggressively, or the feta will coat everything in a white film; let the layers speak for themselves.
How to make slow cooker meals?

Why we love this
Slow cooker meals like BBQ Pulled Chicken are the unsung heroes of the food board lifestyle because they do all the heavy lifting while you’re out enjoying the sun. The meat becomes so tender it practically melts into the rich, smoky-sweet sauce, creating a filling that is perfect for sliders or eating straight off the board. We love the deep, caramelized aroma that fills the house as it cooks, signaling to everyone that a feast is on the way. It’s the ultimate low-effort, high-reward protein that keeps your hosting duties stress-free.
Ingredients
- 2 lbs Boneless, skinless chicken thighs
- 1.5 Cups BBQ sauce (your favorite brand)
- 1/4 Cup Apple cider vinegar
- 1 Tablespoon Brown sugar
- 1 Teaspoon smoked paprika
- 1 Onion, diced
How to make it
- Place the diced onion at the bottom of the slow cooker to create a flavor base and prevent the meat from sticking to the bottom.
- Layer the chicken thighs over the onions. Thighs are preferred over breasts for slow cooking as they stay juicy and shred much more easily.
- In a small bowl, whisk together the BBQ sauce, apple cider vinegar, brown sugar, and smoked paprika. Pour this mixture over the chicken.
- Cover and cook on LOW for 6-7 hours or on HIGH for 3-4 hours. Cooking on low is recommended for the most tender results.
- Once the chicken is tender enough to fall apart with a fork, remove it from the slow cooker and place it in a large bowl.
- Shred the meat using two forks. Add back 1/2 cup of the cooking juices from the slow cooker to keep the meat moist and flavorful. Discard excess grease.
- Serve in a warm bowl on your board alongside mini buns or as a topping for salads.
Conclusion: The New Era of Hosting
The beauty of the viral food board isn’t just in the colors or the variety—it’s in the freedom it gives you. By moving away from formal plating and toward these interactive spreads, you’re inviting your friends and family into a more relaxed, authentic way of eating. These recipes are designed to be mixed, matched, and enjoyed at your own pace. So, clear off your biggest wooden board, grab some fresh ingredients, and get ready to be the host everyone talks about (for all the right reasons!).