
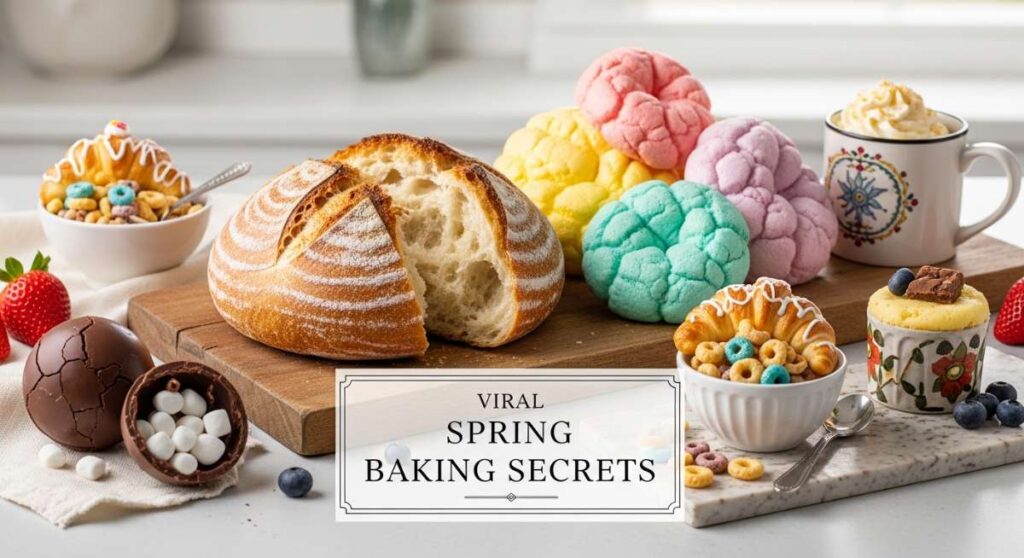
Hello, my loves! As the soft morning light begins to dance across my kitchen counters and the first cherry blossoms peek through the window, I can’t help but feel a rush of creative energy. There is something truly magical about spring baking—the way the scents of citrus and floral notes fill the air, turning our homes into a sanctuary of warmth and sweetness. I’ve spent the last few weeks whisking, folding, and experimenting to bring you the very best of what’s trending in the baking world right now.
This season is all about texture, delicate flavors, and that ‘wow’ factor that makes every bite feel like a cloud-soft embrace. Whether you are hosting a sprawling garden brunch or simply looking for a quiet moment of joy with a cup of tea, these recipes are designed to nourish your soul as much as your palate. I am so excited to share these viral secrets with you, gathered from the heart of my kitchen to yours, so we can celebrate the beauty of this blooming season together.
Grab your favorite linen apron and let’s dive into these viral sensations that have been capturing hearts everywhere. From the secret to the softest cookies you’ve ever tasted to the hacks that will make your cakes look like professional works of art, I’ve curated everything you need to become the star of your spring gatherings. Let’s make something beautiful today, shall we?
Viral Lemon Sugar Cookie Secret

Why we love this
These cookies are like holding a little piece of sunshine in your palm, offering a bright and zesty punch that perfectly balances the rich, buttery sweetness of the dough. The viral secret lies in the way we treat the lemon, ensuring that every fiber of the cookie is infused with natural oils rather than just artificial extracts. We love them because they have that elusive ‘melt-in-your-mouth’ texture that usually takes years to master, but with this trick, you’ll get it right every single time. They are the perfect refreshing treat to serve alongside a cold glass of lavender lemonade on a breezy afternoon.
Ingredients
- 2 1/2 cups all-purpose flour
- 1 cup unsalted butter, softened
- 1 1/2 cups granulated sugar
- 2 large eggs
- 3 large lemons (zest and juice)
- 1 teaspoon baking soda
- 1/2 teaspoon salt
- 1/2 teaspoon vanilla extract
How to make it
- Begin by zesting your lemons directly into your bowl of granulated sugar; use your fingers to massage the zest into the sugar for 2 minutes until the sugar is fragrant and moist.
- Cream the lemon-infused sugar and the softened butter together in a stand mixer until the mixture is light, fluffy, and pale yellow.
- Add the eggs one at a time, followed by the vanilla extract and two tablespoons of fresh lemon juice, mixing well after each addition.
- In a separate bowl, whisk together the flour, baking soda, and salt, then gradually incorporate the dry ingredients into the wet mixture on low speed.
- Chill the dough for at least 30 minutes before scooping into balls, rolling them in extra sugar, and baking at 350°F for 10-12 minutes until the edges are just barely golden.
Fluffy Strawberry Cream Cake Hack

Why we love this
There is nothing quite as nostalgic or lovely as a strawberry cream cake, but the viral hack we’re using today takes the moisture levels to heights you wouldn’t believe. By incorporating a specific fruit-reduction technique, we manage to pack intense berry flavor into the sponge without making it soggy or dense. We love this cake because it looks like a pink dream on the table, and the crumb is so incredibly soft it feels like biting into a literal cloud. It’s the ultimate centerpiece for a Mother’s Day brunch or a spring birthday celebration where you want everyone to ask for seconds.
Ingredients
- 1 box white cake mix (high quality)
- 1 cup fresh strawberry puree (reduced)
- 3 large egg whites
- 1/2 cup vegetable oil
- 1/2 cup sour cream
- 1 teaspoon strawberry extract
- Fresh sliced strawberries for topping
- Whipped cream frosting
How to make it
- Reduce your strawberry puree in a small saucepan over medium heat for 10-15 minutes until it has thickened and concentrated to about half its original volume.
- In a large mixing bowl, combine the cake mix with the cooled strawberry reduction, egg whites, oil, and sour cream, which provides that signature moistness.
- Whisk the batter for two full minutes to ensure enough air is incorporated, giving the cake its legendary fluffy and light structural integrity.
- Pour the batter into two greased 8-inch round pans and bake at 325°F for 25-30 minutes, or until a toothpick comes out clean from the center.
- Once completely cooled, layer the cakes with thick billows of whipped cream frosting and a generous amount of freshly sliced strawberries between every single layer.
Professional Floral Cupcake Design

Why we love this
Transforming a simple cupcake into a blooming garden is the creative therapy we all need this season, and the viral ‘palette knife’ technique makes it accessible for everyone. We love this approach because it moves away from the stiff, traditional piping of the past and embraces a more textured, impressionist art style that looks effortlessly chic. These cupcakes aren’t just desserts; they are edible art pieces that bring a touch of sophisticated whimsy to any dessert table or gift basket. The best part is that no two flowers look exactly the same, giving each treat its own unique and beautiful personality.
Ingredients
- 12 pre-baked vanilla cupcakes
- 2 cups stiff Swiss Meringue buttercream
- Gel food coloring (pink, yellow, green, and lilac)
- Small offset spatula or palette knives
- Piping bags with small round tips
- Edible gold leaf (optional)
How to make it
- Divide your buttercream into several small bowls and tint them with the gel colors, keeping one bowl of plain white for highlighting your petals.
- Apply a thin ‘crumb coat’ layer of frosting to the top of each cupcake to create a smooth, even canvas for your floral design work.
- Using the tip of a palette knife, scoop a small amount of colored frosting and press it onto the cupcake, dragging it inward to create a realistic petal shape.
- Repeat this process in a circular pattern, layering different shades of the same color to add depth and dimension to your blooming flowers.
- Use a piping bag with a tiny round tip to add yellow ‘pollen’ dots to the centers and green leaf accents around the base of the petals for a finished look.
Honey Lavender Bread Recipe

Why we love this
This honey lavender bread is the definition of artisanal comfort, combining the floral notes of spring with the grounding, golden sweetness of raw honey. We love it because the aroma that fills your home while it bakes is better than any candle you could ever buy—it’s pure, soothing relaxation in a loaf. The crumb is tight yet tender, making it the perfect vessel for a thick smear of salted butter or a drizzle of extra honey. It’s a sophisticated twist on a classic quick bread that feels both rustic and incredibly refined at the same time.
Ingredients
- 2 cups all-purpose flour
- 1/2 cup honey (wildflower is best)
- 1/4 cup granulated sugar
- 1 tablespoon dried culinary lavender
- 1 cup whole milk
- 1/3 cup melted butter
- 1 large egg
- 1 tablespoon baking powder
How to make it
- Warm the milk in a small saucepan over low heat and add the culinary lavender, allowing it to steep for at least 15 minutes before straining out the buds.
- In a large bowl, whisk together the flour, sugar, and baking powder, ensuring there are no lumps in the dry mixture before proceeding.
- In a separate container, combine the lavender-infused milk, honey, melted butter, and egg, whisking until the honey is fully dissolved into the liquids.
- Gently fold the wet ingredients into the dry ingredients using a spatula, being careful not to overmix, as this will keep the bread light and tender.
- Pour the batter into a greased loaf pan and bake at 350°F for 45-50 minutes, letting it cool completely before slicing to let the floral flavors fully settle.
Lemon Blueberry Scone Brunch

Why we love this
There is nothing quite like a warm scone to make a spring morning feel special, especially when it is bursting with juicy blueberries and bright lemon zest. These scones have gone viral for their incredible ‘shatter-crisp’ exterior and their flaky, layered interior that rivals the best bakeries in London. We love how the tartness of the lemon cuts through the richness of the heavy cream, creating a flavor profile that is balanced and sophisticated. They are the ultimate ‘make-ahead’ brunch item because they actually freeze beautifully and can be popped in the oven whenever guests arrive.
Ingredients
- 3 cups all-purpose flour
- 1/2 cup granulated sugar
- 1 tablespoon baking powder
- 1/2 cup cold unsalted butter (grated)
- 1 cup fresh blueberries
- 1 cup heavy cream (plus extra for brushing)
- Zest of 2 lemons
- 1/2 teaspoon salt
How to make it
- Whisk the flour, sugar, baking powder, salt, and lemon zest in a large chilled bowl to ensure the dry base is evenly flavored.
- Grate the frozen butter using a box grater and quickly toss it into the flour mixture, using your fingertips to coat each piece of butter with flour.
- Gently fold in the fresh blueberries, then pour in the heavy cream, stirring just until a shaggy dough begins to form under your spatula.
- Turn the dough out onto a floured surface, pat it into a 1-inch thick circle, and cut it into 8 wedges using a sharp knife or a bench scraper.
- Place the wedges on a baking sheet, brush with a little extra cream, and bake at 400°F for 18-22 minutes until the tops are golden brown and firm.
Pastel Layer Cake Inspiration

Why we love this
This pastel layer cake is a visual celebration of everything we love about the transition from winter to spring, featuring soft hues and delicate textures. We love this trend because it encourages playing with color in a way that feels soft and ethereal rather than bold and overwhelming, perfect for a garden party. The inspiration comes from the watercolor skies of early April, and when you slice into it, the layers reveal a beautiful gradient that surprises every guest. It’s a high-impact dessert that actually uses very simple techniques to achieve a look of professional-grade elegance and charm.
Ingredients
- 3 layers of vanilla sponge cake
- 4 cups vanilla bean buttercream
- Gel food coloring (mint, peach, and sky blue)
- A rotating cake stand
- Large offset spatula
- Fresh edible pansies for decoration
How to make it
- Divide your buttercream into three separate bowls and tint each one with a tiny drop of pastel food coloring to achieve soft, muted tones.
- Place your first cake layer on the stand, fill it with plain buttercream, and repeat until all three layers are stacked and stable.
- Apply a thick band of the mint frosting around the bottom third of the cake, the peach in the middle, and the blue at the top.
- Hold your offset spatula vertically against the side of the cake while spinning the stand slowly to blend the colors together in a watercolor effect.
- Finish the look by smoothing the top and pressing fresh, pressed edible pansies or violets into the sides of the cake for a natural, botanical touch.
Rose Water Shortbread Cookies

Why we love this
These shortbread cookies are the epitome of elegance, offering a delicate floral note that feels incredibly luxurious and sophisticated on the palate. We love them because they only require a few high-quality ingredients, allowing the buttery texture and the subtle rose aroma to truly take center stage. The viral appeal of these cookies comes from their ‘glass-like’ glaze and the addition of dried petals, making them look like something from a royal tea party. They are the perfect treat to box up with a ribbon and gift to someone who needs a little extra love and beauty in their day.
Ingredients
- 1 cup salted butter, softened
- 1/2 cup powdered sugar
- 2 cups all-purpose flour
- 1 teaspoon culinary rose water
- 1 cup white chocolate (melted for dipping)
- Dried culinary rose petals
- 1/2 teaspoon vanilla extract
How to make it
- Cream the softened butter and powdered sugar together until completely smooth and creamy, then stir in the rose water and vanilla extract carefully.
- Gradually add the flour to the butter mixture, mixing on low speed until a soft dough forms that pulls away from the sides of the bowl.
- Roll the dough out between two sheets of parchment paper to a 1/4-inch thickness and chill in the refrigerator for at least 1 hour to prevent spreading.
- Cut the dough into rectangles or circles and bake at 325°F for 12-15 minutes, ensuring they remain pale and do not brown too much on the edges.
- Once cooled, dip half of each cookie into melted white chocolate and immediately sprinkle with crushed dried rose petals for a stunning, fragrant finish.
White Chocolate Raspberry Tart

Why we love this
This tart is a masterclass in contrast, featuring a crisp, buttery crust, a silky-smooth white chocolate ganache, and the sharp, bright acidity of fresh raspberries. We love it because it’s a ‘no-bake’ filling option that looks incredibly high-end while being surprisingly simple to assemble in your own kitchen sanctuary. The viral ‘swirl’ technique we use for the raspberry coulis makes the top of the tart look like a piece of abstract marble art that is almost too pretty to eat. It is the perfect dessert for those warmer spring evenings when you want something decadent but light and refreshing.
Ingredients
- 1 pre-baked 9-inch tart shell
- 12 oz high-quality white chocolate
- 1/2 cup heavy cream
- 1 cup fresh raspberries (for the top)
- 1/4 cup raspberry puree (strained)
- 1 teaspoon lemon juice
- Fresh mint leaves for garnish
How to make it
- Heat the heavy cream in the microwave or on the stove until it just begins to simmer, then pour it over the finely chopped white chocolate.
- Let it sit for two minutes, then stir gently until you have a glossy, smooth ganache; pour this immediately into your prepared tart shell.
- While the ganache is still wet, drop small dots of the strained raspberry puree across the surface using a toothpick or a small spoon.
- Use the toothpick to gently drag through the dots, creating beautiful swirls and heart shapes throughout the white chocolate surface of the tart.
- Refrigerate the tart for at least 4 hours until firm, then top with a ring of fresh raspberries and mint leaves just before serving to your loved ones.
Moist Carrot Cake Secret

Why we love this
Forget everything you think you know about dry, spicy carrot cakes—this version is the most moist and tender cake you will ever experience. The viral secret is all in the preparation of the carrots and a ‘hidden’ fruit ingredient that keeps the crumb hydrated for days after baking. We love it because it feels wholesome yet indulgent, with a complex spice profile that perfectly complements the thick, tangy layers of cream cheese frosting. It’s a timeless spring classic that has been updated for the modern palate, ensuring it remains the most requested recipe in your collection.
Ingredients
- 2 cups grated carrots (finely shredded)
- 1/2 cup crushed pineapple (drained well)
- 2 cups all-purpose flour
- 1 1/2 cups vegetable oil
- 2 cups granulated sugar
- 4 large eggs
- 2 teaspoons cinnamon
- 1 cup chopped pecans
How to make it
- Whisk the oil, sugar, and eggs together until the mixture is thick and slightly frothy, which creates the foundation for a perfectly moist cake.
- Stir in the finely shredded carrots and the secret ingredient—drained crushed pineapple—which adds moisture and a subtle sweetness without a heavy pineapple taste.
- Sift together the flour, cinnamon, and baking soda, then fold them into the wet ingredients along with the chopped pecans for a bit of crunch.
- Divide the batter between two greased 9-inch pans and bake at 350°F for 35-40 minutes until a tester comes out with just a few moist crumbs.
- Let the cakes cool completely before frosting with a thick layer of traditional cream cheese icing, making sure to coat the sides generously for a rustic look.
Butter Cookies Spring Twist

Why we love this
These are not your average butter cookies; they are a celebration of spring’s playfulness, featuring a citrus-glaze twist that elevates the humble shortbread to new heights. We love them because they are incredibly versatile—you can stamp them into floral shapes or use a cookie press to create delicate designs that hold their shape perfectly. The viral ‘dip-and-dry’ glazing method gives them a professional, matte finish that is usually only seen in high-end specialty bakeries. They are the ultimate companion for a mid-afternoon tea break, offering a satisfying snap and a burst of bright, buttery flavor.
Ingredients
- 1 cup unsalted butter, softened
- 3/4 cup granulated sugar
- 1 large egg yolk
- 2 1/4 cups all-purpose flour
- 1 teaspoon almond extract
- 1 cup powdered sugar (for glaze)
- 2 tablespoons orange juice
- Pastel sprinkles
How to make it
- Cream the softened butter and granulated sugar together until very light and fluffy, then beat in the egg yolk and the almond extract.
- Slowly add the flour, mixing just until a soft dough forms; wrap it in plastic and let it rest in the fridge for 20 minutes to firm up.
- Roll the dough out and use your favorite spring-themed cookie cutters to create flowers, butterflies, or simple circles, then bake at 350°F for 10 minutes.
- Whisk the powdered sugar and orange juice together to create a thin, pourable glaze that smells like fresh citrus groves in the morning.
- Dip the cooled cookies face-down into the glaze, let the excess drip off, and place them on a rack to set, adding a few pastel sprinkles while wet.
Embracing the Sweetness of the Season
As we wrap up our journey through these viral spring baking trends, I hope your heart feels as full as your kitchen surely will. Baking is more than just following a recipe; it’s an act of love, a way to slow down and appreciate the beautiful, fleeting moments of the season. Whether you’re trying the lemon sugar cookie secret or swirling a raspberry tart, remember that the most important ingredient is the joy you find in the process. I can’t wait to see your beautiful creations, so please share them with me! Go forth and bake something wonderful, my loves!