

Elevated Everyday: Lifestyle Secrets for a More Beautiful Life
Have you ever noticed how a single ray of sunlight hitting a vase of fresh flowers can completely shift the energy of a room? It’s in those quiet, intentional moments that we truly find the heartbeat of a home. For years, I chased the ‘perfect’ life, only to realize that beauty isn’t found in a catalog—it’s curated through the small, soulful details we weave into our daily routines. It’s the texture of a linen napkin, the scent of lavender by the porch, or the way a workspace makes us feel empowered rather than drained.
Today, I’m opening up my personal playbook of lifestyle secrets to help you elevate the mundane into the extraordinary. Whether you’re looking to transform a tiny apartment into a whimsical sanctuary or turn your backyard into a private retreat, these ideas are designed to spark joy and foster a sense of belonging. Let’s dive into how we can make every corner of our lives feel a little more magical, intentional, and deeply, beautifully ours.
How to Create Simple Landscaping for a Welcoming Front Yard
Why we love this
There is something deeply grounding about the scent of freshly turned earth and the crisp, clean lines of a well-edged flower bed. A welcoming front yard isn’t just about curb appeal; it’s a tactile greeting to yourself every time you pull into the driveway, offering a sense of peace before you even step through the door. We love the way varied textures—from the velvety softness of silver mound artemisia to the structural elegance of boxwood—create a sensory journey that evolves with the seasons, making your home feel like a living, breathing part of the landscape.
Essential Elements:
- Dark hardwood mulch for contrast
- Steel or plastic landscape edging
- A mix of perennial ‘thriller, filler, and spiller’ plants
- Solar-powered warm-toned path lights
- Decorative river stones or gravel
How to make it
- Begin by defining your borders using a garden hose to map out organic, flowing curves rather than rigid straight lines, which look more natural and inviting.
- Use a sharp spade or an edger to cut a 4-inch deep trench along your mapped line, removing all grass and weeds to create a clean ‘V’ shape that prevents lawn encroachment.
- Incorporate a high-quality soil conditioner or organic compost into your existing dirt, tilling it to a depth of 6 inches to ensure your new plants have the nutrient-rich foundation they need to thrive.
- Arrange your plants while they are still in their pots, placing taller ‘thrillers’ like ornamental grasses in the back, ‘fillers’ like lavender in the middle, and ‘spillers’ like creeping phlox near the front edge.
- Dig holes twice as wide as the root ball, tease the roots gently, and plant them at the same depth they were in the pot, tamping down firmly to remove air pockets.
- Apply a 3-inch layer of mulch across the entire bed, being careful not to pile it against the stems of the plants, which can cause rot, then water deeply with a soaking hose.
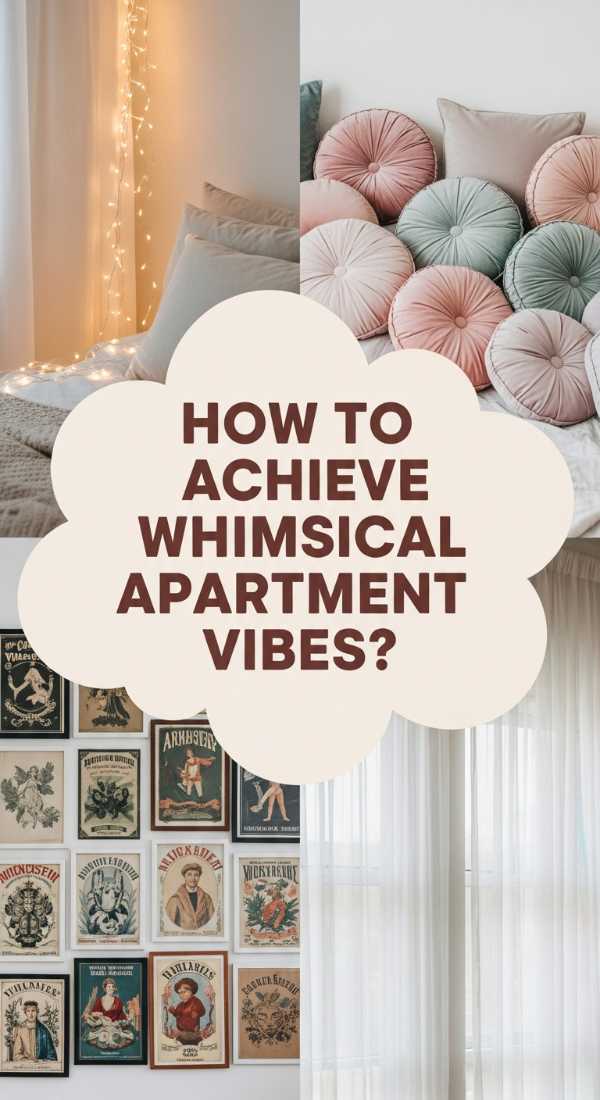
How to Curate a Whimsical Apartment Aesthetic for Magical Living

Why we love this
Stepping into a whimsical apartment feels like walking into the pages of a forgotten storybook, where every corner holds a whisper of magic and every object has a soul. This aesthetic celebrates the imperfect and the ethereal, blending soft, glowy light with an eclectic mix of textures that invite you to slow down and dream. We adore how this style transforms a standard urban box into a sanctuary filled with the scent of dried eucalyptus and the shimmering play of rainbows from window crystals, proving that you don’t need a massive space to live a life full of wonder.
Essential Elements:
- Sheer iridescent or lace curtains
- Fairy lights and warm-toned mushroom lamps
- Antique gold frames and mismatched mirrors
- Dried flower bouquets and hanging ivy
- Velvet floor cushions and layered vintage rugs
How to make it
- Start by softening the harsh overhead lighting common in apartments by replacing it with a ‘layering’ technique using floor lamps, table lamps, and strings of warm-white LEDs hidden behind sheer fabrics.
- Create a focal point ‘gallery wall’ that mixes traditional art with 3D objects like vintage keys, pressed botanical frames, and small floating shelves holding tiny trinkets.
- Introduce botanical elements at varying heights, using ceiling hooks for trailing pothos and ornate stands for ferns to create a ‘secret garden’ feel that blurs the lines between indoors and out.
- Swap out standard hardware on your cabinets and dressers for brass insects, crystal knobs, or hand-painted ceramic pulls to add a touch of unexpected detail.
- Layer your textiles by draping a lace cloth over a velvet sofa or stacking vintage quilts at the foot of the bed, focusing on fabrics that catch the light or feel luxurious to the touch.
- Place sun-catching prisms or crystals in south-facing windows to cast dancing rainbows across the room during the golden hour, completing the magical atmosphere.
How to Arrange Summer Table Centerpieces for Elegant Outdoor Dining

Why we love this
Al fresco dining is the ultimate summer luxury, and a thoughtful centerpiece is the crown jewel of the experience. It captures the essence of long, honey-colored evenings where the air is thick with the aroma of charcoal and blooming jasmine. We love how a curated table setting encourages guests to linger longer, with the soft flicker of candlelight reflecting off glassware and the vibrant colors of seasonal fruits and flora creating a feast for the eyes before the first course is even served.
Essential Elements:
- A low-profile wooden dough bowl or ceramic tray
- Fresh citrus (lemons, limes, or halved grapefruits)
- Fragrant herbs like rosemary, mint, or basil
- Unscented tea lights or tapered candles in hurricane glass
- Seasonal blooms like zinnias or wild hydrangeas
How to make it
- Choose a low container or arrangement style to ensure that guests can easily see one another across the table, maintaining an intimate and conversational flow.
- Create a ‘living runner’ by laying down a base of eucalyptus or olive branches directly on the table, weaving them together to create a lush, green foundation.
- Intersperse your greenery with whole and halved citrus fruits; the oils from the rinds will release a subtle, refreshing scent that is perfect for outdoor heat.
- Tuck small glass bud vases filled with single stems of bright, seasonal flowers into the greenery to add pops of color without overwhelming the space.
- Incorporate height and safety by using glass hurricane chimneys for your candles, which protects the flame from summer breezes and adds a sophisticated shimmer.
- Scatter a few sprigs of fresh mint or basil near the seating areas to provide a natural, pleasant aroma that also helps subtly deter pests while you dine.
How to Style an Office Desk for Peak Professional Productivity

Why we love this
A well-styled desk is more than just a place to work; it’s a cockpit for your ambitions and a sanctuary for focus. When your physical environment is organized and aesthetically pleasing, the mental clutter seems to vanish, replaced by a sharp, invigorating clarity. We love the tactile satisfaction of a leather desk mat under our wrists and the visual calm of a minimalist color palette, which allows the mind to dive deep into creative tasks without the distraction of a chaotic workspace.
Essential Elements:
- Ergonomic desk mat (vegan leather or felt)
- A high-quality task lamp with adjustable color temperature
- Minimalist cable management clips or boxes
- A small, hardy indoor plant (like a snake plant or succulent)
- A ceramic tray for small essentials (pens, paperclips)
How to make it
- Clear everything off your desk and start with a ‘deep clean’ of the surface, using a microfiber cloth to remove all dust and static for a pristine beginning.
- Position your monitor so the top third of the screen is at eye level, which reduces neck strain and creates a more professional, upright posture.
- Place a large desk mat in the center to define your ‘action zone’; this provides a soft surface for typing and protects your desk from scratches and coffee rings.
- Organize your cables by routing them behind desk legs or using weighted cable blocks to keep charging cords from slipping onto the floor.
- Limit personal decor to three meaningful items—perhaps a framed photo, a unique paperweight, and your plant—to keep the space feeling personal but not cluttered.
- Adjust your lighting so that the primary light source comes from the side of your dominant hand to eliminate shadows while writing or typing.
How to Upgrade a Cheap Pool Deck for Endless Summer Bliss
Why we love this
You don’t need a five-star resort budget to create a pool area that feels like a Mediterranean getaway. Upgrading a simple deck is about leaning into the ‘vacation state of mind’—think bare feet on warm wood, the sound of splashing water, and the cooling touch of a shaded lounge chair. We love how a few strategic additions can turn a basic wooden or concrete platform into a high-end oasis where every weekend feels like a holiday, draped in the scent of coconut sunscreen and sea salt.
Essential Elements:
- Interlocking deck tiles or high-quality wood stain
- Outdoor rugs with geometric or natural patterns
- Weather-resistant oversized floor planters
- String lighting or solar post-cap lights
- Striped cabana towels and teak loungers
How to make it
- Deep clean the existing surface using a power washer on a medium setting to strip away dirt, mildew, and old oxidation without damaging the wood fibers.
- If the wood is graying, apply a semi-transparent penetrating stain in a warm teak or cool driftwood tone, which protects the deck while highlighting the natural grain.
- Define ‘zones’ for lounging and dining by placing large, mildew-resistant outdoor rugs; this hides imperfections in the deck and provides a soft surface for bare feet.
- Install vinyl or wood lattice panels around the base of the deck to hide unsightly structural beams and pool equipment, creating a polished, finished look.
- Add ‘weight’ to the corners with heavy ceramic planters filled with tall grasses or tropical hibiscus to create a sense of enclosure and privacy.
- String commercial-grade globe lights overhead, ensuring they are rated for wet environments and securely anchored to poles or the house for a magical evening glow.
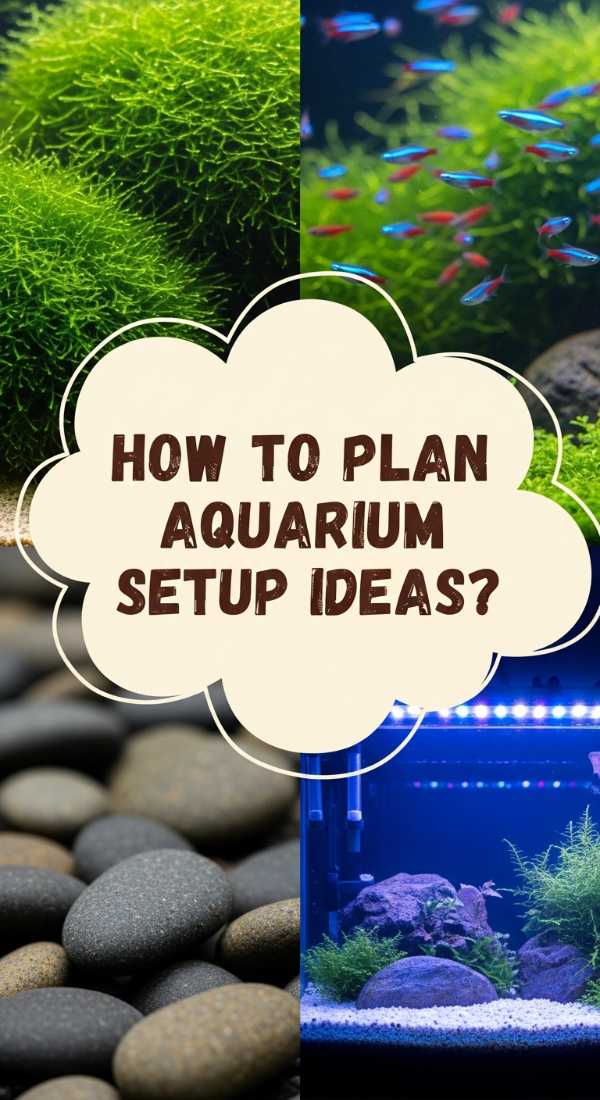
How to Plan Aquarium Setup Ideas for Serene Underwater Vibes

Why we love this
There is a hypnotic, meditative quality to a well-designed aquarium that no other home feature can match. The gentle hum of the filter, the rhythmic swaying of live plants, and the vibrant flash of fish moving through the water create a living piece of art. We love how an aquarium brings a slice of the natural world indoors, humidifying the air slightly and providing a tranquil focal point that lowers the heart rate and sparks quiet reflection after a long day.
Essential Elements:
- Rimless glass aquarium for a modern look
- Active substrate for live plants (aqua-soil)
- Dragon stone or driftwood for ‘hardscaping’
- Live aquatic plants (Anubias, Java Fern, or Moss)
- Full-spectrum LED lighting with a 24-hour cycle
How to make it
- Select a level, sturdy surface away from direct sunlight, which can cause excessive algae growth and temperature fluctuations that stress the ecosystem.
- Layer your substrate with a slight slope, being thicker at the back and thinner at the front; this creates an illusion of depth and allows for better perspective in the ‘aquascape’.
- Position your ‘hardscape’ (rocks and wood) using the ‘Rule of Thirds’ to create a natural, asymmetrical look that guides the eye through the underwater landscape.
- Fill the tank halfway with conditioned water, then plant your greenery using long tweezers to secure roots firmly into the soil before finishing the fill.
- Install your filtration system and heater, then ‘cycle’ the tank for at least 2-4 weeks to allow beneficial bacteria to colonize before adding any fish.
- Set your LED lights to a timer that mimics a natural day/night cycle, gradually brightening in the morning and dimming to a soft blue ‘moonlight’ in the evening.
How to Design Immersive Tech Spaces with Speaker Wallpapers
Why we love this
In the modern home, technology should be felt and heard, but not necessarily seen as a mess of wires and black boxes. Immersive tech spaces using speaker wallpapers represent the pinnacle of ‘stealth wealth’ design, where your walls literally sing. We love the seamless integration of high-fidelity sound with stunning visual aesthetics, allowing your living room or office to transform into a concert hall or a cinema without sacrificing a single inch of floor space to bulky equipment.
Essential Elements:
- Ultra-thin flat-panel speakers
- Acoustically transparent fabric or ‘wallpaper’
- Hidden integrated amplifier
- Professional-grade mounting brackets
- Cable management routing behind drywall
How to make it
- Identify the ‘sweet spot’ in your room where the sound will converge, typically at ear level when you are seated in your primary viewing or listening position.
- Cut precise openings in the drywall for the flat-panel speakers, ensuring they are mounted flush against the studs to prevent vibrations and rattling.
- Route high-gauge speaker wire through the walls to a centralized media closet or hidden cabinet where your amplifier and streaming devices will live.
- Cover the speaker units with acoustically transparent material—this can be a custom-printed fabric that looks like high-end wallpaper or a textured linen.
- Calibrate the sound system using a specialized microphone and software to account for the room’s unique acoustics and the density of the wallpaper covering.
- Test the system with a variety of frequencies, checking for ‘muffled’ zones and adjusting the equalizer settings to ensure crisp highs and resonant lows.
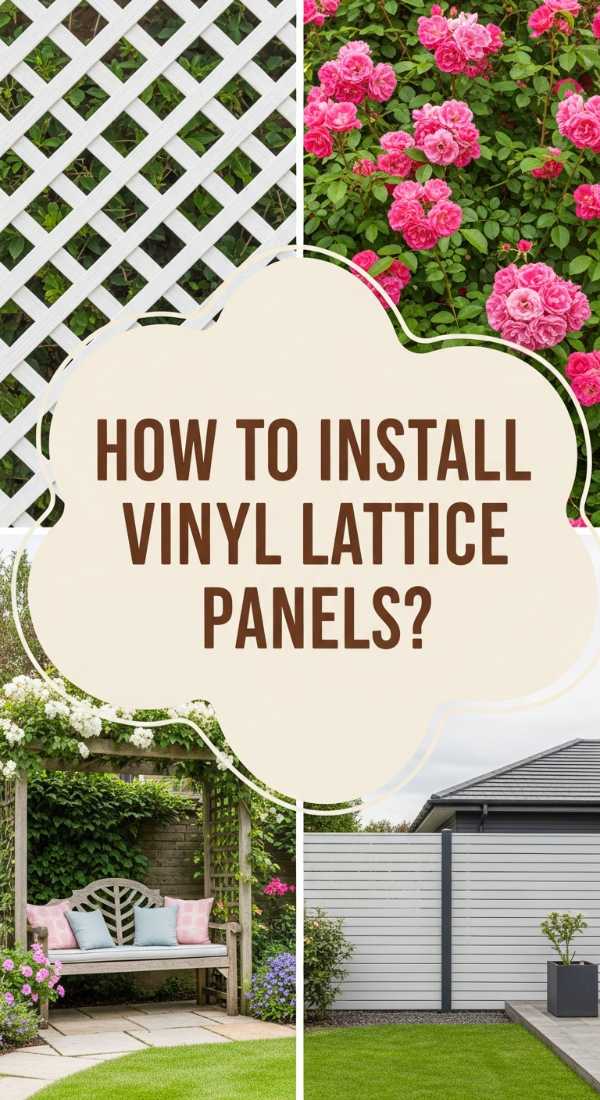
How to Install Vinyl Lattice Panels for Private Garden Sanctuaries
Why we love this
Privacy is the ultimate luxury in a garden, and vinyl lattice panels offer a classic, low-maintenance way to create a ‘secret room’ outdoors. We love the way sunlight filters through the diamond patterns, creating a beautiful interplay of shadows on the ground while providing the perfect scaffolding for climbing roses or clematis. It’s a solution that feels architectural yet organic, turning a breezy porch or a standard fence into a secluded sanctuary where you can truly escape the world.
Essential Elements:
- UV-stabilized vinyl lattice panels
- Vinyl ‘U-channel’ molding for edges
- Pressure-treated 4×4 posts or existing porch pillars
- Stainless steel screws (to prevent rust streaks)
- Power drill and a fine-tooth saw blade
How to make it
- Measure the height and width of the area you wish to enclose, subtracting 1/4 inch from all sides to allow for the vinyl to expand and contract with the temperature.
- Use a circular saw or miter saw with a fine-tooth blade to cut the lattice panels; cutting slowly prevents the vinyl from shattering or cracking along the edges.
- Slide the cut edges of the lattice into the vinyl ‘U-channel’ moldings to create a finished, professional frame that hides the raw cuts.
- Pre-drill holes through the molding and lattice that are slightly larger than your screws; this ‘oversizing’ is critical to prevent the panels from buckling in the heat.
- Mount the framed panels to your posts, ensuring they are perfectly level, and use decorative screw caps to hide the hardware for a seamless look.
- Plant climbing vines at the base and weave the first few tendrils through the bottom diamonds to encourage the plant to grow upward and fill the screen.
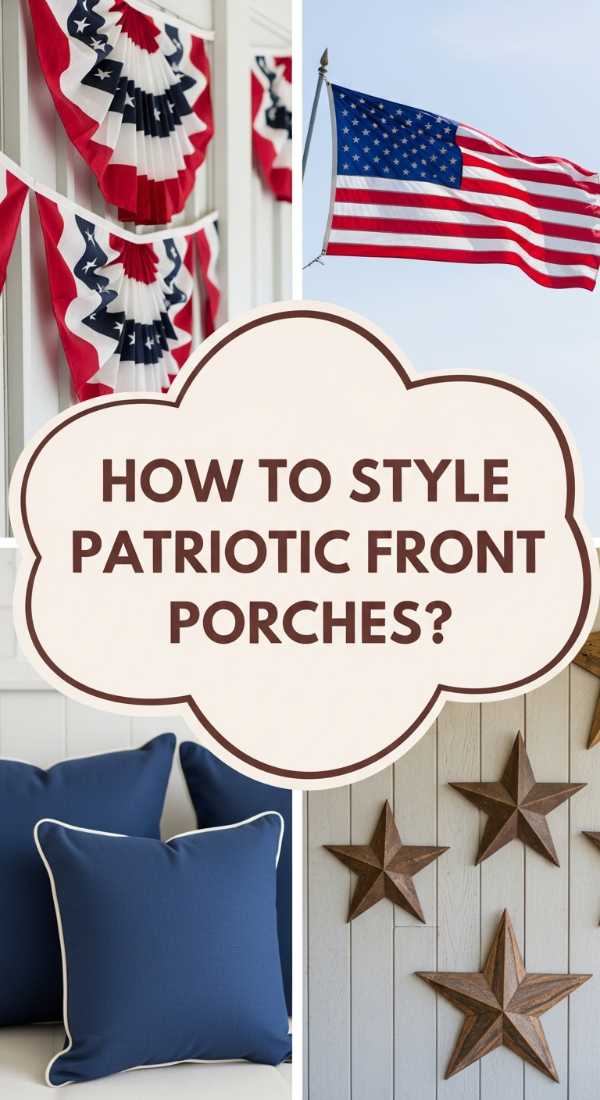
How to Decorate a Patriotic Front Porch for Seasonal Curb Appeal
Why we love this
There is a timeless, nostalgic charm to a patriotic porch that feels like a warm hug from Americana. It’s the visual equivalent of a glass of ice-cold lemonade on a humid July afternoon—crisp, refreshing, and full of pride. We love the bold contrast of navy blues, cherry reds, and star-white accents against the natural greenery of a porch, creating a high-energy look that celebrates community and heritage while making your home the standout star of the neighborhood.
Essential Elements:
- Tea-stained or vibrant cotton American flags
- Red and white striped bunting
- Woven wicker furniture with navy cushions
- Galvanized metal buckets for floral displays
- Red geraniums and white petunias
How to make it
- Start with a clean slate by sweeping away cobwebs and washing the porch floor; a bright, clean backdrop makes the red, white, and blue colors ‘pop’.
- Hang pleated fans or bunting along the porch railing, ensuring they are spaced evenly and secured with hidden zip ties to prevent them from sagging or blowing away.
- Mount a high-quality flag holder at a 45-degree angle near the front door, choosing a flag made of embroidered cotton for a more ‘lifestyle’ and less ‘plastic’ appearance.
- Arrange your planters in odd numbers (groups of 3 or 5), mixing heights by using upside-down buckets as pedestals to create a dynamic visual flow.
- Incorporate ‘living color’ by planting red geraniums for height, white alyssum for fragrance, and blue lobelia for a trailing ‘spiller’ effect in every pot.
- Add a final touch of comfort with a navy-striped outdoor rug and a few red throw pillows to make the space as functional for lounging as it is beautiful to look at.
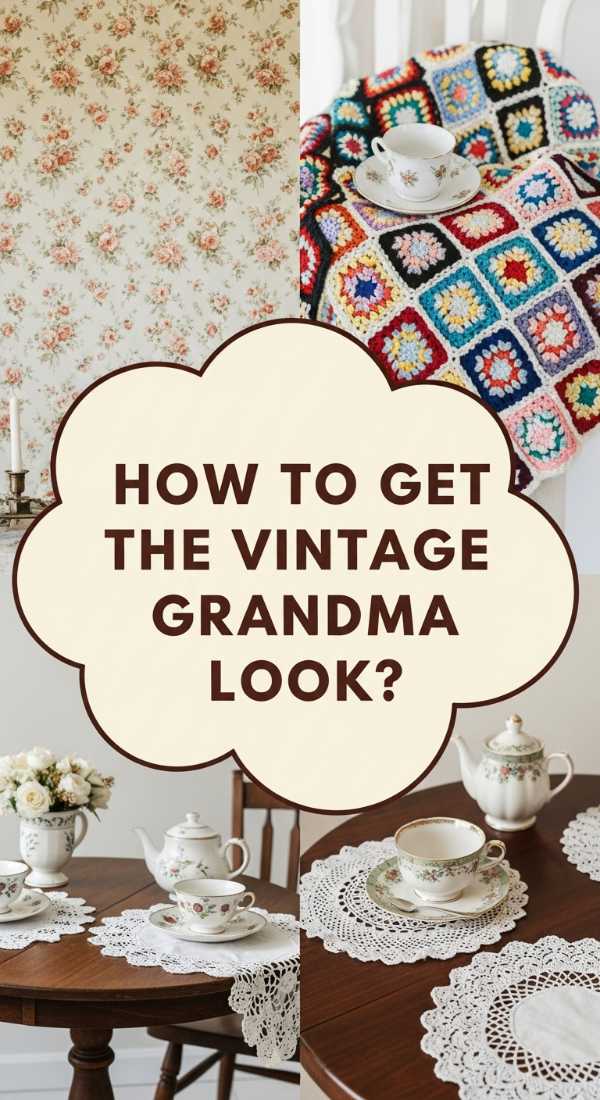
How to Curate a Vintage Grandma House Aesthetic for Cozy Nostalgia
[IMAGE_10]
Why we love this
Commonly known as ‘Grandmacore,’ this aesthetic is all about the ‘art of the slow.’ It’s the smell of cinnamon toast, the weight of a hand-crocheted blanket, and the comforting clutter of a life well-lived. We love this style because it rejects the coldness of modern minimalism in favor of warmth, history, and heirlooms. It makes every guest feel immediately at ease, surrounded by soft textures and whimsical patterns that tell a story of family, tradition, and the simple joys of home-making.
Essential Elements:
- Crocheted doilies and handmade afghans
- Floral ‘chintz’ wallpaper or textiles
- Vintage mismatched china and teacups
- Warm wood furniture with a distressed patina
- Antique brass floor lamps with pleated shades
How to make it
- Focus on ‘pattern mixing’ by pairing a small-scale floral print with a larger-scale gingham or stripe in a similar color family to create that signature eclectic look.
- Display your ‘treasures’ openly on open shelving or in glass-front cabinets—think old cookbooks, Depression glass, and copper tins—rather than hiding them away.
- Introduce the scent of nostalgia using beeswax candles or stovetop potpourri made of apple slices, cinnamon sticks, and cloves.
- Layer your lighting using only warm-spectrum bulbs (2700K) and choose lampshades with fringe or pleats to diffuse the light into a soft, amber glow.
- Incorporate ‘functional vintage’ by using old jars for buttons, vintage baskets for mail, and antique hooks for aprons in the kitchen.
- Don’t be afraid of ‘clutter’—the key to the grandma aesthetic is the ‘curated collection,’ where every item feels like it has been gathered over decades with love.
Creating Your Own Beautiful Life
Designing a life you love isn’t about following every trend—it’s about finding the elements that resonate with your soul and bringing them into your physical space. Whether it’s the quiet peace of an aquarium or the bold joy of a patriotic porch, these changes are the bridge between a house and a home. Start small, be intentional, and watch as your everyday environment begins to reflect the beauty you carry within.
Frequently Asked Questions
How can I make my home feel more expensive on a budget?
Focus on ‘high-impact’ changes like updating lighting fixtures, adding oversized rugs to define spaces, and using a consistent color palette. Replacing standard plastic hardware with brass or ceramic can also make furniture look much more high-end.
What is the best way to maintain an outdoor deck?
Regular maintenance is key. Sweep it weekly to prevent debris from trapping moisture, and plan for a deep clean and reseal every 2-3 years depending on your climate and the amount of sun the deck receives.
Are live plants difficult to keep in an aquarium?
Not at all, if you start with ‘low-light’ varieties like Anubias or Java Fern. These plants don’t require CO2 injection and are very hardy, making them perfect for beginners who want a lush look without the high maintenance.