
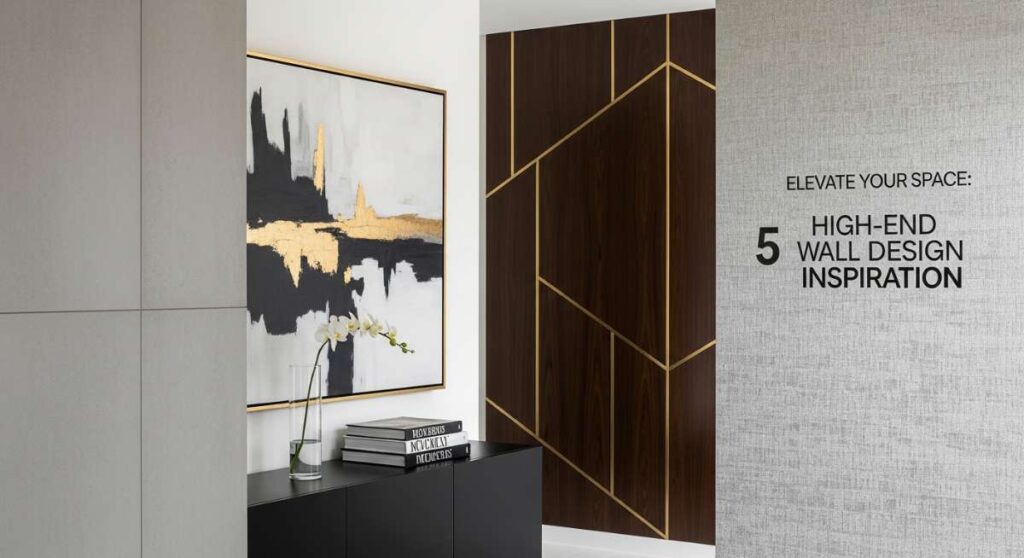
Have you ever walked into a room and felt an immediate sense of peace, as if the walls themselves were whispering a warm welcome? There is a profound magic in how we curate our surroundings; it’s more than just decor, it’s about crafting a sanctuary that mirrors our inner evolution. When we transition from basic functionality to high-end design, we aren’t just buying furniture—we are investing in the backdrop of our lives, the textures we touch every morning, and the colors that catch the golden hour light.
In my years of exploring interior aesthetics, I’ve realized that walls are the most underutilized real estate in the home. They are the canvas for your personality, the frame for your memories, and the foundation of luxury. Today, I’m sharing ten transformative ways to elevate your space, turning ordinary vertical surfaces into breathtaking masterpieces that exude sophistication and warmth. Let’s dive into the art of high-end living, one wall at a time.
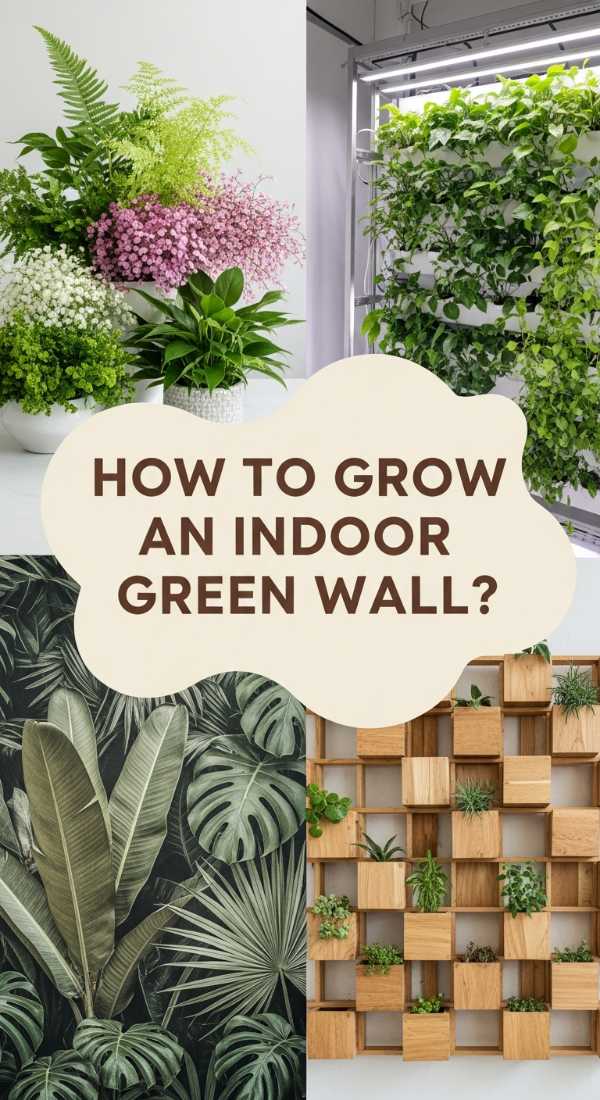
How to Create a Lush Green Wall for a Breathing Home
Why we love this
Imagine waking up to the gentle, earthy aroma of damp moss and fresh ferns right in your living room. A lush green wall brings the outdoors in, creating a living tapestry that purifies the air while providing a vibrant, tactile experience. The deep emerald hues and the varying textures of broad leaves against delicate vines create a visual depth that feels both expensive and deeply grounding. It’s like having a private botanical garden that hums with life, offering a cool, misty microclimate that eases the soul after a long day.
Essential Elements:
- Vertical irrigation system or felt pocket planters
- Assorted humidity-loving plants (Pothos, Ferns, Philodendrons)
- Full-spectrum LED grow lights
- Moisture-resistant backing board
- Organic potting mix and hydro-stones
How to make it
- Begin by securing a waterproof backing board to your wall to prevent moisture damage; use a drill to fix it firmly into the studs, ensuring a 1-inch air gap for ventilation.
- Install your chosen vertical planter system—felt pockets work best for a seamless look—starting from the top and working downwards, ensuring each row overlaps slightly.
- Set up a drip irrigation line hidden along the top edge; use a smart timer to deliver water for 5 minutes every morning, looking for the visual cue of moist (but not dripping) soil.
- Prepare your plants by gently removing excess soil and wrapping roots in a thin layer of damp moss before nesting them into the pockets.
- Arrange plants by light needs: place light-hungry ferns near the top grow lights and shade-tolerant vines toward the bottom, ensuring a lush, overlapping canopy.
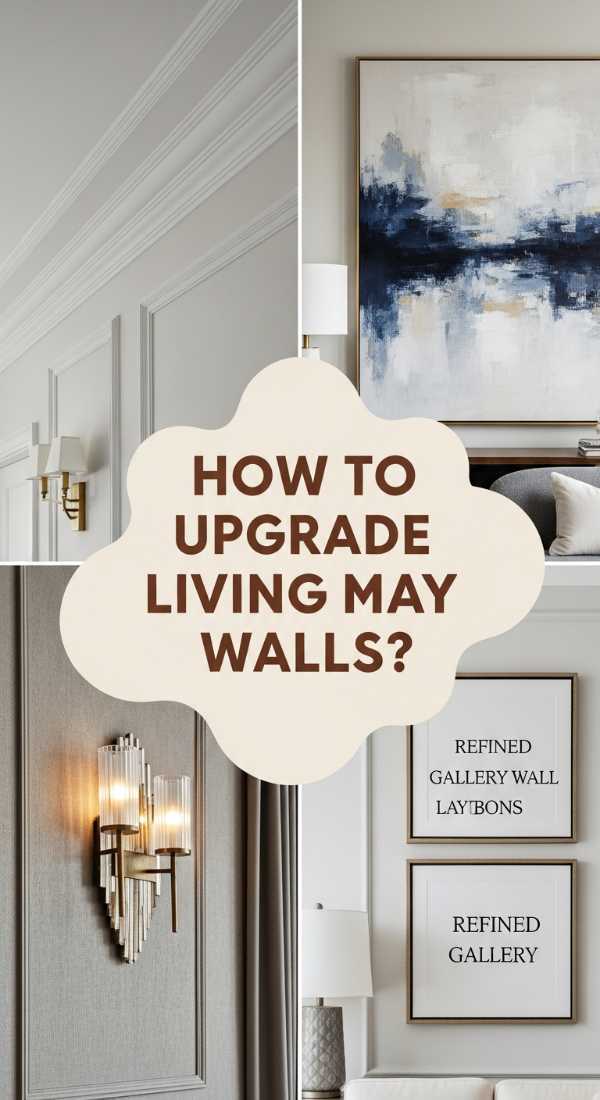
How to Elevate Living Room Wall Designs for Elegant Comfort
Why we love this
There is a specific kind of quiet luxury that comes from perfectly executed architectural molding. When light hits the crisp edges of wainscoting or picture frame molding, it creates a dance of soft shadows that feels inherently sophisticated. We love this approach because it adds structural integrity to a room, making even a minimalist space feel finished and intentional. The feeling is one of timelessness—a blend of Parisian apartment chic and modern comfort that invites you to sink into your sofa with a glass of wine and a good book.
Essential Elements:
- Polyurethane or wood molding strips
- High-quality matte finish paint
- Laser level and miter saw
- Construction adhesive and finish nails
- Caulk and wood filler
How to make it
- Measure your wall height and divide it into thirds to determine the ideal placement for a chair rail; use a laser level to snap a perfectly horizontal guide line across the entire length.
- Cut your molding strips at 45-degree angles using a miter saw for seamless corner joins; always double-check measurements before cutting to avoid gaps.
- Apply a thin bead of high-strength construction adhesive to the back of the molding and press firmly against the wall, following up with a pneumatic nail gun for a permanent hold.
- Fill all nail holes with wood filler and caulk the seams where the molding meets the wall; this is the professional secret to a built-in, seamless look.
- Apply two coats of premium matte paint over the entire wall and molding; wait 4 hours between coats for a smooth, streak-free finish that mimics high-end plaster work.
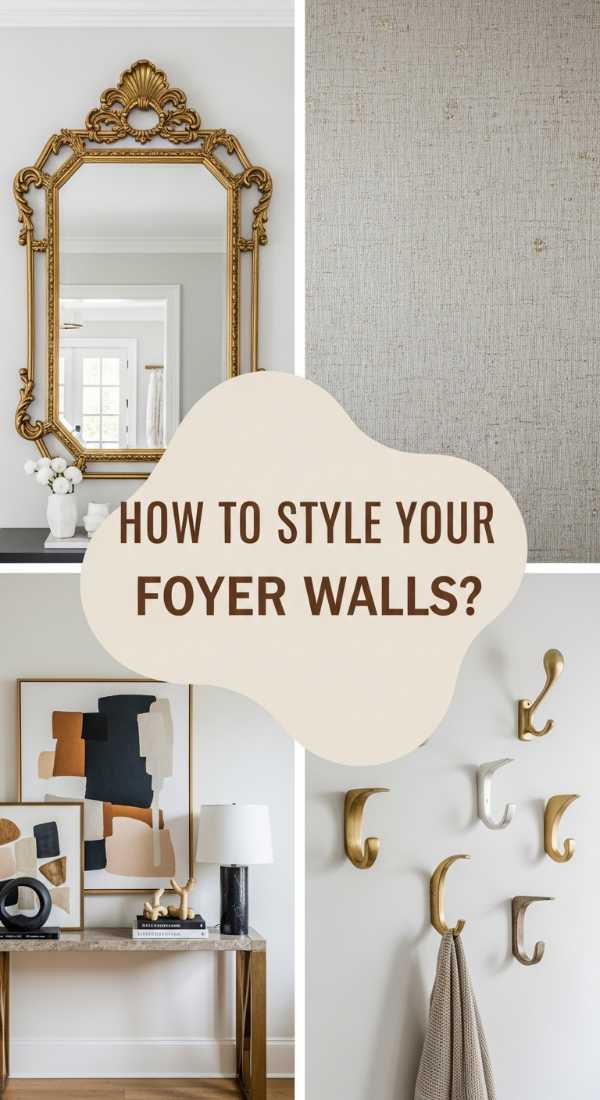
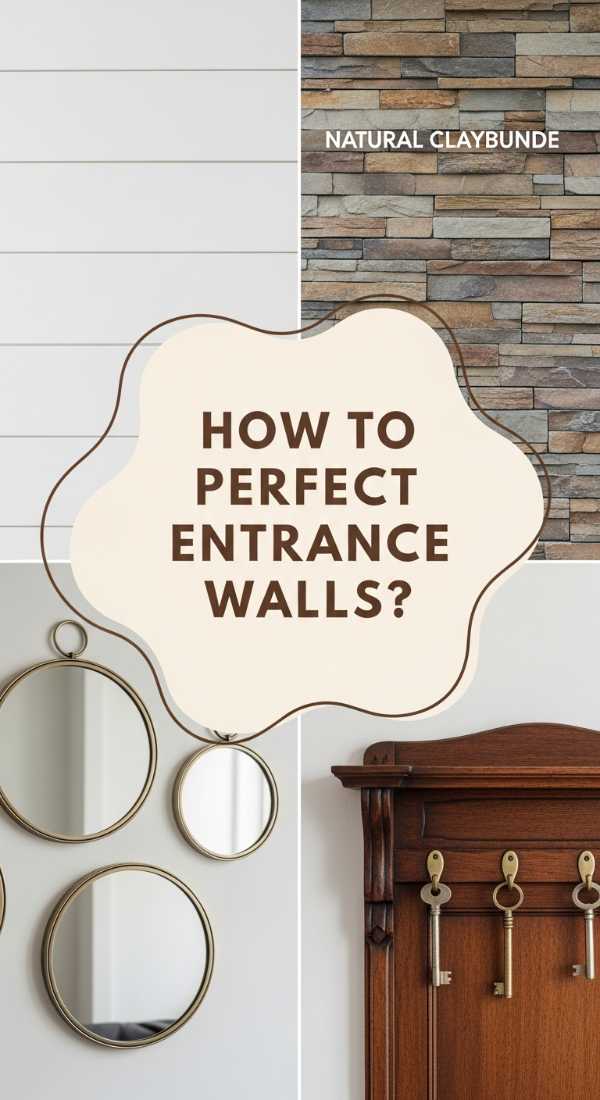
How to Master Entrance Foyer Wall Design for a Grand Welcome
Why we love this
The foyer is your home’s handshake, and a grand wall design ensures it’s a memorable one. Incorporating large-scale mirrors or oversized art creates a sense of infinite space and reflects light into the heart of the home. We love the way a well-designed foyer wall uses reflective surfaces and warm metallic accents to create a glow that feels like a warm embrace. It’s about that instant transition from the chaotic outside world into a curated sanctuary of calm and prestige.
Essential Elements:
- Floor-to-ceiling mirror panels or oversized canvas art
- Sconce lighting with warm-tone bulbs
- A sleek console table with a marble top
- Metallic trim (gold or brushed brass)
- Decorative wall hooks or hidden storage
How to make it
- Identify the focal wall directly opposite or adjacent to the door; prep the surface by cleaning it thoroughly with a de-greaser to ensure adhesives bond perfectly.
- Install your oversized mirror or artwork at eye level, which is typically 57-60 inches from the floor to the center of the piece, ensuring it is anchored with heavy-duty toggles.
- Mount wall sconces on either side of the focal piece; position them approximately 60 inches from the floor to provide a soft, flattering glow at face height.
- Add a slim-profile console table beneath the art; ensure there is at least 36 inches of walking clearance to maintain an airy, uncrowded feel.
- Style the surface with a single sculptural vase and a tray for keys, keeping the look edited and high-end rather than cluttered.
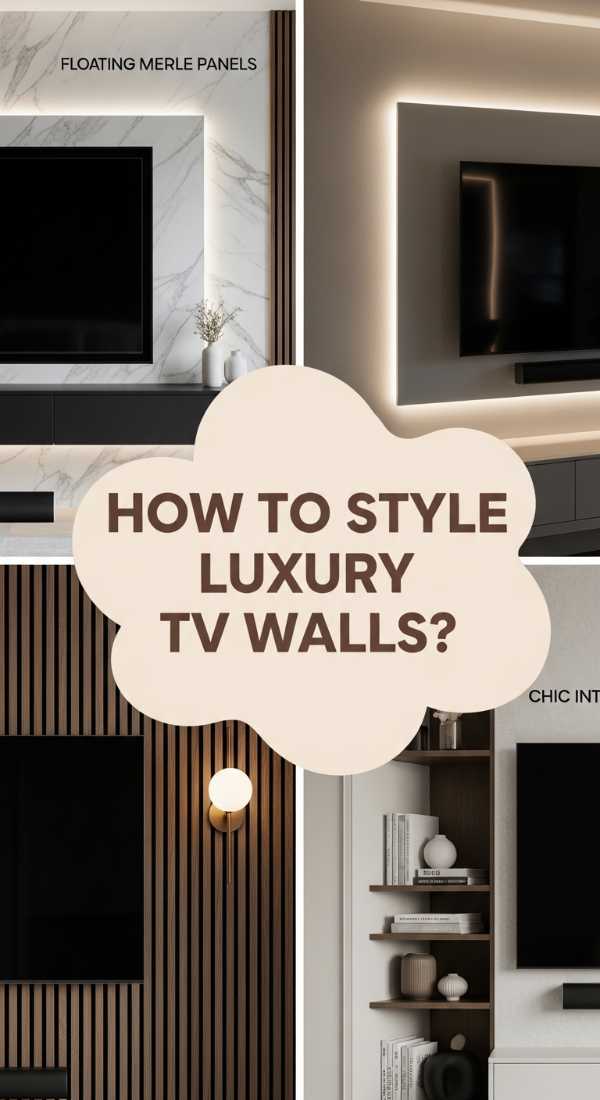
How to Style a TV Wall Design for Luxury Cinema Vibes

Why we love this
The modern home cinema experience is all about the disappearance of technology into the design. We love a TV wall that uses dark, moody textures—like slatted wood or charcoal stone—to absorb light and make the screen pop. It’s a sensory feast where the tactile warmth of the wood meets the high-tech glow of the screen, creating an immersive atmosphere that feels like a private VIP screening room. It turns a functional appliance into a centerpiece of luxury minimalism.
Essential Elements:
- Vertical wood slats or 3D wall panels
- Recessed LED backlighting strips
- Floating media console
- In-wall cable management kit
- Dark-toned matte paint
How to make it
- Install an in-wall cable routing kit behind where the TV will sit; this is the most critical step to achieving a clean, professional luxury look without messy wires.
- Apply a dark, non-reflective paint to the wall area to minimize glare and enhance the contrast of the television screen.
- Attach vertical wood slats across the wall using a spacer block to ensure perfectly even 1/2-inch gaps; use a level constantly to prevent any leaning.
- Mount a floating console at least 12 inches off the ground to create the illusion of more floor space, which is a hallmark of high-end modern design.
- Place LED strips behind the TV or along the top of the slats; set the color to a warm white (2700K) to provide bias lighting that reduces eye strain and adds a cinematic glow.
How to Craft Accent Wall Designs for Bold Visual Impact
Why we love this
An accent wall is where you get to play with drama and scale. We love the use of deep, saturated pigments or textured wallpapers that tell a story the moment you walk in. Whether it’s a rich navy lime-wash or a geometric metallic paper, this design choice acts as the room’s heartbeat. It creates a focal point that anchors the furniture and draws the eye, providing a sophisticated backdrop for conversations and quiet moments alike.
Essential Elements:
- Specialty paint (Lime-wash, Suede, or Metallic)
- Textured wallpaper or fabric panels
- Painter’s tape (Gold standard for sharp lines)
- Large-scale brushes or specialized rollers
- Accent lighting (picture lights or spots)
How to make it
- Select a wall that naturally draws the eye, such as the one behind a bed or a sofa, and repair any imperfections with spackle for a perfectly flat starting surface.
- If using lime-wash, apply the first coat in large, random “X” motions using a block brush to create the signature clouded, movement-heavy texture.
- Wait for the first coat to dry completely (usually 4-6 hours) before applying a second coat with smaller, tighter motions to deepen the color and texture.
- If using wallpaper, apply a high-quality primer first to allow for easy removal later, and use a plastic smoother to push out air bubbles from the center to the edges.
- Finish by installing a dedicated picture light above a central piece of art to highlight the texture and color of your new accent wall.
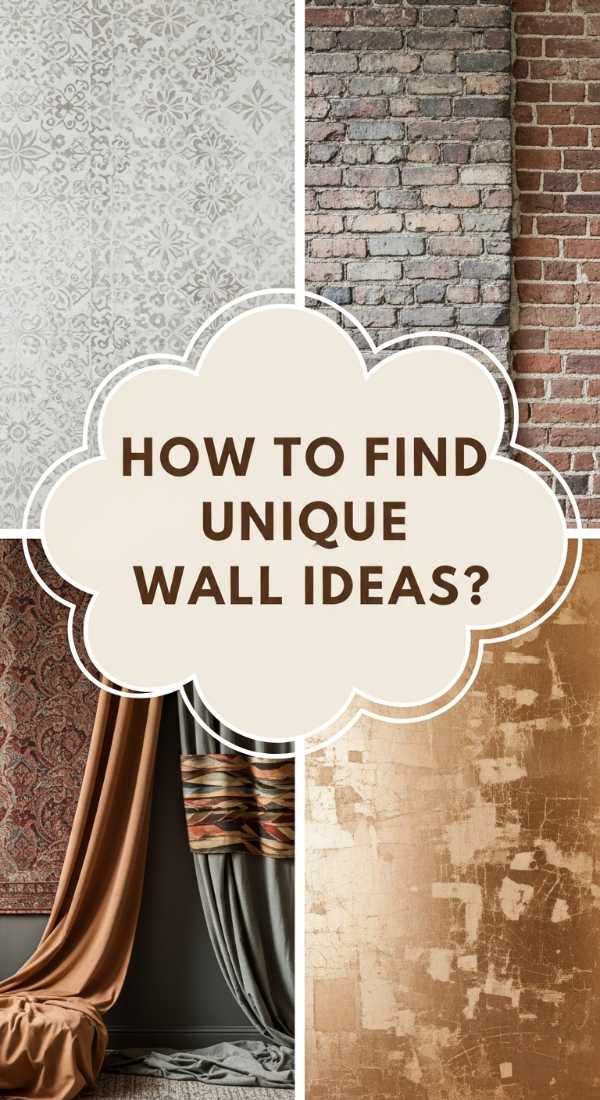
How to Discover Unique Wall Design Ideas for Creative Living
Why we love this
Creative living is about breaking the rules in the most elegant way possible. We love walls that incorporate unexpected materials like leather tiles, antique salvaged wood, or a curated floor-to-ceiling gallery of personal history. This approach feels deeply personal and curated, moving away from “catalog” looks toward a space that breathes with your specific journey. It’s a sensory delight of mismatched frames, varying textures, and a story behind every single piece.
Essential Elements:
- Eclectic collection of frames and art
- Alternative materials (cork, leather, or reclaimed timber)
- Standoff mounts for 3D objects
- Directional ceiling tracks for lighting
- Heavy-duty mounting hardware
How to make it
- Lay your entire gallery out on the floor first to find the perfect balance; mix mediums like oil paintings, sketches, and 3D objects for maximum visual interest.
- Use butcher paper to trace each item, tape the paper to the wall, and adjust until the composition feels harmonious—aim for a 2-3 inch gap between pieces.
- Install directional track lighting on the ceiling, angling the spots to hit the center of your most significant pieces to create a professional gallery vibe.
- For textured materials like leather tiles, use a specialized contact adhesive, starting from the center of the wall and working outward to ensure symmetry.
- Introduce one “hero” piece that is significantly larger or more colorful than the rest to act as the visual anchor for the creative chaos.
How to Install an Indoor Green Wall for a Natural Sanctuary
Why we love this
While the lush wall is about abundance, the natural sanctuary green wall is about serenity and Zen. We love using preserved moss or low-maintenance air plants to create a wall that looks like a slice of a quiet forest floor. It requires no watering, yet it offers the same tactile soft texture and vibrant greens of a living system. It’s the perfect solution for high-end spaces where you want the beauty of nature without the maintenance, providing a permanent sense of spring.
Essential Elements:
- Preserved Reindeer or Sheet Moss
- Wooden shadow box frames
- Hot glue gun and industrial adhesive
- Natural driftwood accents
- Low-UV environment (to prevent fading)
How to make it
- Construct or purchase shallow wooden shadow box frames (approx. 2 inches deep) and stain them in a dark walnut or ebony finish for a luxury contrast.
- Clean the preserved moss by gently shaking off any loose particles; avoid getting it wet as this will damage the preservation salts.
- Apply hot glue liberally to the back of the moss and press it into the frame, mixing different shades of green to mimic natural growth patterns.
- Incorporate pieces of driftwood or stone among the moss to add structural height and a more organic, “found in nature” appearance.
- Mount the frames in a grouping of three (a triptych) on a wall that receives indirect light to keep the moss soft and vibrant for years.
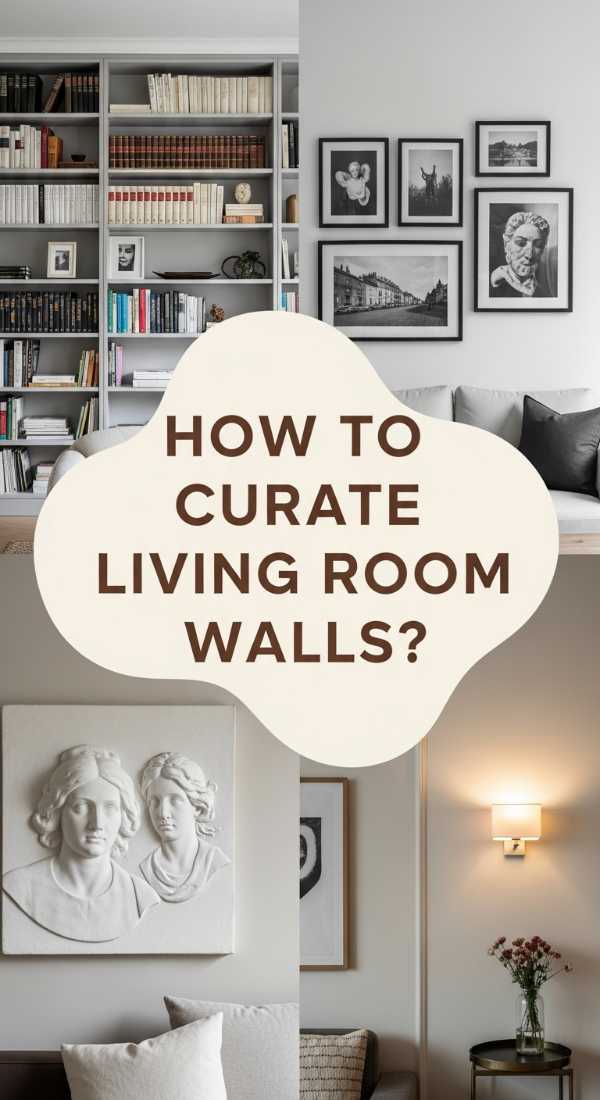
How to Curate Living Room Wall Designs for Timeless Sophistication
Why we love this
Timeless sophistication is found in materials that have been revered for centuries: marble, stone, and fine plaster. We love a living room wall that utilizes large-format porcelain slabs that mimic rare Calacatta marble. The cool touch of the stone and the continuous, flowing veins create a sense of permanence and grandeur. It feels like living inside a piece of fine sculpture, where the wall itself is the most expensive “furniture” in the house.
Essential Elements:
- Large-format porcelain or marble slabs
- Specialized tile adhesive and spacers
- Wet saw with diamond blade
- Epoxy grout in a matching color
- Professional stone sealer
How to make it
- Ensure the wall is structurally reinforced to handle the weight of stone or large-format tile; use cement board instead of standard drywall.
- Dry-lay the slabs on the floor to match the “veining” patterns (book-matching) so that the lines flow seamlessly from one panel to the next.
- Apply a thick layer of thin-set mortar to both the wall and the back of the slab (back-buttering) to ensure 100% coverage and no air pockets.
- Use a leveling system with clips and wedges to ensure the slabs are perfectly flat and flush with one another, as even a 1mm lip can ruin the luxury effect.
- Grout the tiny seams with a color-matched epoxy grout, then polish the entire surface with a microfiber cloth to achieve a high-gloss, mirror-like finish.
How to Perfect an Entrance Foyer Wall Design for Instant Charm

Why we love this
Charm is about the details that make a house feel like a home. We love using high-end, hand-painted wallpapers or delicate shiplap in a foyer to create a soft, inviting texture. It’s the difference between a house that looks like a showroom and one that looks like a lived-in legacy. The scent of a luxury candle on a wood console, paired with a wall that feels soft to the eye, creates an immediate emotional connection for anyone who enters.
Essential Elements:
- Designer wallpaper (floral or subtle texture)
- Sconce lighting with linen shades
- Vintage-inspired wall hooks
- Traditional crown molding
- Fresh seasonal greenery
How to make it
- Prep the foyer wall by sanding it smooth and applying a wallpaper primer; this ensures the paper adheres well and doesn’t peel in entry-way humidity.
- Apply the wallpaper using the “paste-the-wall” method for easier adjustment, ensuring the patterns align perfectly at eye level.
- Install a decorative peg rail or high-end brass hooks at 60 inches high; space them 8 inches apart for a balanced, functional look.
- Mount a single, high-quality linen-shade sconce above the console table to provide a soft, diffuse light that warms up the wallpaper’s colors.
- Add a small bench with a velvet cushion against the wall to provide a tactile contrast to the paper and wood elements.
How to Modernize TV Wall Design for Luxury Minimalism
[IMAGE_10]
Why we love this
Luxury minimalism is the art of subtraction. We love a TV wall that is completely flush, where the screen is recessed into a custom-built niche. This removes the visual “noise” of a protruding device and treats the screen as a digital art piece. The look is incredibly sleek, clean, and forward-thinking, providing a sense of order and calm that allows the architectural lines of the home to shine through.
Essential Elements:
- Custom drywall niche
- Recessed TV mount
- Hidden media closet or cabinet
- Smart home integration (IR extenders)
- Matte white or soft gray finish
How to make it
- Frame a custom niche into the wall that is exactly 2 inches wider and taller than your television to allow for ventilation and a “shadow gap” look.
- Install a recessed “media box” inside the niche to house outlets and HDMI ports, ensuring no plugs interfere with the TV sitting flush.
- Use a heavy-duty, ultra-slim articulating mount that allows the TV to be pushed completely back into the niche.
- Apply a high-end matte paint to the inside of the niche in a slightly darker shade than the wall to create a sense of depth.
- Program a smart remote or hub so that all peripheral devices (cable boxes, consoles) can be hidden in a separate closet, keeping the wall 100% wire-free.
Conclusion
Elevating your space through intentional wall design is one of the most rewarding journeys you can take in home ownership. Whether you choose the living energy of a green wall, the structured elegance of molding, or the sleek lines of a minimalist TV setup, you are doing more than just decorating—you are defining the atmosphere of your life. I hope these ideas inspire you to look at your walls not as boundaries, but as invitations to create something truly extraordinary. Remember, luxury isn’t about the price tag; it’s about the feeling of a space that has been curated with love, care, and a vision for high-end comfort.