
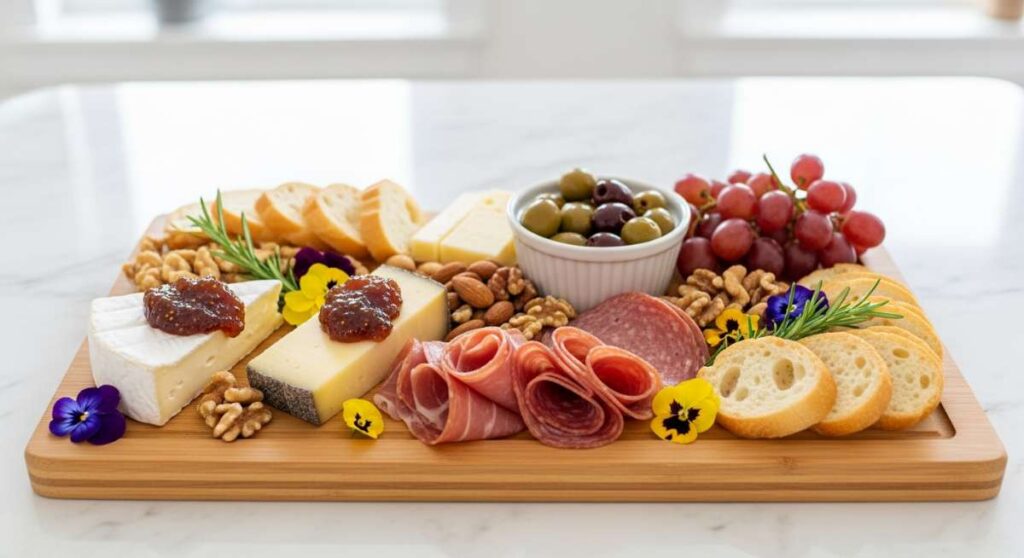
There’s something truly magical about gathering around a table, isn’t there? It’s where the best stories are shared, where belly laughs echo against the walls, and where the stress of the day simply melts away into the steam rising from a shared plate. Recently, I’ve found that the secret to being a relaxed host isn’t about fancy white-tablecloth service; it’s about the ‘board’ mentality—creating interactive, beautiful, and accessible food spreads that invite everyone to dig in and stay a while.
We’ve all seen those viral food boards across social media, and while they look like works of art, they are actually the ultimate hack for effortless entertaining. Whether it’s a lazy Sunday brunch or a Friday night get-together, shifting your focus from individual plating to a communal food board changes the entire energy of the room. It’s less about perfection and more about the tactile, sensory experience of sharing a meal made with love.
In this guide, I’m breaking down ten of my favorite viral-inspired food board components. From the creamiest pastas to the fluffiest pancakes, these are the recipes that will turn your next gathering into a memory your friends won’t stop talking about. Let’s get cooking and styling!
How to make creamy pasta?
Why we love this
There is nothing quite as comforting as a bowl of pasta that feels like a warm hug. This creamy version is all about the luxurious, velvety texture that coats every single strand of noodle, creating a glossy finish that looks like it came straight from a Tuscan kitchen. As you toss the pasta, the aroma of toasted garlic and sharp parmesan fills the air, promising a rich, savory experience. The silkiness of the sauce against the al dente bite of the pasta creates a mouthfeel that is pure indulgence, making it the undeniable star of any dinner board.
Ingredients
- 1 lb Fettuccine or Pappardelle
- 2 cups heavy cream
- 1/2 cup unsalted butter
- 1 cup freshly grated Parmigiano-Reggiano
- 3 cloves garlic, minced
- Fresh parsley, finely chopped
- Sea salt and cracked black pepper
- Reserved pasta water
How to make it
- Bring a large pot of water to a vigorous boil and salt it generously; it should taste like the sea to properly season the pasta from the inside out.
- Add your pasta and cook until it is just shy of al dente—usually about 2 minutes less than the package instructions—as it will finish cooking in the sauce.
- While the pasta boils, melt the butter in a large skillet over medium-low heat. Once foaming, add the minced garlic and sauté for 1-2 minutes until fragrant but not browned, as burnt garlic will turn the sauce bitter.
- Pour in the heavy cream and bring to a gentle simmer. Let it reduce for about 3-5 minutes, stirring frequently with a whisk until it thickens slightly and can coat the back of a spoon.
- Just before draining the pasta, scoop out 1 cup of the starchy pasta water. This is liquid gold for emulsifying your sauce later.
- Transfer the pasta directly into the skillet with the cream. Sprinkle the grated cheese over the top and toss vigorously with tongs.
- Slowly add the reserved pasta water, 1/4 cup at a time, while tossing over low heat. The starch and cheese will emulsify into a glossy, clingy sauce that isn’t watery or broken.
- Season with salt and plenty of cracked pepper, garnish with parsley, and serve immediately while the texture is at its peak silkiness.
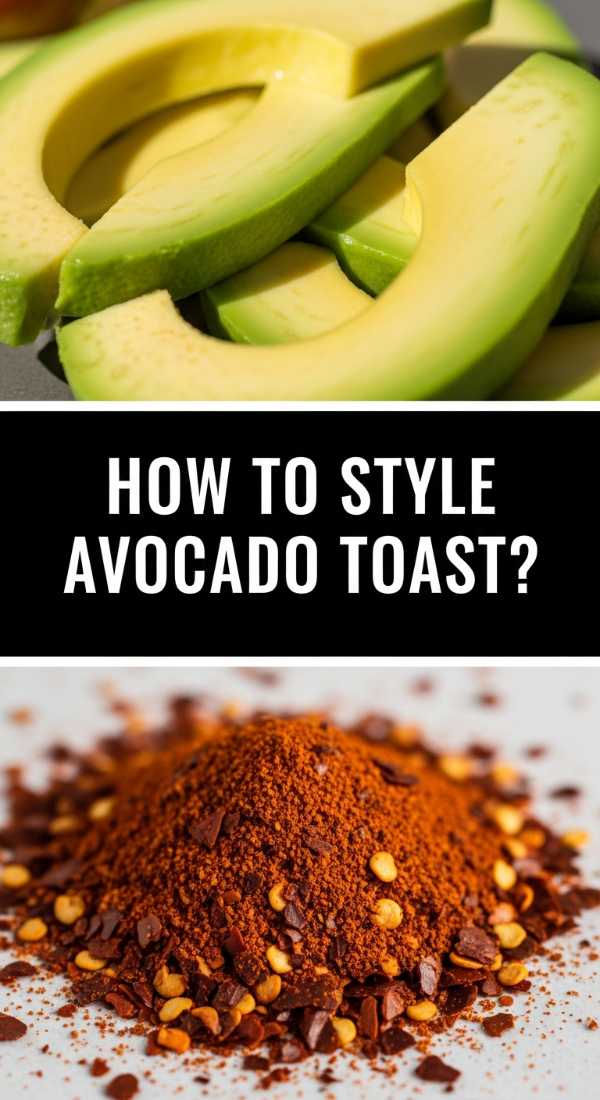
How to style avocado toast?

Why we love this
Avocado toast is the ultimate canvas for culinary creativity, and styling it for a board is all about the contrast of textures and colors. Imagine a thick slice of sourdough, toasted to a deep golden brown, topped with a vibrant, lime-green mash that is both buttery and bright. We love the way the richness of the avocado is cut by the zing of citrus and the crunch of seeds or radishes. It’s a visual feast that feels as good as it tastes, offering a satisfying crunch followed by a creamy, melt-in-your-mouth center that makes every bite feel like a gourmet treat.
Ingredients
- Thick-cut sourdough bread
- 2 ripe Hass avocados
- 1 lemon (for juice and zest)
- Red pepper flakes
- Radishes, thinly sliced
- Everything Bagel seasoning or hemp hearts
- Microgreens
- Extra virgin olive oil
How to make it
- Toast your sourdough slices in a toaster or under a broiler until the edges are dark golden and the center is sturdy enough to hold the weight of the toppings.
- In a small bowl, halve the avocados and remove the pits. Scoop the flesh into the bowl and add a squeeze of lemon juice and a pinch of salt.
- Use a fork to mash the avocado, but keep it slightly chunky; this provides a more interesting texture and prevents the toast from becoming soggy.
- Spread a thick, generous layer of the mash onto the toast, using a swirling motion with the back of a spoon to create small ‘wells’ for the oil to sit in.
- Layer the thinly sliced radishes in a shingle pattern across one side for a professional, tiered look.
- Drizzle a high-quality extra virgin olive oil over the top, letting it pool slightly in the avocado swirls.
- Sprinkle with red pepper flakes for a hint of heat and Everything Bagel seasoning for a savory crunch.
- Finish with a handful of microgreens and a pinch of lemon zest to add height and a pop of fresh color before arranging on your board.
How to make smoothie bowls?

Why we love this
A smoothie bowl is essentially a vibrant, edible rainbow that brings a burst of energy to your morning. We love the thick, soft-serve-like consistency that makes it feel like eating dessert for breakfast, combined with the icy freshness of frozen fruit. The magic happens in the toppings—the contrast between the cold, smooth base and the crunchy granola, juicy berries, and creamy nut butters. It’s a sensory delight that smells of tropical vanilla and fresh berries, providing a refreshing and nutrient-dense start to the day that looks stunning on a breakfast board.
Ingredients
- 2 cups frozen mixed berries
- 1 frozen banana (sliced)
- 1/2 cup Greek yogurt or coconut cream
- 1/4 cup almond milk (use sparingly)
- Toppings: Granola, chia seeds, sliced strawberries, kiwi, and honey
How to make it
- Start with a high-powered blender. It is crucial that the fruit is completely frozen to achieve that thick, spoonable texture rather than a liquid drink.
- Add the frozen banana, berries, and yogurt to the blender first. Add only a splash of almond milk—about 2 tablespoons to start.
- Pulse the blender on a low setting. You will likely need to stop and scrape down the sides or use a tamper to push the frozen fruit into the blades.
- Continue blending and adding milk only 1 tablespoon at a time until the mixture is smooth but so thick it barely moves in the blender.
- Scoop the mixture into chilled bowls; chilling the bowls prevents the base from melting while you are styling the toppings.
- Smooth the top with a spoon and then begin your ‘rows.’ Start with a line of granola for crunch, followed by a line of perfectly sliced fruit.
- Sprinkle seeds in a decorative swirl and finish with a generous drizzle of honey or nut butter for a professional finish.
How to bake soft cookies?

Why we love this
There is a specific kind of joy found in a cookie that is crisp on the very edges but stays incredibly soft, doughy, and chewy in the center. As they bake, the scent of caramelized sugar and high-quality butter wafts through the house, creating an instant feeling of coziness. These cookies are all about the contrast—the snap of a dark chocolate chunk against the tender, pale crumb of the dough. They are the ultimate crowd-pleaser for a dessert board, offering a nostalgic sweetness that feels sophisticated and homemade all at once.
Ingredients
- 1 cup salted butter, softened
- 1 cup brown sugar, packed
- 1/2 cup white sugar
- 2 large eggs (room temperature)
- 1 tbsp vanilla extract
- 3 cups all-purpose flour
- 1 tsp baking soda
- 2 cups dark chocolate chunks
- Flaky sea salt
How to make it
- Cream the softened butter and both sugars in a stand mixer on medium-high for at least 3-5 minutes. You are looking for a pale, fluffy texture which indicates the sugar has partially dissolved.
- Add the eggs one at a time, beating well after each addition, then stir in the vanilla.
- In a separate bowl, whisk together the flour and baking soda. Sifting isn’t strictly necessary, but it helps ensure no lumps of baking soda remain.
- Turn the mixer to the lowest setting and add the dry ingredients. Mix until just combined—over-mixing at this stage develops gluten and makes the cookies tough.
- Fold in the chocolate chunks by hand using a spatula.
- Refrigerate the dough for at least 2 hours, or ideally overnight. This allows the flour to hydrate and the fats to chill, which prevents the cookies from spreading too thin.
- Preheat your oven to 350°F (175°C). Scoop large balls of dough onto a parchment-lined sheet.
- Bake for 9-11 minutes. The key is to take them out when the edges are just starting to turn golden but the centers still look slightly underbaked and ‘wet.’
- Let them cool on the pan for 10 minutes to set, then sprinkle with flaky sea salt to balance the sugar.
How to cook glazed salmon?

Why we love this
Glazed salmon is the perfect centerpiece for a savory board because it manages to be both light and incredibly flavorful. The glaze caramelizes under the heat, creating a sticky, sweet, and salty crust that shimmers under the light, while the interior remains moist, pink, and flaky. We love the combination of the fatty fish with a bright, ginger-soy glaze that cuts through the richness. It’s an elegant dish that feels upscale but is surprisingly simple to master, providing a beautiful focal point for a healthy, high-protein spread.
Ingredients
- 4 salmon fillets
- 1/4 cup soy sauce
- 2 tbsp honey or maple syrup
- 1 tbsp grated fresh ginger
- 2 cloves garlic, grated
- 1 tsp toasted sesame oil
- Squeeze of lime
- Green onions and sesame seeds for garnish
How to make it
- Pat the salmon fillets completely dry with a paper towel. Moisture is the enemy of a good sear and a sticky glaze.
- In a small bowl, whisk together the soy sauce, honey, ginger, garlic, sesame oil, and lime juice until the honey is fully incorporated.
- Place the salmon in a shallow dish and pour half of the glaze over it. Let it marinate at room temperature for 15-20 minutes while you preheat your pan.
- Heat a non-stick or cast-iron skillet over medium-high heat with a teaspoon of neutral oil.
- Place the salmon skin-side up in the hot pan. Sear for 3-4 minutes without moving it to develop a golden-brown crust.
- Flip the fillets carefully. Pour the remaining half of the glaze into the pan.
- Reduce the heat to medium and use a spoon to continuously baste the salmon with the bubbling glaze as it thickens.
- Cook for another 3-4 minutes until the salmon flakes easily with a fork and the glaze is thick and tacky.
- Remove from heat, garnish with sliced green onions and sesame seeds, and serve warm.
How to make street tacos?

Why we love this
Street tacos are all about the explosion of vibrant flavors and the fun of a build-your-own board. We love the charred, smoky aroma of the corn tortillas hitting a hot flame, paired with the succulent, seasoned proteins and the sharp bite of raw onions and cilantro. Every taco is a perfect balance of savory, acidic, and spicy. The tactile experience of folding a warm tortilla around fresh ingredients makes for an interactive dining experience that feels festive, casual, and incredibly satisfying for a crowd.
Ingredients
- Small corn tortillas
- 1 lb flank steak or chicken thighs
- 1 white onion, finely diced
- Fresh cilantro, chopped
- 2 limes, cut into wedges
- Radishes, thinly sliced
- Taco seasoning (cumin, chili powder, garlic powder)
- Hot sauce or salsa verde
How to make it
- Season your meat generously with the spice blend and a bit of oil. Let it sit for at least 30 minutes to allow the flavors to penetrate.
- Sear the meat over high heat in a cast-iron skillet or on a grill to get a deep char on the outside while keeping the inside juicy. Once cooked, let it rest for 5 minutes before dicing into small, bite-sized cubes.
- The most important step for the tortillas: Heat them directly over a gas flame for 10-15 seconds per side using tongs until they are charred at the edges and pliable. If using electric, use a dry, hot skillet.
- Keep the warm tortillas wrapped in a clean kitchen towel to steam slightly and stay soft.
- To assemble, double up the tortillas (street style) and fill with a generous portion of meat.
- Top with a sprinkle of the raw diced onions and a heavy handful of fresh cilantro. The sharpness of the onion is essential to cut through the fat of the meat.
- Arrange on a board with lime wedges and radish slices, instructing guests to squeeze the lime over the taco right before eating to wake up all the flavors.
How to flip fluffy pancakes?

Why we love this
There is a nostalgic comfort in a stack of perfectly fluffy pancakes that are airy on the inside with a subtle buttery crisp on the outside. We love the way they act as a sponge for maple syrup, soaking up all that golden sweetness without becoming mushy. The gentle scent of vanilla and malted flour on a Saturday morning is enough to bring anyone to the table. These are the ultimate breakfast board staples, providing a soft, pillowy texture that pairs beautifully with fresh berries and crispy bacon.
Ingredients
- 2 cups all-purpose flour
- 2 tbsp sugar
- 1 tbsp baking powder
- 1/2 tsp salt
- 1 1/2 cups milk
- 1 large egg
- 1/4 cup melted butter
- 1 tsp vanilla extract
How to make it
- Whisk your dry ingredients (flour, sugar, baking powder, salt) in a large bowl. Ensure there are no large clumps of flour.
- In a separate jug, mix the milk, egg, melted butter, and vanilla.
- Make a well in the dry ingredients and pour in the wet. Stir with a spatula until *just* combined. Stop immediately when the flour streaks disappear—lumps are your friend here! Over-mixing is the #1 reason for flat pancakes.
- Let the batter rest for 10 minutes. This allows the baking powder to activate and the flour to hydrate, resulting in a much fluffier texture.
- Heat a griddle or non-stick pan over medium heat. Test the heat by dropping a bead of water; it should dance and sizzle.
- Lightly grease with butter and ladle 1/4 cup of batter per pancake.
- Wait for bubbles to form on the surface and the edges to look set and matte. This is the ‘tell’ that it’s time to flip.
- Flip in one smooth motion and cook for only 1-2 minutes on the second side until golden brown. Serve stacked high with a pat of butter.
How to make homemade pizza?

Why we love this
Homemade pizza is a labor of love that rewards you with a crust that has that perfect ‘chew’ and a sauce that tastes of sun-ripened tomatoes. We love the charred, bubbly cheese that pulls away in long, gooey strands and the way the bottom of the crust develops those characteristic ‘leopard spots’ of char. It’s a rustic, sensory experience that turns a meal into a craft. Setting out a pizza board with different toppings allows everyone to customize their slice, making the process of making and eating it just as enjoyable as the final bite.
Ingredients
- 1 lb pizza dough (room temperature)
- 1/2 cup San Marzano tomato sauce
- 8 oz fresh mozzarella, sliced or torn
- Fresh basil leaves
- Extra virgin olive oil
- Cornmeal (for the pan)
- Red pepper flakes
How to make it
- Preheat your oven to its highest possible setting (usually 500°F/260°C) with a pizza stone or inverted baking sheet inside for at least 45 minutes. You need a screaming hot surface to get a crisp crust.
- On a floured surface, gently stretch your room-temperature dough. Avoid using a rolling pin as it knocks out the air bubbles; instead, use your knuckles to stretch it from the center outwards.
- Sprinkle a pizza peel or a flat sheet with cornmeal and lay the dough on top. Shake it slightly to ensure it slides easily.
- Spread a thin layer of sauce, leaving a 1-inch border for the crust. Use less sauce than you think; too much will make the dough soggy.
- Add the fresh mozzarella pieces and a drizzle of olive oil.
- Slide the pizza onto the hot stone in the oven. Bake for 8-12 minutes, watching closely. You want the crust to be puffed and charred and the cheese to be bubbling and slightly browned.
- Remove from the oven and immediately top with fresh basil. The residual heat will wilt the basil just enough to release its oils without turning it black.
- Slice and serve on a wooden board for that authentic pizzeria feel.
How to make aesthetic salads?
Why we love this
An aesthetic salad is the antidote to the boring side dish; it’s a masterpiece of color, crunch, and vitality. We love the mixture of different greens—from peppery arugula to crisp butter lettuce—tossed with unexpected elements like jewel-toned pomegranate seeds, creamy goat cheese, and toasted nuts. Every bite offers a different texture and a burst of freshness. It smells of garden herbs and bright citrus vinaigrette, making it a refreshing addition to a heavy food board that cleanses the palate and delights the eyes.
Ingredients
- Mixed greens (Arugula, Radicchio, Spinach)
- 1 English cucumber, shaved into ribbons
- 1/2 cup crumbled goat cheese or feta
- 1/4 cup toasted walnuts or pistachios
- 1/2 cup fresh berries or sliced pear
- Vinaigrette: 3 parts olive oil, 1 part balsamic vinegar, 1 tsp Dijon mustard
- Edible flowers (optional)
How to make it
- Start with very cold, very dry greens. Use a salad spinner to remove every drop of water so the dressing clings to the leaves rather than sliding off.
- Instead of chopping the cucumber, use a vegetable peeler to create long, elegant ribbons. This adds a high-end, ‘styled’ look to the bowl.
- In a small jar, shake the oil, vinegar, and mustard until emulsified. Season with salt and pepper.
- Lightly toss the greens with half the dressing in a large bowl. Don’t over-dress; the leaves should look shiny, not weighed down.
- Transfer the dressed greens to a shallow, wide platter (this shows off more ingredients than a deep bowl).
- Artfully tuck the cucumber ribbons into the greens, creating height and movement.
- Scatter the cheese, nuts, and fruit over the top. By layering them last, you ensure they don’t all sink to the bottom.
- Finish with a few more drops of dressing and a sprinkle of edible flowers or fresh herbs for that ‘viral’ Instagram-worthy finish.
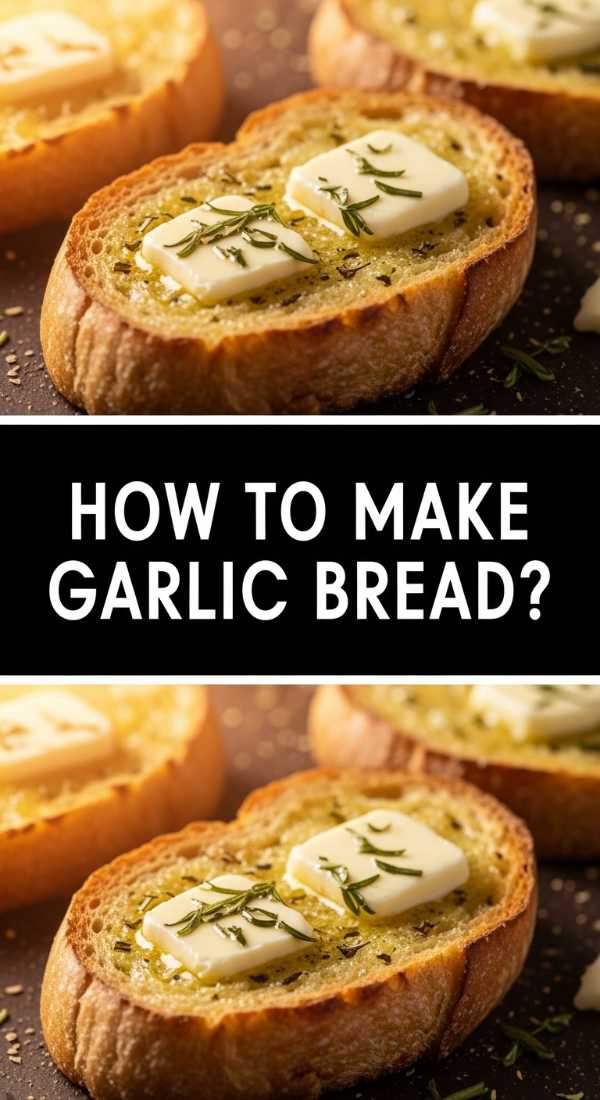
How to make garlic bread?
[IMAGE_10]
Why we love this
Garlic bread is the universal language of deliciousness. We love the way a crusty baguette transforms into a soft, buttery, garlic-infused delight that shatters slightly when you bite into it. The aroma alone—sharp garlic, earthy parsley, and rich butter—is enough to make anyone’s mouth water. It is the ultimate side for a pasta or salad board, perfect for mopping up sauces and adding a savory, salty crunch to the meal. It’s simple, rustic, and always the first thing to disappear from the table.
Ingredients
- 1 large French baguette or Italian loaf
- 1/2 cup unsalted butter, softened
- 4 cloves garlic, mashed into a paste
- 1/4 cup freshly grated Parmesan cheese
- 2 tbsp fresh parsley, minced
- Pinch of salt
How to make it
- Preheat your oven to 375°F (190°C).
- In a small bowl, combine the softened butter, garlic paste, parsley, and a pinch of salt. Use a fork to whip them together until the garlic is evenly distributed throughout the butter.
- Slice the baguette. You can either slice it all the way through into rounds or, for a more impressive presentation, slice it ‘hasselback’ style, cutting 3/4 of the way down so the loaf stays together.
- Generously spread the garlic butter between each slice or over the cut faces of the bread. Don’t be shy; the butter needs to soak into the crumb to create that soft interior.
- Sprinkle the grated Parmesan over the top of the loaf.
- Wrap the loaf in aluminum foil, but leave the very top exposed. This allows the bottom to steam and stay soft while the top gets crispy and the cheese browns.
- Bake for 10-15 minutes. For a final touch of gold, turn on the broiler for the last 60 seconds to brown the edges.
- Serve warm, tucked into a linen-lined basket on your food board.
The Art of the Board
Elevating your hosting game doesn’t require a culinary degree; it just requires a little bit of heart and a focus on beautiful, shared experiences. By taking these viral favorites and presenting them with intention, you create a space where food is more than just sustenance—it’s a reason to connect. So, grab your biggest wooden board, whip up these recipes, and watch as your home becomes the favorite gathering spot for everyone you love. Happy hosting!