
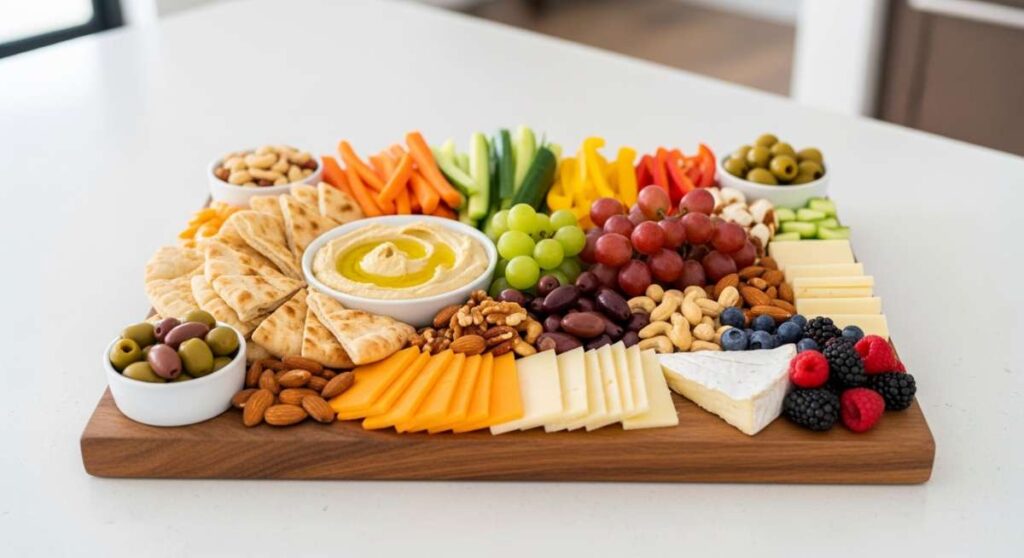
Effortless Entertaining: The Viral Board Trend You Need to Try
There is something inherently magical about a shared meal that doesn’t feel like a chore. We’ve all been there—trying to host a beautiful dinner party while stuck in the kitchen, missing the laughter and the stories happening just a room away. That’s why I fell head over heels for the viral ‘Dinner Board’ trend. It’s not just about the food; it’s about the intimacy of reaching across the table, the casual grazing, and the beautiful mess of colors and textures that make guests feel immediately at home.
The secret to a truly viral board isn’t just aesthetic; it’s about variety and execution. By combining small portions of different high-quality proteins and perfectly cooked sides, you create a tapestry of flavor that caters to everyone. Whether you are hosting a cozy girls’ night or a Sunday family brunch, these techniques will elevate your board from a simple snack platter to a gourmet experience that people will be talking about long after the last bite is gone.
How to cook juicy chicken?
Why we love this
There is nothing quite as satisfying as a piece of chicken that boasts a crackling, golden-brown skin while remaining impossibly succulent on the inside. When you slice into a perfectly cooked breast or thigh, the clear juices should run freely, mingling with the herbs and aromatics on your board. The aroma of toasted rosemary and garlic creates an inviting atmosphere that signals a meal made with love, providing a hearty, savory anchor for your spread that pairs beautifully with almost any dipping sauce.
Ingredients
- 4 boneless, skin-on chicken breasts or thighs
- 2 tablespoons extra virgin olive oil
- 3 cloves garlic, smashed
- Fresh sprigs of rosemary and thyme
- Flaky sea salt and cracked black pepper
- 2 tablespoons unsalted butter
How to make it
- Pat the chicken extremely dry with paper towels; moisture is the enemy of a good sear and juicy interior.
- Season both sides generously with salt and pepper, letting the meat sit at room temperature for about 15 minutes to ensure even cooking.
- Heat a heavy-bottomed or cast-iron skillet over medium-high heat until a drop of water sizzles and evaporates instantly.
- Add the olive oil and place the chicken skin-side down, pressing gently with a spatula to ensure full contact with the pan.
- Cook undisturbed for 5-7 minutes until the skin is deep golden and releases easily from the pan; if it sticks, it’s not ready.
- Flip the chicken and immediately add the butter, garlic, and herbs to the pan, letting the butter foam and brown.
- Toss the melting butter over the chicken continuously (basting) for another 4-5 minutes until the internal temperature reaches 165°F (74°C).
- Remove from heat and let the chicken rest for at least 8 minutes before slicing to allow the juices to redistribute throughout the fibers.
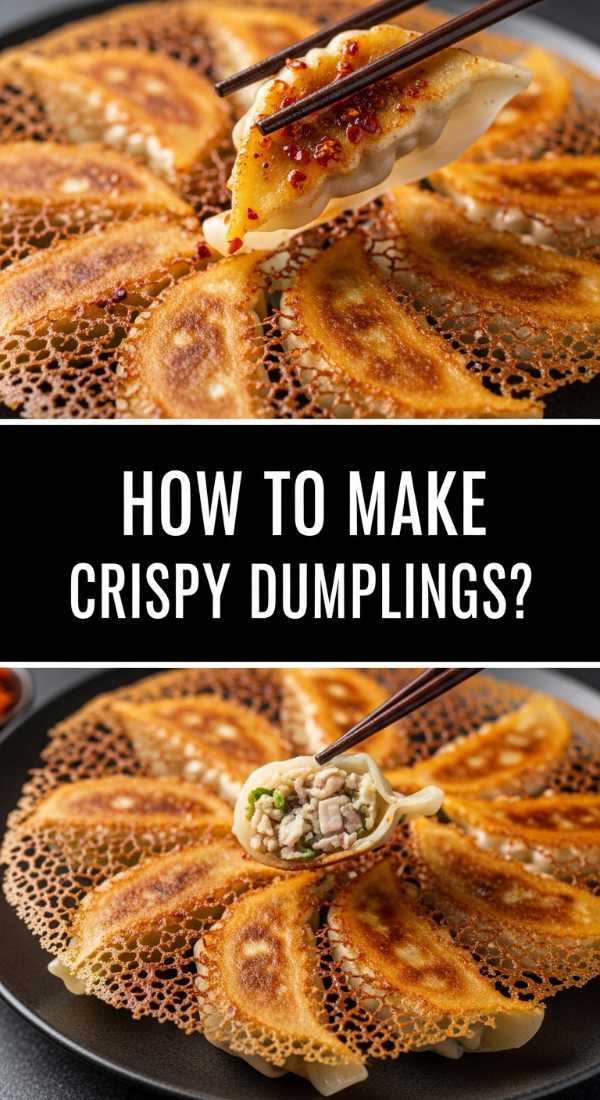
How to make crispy dumplings?

Why we love this
The allure of a perfect dumpling lies in the dramatic contrast of textures—the top is silky, delicate, and translucent, while the bottom features a lacy, golden-brown ‘skirt’ that shatters with a satisfying crunch. As you bite through the dough, you’re met with a burst of savory steam and a ginger-scented filling that dances on the palate. They add a playful, interactive element to any board, especially when served with a spicy chili oil that pools in the ridges of the crispy base.
Ingredients
- 1 pack of high-quality frozen or fresh dumplings
- 1 tablespoon neutral oil (grapeseed or vegetable)
- 1/2 cup water
- 1 teaspoon cornstarch (for the extra-crispy skirt)
- Toasted sesame seeds and scallions for garnish
How to make it
- Whisk the cornstarch into your 1/2 cup of water until completely dissolved; this creates that professional ‘webbed’ lace effect.
- Heat a non-stick pan over medium heat with the neutral oil until shimmering but not smoking.
- Arrange the dumplings in a circular pattern, flat-side down, and fry for 2-3 minutes until the bottoms are light golden brown.
- Carefully pour the water-cornstarch mixture into the pan and immediately cover with a tight-fitting lid to trap the steam.
- Let the dumplings steam for 5-6 minutes; the steam cooks the dough and filling while the bottom remains in contact with the heat.
- Remove the lid and continue to cook for 2-3 more minutes until all the water has evaporated and a thin, crispy brown crust forms across the bottom of the pan.
- Invert a plate over the pan and flip the dumplings out in one piece to show off the unified crispy skirt.
How to prepare zesty shrimp?

Why we love this
Shrimp are the jewels of a grazing board, offering a bright, oceanic sweetness that cuts through richer, heavier meats. When prepared with plenty of citrus and spice, they become incredibly addictive, offering a firm, snappy texture that is light yet satisfying. The scent of charred lemon and toasted red pepper flakes drifting from the board is enough to make anyone’s mouth water, and their vibrant pink hue adds a stunning pop of color that looks incredible in photos.
Ingredients
- 1 lb large shrimp, peeled and deveined
- Zest and juice of 2 lemons
- 4 cloves garlic, minced
- 1/2 teaspoon red pepper flakes
- 3 tablespoons cold butter, cubed
- Fresh parsley, finely chopped
How to make it
- Toss the shrimp in a bowl with half the lemon zest, minced garlic, a splash of oil, and the red pepper flakes, letting them marinate for 10 minutes.
- Heat a large skillet over high heat; shrimp cook very quickly, so you want maximum heat for a fast sear without overcooking the center.
- Add the shrimp in a single layer, ensuring they aren’t crowded, and sear for about 90 seconds per side until they turn opaque and form a slight char.
- Reduce heat to low and add the lemon juice and the cold butter cubes, swirling the pan constantly to create a glossy, emulsified sauce.
- As soon as the butter is melted and the shrimp are coated in a thick, zesty glaze, remove them from the heat immediately.
- Finish with the remaining lemon zest and fresh parsley to maintain a bright, herbaceous profile.
How to make authentic tacos?
Why we love this
There is a rustic, unpretentious soul to authentic tacos that brings a sense of celebration to the table. The smell of toasted corn tortillas, slightly charred on the edges, creates a nostalgic warmth that pairs perfectly with tender, spice-rubbed meats. Every bite is a balance of earthy corn, bright lime, and the sharp bite of raw onions and cilantro. They are the ultimate customizable food, allowing guests to build their own tiny masterpieces right there on the board.
Ingredients
- Small corn tortillas
- 1 lb skirt steak or pork shoulder, thinly sliced
- 1 white onion, finely diced
- Fresh cilantro, chopped
- Lime wedges
- Dried oregano and cumin rub
How to make it
- Rub your meat with a blend of cumin, oregano, salt, and pepper, letting it sit for 20 minutes to penetrate the fibers.
- Sear the meat over high heat in a cast-iron pan or over an open flame until deeply browned and slightly crispy on the edges.
- While the meat rests, heat your corn tortillas directly over a gas flame or on a dry griddle for 30 seconds per side until they puff slightly and develop charred spots.
- Keep the tortillas warm by wrapping them in a clean kitchen towel; this steams them slightly and makes them pliable so they don’t crack.
- Dice the meat into small, bite-sized pieces across the grain to ensure every taco is easy to chew.
- Assemble by placing a generous portion of meat on the tortilla, topped with a sprinkle of onions and cilantro, and a heavy squeeze of fresh lime juice.
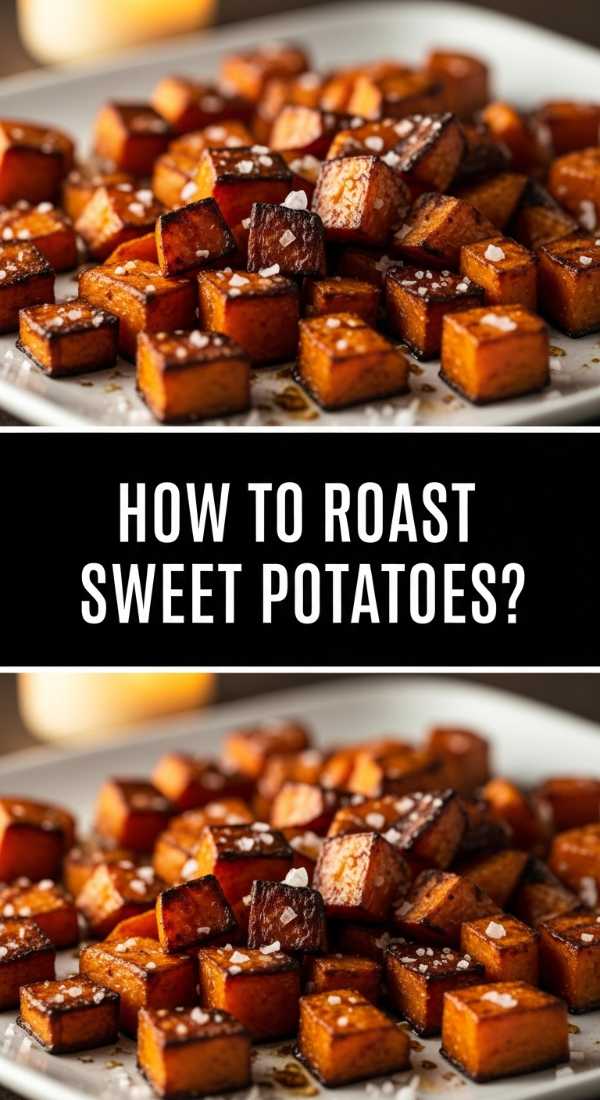
How to roast sweet potatoes?

Why we love this
Roasted sweet potatoes bring a cozy, grounded sweetness to a food board, acting as a bridge between savory proteins and fresh dips. When done right, they have a creamy, velvet-like interior that contrasts beautifully with a caramelized, almost candy-like exterior shell. The natural sugars intensify in the oven, creating a rich umami flavor that feels indulgent yet healthy, while their deep orange color makes the entire board look like a work of art.
Ingredients
- 3 large sweet potatoes, cubed into 1-inch pieces
- 3 tablespoons avocado oil (high smoke point)
- 1 teaspoon smoked paprika
- 1/2 teaspoon cinnamon (optional for depth)
- Flaky sea salt
How to make it
- Preheat your oven to 425°F (220°C); a high temperature is essential for caramelization before the interior turns to mush.
- Toss the sweet potato cubes in a large bowl with the oil, paprika, cinnamon, and salt until every side is thoroughly coated.
- Spread the cubes onto a large baking sheet, ensuring they are spaced out; if the pan is crowded, they will steam instead of roast.
- Roast for 20 minutes, then use a spatula to flip the cubes to ensure even browning on multiple sides.
- Continue roasting for another 10-15 minutes until the edges are dark brown and the centers are soft when pierced with a fork.
- Let them cool for 5 minutes on the baking sheet to allow the outer skin to crisp up even further before serving.
How to make creamy pasta?
Why we love this
Creamy pasta is the ultimate comfort food addition to a board, offering a silky, luxurious mouthfeel that provides a satisfying richness. The way the sauce clings to every ridge of the noodle, releasing the aroma of aged parmesan and freshly cracked pepper, is purely hypnotic. It’s the kind of dish that invites guests to take ‘just one more bite,’ providing a soft, warm texture that balances the crunchier elements of your spread.
Ingredients
- 1/2 lb long pasta (like Fettuccine or Linguine)
- 1 cup heavy cream
- 1.5 cups freshly grated Parmesan cheese
- 2 cloves garlic, finely grated
- 1/2 cup reserved pasta water
- Black pepper and nutmeg
How to make it
- Boil your pasta in heavily salted water until it is about 2 minutes away from being al dente; it will finish cooking in the sauce.
- In a wide skillet, simmer the heavy cream and grated garlic over medium-low heat for about 3 minutes until it slightly thickens.
- Using tongs, transfer the pasta directly from the boiling water into the cream sauce, bringing some of that starchy water with it.
- Add the Parmesan cheese in three separate stages, tossing vigorously with the tongs after each addition to emulsify the cheese into the cream.
- If the sauce looks too thick, splash in more reserved pasta water a tablespoon at a time until it reaches a glossy, coat-the-back-of-a-spoon consistency.
- Finish with a generous amount of black pepper and a tiny pinch of nutmeg to enhance the nuttiness of the cheese.
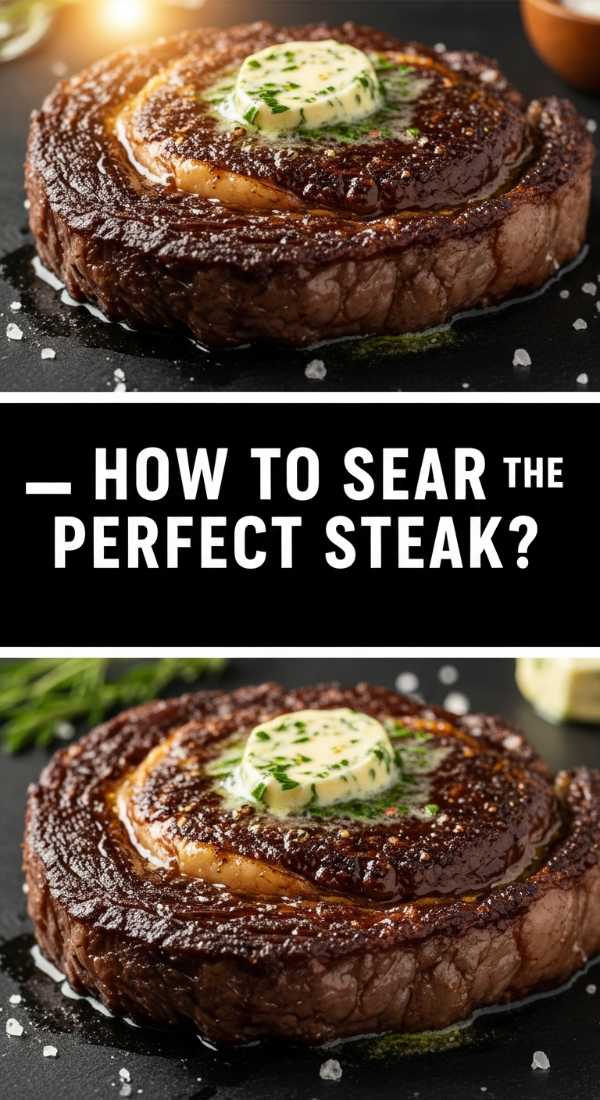
How to sear perfect steak?
Why we love this
There is a primal, sophisticated joy in a perfectly seared steak, characterized by a dark, savory crust known as the Maillard reaction. Inside, the meat should be a consistent, tender pink, melting away with very little effort. The scent of browning butter and seared beef is the quintessential ‘dinner party’ aroma, signaling a high-end experience that makes any board feel like a special occasion.
Ingredients
- 1.5-inch thick Ribeye or New York Strip
- Kosher salt (plenty of it)
- High-heat oil (Canola or Avocado)
- 3 tablespoons butter
- Garlic cloves and fresh thyme
How to make it
- Salt the steak on all sides 45 minutes before cooking and leave it on the counter; this draws out moisture and سپس reabsorbs the brine for deep seasoning.
- Pat the steak perfectly dry with a paper towel right before it hits the pan.
- Heat a cast-iron skillet over high heat until it is screaming hot and starting to lightly smoke.
- Add the oil and lay the steak away from you to avoid splashes; sear for 3-4 minutes without moving it to build a thick crust.
- Flip the steak and immediately add the butter, garlic, and thyme.
- Tilt the pan so the hot butter pools at the bottom and use a large spoon to pour that flavored butter over the steak repeatedly for 3 minutes.
- Cook until the internal temperature is 130°F for medium-rare, then remove to a cutting board.
- Crucial: Let the steak rest for 10 full minutes before slicing to ensure the juices stay inside the meat.
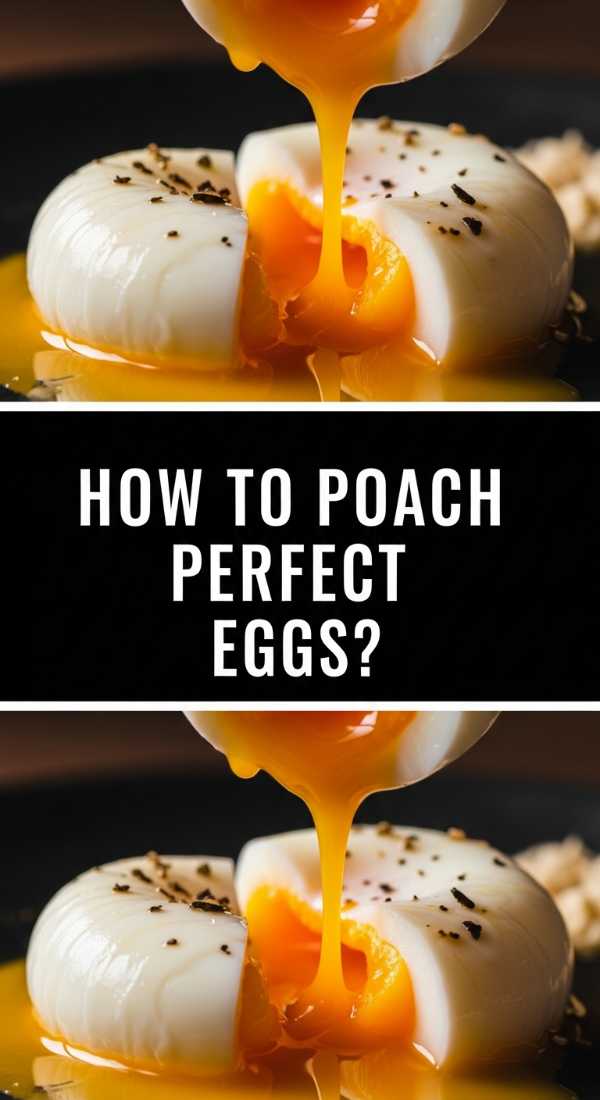
How to poach perfect eggs?

Why we love this
A poached egg is like a hidden treasure on a brunch board, waiting to be pierced so the rich, golden yolk can spill out and create a natural sauce for everything it touches. The whites are delicate and cloud-like, offering a clean, mild flavor that highlights the quality of the egg. It’s a sophisticated technique that never fails to impress, adding a touch of elegance and a beautiful visual ‘ooze’ factor to your presentation.
Ingredients
- Fresh, cold large eggs (freshness is key for holding shape)
- 1 tablespoon white vinegar
- A pinch of salt
- Water
How to make it
- Fill a deep saucepan with water and bring it to a very gentle simmer; you want small bubbles, not a rolling boil.
- Add the vinegar to the water; this helps the egg whites coagulate and wrap around the yolk more quickly.
- Crack each egg into a fine-mesh sieve over a bowl to drain away the watery, thin part of the whites—this prevents ‘whisps’ in the water.
- Transfer the egg to a small ramekin. Create a gentle whirlpool in the water with a spoon.
- Drop the egg into the center of the vortex and turn the heat down to low; the movement will help the white wrap around itself.
- Cook for exactly 3 minutes for a runny yolk and set whites.
- Remove with a slotted spoon and gently pat the bottom of the spoon on a paper towel to remove excess water before placing on the board.
How to make chicken burgers?
Why we love this
Chicken burgers are the lighter, brighter cousin of the classic beef patty, offering a succulent and juicy bite that feels refreshing. When seasoned with herbs and citrus, they have a zesty, clean profile that pairs wonderfully with avocado or spicy slaws. The outside develops a beautiful, charred lace from the grill or pan, while the inside stays moist and tender, making them a crowd-pleasing addition that won’t leave guests feeling overly heavy.
Ingredients
- 1 lb ground chicken (preferably a mix of breast and thigh)
- 1/4 cup panko breadcrumbs
- 1 egg, lightly beaten
- 2 tablespoons grated onion (for moisture)
- 1 tablespoon Dijon mustard
- Salt, pepper, and garlic powder
How to make it
- In a large bowl, gently combine the ground chicken, breadcrumbs, egg, grated onion, and seasonings; do not overwork the meat or it will become tough.
- Form the mixture into patties that are slightly larger than your buns, as they will shrink slightly during cooking.
- Press a small indentation into the center of each patty with your thumb to prevent them from bulging into a ball shape.
- Heat a skillet or grill to medium-high and oil the surface well to prevent the lean meat from sticking.
- Cook the patties for 5-6 minutes per side; since chicken must be fully cooked, ensure they reach an internal temperature of 165°F.
- In the last minute of cooking, add a slice of cheese if desired and cover with a lid to melt it perfectly.
- Let the burgers rest for 3 minutes before serving to ensure the juices set.
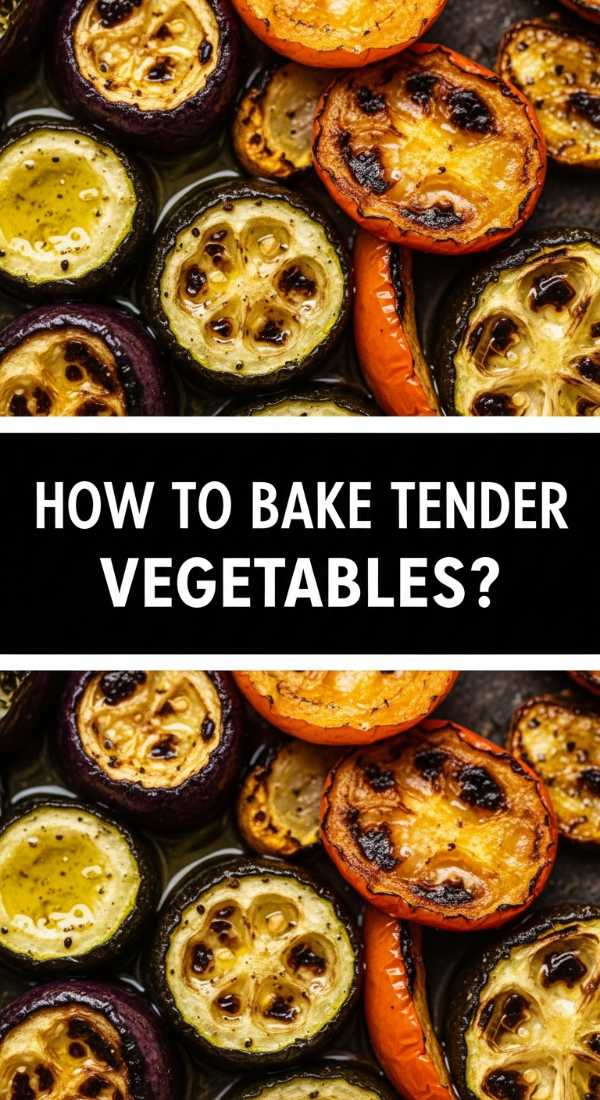
How to bake tender vegetables?
[IMAGE_10]
Why we love this
Baking vegetables transforms humble produce into tender, flavorful morsels that are bursting with concentrated natural sugars. There is something deeply comforting about the way a bell pepper or a spear of asparagus softens in the oven, becoming supple and infused with the flavor of olive oil and herbs. They provide the essential ‘fresh’ element to a board, offering various textures and a vibrant spectrum of colors that make the entire display look abundant and healthy.
Ingredients
- Mixed vegetables (Zucchini, Bell Peppers, Asparagus, Carrots)
- 3 tablespoons extra virgin olive oil
- 2 teaspoons dried Italian herbs
- 2 cloves garlic, sliced thin
- Balsamic glaze for drizzling
How to make it
- Cut all vegetables into uniform sizes to ensure they cook at the same rate; for example, slice carrots thinner than zucchini.
- Toss the vegetables in a bowl with olive oil, herbs, salt, pepper, and the sliced garlic until every piece is glistening.
- Arrange them in a single layer on a parchment-lined baking sheet; do not overlap them, or they will steam and turn mushy.
- Bake at 400°F (200°C) for 15-20 minutes, depending on the vegetable density.
- Check for ‘tender-crisp’ status by piercing with a knife; it should go in easily but still have a tiny bit of resistance.
- For an extra flavor boost, turn on the broiler for the last 2 minutes to get slightly charred, blistered edges.
- Drizzle with a high-quality balsamic glaze immediately before serving to add a sweet, acidic finish.
Conclusion
The beauty of the viral food board trend is that it removes the formality of hosting and replaces it with connection. By mastering these foundational recipes—from the perfect sear on a steak to the crispy skirt of a dumpling—you create a landscape of flavors that invites guests to explore and enjoy at their own pace. Remember, a great board is more than the sum of its parts; it’s about the joy of sharing a beautiful, home-cooked meal with the people who matter most. So, grab your largest platter, start cooking, and watch as your table becomes the heart of the home.