

Effortless Entertaining: How to Build the Viral Simple Food Board
There’s a certain magic that happens when you clear off the kitchen island, lay out a massive wooden board, and start layering textures, colors, and aromas. In our fast-paced lives, the ‘Simple Food Board’ has become more than just a trend; it’s a lifestyle shift toward intentional, communal eating. It’s about the laughter that erupts while sharing a platter of pillowy dumplings or the quiet satisfaction of seeing a perfectly decorated cake become the centerpiece of a spring afternoon. This is about reclaiming the joy of hosting without the stress of a five-course meal.
As the seasons shift and the light lingers longer in our dining rooms, I find myself craving dishes that feel both celebratory and grounded. This guide is designed to help you curate your own viral food board, mixing savory comfort with fresh, seasonal pops. From the technical secrets of the perfect dumpling dough to the whimsical finishing touches of a cherry-topped cake, we are diving deep into the elements that make people stop scrolling and start gathering. Let’s build something beautiful together.
Master the art of squishy dumplings

Why we love this
There is something inherently comforting about a dumpling that is perfectly squishy, offering a tender bite that gives way to a savory, juice-filled center. The aroma of toasted sesame oil and fresh ginger wafts up with the steam, promising a mouthfeel that is both silky on the outside and substantial on the inside. We love how these little pillows of joy can turn a simple weeknight into a festive occasion, inviting everyone to lean in, chopsticks ready, for a taste of pure, handmade warmth that feels like a hug for your palate.
Ingredients
- Ground pork or minced mushrooms
- Napa cabbage, finely shredded
- Fresh ginger and garlic, minced
- Soy sauce and toasted sesame oil
- Round dumpling wrappers (store-bought or handmade)
- Cornstarch for dusting
How to make it
- Prepare your filling by combining your protein of choice with the shredded cabbage, ensuring you have squeezed all excess moisture from the vegetables to prevent soggy bottoms.
- Add the aromatics—ginger, garlic, soy sauce, and sesame oil—mixing vigorously in one direction to develop a cohesive, slightly tacky texture in the meat or mushroom base.
- Place a teaspoon of filling in the center of a wrapper, moisten the edges with a flick of water, and fold into pleats, pressing firmly to ensure an airtight seal so they don’t burst during cooking.
- Heat a non-stick skillet over medium-high heat with a tablespoon of neutral oil. Place the dumplings in the pan and sear for 2-3 minutes until the bottoms are golden brown and crispy.
- Pour in 1/4 cup of water and immediately cover with a tight-fitting lid to trap the steam. Let them cook for 5-7 minutes; you’ll know they are done when the wrappers look translucent and feel springy to the touch.
Fresh seasonal spring dinner inspiration

Why we love this
Spring is the season of renewal, and nothing captures that essence better than a dinner board brimming with vibrant greens and zesty citrus. Think of the snap of fresh asparagus, the earthy sweetness of young peas, and the bright, floral notes of Meyer lemon drizzled over everything. This style of eating is light enough to leave you energized for an evening walk but flavorful enough to satisfy the deepest cravings for something crisp, clean, and garden-fresh.
Ingredients
- Blanched asparagus spears
- Shaved radish and fennel
- Soft-boiled eggs with jammy yolks
- Fresh mint and parsley
- Toasted sourdough slices
- Whipped goat cheese with lemon zest
How to make it
- Start by blanching your asparagus in heavily salted boiling water for exactly 2 minutes, then immediately shock them in an ice bath to preserve that bright emerald green color and snappy texture.
- Prepare a fennel and radish salad by using a mandoline to shave them into paper-thin slices, tossing them with a drizzle of high-quality olive oil and a squeeze of lemon to prevent browning.
- Whip your goat cheese in a small bowl with lemon zest and a pinch of cracked black pepper until it is light and spreadable, creating the perfect base for your toast.
- Arrange the components on your board in clusters, placing the jammy eggs in the center and garnishing the entire spread with torn mint and parsley leaves for a burst of herbal aroma.
- Finish with a sprinkle of flaky sea salt over the vegetables to enhance their natural sweetness and provide a satisfying crunch with every bite.
Perfect cherry on cake decoration
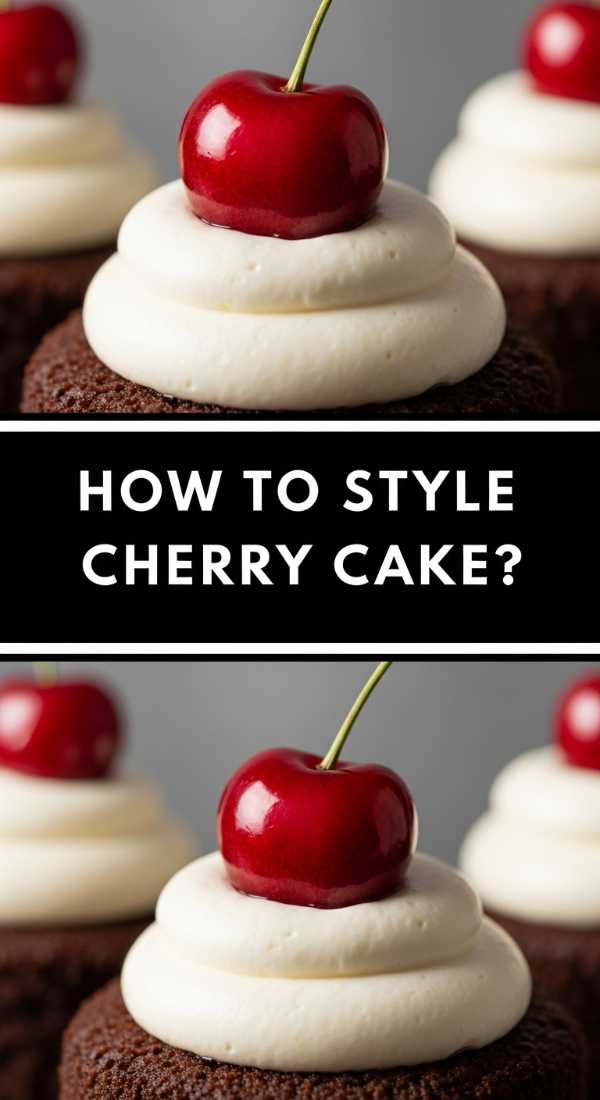
Why we love this
The visual of a bright, glossy cherry sitting atop a cloud of white frosting is the ultimate symbol of classic confectionery charm. It brings a nostalgic, whimsical energy to any dessert board, acting as a beacon of sweetness that draws the eye and makes the heart flutter. The contrast between the deep, ruby red of the fruit and the pristine ivory of the cream creates a sophisticated yet playful aesthetic that feels professional and heartfelt all at once.
Ingredients
- Fresh Bing cherries with stems attached
- Edible gold leaf (optional)
- Clear apricot glaze or simple syrup
- Stiff-peak vanilla buttercream
- Maraschino cherries (if going for a retro look)
How to make it
- Select cherries that are firm to the touch and have their stems intact, as the stem provides a natural handle and an artisanal look to your decoration.
- Wash and dry the cherries thoroughly; any moisture left on the fruit will cause the frosting to slide or the glaze to bead up.
- Dip each cherry into a warm apricot glaze or a thick simple syrup to give it a mirror-like shine that will hold up even under warm party lights.
- Pipe a small, sturdy swirl of buttercream onto your cake surface using a star tip, ensuring the base is wide enough to support the weight of the fruit.
- Carefully place the cherry into the center of the swirl, pressing down just enough to anchor it, and finish with a tiny fragment of gold leaf for an ultra-luxurious, viral-ready appearance.
Soft and chewy spring cookies

Why we love this
A soft and chewy cookie is the ultimate handheld comfort food, especially when infused with the light, airy flavors of the spring season. We love the way the edges offer a slight caramel-like crunch while the center remains incredibly tender, almost melting on the tongue with hints of vanilla and almond. These cookies are like biting into a sweet, sugary cloud, providing a gentle transition from the heavy desserts of winter to the brighter, more delicate treats of the warmer months.
Ingredients
- Unsalted butter, softened to room temperature
- Granulated sugar and light brown sugar
- Egg and extra egg yolk for richness
- All-purpose flour and cornstarch (the secret to softness)
- Dried lavender or lemon zest
How to make it
- Cream the softened butter with both sugars for at least 3-5 minutes until the mixture is pale and fluffy; this aeration is key to a light cookie structure.
- Add the whole egg and the extra egg yolk, which provides the fat content necessary for that coveted chewy, fudgy center that separates a good cookie from a great one.
- Whisk your dry ingredients together, including a tablespoon of cornstarch which prevents the gluten from becoming too tough, ensuring a delicate crumb.
- Fold the dry ingredients into the wet mixture by hand until just combined, then chill the dough for at least 2 hours to prevent the cookies from spreading too thin in the oven.
- Scoop into rounded mounds and bake at 350°F (175°C) for 9-11 minutes, removing them when the edges are just set but the centers still look slightly underbaked; they will firm up on the pan to perfection.
Lighter pasta for spring evenings
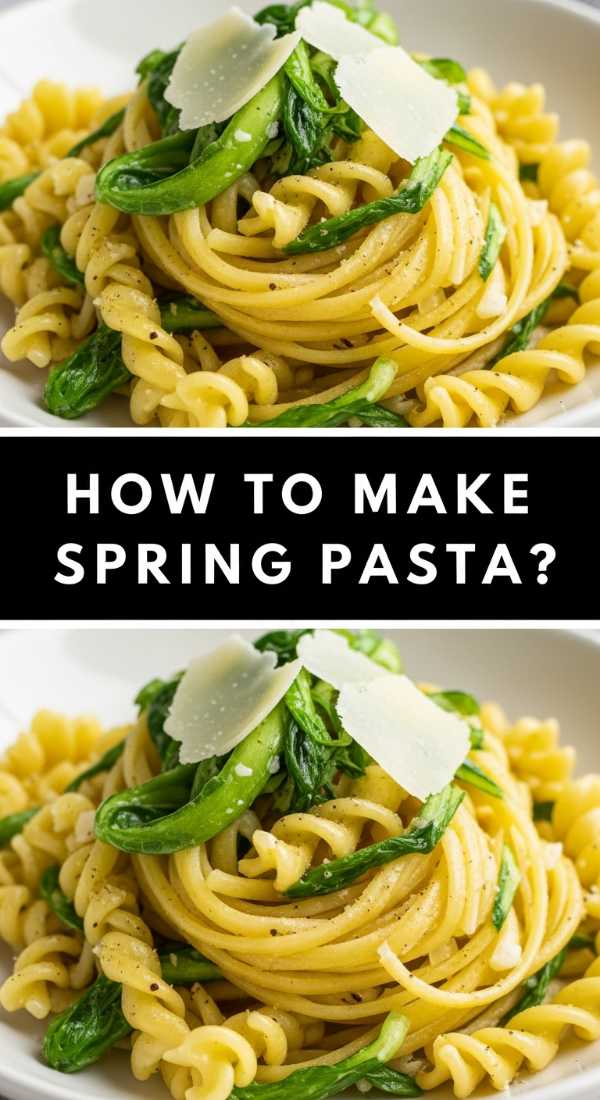
Why we love this
As the sun sets later, we find ourselves yearning for a bowl of pasta that satisfies without the heaviness of a thick ragu. A lighter spring pasta is a masterclass in balance, utilizing the liquid gold of pasta water combined with olive oil and citrus to create a silky, emulsified sauce that coats every strand. It smells like a Mediterranean garden, with the fragrance of basil and garlic dancing through the steam, offering a meal that feels as refreshing as a cool spring breeze.
Ingredients
- Linguine or Spaghetti
- Fresh peas and sliced zucchini
- Extra virgin olive oil
- Garlic cloves, thinly sliced
- Red pepper flakes and lemon juice
How to make it
- Boil your pasta in a large pot of water that is salted “like the sea,” which seasons the noodles from the inside out and provides the starchy water needed for the sauce.
- While the pasta cooks, sauté the thinly sliced garlic in a generous amount of olive oil over low heat until it is fragrant and translucent, being careful not to let it brown or turn bitter.
- Add the sliced zucchini and peas to the oil, cooking them for only 2-3 minutes so they retain their vibrant color and a slight bite.
- Using tongs, transfer the pasta directly from the water into the skillet with the vegetables, bringing along some of that precious starchy pasta liquid.
- Toss vigorously over medium heat while adding a squeeze of lemon and a handful of herbs, stirring until the oil and water emulsify into a light, glossy sauce that clings to the pasta.
The ultimate backyard crawfish boil

Why we love this
There is no food event quite as communal or exhilarating as a backyard crawfish boil. It’s a sensory explosion: the spicy, cayenne-heavy aroma filling the air, the bright red shells piled high on newspaper-lined tables, and the sound of friends peeling and laughing together. We love it because it’s messy, it’s loud, and it forces everyone to put down their phones and engage in the tactile, rewarding process of enjoying a true Southern feast under the open sky.
Ingredients
- Live crawfish (purged)
- Cajun spice blend (Zatarain’s or similar)
- Andouille sausage, sliced
- Corn on the cob and red potatoes
- Lemons, halved, and whole garlic heads
How to make it
- Fill a massive outdoor boiling pot halfway with water and bring it to a rolling boil before adding your spice blend, halved lemons, and smashed garlic heads to create a potent flavor base.
- Add the potatoes and sausage first, as they require the longest cooking time; boil them for about 10-15 minutes until the potatoes are just starting to soften.
- Toss in the corn and the live, purged crawfish, ensuring they are fully submerged in the bubbling, spicy liquid.
- Bring the pot back to a boil for only 3-5 minutes, then turn off the heat and let the crawfish soak for at least 15-20 minutes; this soak time is when they absorb all the spicy, citrusy juices.
- Drain the pot and dump the entire contents onto a table covered in brown paper, encouraging guests to dig in while everything is steaming hot and perfectly seasoned.
Fresh spring dinner meal prep

Why we love this
Meal prep doesn’t have to mean boring plastic containers filled with dry chicken; for spring, it’s about preparing components that stay vibrant and crisp all week long. We love the feeling of opening the fridge to find jars of pickled red onions, washed greens, and marinated proteins ready to be assembled into a beautiful board or bowl in minutes. It takes the decision fatigue out of your evenings, allowing you to enjoy a high-quality, “viral-worthy” dinner even on your busiest days.
Ingredients
- Quinoa or farro (cooked and cooled)
- Grilled chicken or chickpeas
- Pickled vegetables (carrots, onions)
- Lemon-tahini dressing
- Pre-washed arugula or kale
How to make it
- Cook a large batch of your grain of choice in vegetable broth instead of water to infuse it with extra flavor, then spread it on a baking sheet to cool quickly before storing.
- Roast or grill your protein with simple seasonings like salt, pepper, and dried oregano, then slice it into strips once cooled to make it easy to grab and serve.
- Prepare a variety of “toppings” by quick-pickling red onions in apple cider vinegar and sugar, and roasting a tray of seasonal vegetables like bell peppers and broccoli.
- Whisk together a large jar of dressing—tahini, lemon juice, garlic, and a splash of maple syrup—keeping it separate so your greens don’t wilt over time.
- Store each component in glass containers, then when you’re ready to eat, simply layer the grains, greens, and protein onto a board and drizzle with your pre-made sauce for an instant feast.
Creamy and delicious spring pasta sauce

Why we love this
This sauce is the bridge between winter indulgence and spring freshness. It has a velvety, luxurious mouthfeel that coats the tongue, yet it tastes light and herbaceous thanks to the addition of fresh green peas and lemon zest. We love the way it transforms a simple box of pasta into a gourmet experience, with an aroma of simmering garlic and heavy cream that makes your kitchen feel like a high-end Italian bistro on a sun-drenched afternoon.
Ingredients
- Heavy cream or full-fat coconut milk
- Parmesan cheese, freshly grated
- Frozen or fresh peas
- Shallots, finely diced
- Fresh basil and black pepper
How to make it
- In a wide skillet, sauté the diced shallots in a bit of butter over medium-low heat until they are soft and translucent, but not browned, to keep the sauce color pale and elegant.
- Pour in the heavy cream and bring it to a very gentle simmer; let it reduce by about a third until it starts to thicken naturally and coat the back of a spoon.
- Whisk in the freshly grated Parmesan cheese one handful at a time, stirring constantly to ensure it melts smoothly into the cream without clumping.
- Add the peas and a generous amount of cracked black pepper, cooking for just 2 minutes until the peas are heated through and pop with sweetness.
- Fold in your cooked pasta and a splash of pasta water, tossing until the sauce is glossy and thick, then finish with a flurry of fresh basil just before serving.
Dough texture secrets for dumplings

Why we love this
Mastering dumpling dough is like learning a secret language of the kitchen. There is a profound tactile satisfaction in feeling a shaggy mess of flour and water transform under your palms into a smooth, elastic, and supple ball of dough. We love this process because it connects us to the food on a deeper level; knowing exactly how much tension and hydration the dough needs results in a wrapper that is thin enough to be delicate but strong enough to hold all those delicious juices.
Ingredients
- All-purpose flour (medium protein content)
- Boiling water (for hot water crust)
- Pinch of salt
How to make it
- Measure your flour into a large bowl and make a well in the center; pour in the boiling water gradually while stirring with chopsticks to create “snowflakes” of dough.
- The hot water partially cooks the flour’s starch, which is the secret to a dough that is incredibly easy to roll out and has that signature “squishy” chewiness once steamed.
- Once the dough is cool enough to touch, knead it on a clean surface for at least 8-10 minutes until it becomes completely smooth and bounces back slightly when poked.
- Wrap the dough tightly in plastic wrap and let it rest for at least 30 minutes; this allows the gluten to relax, making it much easier to roll into paper-thin circles later.
- When rolling, use a small dowel-style rolling pin and rotate the wrapper as you go, keeping the edges slightly thinner than the center to ensure a perfect seal without a doughy top.
Professional cherry cake finishing touches

Why we love this
The difference between a homemade cake and a professional masterpiece often lies in the final five minutes of decorating. We love the art of the “finishing touch” because it allows for total creative expression. Whether it’s the precise placement of a stem-on cherry or the dusting of powdered sugar that looks like fallen snow, these details elevate the entire experience. It turns a simple dessert into a viral work of art that guests will be hesitant to cut into because it looks so breathtakingly perfect.
Ingredients
- Fresh cherries (pitted and unpitted)
- Mint sprigs for a pop of green
- Powdered sugar for dusting
- Whipped cream or meringue kisses
- Crushed pistachios for texture
How to make it
- Apply a “crumb coat” of frosting first and chill the cake for 20 minutes; this ensures your final layer of frosting is perfectly smooth and free of any stray cake crumbs.
- Use an offset spatula to create intentional swirls or a smooth finish on your top layer, providing a clean canvas for your cherry arrangements.
- Cluster three cherries of slightly different sizes in the center of the cake to create a focal point, leaving the stems pointing in different directions for a natural, organic look.
- Place small mint sprigs near the cherries; the vibrant green provides a stunning color contrast against the red fruit and white frosting, making the colors “pop” in photos.
- Just before serving, use a fine-mesh sieve to lightly dust the entire cake with powdered sugar and sprinkle crushed pistachios around the base for a professional, textured finish.
Gather Around the Board
Building a viral food board is less about perfection and more about the abundance of the season. It’s a way to show your loved ones that you care through the effort of handmade dough, the brightness of spring produce, and the whimsical beauty of a cherry-topped treat. As you set your board on the table, remember that the most important ingredient is the community it creates. Happy hosting!