
Effortless Elegance: How to Style a Viral Food Board
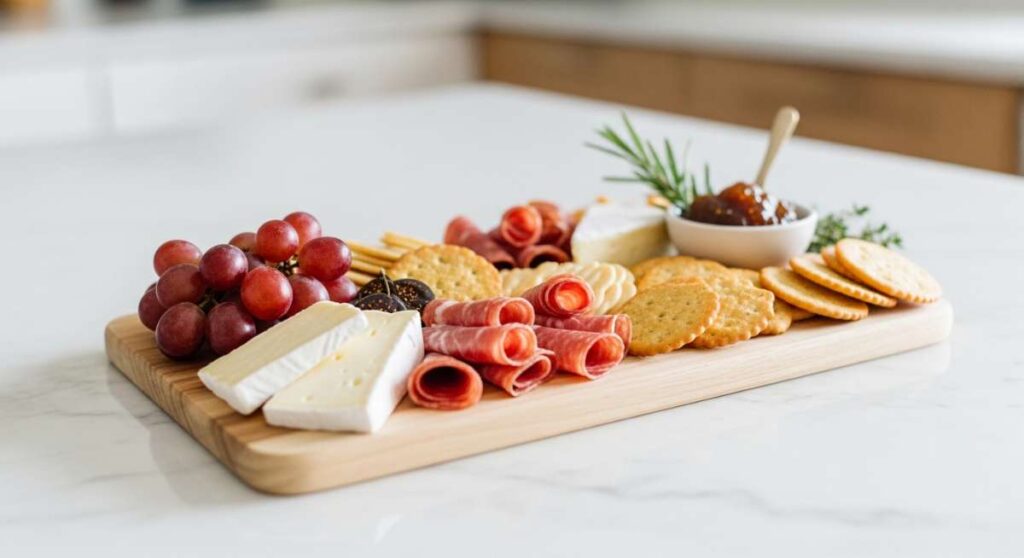
There is something truly magical about a gathering that feels both high-end and completely relaxed. You know that feeling when you walk into a room and a beautiful spread is laid out—not just on plates, but as a centerpiece of textures and colors? That is the vibe we are going for today. We are taking the humble chicken and turning it into the star of an effortless, viral-worthy food board that your friends will be talking about for weeks. It is about more than just food; it is about creating a moment of connection through shared flavors and visual beauty.
The secret to a viral food board lies in the layering of abundance. When you arrange perfectly cooked chicken thighs and legs alongside roasted herbs and vibrant sauces, you create a rustic elegance that feels attainable yet luxurious. In this guide, I’m walking you through every technique you need to master the art of the chicken board. From the sizzle of the pan to the final sprinkle of sea salt, we are going to make sure your next dinner party is an absolute showstopper.
How to bake juicy chicken thighs

Why we love this
There is nothing quite like the sound of a knife gently cracking through perfectly rendered, golden-brown chicken skin to reveal the steaming, succulent meat beneath. The aroma fills your kitchen with notes of toasted garlic and savory fat, creating an instant sense of home and comfort. When you bite into a thigh that has been baked to perfection, the contrast between the salty, crispy exterior and the tender, melt-in-your-mouth interior is pure culinary bliss. It provides that essential “anchor” for your food board, offering a rich, savory base that pairs beautifully with bright dipping sauces.
Ingredients
- 4-6 bone-in, skin-on chicken thighs
- 2 tablespoons olive oil
- 1 teaspoon sea salt
- 1/2 teaspoon cracked black pepper
- 1 teaspoon garlic powder
- 1/2 teaspoon smoked paprika
- Fresh rosemary sprigs
How to make it
- Preheat your oven to 425°F (220°C). This high temperature is crucial for rendering the fat and achieving that signature crispy skin while keeping the inside moist.
- Pat the chicken thighs extremely dry with paper towels. Any moisture on the skin will lead to steaming rather than browning, so don’t skip this step.
- In a small bowl, whisk together the olive oil, salt, pepper, garlic powder, and smoked paprika until it forms a loose paste.
- Massage the oil mixture over every inch of the chicken, including underneath the skin where possible, to ensure deep flavor penetration.
- Place the thighs on a wire rack set over a rimmed baking sheet. This allows hot air to circulate around the entire piece of meat, ensuring the bottom doesn’t get soggy.
- Bake for 25-30 minutes. Use a meat thermometer to check for an internal temperature of 165°F (74°C). The juices should run clear when pierced.
- Let the meat rest for 5-10 minutes before moving it to your food board. This allows the juices to redistribute, ensuring every bite is as moist as the last.
How to cook chicken legs

Why we love this
Chicken legs, or drumsticks, bring a wonderful sense of nostalgia and playfulness to a viral food board. They are the ultimate finger food, designed by nature to be picked up and enjoyed with enthusiasm. The dark meat stays incredibly moist, absorbing flavors and spices with ease, while the skin crisps up into a savory treat. Watching guests reach for a perfectly glazed drumstick, their faces lighting up with the first bite of tender meat, is exactly why we love including these on a communal spread.
Ingredients
- 8 chicken drumsticks
- 3 tablespoons melted butter
- 1 tablespoon onion powder
- 1 teaspoon dried thyme
- 1/2 teaspoon cayenne pepper (optional)
- Salt and pepper to taste
How to make it
- Preheat your oven to 400°F (200°C). Prepare a baking dish by lining it with parchment paper for easy cleanup.
- Check the drumsticks for any loose bits of skin or bone and trim them if necessary. Pat them dry with a clean towel to help the butter and spices adhere.
- In a large bowl, toss the drumsticks with the melted butter, ensuring each piece is fully coated. The fat acts as a conductor for heat and flavor.
- Sprinkle the onion powder, thyme, cayenne, salt, and pepper over the chicken, tossing again to distribute the seasoning evenly across the batch.
- Arrange the legs in a single layer on the baking sheet, ensuring they aren’t touching so the air can circulate freely for maximum crispiness.
- Roast for 35-40 minutes, turning them halfway through the cooking process. You are looking for a deep golden-brown color and an internal temperature of 170°F (75°C) for the best texture in dark meat.
- For an extra viral-worthy finish, turn on the broiler for the last 2 minutes to get those edges slightly charred and extra crunchy.
How to prepare chicken thighs

Why we love this
Preparation is the silent hero of any great recipe, the foundation upon which all those beautiful textures and flavors are built. Taking the time to properly prep your chicken thighs ensures that every bite is consistent, free of unwanted gristle, and seasoned to perfection. There is a tactile satisfaction in the process—the feeling of sharp shears trimming away excess fat and the ritual of patting the skin dry. This step transforms raw ingredients into a blank canvas, ready to be painted with the bold flavors that make your board stand out.
Ingredients
- Fresh chicken thighs (bone-in or boneless)
- Kitchen shears or a sharp chef’s knife
- Paper towels
- A large clean cutting board
- Kosher salt
How to make it
- Start by removing the chicken from its packaging and placing it on a dedicated poultry cutting board. Ensure your workspace is clear to prevent cross-contamination.
- Use kitchen shears to trim away any large, hanging flaps of excess fat or skin. While some fat is good for flavor, too much can lead to a greasy finish on your board.
- If using bone-in thighs, check the underside for any small bone fragments or connective tissue that might be unpleasant for your guests.
- The most critical step: use paper towels to pat the chicken completely dry on all sides. You want the surface to be matte, not shiny, to ensure a perfect sear later.
- If you are not cooking them immediately, place the trimmed chicken on a plate and let it sit uncovered in the fridge for 30 minutes. This “air-drying” technique leads to the absolute best skin texture.
- Season the chicken with a light dusting of kosher salt about 15 minutes before cooking. This acts as a dry brine, drawing moisture to the surface where it can evaporate and tightening the proteins for a juicier result.
How to use the crockpot

Why we love this
The crockpot is the ultimate tool for the “effortless” side of elegance, allowing you to create meltingly tender meat while you focus on styling the rest of your board. There is something incredibly comforting about the slow-cooked aroma that drifts through the house all day, building anticipation for the meal. When you finally lift the lid, the chicken is so tender it practically falls off the bone at the mere suggestion of a fork. It adds a wonderful soft texture to your board that contrasts beautifully with crunchier elements like nuts or crackers.
Ingredients
- 2 lbs chicken thighs
- 1 cup chicken bone broth
- 1 sliced yellow onion
- 4 cloves smashed garlic
- 1 tablespoon Italian seasoning
- 1 slice of lemon
How to make it
- Lay the sliced onions and smashed garlic across the bottom of the slow cooker to create a flavor-infused bed for the meat.
- Place the chicken thighs on top of the onions in a single layer if possible, though overlapping slightly is fine in a crockpot.
- Whisk the Italian seasoning into the bone broth and pour it carefully around the sides of the chicken, not directly over the top, to keep any seasonings on the meat from washing off.
- Place the lemon slice on top for a hit of acidity that cuts through the richness of the dark meat.
- Set the crockpot to ‘Low’ for 6 to 8 hours or ‘High’ for 3 to 4 hours. For the absolute best “pull-apart” texture, the low and slow method is always preferred.
- Check the internal temperature; it should be around 190°F to 200°F (88-93°C) for shredded chicken styles, as this is when the connective tissue fully breaks down.
- Carefully remove the chicken and shred it with two forks or serve it whole, drizzled with a bit of the cooking liquid to keep it glistening on your board.
How to sear chicken thighs
Why we love this
Searing is an art form that brings a professional, high-end feel to your viral food board. That deep, mahogany-colored crust created by the Maillard reaction isn’t just visually stunning; it’s a concentrated burst of umami and savory goodness. The sound of the chicken hitting a hot cast-iron skillet is the music of a kitchen in full swing. This method creates a sophisticated profile that makes the chicken feel like it came straight from a bistro, giving your board an air of culinary expertise that guests will find irresistible.
Ingredients
- 4 boneless, skin-on chicken thighs
- 2 tablespoons high-smoke-point oil (like avocado oil)
- 1 tablespoon unsalted butter
- Flaky sea salt
- Fresh thyme
How to make it
- Place a heavy-bottomed skillet, preferably cast iron, over medium-high heat. Allow it to heat until the oil is shimmering and just starting to show a faint wisp of smoke.
- Season the skin side of the chicken liberally with salt right before placing it in the pan.
- Lay the chicken skin-side down into the pan, moving it away from you to avoid oil splatters. Press down lightly with a spatula to ensure full contact with the heat.
- Do not move the chicken for at least 5-7 minutes. Patience is key; the chicken will naturally release from the pan once the crust has formed.
- Flip the chicken once the skin is deep golden and crispy. Add the butter and fresh thyme to the pan, letting the butter foam up.
- Tilt the pan and spoon the hot, flavored butter over the chicken for 2-3 minutes to finish the cooking and add a glossy, rich sheen.
- Remove from heat and let rest on a wooden board. The residual heat will finish the cooking while the skin stays delightfully crunchy.
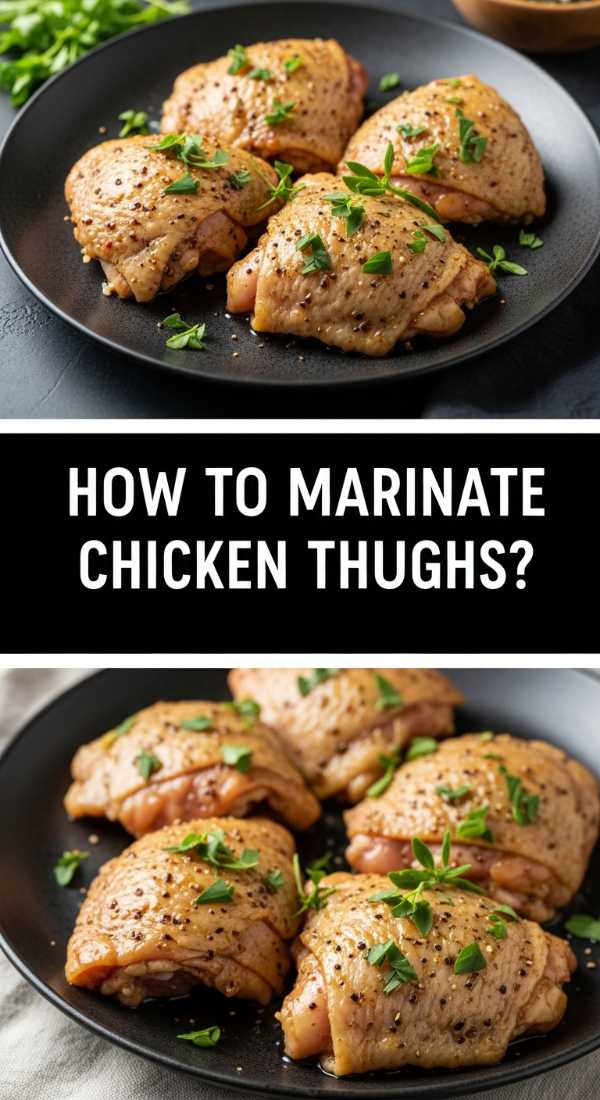
How to marinate chicken thighs

Why we love this
Marinating is where you can truly express your creativity and define the flavor theme of your board. Whether you go for a bright citrus profile or a deep, spiced Mediterranean vibe, the marinade works its magic deep into the muscle fibers, ensuring every bite is an explosion of flavor. It is a sensory journey—the bright scent of lemon zest, the earthy hum of cumin, or the sweet tang of honey. A well-marinated chicken thigh is vibrant and colorful, making it a visual highlight that draws everyone’s eyes to the center of your spread.
Ingredients
- 1/4 cup olive oil
- 3 tablespoons lemon juice or apple cider vinegar
- 2 tablespoons honey or maple syrup
- 3 cloves minced garlic
- 1 tablespoon fresh chopped herbs (oregano or parsley)
- 1 teaspoon red pepper flakes
How to make it
- In a medium glass bowl or a reusable silicone bag, whisk together the oil, acid (lemon/vinegar), and sweetener. The oil carries the flavor, while the acid tenderizes the meat.
- Add the garlic, herbs, and red pepper flakes, mixing thoroughly to create a cohesive emulsion.
- Place your chicken thighs into the container, ensuring they are completely submerged or coated in the liquid.
- Seal the container and refrigerate for at least 30 minutes, though 4 to 6 hours is the “sweet spot” for maximum flavor without the acid making the meat mushy.
- Every hour or so, give the bag a shake or flip the chicken to ensure the marinade is reaching all surfaces evenly.
- When ready to cook, remove the chicken from the marinade and wipe off any excess large pieces of garlic to prevent them from burning in the pan.
- Cook according to your preferred method—the sugars in the marinade will caramelize beautifully, giving the chicken a stunning, glazed appearance.
How to roast chicken thighs

Why we love this
Roasting is the quintessential technique for a rustic, elegant board that feels like a harvest feast. There is something deeply satisfying about watching the heat of the oven transform simple ingredients into a caramelized masterpiece. The way the edges of the chicken slightly darken and the juices bubble creates an inviting, home-cooked aesthetic that is perfect for Instagram stories. Roasting allows the chicken to develop a complex sweetness and a tender texture that pairs perfectly with roasted root vegetables and crusty bread, making the board feel like a complete, curated meal.
Ingredients
- 6 bone-in chicken thighs
- 1 lb baby potatoes, halved
- 1 bunch of asparagus or carrots
- 3 tablespoons olive oil
- 2 teaspoons smoked paprika
- Salt and pepper
How to make it
- Preheat your oven to 400°F (200°C). Roasting is a dry-heat method, so ensure your oven is fully up to temperature before starting.
- On a large sheet pan, toss the potatoes and vegetables with half of the olive oil, salt, and pepper. Spread them out to the edges to make room for the chicken in the center.
- Coat the chicken thighs in the remaining oil and the smoked paprika. The paprika will provide a gorgeous, deep-red hue as it roasts.
- Place the chicken in the center of the pan, nestled among the vegetables but not buried by them.
- Roast for 35-45 minutes. The potatoes should be tender and browned, and the chicken skin should be tight and golden.
- Check the thickest part of the thigh; the internal temperature should reach 165°F (74°C).
- Serve everything directly from the pan onto your large wooden board, keeping the roasted vegetables clustered around the chicken for a lush, abundant look.
How to grill chicken legs

Why we love this
Grilling brings an element of smoke and fire to your board that is impossible to replicate indoors. Those beautiful, dark grill marks are a visual cue for summer nights and outdoor gatherings, adding a rugged yet sophisticated texture to your food board. The scent of char and caramelized protein wafting through the air is an immediate appetite-builder. Grilled chicken legs offer a slightly chewy, smoky skin and a juicy interior that feels adventurous and bold, making them a perfect contrast to softer cheeses or fresh fruits on your spread.
Ingredients
- 10 chicken drumsticks
- 1/2 cup of your favorite BBQ sauce or dry rub
- Vegetable oil for the grates
- Lime wedges for garnish
How to make it
- Preheat your grill to medium-high heat (about 375-400°F). Clean the grates thoroughly and wipe them with an oil-soaked paper towel to prevent sticking.
- If using a dry rub, apply it to the chicken legs at least 20 minutes before grilling to allow the flavors to set.
- Place the drumsticks on the grill grates over direct heat. Sear them for about 5 minutes, turning frequently to get an even char on all sides.
- Move the legs to the cooler side of the grill (indirect heat) and close the lid. This allows the meat to cook through without burning the exterior.
- Cook for another 20-25 minutes. If you are using BBQ sauce, brush it on during the last 5-10 minutes of cooking to prevent the sugars in the sauce from burning.
- The chicken is done when it reaches an internal temperature of 175°F (80°C). Dark meat on the bone benefits from a slightly higher temperature to ensure it’s fully tender.
- Remove from the grill and let rest. Garnish with a squeeze of lime to brighten the smoky flavors before placing them on the board.
How to make chicken dinner

Why we love this
A complete chicken dinner board is the ultimate expression of hospitality, turning a simple meal into an interactive experience. We love this approach because it breaks down the formality of a seated dinner, encouraging guests to graze, mix, and match flavors at their own pace. There is a visual harmony in seeing the main protein surrounded by vibrant sides, dipping bowls, and fresh herbs. It creates a sense of bounty that is both welcoming and impressive, making the act of eating feel like a celebration of good food and even better company.
Ingredients
- Cooked chicken thighs and legs
- A bowl of creamy hummus or tzatziki
- Warm pita bread or sliced baguette
- Olives, nuts, and dried apricots
- Fresh cucumber and tomato salad
How to make it
- Start with your largest wooden board or a clean marble slab. Place the largest items first—in this case, your various styles of cooked chicken.
- Place small bowls for sauces and salads in opposite corners to create balance and structure on the board.
- Fill the spaces around the bowls with your starch, such as sliced bread or crackers, fanning them out to create movement.
- Nestle the chicken pieces into the gaps, grouping them by type (e.g., grilled on one side, roasted on the other).
- Fill the remaining small crevices with “fillers” like olives, nuts, or fresh grapes. This creates the dense, abundant look that is essential for a viral post.
- Garnish the entire board with fresh herbs like parsley or mint, and a few lemon wedges for pops of color.
- Place serving tongs and small plates nearby, ensuring that despite the beauty, the board remains functional and easy for guests to enjoy.
How to season chicken thighs
[IMAGE_10]
Why we love this
Seasoning is the soul of the dish, the magical step where you define the personality of your chicken. We love the process of blending spices because it is so tactile—rubbing the coarse salt and fragrant herbs into the skin, watching the colors change as the spices adhere. The right seasoning blend creates a complex flavor profile that lingers on the palate, combining heat, salt, and earthiness. It ensures that your chicken isn’t just a vehicle for sauce, but a stand-alone star that brings depth and character to every corner of your viral food board.
Ingredients
- 1 tablespoon kosher salt
- 1 teaspoon smoked paprika
- 1 teaspoon onion powder
- 1/2 teaspoon cumin
- 1/2 teaspoon dried oregano
- 1/4 teaspoon cinnamon (the secret ingredient!)
How to make it
- In a small dry bowl, combine all the spices. Use a fork or a small whisk to break up any clumps and ensure a perfectly uniform blend.
- The secret to great seasoning is layering. Start with a light sprinkle of salt from about 12 inches above the chicken to ensure even coverage.
- Apply the spice blend generously. For skin-on chicken, make sure to get some of the rub underneath the skin directly onto the meat for maximum impact.
- Press the seasoning into the meat with your hands; don’t just sprinkle it. This helps the spices stick during the cooking process and prevents them from falling off in the pan.
- Let the seasoned chicken sit at room temperature for about 15-20 minutes. This allows the salt to penetrate the meat and the other flavors to begin to bloom.
- When cooking, avoid moving the chicken too much early on, as this can scrape off the seasoning before it has a chance to form a crust.
- Finish the dish with a final tiny pinch of flaky sea salt right before serving to provide a textural crunch and a burst of flavor.
Conclusion
Styling a viral food board is all about the details and the love you put into every step. By mastering these chicken techniques, you have created a foundation of flavor that is as beautiful as it is delicious. Remember, there are no mistakes in board styling—only opportunities to add more color and texture. Now, go grab your favorite board, start cooking, and get ready to host the most elegant, effortless gathering of the season!