
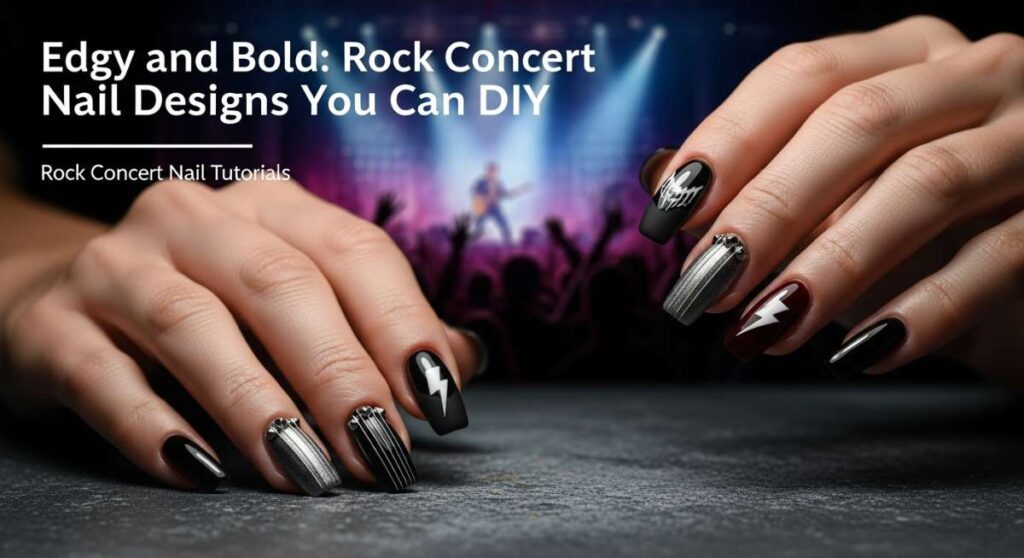
Edgy and Bold: Rock Concert Nail Designs You Can DIY
Hello, my loves! There is something so magical about the electricity in the air right before a rock concert, isn’t there? I can almost feel the bass thrumming in my chest and the way the lights catch every little movement. It’s a moment of pure, raw connection, and I want you to feel that same spark every time you look down at your hands. Getting ready for a show is like a warm, cloud-soft embrace of your own creativity, a chance to let your inner rockstar shine through.
I know how much you adore those little details that make an outfit pop, and let’s be honest—nothing says ‘I’m with the band’ quite like a custom set of nails. Whether you’re headbanging in the pit or swaying to a soulful ballad, your nails are your ultimate accessory. I’ve gathered some of my favorite edgy looks that you can totally do at home, wrapped in love and easy-to-follow steps so you can focus on the music and the memories.
5 Easy Steps for Cherry Rock Nails
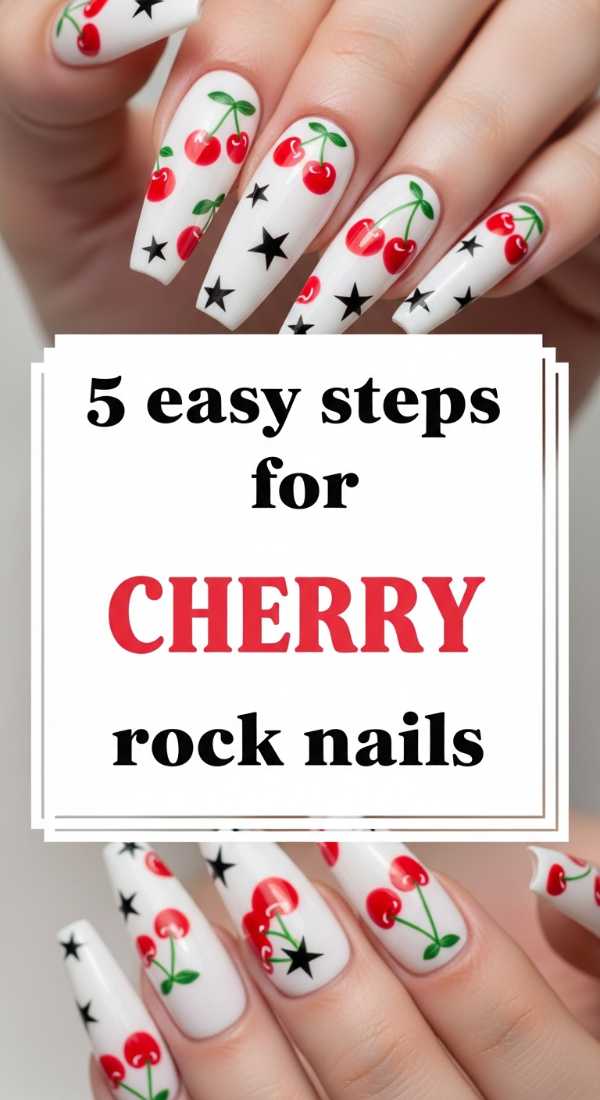
Why to love these Nails:
These nails are the perfect blend of sweet and salty, my loves. They take that classic, innocent cherry motif and give it a dark, rebellious twist that feels so effortlessly cool. It’s like wearing your favorite vintage leather jacket over a silk dress—the contrast is just everything.
Essential Items:
- Deep cherry red nail polish
- Opaque black nail polish
- A fine-tipped dotting tool
- Clear top coat
- Base coat
How to Prepare:
- Apply a nourishing base coat to protect your natural nails.
- Paint two thin coats of the deep red polish and let them dry completely.
- Using your dotting tool and black polish, place two small dots side-by-side near the tip of the nail.
- Connect the dots with thin, black ‘stems’ that meet at a point near the cuticle.
- Seal the look with a high-shine top coat for that rockstar gloss.
Budget Range
- Essie ‘Gala-Vanting’ Red – $10
- Wet n Wild ‘Black Cream’ – $2
- Nail Art Dotting Tool Set – $5
Master Black Checkers in 4 Steps
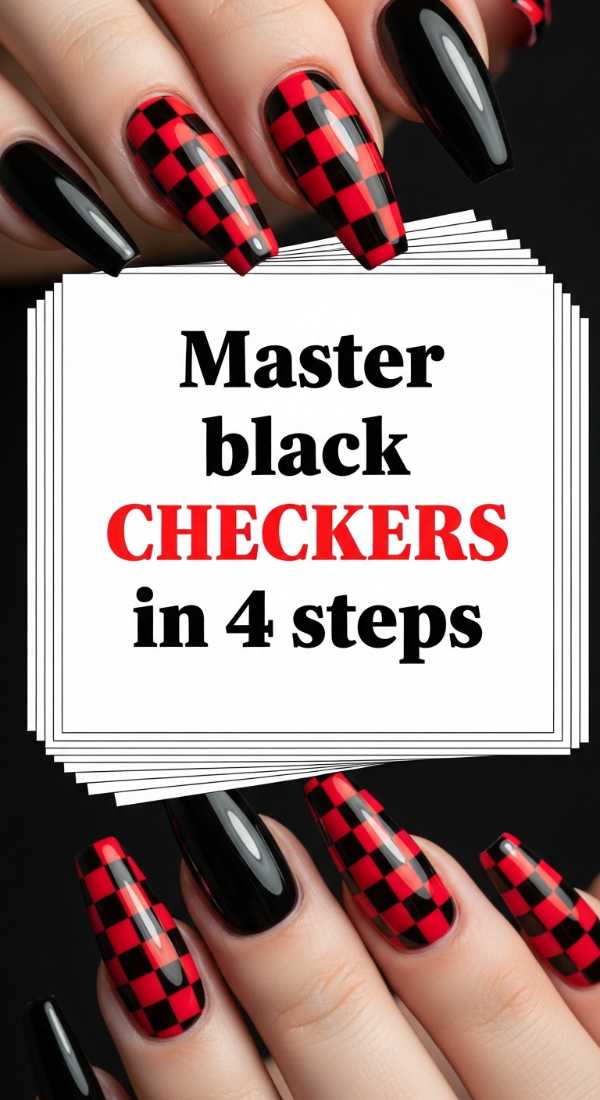
Why to love these Nails:
Oh, the nostalgia! Black checkers are a total tribute to the ska and pop-punk scenes we grew up loving. They are bold, graphic, and they go with literally every concert tee in your closet. They feel like a warm hug from your teenage self, but with a grown-up, polished edge.
Essential Items:
- Crisp white nail polish
- Black striping polish (or a thin brush)
- Matte top coat
- Patience and a steady hand
How to Prepare:
- Apply two coats of white polish as your canvas.
- Draw two vertical black lines and two horizontal black lines to create a grid.
- Fill in every other square with the black polish like a chessboard.
- Apply a matte top coat to give it that authentic ‘Vans’ sneaker vibe.
Budget Range
- Sally Hansen White On – $5
- Beetles Black Liner Gel – $8
- NYX Matte Finish Top Coat – $7
Get 8-Ball Nail Art in 6 Steps
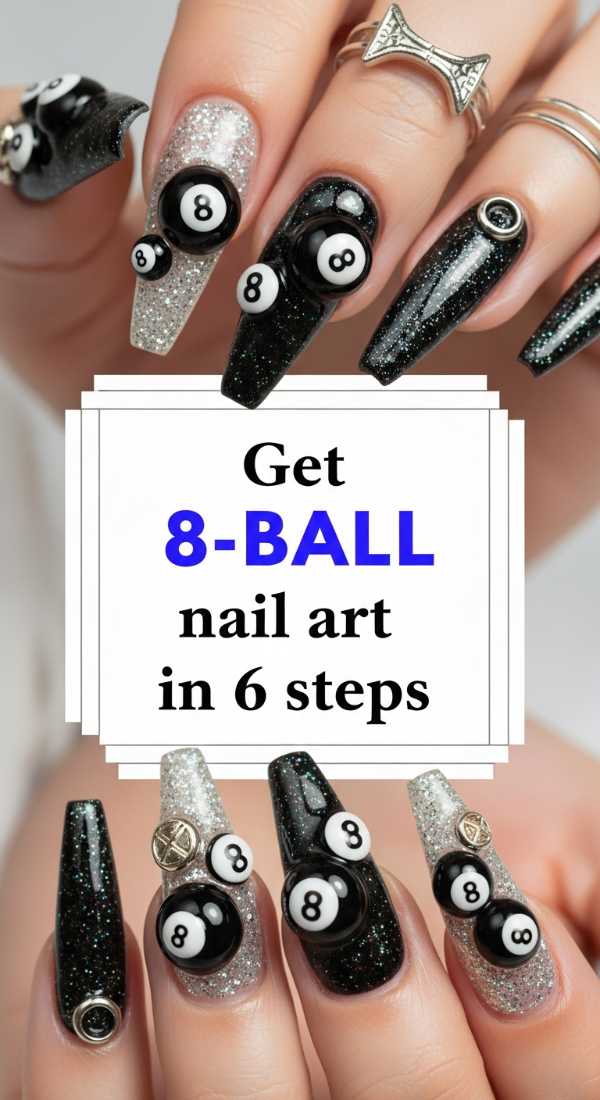
Why to love these Nails:
There’s something so mysterious and fun about 8-ball nail art. It evokes that late-night pool hall energy and the thrill of the unknown. It’s a conversation starter for sure, and it looks incredibly professional even though you did it yourself in your pajamas!
Essential Items:
- Jet black polish
- Bright white polish
- Detailing brush
- Small dotting tool
- Reinforcement stickers (optional)
How to Prepare:
- Paint your entire nail with the jet black polish.
- Wait for it to dry, then paint a medium-sized white circle in the center.
- Once the white circle is dry, use a smaller dotting tool to place a tiny black circle inside it.
- Carefully paint a small white number ‘8’ inside the tiny black circle.
- Clean up any edges with a brush dipped in remover.
- Finish with a protective top coat.
Budget Range
- OPI Black Onyx – $11
- Zoya Purity White – $12
- Detailing Brush Set – $6
3 Quick Steps for Star Tips
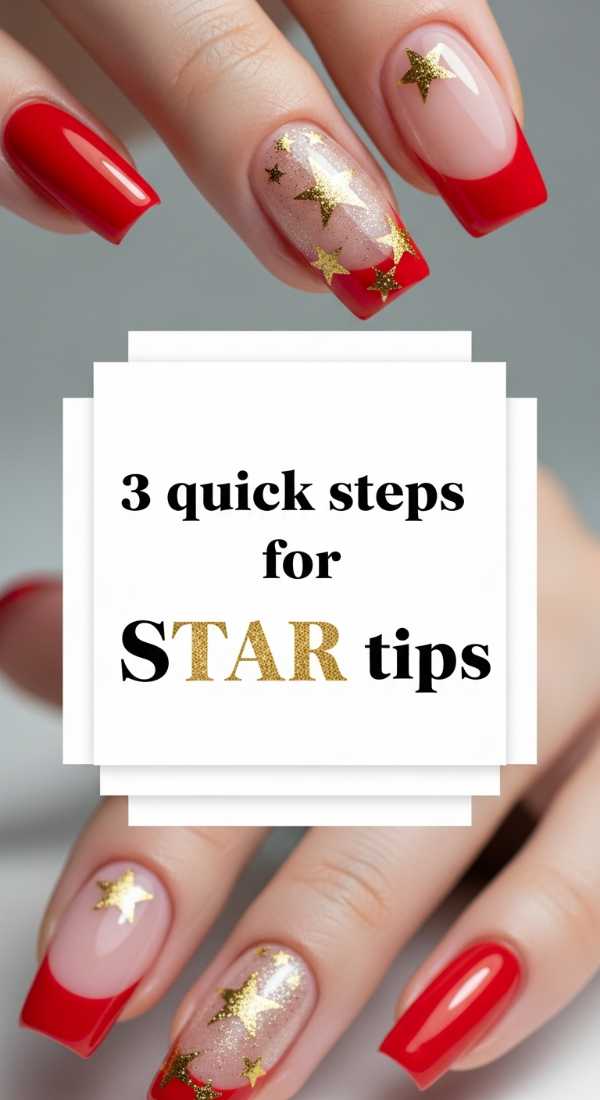
Why to love these Nails:
Star tips are for the dreamers who love to scream lyrics at the top of their lungs. They add a touch of celestial magic to an edgy look, making your hands look like they’re catching the stage lights. It’s a soft way to do ‘rocker’ without being too heavy.
Essential Items:
- Nude or sheer pink base polish
- Black star nail decals or black polish
- Tweezers
How to Prepare:
- Apply your sheer base coat for a clean, natural look.
- Use tweezers to place star decals along the tips of your nails, or hand-paint them if you’re feeling brave.
- Press them down firmly and seal with two layers of top coat.
Budget Range
- Essie Mademoiselle – $9
- Star Nail Decals (Etsy) – $4
- Seche Vite Top Coat – $9
Apply 3D Charms in 7 Minutes
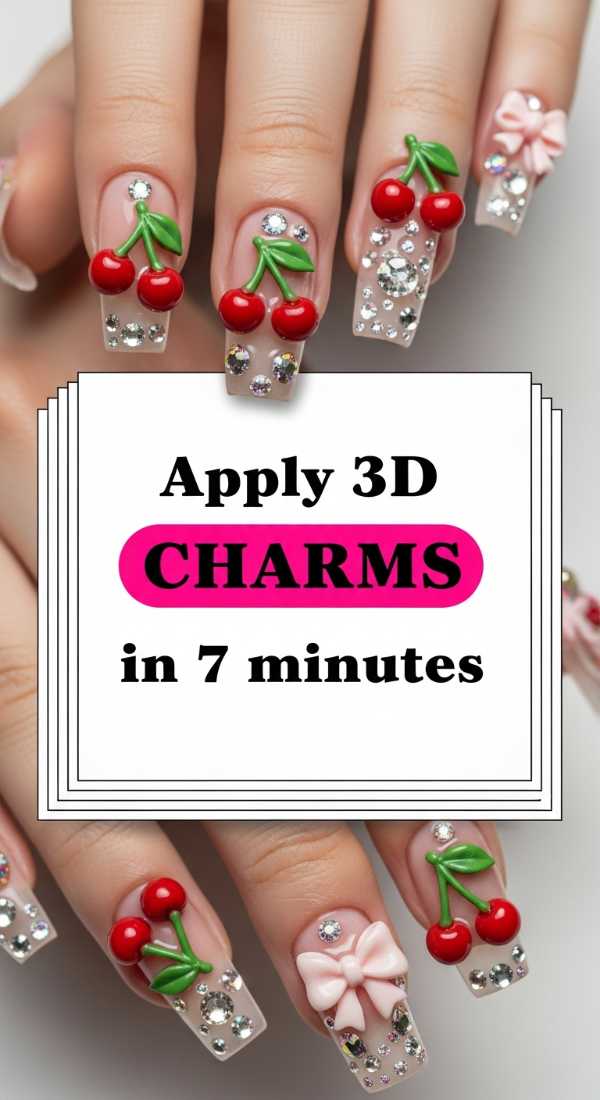
Why to love these Nails:
Texture is everything, sweethearts! 3D charms like tiny crosses or silver studs add a physical weight to your style that feels so expensive and custom. It’s the ultimate way to bring that ‘jewelry for your nails’ trend into your concert look.
Essential Items:
- Dark grey or black polish
- Nail glue or thick builder gel
- Silver metal charms (crosses, studs, or chains)
- Orange wood stick
How to Prepare:
- Paint your nails your chosen base color and let dry.
- Apply a small bead of nail glue exactly where you want the charm.
- Pick up the charm with the wood stick and press it into the glue.
- Hold for 10 seconds to ensure it’s secure.
- Apply top coat *around* the charm, not over it, to keep the metallic shine.
- Repeat for accent nails.
- Check for any snags and smooth them out.
Budget Range
- Modelones Nail Glue – $6
- Mixed Silver Nail Charms (Amazon) – $7
- Revlon Gunmetal Polish – $5
Create Grunge Nails in 5 Steps
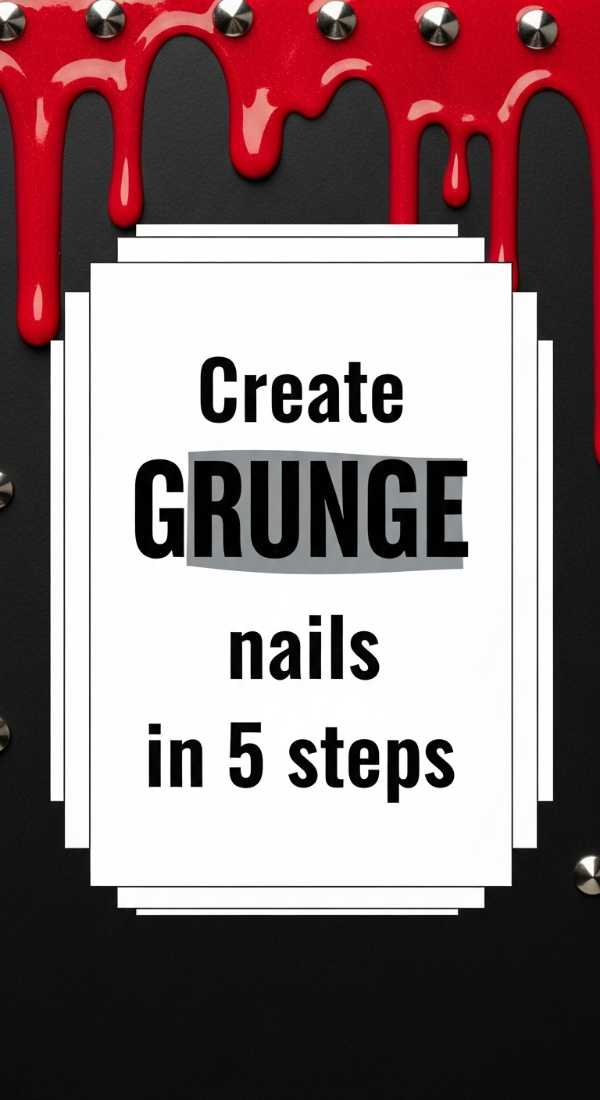
Why to love these Nails:
This look is all about that beautiful, messy imperfection. It’s inspired by the Seattle scene and that ‘just woke up like this’ energy. Grunge nails don’t have to be perfect, which makes them so relaxing to create. They embrace the chaos of the music.
Essential Items:
- Black polish
- Grey polish
- A makeup sponge
- Acetone for cleanup
How to Prepare:
- Paint your nails a solid grey.
- Dab a little black polish onto a makeup sponge and blot off the excess.
- Lightly tap the sponge onto the tips and sides of the nails for a ‘smudged’ effect.
- Use a brush dipped in acetone to slightly blur the edges of the black polish.
- Top with a matte coat for that dusty, vintage feel.
Budget Range
- Wet n Wild Grey – $2
- Wedge Makeup Sponges – $3
- Pure Acetone – $4
Design Chrome Concert Nails in 4 Steps
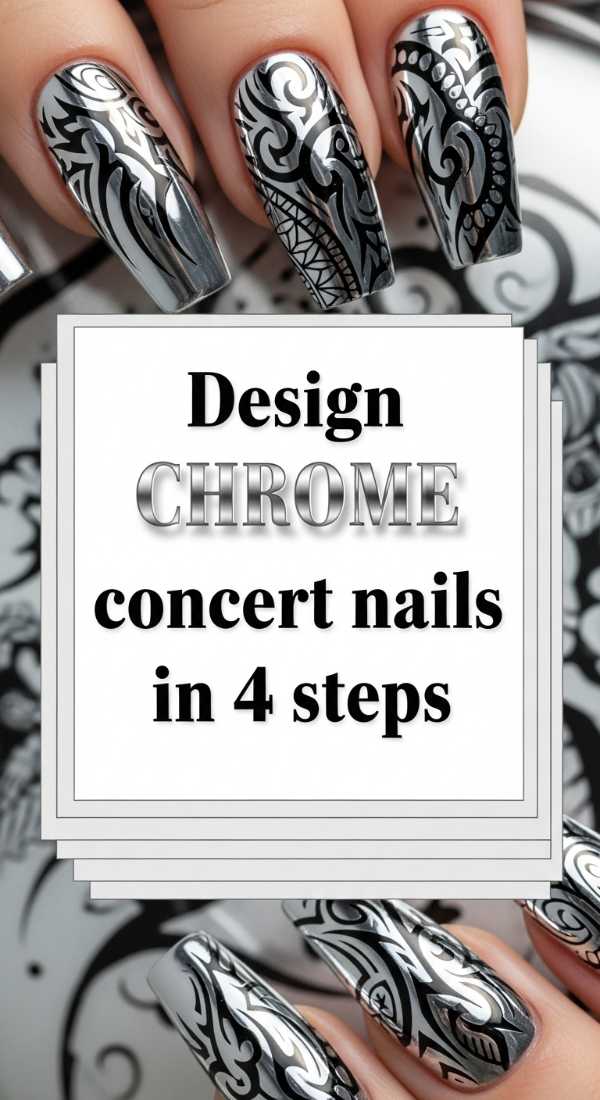
Why to love these Nails:
If you want to feel like a futuristic rock star, chrome is your best friend. It reflects every strobe light and phone flash in the crowd. It’s sleek, it’s modern, and it feels incredibly powerful. You’ll feel like you’re glowing from the inside out.
Essential Items:
- No-wipe gel top coat
- Silver chrome powder
- Sponge applicator
- UV/LED Lamp
How to Prepare:
- Apply a black gel base and cure.
- Apply a no-wipe top coat and cure for only 30 seconds.
- Rub the chrome powder onto the nail until it turns into a mirror.
- Apply another layer of top coat and cure fully to lock in the shine.
Budget Range
- Artdone Chrome Powder – $8
- SUNUV LED Lamp – $25
- Gelish No-Wipe Top Coat – $12
6 Steps to Perfect Flame Nails
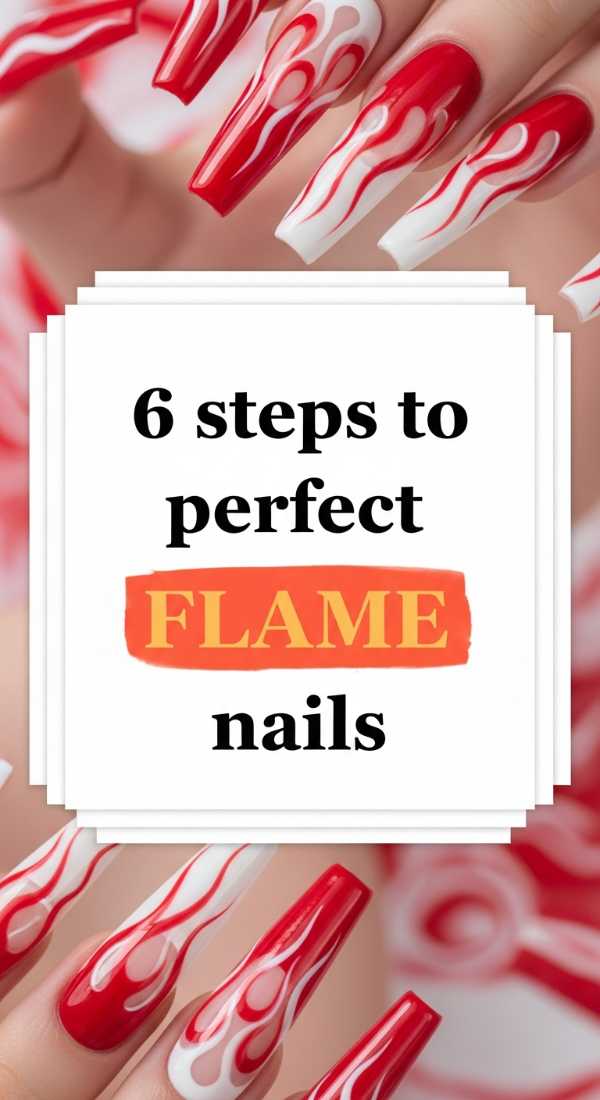
Why to love these Nails:
Flame nails are the ultimate symbol of passion! They represent the heat of the crowd and the fire of a great guitar solo. They are undeniably fierce but can be done in soft colors if you want a more ‘whisper’ version of this ‘roar’.
Essential Items:
- Orange or red polish
- Yellow polish
- Very thin striping brush
- Base color (black works best)
How to Prepare:
- Start with a black base coat for maximum drama.
- Using your thin brush and red polish, draw three wavy ‘S’ shapes starting from the tip.
- Connect the waves at the tip of the nail.
- Add a smaller flame shape inside the red using the orange polish.
- Add a tiny flick of yellow at the very center of the flame.
- Seal with a glossy top coat.
Budget Range
- Sinful Colors ‘Black on Black’ – $3
- Holler and Glow Neon Polish Set – $10
- Nail Art Brush Set – $6
Do Red French Tips in 3 Steps
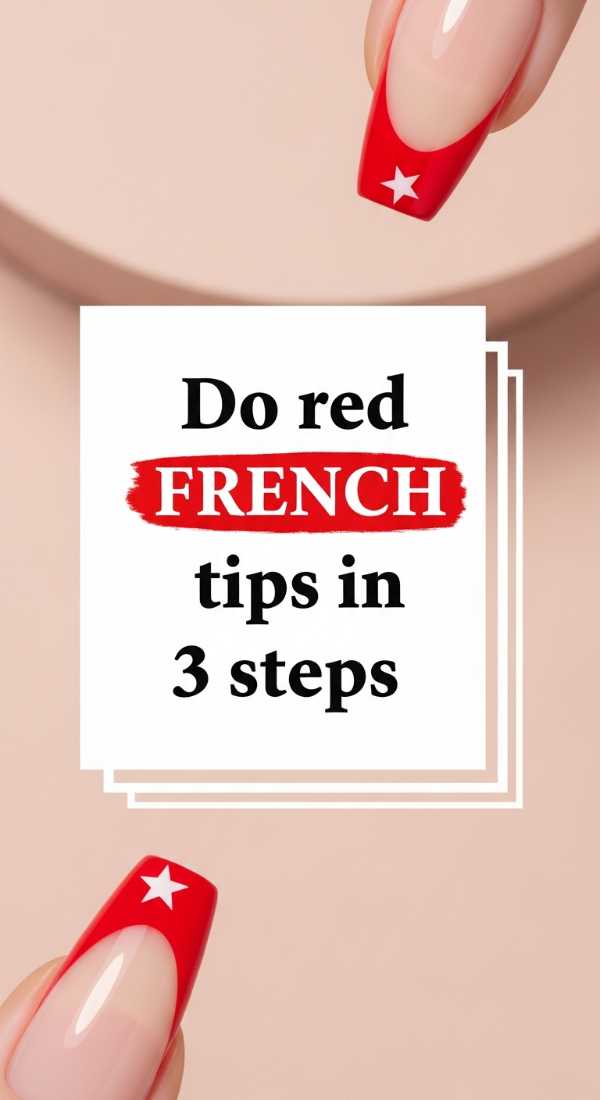
Why to love these Nails:
This is for my loves who want a ‘vampy’ twist on a classic. Red French tips are sophisticated yet dangerous. They suggest a sharp edge while keeping things feminine and soft. It’s the perfect ‘cool girl’ nail for a rock show.
Essential Items:
- Sheer nude base
- Deep blood-red polish
- French tip guides or a steady hand
How to Prepare:
- Apply your sheer nude base and let it dry completely.
- Place a guide sticker slightly below the tip (or freehand) and paint the tip with deep red.
- Remove the guide immediately and finish with a high-gloss top coat.
Budget Range
- Orly ‘Rose-Colored Glasses’ – $12
- China Glaze ‘Seduce Me’ – $8
- French Tip Guides – $3
8 Steps for the Ultimate Rock Set
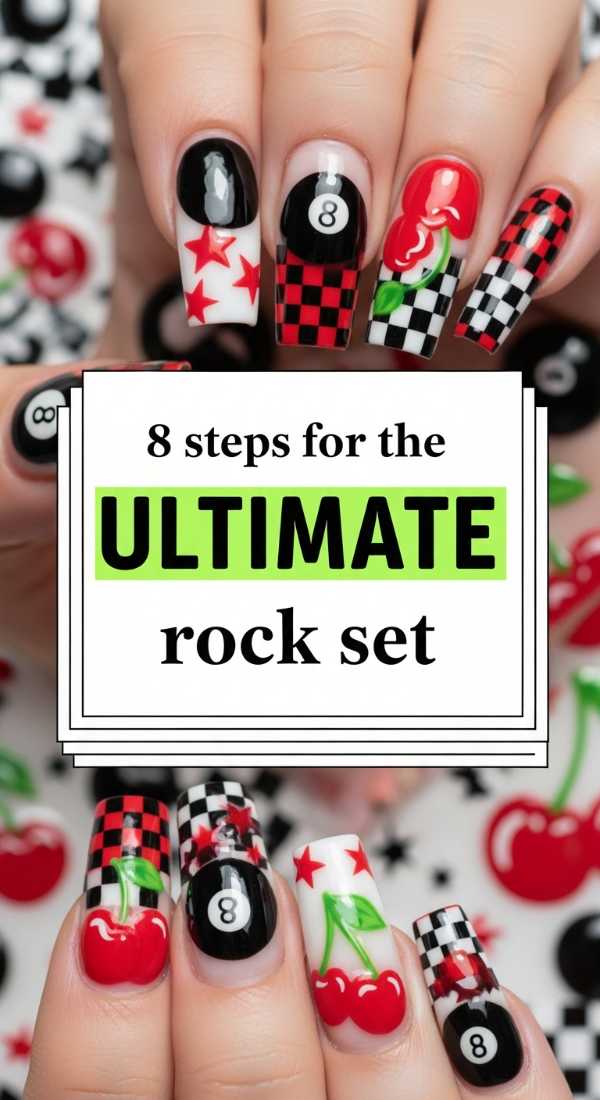
Why to love these Nails:
Why choose just one when you can have them all? This set is a curated gallery of everything we love about rock culture. It’s a maximalist dream that shows off your personality and your dedication to the vibe. It’s you, fully expressed.
Essential Items:
- All previous polishes
- Small rhinestones
- A mix of matte and glossy top coats
How to Prepare:
- Plan your design: choose a different motif for each finger (e.g., thumb: chrome, index: flames).
- Apply base coats to all fingers.
- Work one nail at a time to complete the specific designs (checkers, 8-balls, etc.).
- Add 3D rhinestones to the ‘star tips’ nail for extra flare.
- Mix textures by using matte top coat on the grunge nail and glossy on the others.
- Ensure all layers are thin to prevent peeling.
- Clean up cuticles with a small brush and acetone for a pro finish.
- Apply cuticle oil to keep your hands looking soft and hydrated.
Budget Range
- Complete Nail Art Kit – $20
- Nail Glue – $5
- Cuticle Oil – $6
Rock On with Confidence
There you have it, my loves! Ten ways to bring that concert energy right to your fingertips. Remember, nail art is a form of self-care. It’s a quiet moment you take for yourself before the beautiful noise of the world takes over. Don’t worry about being perfect; the best rock and roll is always a little bit messy and a lot of bit soulful. I can’t wait to see which look you choose for your next show. Tag me in your photos, and stay bold, stay edgy, and most importantly, stay uniquely you!