

Easy, Aesthetic, and Viral: The Only Food Board Guide You Need
There is something inherently communal and deeply satisfying about a beautifully laid out food board. It’s more than just a meal; it’s an invitation to linger, to graze, and to share stories over a tapestry of colors and textures. I remember the first time I set out a massive spread for my friends—the way the afternoon light hit the vibrant berries and the sound of laughter filled the room as everyone reached for their favorite bites. It turned a simple Tuesday into a core memory, and that’s the magic we’re tapping into today.
We’ve all seen those viral boards on social media that look almost too good to eat, but I’m here to tell you that achieving that aesthetic isn’t about being a professional chef. It’s about the art of assembly and choosing recipes that spark joy. Whether you’re hosting a sun-drenched backyard party or just want to make a weeknight dinner feel like a celebration, this guide is your roadmap to creating a viral-worthy food board that tastes even better than it looks. Let’s dive into the ultimate summer spreads that will have your guests reaching for their phones and their forks.
10 Easy Summer Crockpot Recipes You Need
Why we love this
Nothing beats the convenience of a crockpot when the temperatures rise, allowing you to create succulent, tender meats without turning your kitchen into a sauna. Imagine the aroma of sweet honey and tangy balsamic infusing into a roast for hours, resulting in a texture so soft it practically melts the moment it hits your tongue. The flavor profile is deep and complex, offering a savory-sweet balance that feels sophisticated yet incredibly comforting. It’s the perfect base for a ‘Build Your Own Slider’ board, providing a warm, hearty element that contrasts beautifully with chilled toppings and fresh buns.
Ingredients
- 3 lbs Pork shoulder or chicken thighs
- 1 cup Honey-barbecue sauce
- 1/4 cup Apple cider vinegar
- 2 tablespoons Smoked paprika
- 1 large Onion, thinly sliced
- 3 cloves Garlic, minced
- Salt and cracked black pepper to taste
How to make it
- Begin by prepping your meat; if using pork, trim any excess thick fat caps, but leave enough for moisture. Pat the meat completely dry with paper towels to ensure the spices stick properly.
- In a small bowl, whisk together the honey-barbecue sauce, apple cider vinegar, smoked paprika, salt, and pepper until the mixture is glossy and well-combined.
- Layer the sliced onions and minced garlic at the bottom of the slow cooker to create a flavor-packed ‘trivet’ that prevents the meat from sticking to the bottom.
- Place the meat on top of the onions and pour the sauce mixture over it, using a spatula to ensure every inch of the protein is coated.
- Set your crockpot to ‘Low’ and cook for 7 to 8 hours. Resist the urge to open the lid, as this releases the steam necessary for that ultra-tender texture. Visual cue: the meat should easily pull apart with the light pressure of a fork.
- Once finished, shred the meat directly in the pot using two forks, allowing it to soak up all the residual juices for 15 minutes before serving on your board.
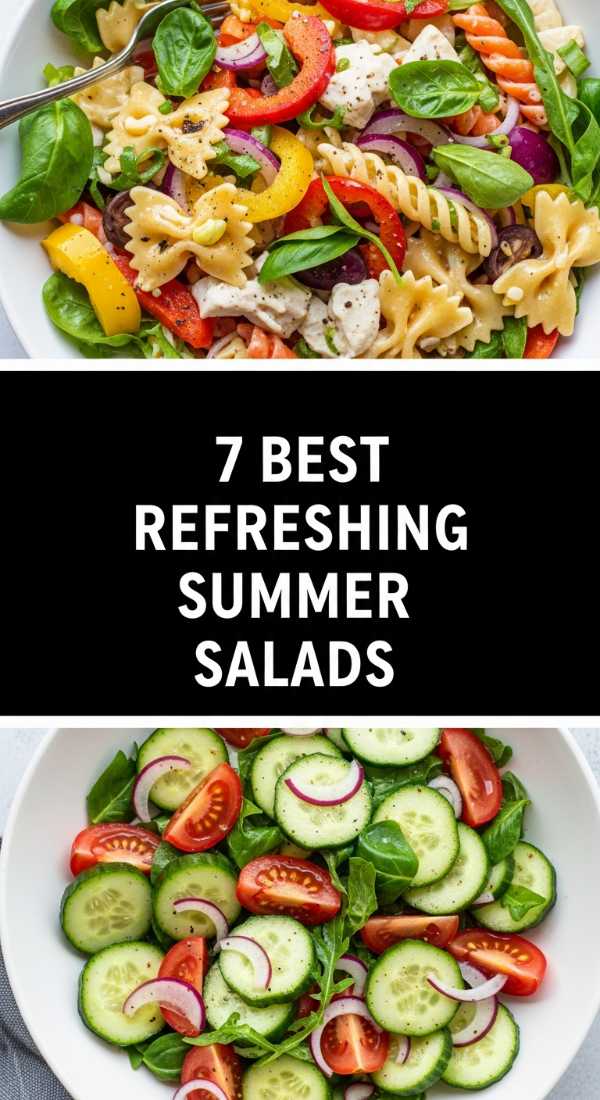
7 Refreshing Summer Salad Recipes to Try

Why we love this
A summer salad should be a celebration of crunch and vitality, a refreshing explosion of garden-fresh flavors that cleanses the palate. Picture vibrant slices of watermelon paired with salty, crumbly feta and the sharp, peppery bite of fresh arugula, all drizzled with a lime-infused vinaigrette. The texture is a delightful contrast between the juicy fruit, the creamy cheese, and the snap of crisp greens, creating a sensory experience that is both cooling and invigorating. It brings a pop of bright color to any board, making it look instantly more professional and appetizing.
Ingredients
- 4 cups Fresh watermelon cubes
- 1 cup High-quality feta cheese, crumbled
- 2 cups Baby arugula or spinach
- 1/2 cup Fresh mint leaves, chiffonade
- 1/4 cup Extra virgin olive oil
- 2 tablespoons Fresh lime juice
- 1/2 teaspoon Flaky sea salt
How to make it
- Start by chilling your watermelon in the refrigerator for at least two hours before assembly; a cold salad is essential for that refreshing summer feeling.
- Whisk the olive oil and lime juice in a small glass jar until emulsified. The mixture should look slightly thickened and opaque.
- In a large, shallow wooden bowl (perfect for board presentation), lay down a bed of arugula, fluffing it up to create volume.
- Scatter the chilled watermelon cubes evenly over the greens. Ensure they are cut into bite-sized 1-inch squares for easy grazing.
- Sprinkle the feta cheese over the top, followed by the fresh mint. To chiffonade the mint, stack the leaves, roll them tightly like a cigar, and slice thin ribbons.
- Just before serving, drizzle the dressing in a zigzag motion and finish with a generous pinch of flaky sea salt to enhance the natural sweetness of the fruit.
12 Top Cookout Side Dishes Everyone Loves

Why we love this
Cookout sides are the unsung heroes of the summer food board, providing the nostalgic, smoky flavors that define outdoor dining. Think of charred Mexican street corn, or Elote, with its kernels bursting with sweetness and a smoky exterior that carries the char of the grill. The aroma of toasted corn mixed with chili powder and lime is intoxicating, drawing everyone to the table before the main course is even ready. The texture is a playful mix of firm kernels and creamy, tangy sauce that creates a messy, joyous eating experience that is quintessentially summer.
Ingredients
- 6 ears of Fresh sweet corn, husks removed
- 1/2 cup Mayonnaise or Mexican Crema
- 1/2 cup Cotija cheese, crumbled
- 1 teaspoon Chili powder or Tajin seasoning
- 1/4 cup Fresh cilantro, chopped
- 2 Fresh limes, cut into wedges
How to make it
- Preheat your grill to medium-high heat (about 400°F). Ensure the grates are clean and lightly oiled to prevent sticking.
- Place the corn directly on the grates. Grill for about 10-12 minutes, turning occasionally. You are looking for even char marks—blackened spots on the yellow kernels—and a slightly softened texture.
- While the corn is hot, use a silicone brush to coat each cob thinly but thoroughly with the mayonnaise or crema. The heat from the corn will help the sauce melt into the crevices.
- Generously sprinkle the Cotija cheese over the cobs, rotating them so they are fully encrusted in the salty cheese.
- Dust with chili powder or Tajin for a hint of heat and a vibrant red aesthetic.
- Arrange the corn on your food board, garnished with fresh cilantro and lime wedges, which guests can squeeze over their corn for an extra hit of acidity.
8 Healthy Summer Dinner Recipes for Families

Why we love this
When the sun stays out late, dinner should be light, nourishing, and full of lean proteins that don’t leave you feeling sluggish. A lemon-herb grilled salmon board is the epitome of healthy elegance, featuring flaky, buttery fish with a crisp, seasoned skin. The aroma of zesty lemon zest and fresh dill filling the air creates a spa-like dining experience at your own dinner table. Each bite is a perfect harmony of citrus brightness and the rich, healthy fats of the salmon, making it a meal that feels indulgent while being incredibly good for your body.
Ingredients
- 4 Salmon fillets (approx. 6 oz each)
- 2 tablespoons Avocado oil (high smoke point)
- 2 teaspoons Lemon zest
- 1 tablespoon Fresh dill, chopped
- 1 teaspoon Garlic powder
- Thinly sliced lemon rounds for garnish
How to make it
- Remove the salmon from the fridge 15 minutes before cooking to bring it closer to room temperature, which ensures even cooking throughout the fillet.
- Pat the skin and flesh side completely dry with a paper towel. Moisture is the enemy of a crisp skin.
- Mix the avocado oil, lemon zest, garlic powder, and a pinch of salt in a small bowl. Rub this mixture over the flesh side of the salmon fillets.
- Heat a heavy cast-iron skillet over medium-high heat. You’ll know it’s ready when a drop of water sizzles and evaporates instantly.
- Place the salmon skin-side down in the hot pan. Press down lightly with a spatula for 30 seconds to ensure full contact. Cook undisturbed for 5-6 minutes until the skin is crispy and the flesh has cooked about three-quarters of the way up.
- Carefully flip the fillets and cook for just 1-2 more minutes. The salmon is perfectly done when it reaches an internal temperature of 125°F for medium-rare. Let it rest for 3 minutes before arranging on the board with fresh dill.
5 Best Summer Pasta Salads for Parties

Why we love this
A great pasta salad is the backbone of any party board, offering a versatile and filling option that holds up beautifully in the heat. Imagine a Caprese Orzo salad where tiny, rice-shaped pasta pearls are tossed with milky mini-mozzarella balls and sun-ripened cherry tomatoes. The texture is soft and chewy, punctuated by the burst of juicy tomatoes and the silky finish of a high-quality balsamic glaze. It’s a visually stunning dish that looks like a mosaic of red, white, and green, adding a sophisticated Italian flair to your summer gathering.
Ingredients
- 16 oz Orzo pasta
- 1 pint Cherry tomatoes, halved
- 8 oz Bocconcini (mini mozzarella balls)
- 1 cup Fresh basil leaves
- 1/4 cup Balsamic glaze
- 1/2 cup Basil pesto (store-bought or homemade)
How to make it
- Bring a large pot of salted water to a rolling boil. Cook the orzo according to the package directions, but aim for ‘al dente’—usually about 8-9 minutes. It should have a slight bite.
- Drain the orzo and immediately rinse it under cold running water. This stops the cooking process and washes away excess starch, preventing the pasta from clumping together.
- Transfer the cooled orzo to a large mixing bowl and fold in the basil pesto until every grain of pasta is evenly coated and green.
- Gently stir in the halved cherry tomatoes and the mini mozzarella balls. Be careful not to bruise the tomatoes.
- Taste and adjust seasoning with a little more salt or black pepper if needed. The pesto provides most of the flavor, but a little extra seasoning makes the vegetables pop.
- Spread the pasta onto your board or in a low profile bowl. Just before the guests arrive, drizzle the thick balsamic glaze in a decorative pattern over the top and garnish with whole basil leaves.
9 Best Summer Dessert Recipes to Cool Down

Why we love this
When the heat is on, a no-bake dessert board is the ultimate way to satisfy a sweet tooth without breaking a sweat. A berry icebox cake is a viral sensation for a reason; it’s a cloud-like confection of whipped cream and graham crackers that transforms into a cake-like texture in the fridge. The aroma is purely nostalgic—sweet cream and fresh, tart strawberries that remind you of childhood summers. It’s light, airy, and incredibly cold, providing a much-needed chill that feels like a luxury on a humid July afternoon.
Ingredients
- 2 cups Heavy whipping cream
- 1/2 cup Powdered sugar
- 1 teaspoon Vanilla extract
- 2 sleeves of Honey graham crackers
- 2 cups Fresh strawberries, thinly sliced
- 1 cup Fresh blueberries
How to make it
- In a large chilled glass bowl, combine the heavy cream, powdered sugar, and vanilla. Beat with a hand mixer on high speed until stiff peaks form. The cream should be thick enough to hold its shape on the whisk.
- In a rectangular glass dish or directly on a flat platter (if serving immediately after chilling), spread a very thin layer of whipped cream to act as ‘glue’ for the crackers.
- Lay down a single layer of graham crackers, breaking them to fit the edges of your space.
- Top the crackers with a generous layer of whipped cream, smoothing it out with an offset spatula.
- Add a layer of sliced strawberries on top of the cream. Repeat the layers (crackers, cream, fruit) until you have at least 3 layers of crackers.
- Finish with a final layer of cream and garnish with blueberries and any remaining strawberries. Cover and refrigerate for at least 4 hours (overnight is best). The crackers will absorb the moisture from the cream and become soft and cake-like.
6 Viral Summer Dips for Every Party

Why we love this
Dips are the heart of any food board, acting as the magnetic center that brings everyone together for a shared dipping experience. Whipped feta topped with hot honey and crushed pistachios is currently taking the internet by storm, and for good reason. The texture is impossibly airy and velvety, providing a salty, tangy base that contrasts beautifully with the sticky, spicy honey and the crunch of the nuts. It’s a sophisticated flavor explosion that feels high-end but takes only minutes to prepare, making it the perfect ‘wow’ factor for your aesthetic spread.
Ingredients
- 8 oz Block feta cheese, crumbled
- 1/2 cup Greek yogurt (full fat)
- 1 clove Garlic, grated
- 2 tablespoons Olive oil
- 2 tablespoons Hot honey
- 1/4 cup Roasted pistachios, chopped
How to make it
- Place the crumbled feta, Greek yogurt, grated garlic, and olive oil into a food processor or high-speed blender.
- Process on high for 2-3 minutes. This is the secret step: you want to keep blending until the feta loses its graininess and becomes completely smooth and fluffy, almost like a mousse.
- If the mixture is too thick, add one teaspoon of water at a time until you reach your desired dipping consistency.
- Transfer the whipped feta to a shallow bowl. Use the back of a spoon to create deep ‘swirls’ and ‘valleys’ in the surface—these will hold your toppings.
- Warm the hot honey slightly in the microwave for 10 seconds so it’s extra runny, then drizzle it generously into the swirls of the feta.
- Finish by sprinkling the chopped pistachios over the top for a bright green color and a satisfying crunch. Serve in the center of your board surrounded by toasted pita triangles and cucumber slices.
10 Quick Summer Lunch Ideas for Work

Why we love this
Even on workdays, you deserve a lunch that feels like a mini-vacation, and a Mediterranean-style wrap is the perfect solution. Imagine a soft flour tortilla stuffed with zesty lemon-herb chicken, crisp cucumbers, and a smear of creamy hummus. The texture is a delightful mix of chewy, crunchy, and smooth, providing a balanced meal that is easy to eat with one hand while you finish those emails. The aroma of fresh herbs and garlic is a refreshing departure from the standard office fare, making you the envy of the breakroom.
Ingredients
- 2 Large flour tortillas or wraps
- 1 cup Cooked chicken breast, shredded
- 1/2 cup Classic hummus
- 1/2 Cucumber, sliced into matchsticks
- 1/4 cup Red onion, thinly sliced
- 1/4 cup Feta cheese
- 1 tablespoon Fresh parsley, chopped
How to make it
- Lay your tortillas flat on a clean cutting board. If they are stiff, microwave them for 10 seconds to make them more pliable and prevent tearing.
- Spread a thick, even layer of hummus across the bottom two-thirds of the tortilla, leaving a small border at the edges. This acts as the ‘seal’ for your wrap.
- Place the shredded chicken in a neat line across the center of the hummus. Season the chicken lightly with a pinch of salt and pepper.
- Layer the cucumber matchsticks, red onions, and feta cheese on top of the chicken. The matchstick cut for the cucumber is vital as it provides crunch in every bite without being too bulky.
- Sprinkle the fresh parsley over the filling for a hit of herbal freshness.
- To fold, tuck in the sides of the tortilla first, then roll from the bottom up as tightly as possible. Slice the wrap on a sharp diagonal to show off the beautiful internal layers when placed on your lunch board.
7 Best Fun Summer Drinks to Sip On

Why we love this
No food board is complete without a signature beverage to wash everything down, and a Sparkling Peach Basil Lemonade is the ultimate thirst-quencher. Picture a tall glass filled with ice, featuring a soft orange hue and dark green basil leaves floating throughout. The aroma is a heavenly mix of sun-ripened peaches and the earthy, sweet scent of bruised basil. It’s bubbly, refreshing, and just the right amount of sweet, providing a sophisticated non-alcoholic option that feels just as special as a craft cocktail.
Ingredients
- 1 cup Fresh peach puree (about 2 ripe peaches)
- 1/2 cup Fresh lemon juice
- 1/4 cup Simple syrup (adjust to taste)
- 4 cups Sparkling water or club soda
- 1/2 cup Fresh basil leaves
- Ice cubes
How to make it
- Prepare the peach puree by blending two peeled and pitted peaches until completely smooth. Strain through a fine-mesh sieve if you prefer a perfectly clear drink.
- In a large pitcher, combine the peach puree, lemon juice, and simple syrup. Stir vigorously with a long spoon until the syrup is fully integrated.
- Take the basil leaves and place them in the palm of your hand. Give them a firm ‘clap’—this bruises the leaves just enough to release their essential oils without making them look tattered.
- Add the basil leaves to the pitcher and use a wooden spoon to gently muddle them into the peach base for about 30 seconds.
- Fill the pitcher with plenty of ice to keep everything chilled as you add the sparkling water.
- Slowly pour in the sparkling water, stirring very gently once to combine. Over-stirring will dissipate the bubbles. Serve in glasses garnished with a fresh peach slice and a whole basil sprig for that viral-worthy look.
11 Easy Summer Meals for Busy Nights
[IMAGE_10]
Why we love this
Busy weeknights call for meals that are high on flavor but low on dishes, making the sheet pan shrimp scampi a literal lifesaver. Imagine jumbo shrimp sizzling in a pool of melted butter, garlic, and bright lemon juice, all cooked to perfection in under 10 minutes. The texture of the shrimp is snappy and juicy, while the roasted garlic becomes sweet and spreadable. It’s a meal that feels like it belongs in a high-end bistro, but it’s simple enough to assemble on a single tray and serve right in the center of your table for a rustic, viral board experience.
Ingredients
- 1 lb Jumbo shrimp, peeled and deveined
- 4 tablespoons Butter, melted
- 3 cloves Garlic, minced
- 1/2 teaspoon Red pepper flakes
- 1 Lemon, half sliced into rounds and half juiced
- 2 tablespoons Fresh parsley, chopped
How to make it
- Preheat your oven to 400°F (200°C). Line a large rimmed baking sheet with parchment paper or aluminum foil for the easiest cleanup of your life.
- In a medium bowl, toss the shrimp with the melted butter, minced garlic, lemon juice, and red pepper flakes. Ensure every shrimp is thoroughly glistening with the garlic-butter mixture.
- Spread the shrimp out on the prepared baking sheet in a single layer. Do not crowd them; space allows the heat to circulate so they roast rather than steam.
- Tuck the lemon slices in between the shrimp. These will caramelize in the oven and add a deep citrus flavor to the pan sauce.
- Roast for 6-8 minutes. Watch closely: the shrimp are done the moment they turn opaque and form a ‘C’ shape. If they curl into an ‘O’, they are overcooked!
- Remove from the oven and immediately sprinkle with fresh parsley. Serve the sheet pan directly on your board with a loaf of crusty French bread to soak up all that liquid gold garlic butter.
The Secret to a Perfect Board Conclusion
Building a viral food board isn’t just about following recipes; it’s about the joy of the process and the beauty of the presentation. Remember to play with heights, colors, and textures to keep the eye moving across your spread. Whether you choose one of these sections or mix and match them all, the goal is to create a space where everyone feels welcome to dig in. Summer is fleeting, so take the time to make your meals feel like an event. You’ve got the guide, now go create something beautiful!