

Have you ever found yourself scrolling through your social media feed at 2 AM, mesmerized by a time-lapse video of a backyard transformation, and thought, ‘I could totally do that’? We’ve all been there. There is something deeply satisfying about the idea of rolling up our sleeves and turning a mundane corner of our home into a Pinterest-worthy sanctuary. It’s about more than just the aesthetics; it’s about the pride of creation and the way a well-tended space makes us feel when we finally sit down with a cold drink at the end of the day.
But as any seasoned DIYer knows, the line between ‘viral masterpiece’ and ‘weekend disaster’ is thinner than a coat of primer. This week, I decided to dive deep into the internet’s most famous garden and home projects to see which ones actually deliver on their promises of bliss and beauty. Whether you’re looking to boost your curb appeal or create a cozy retreat for your family, I’ve broken down the best of the best to help you decide: is it a DIY or a don’t?
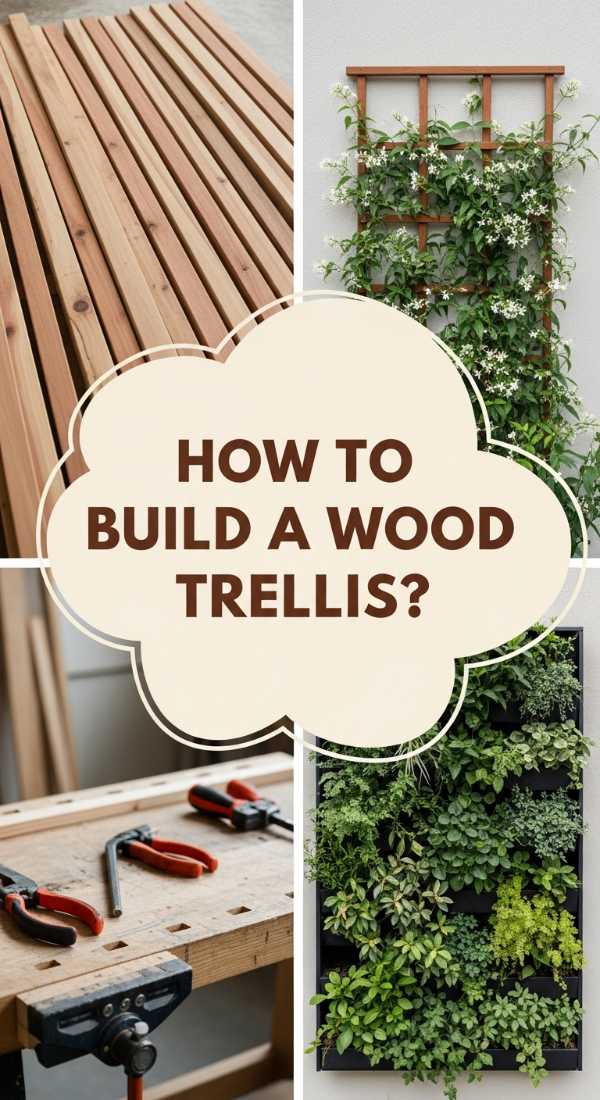
How to Build a Wood Trellis for Vertical Garden Bliss
Why we love this
There is nothing quite like the sight of lush, green vines snaking their way up a sturdy cedar trellis, catching the golden hour light. As the wood weathers to a beautiful silvery-grey, it provides a rustic, organic texture that softens the hard lines of a fence or brick wall. The sweet, intoxicating scent of climbing jasmine or the earthy aroma of ripening cherry tomatoes fills the air, turning a simple garden path into a sensory journey. It creates a living tapestry that breathes life into small spaces, making your garden feel like a private, enchanted forest hidden away from the world.
Essential Elements:
- 8-foot Cedar 2×2 boards
- Outdoor-rated wood screws
- Waterproof wood glue
- Power drill and miter saw
- Measuring tape and pencil
- Weather-resistant wood stain or sealer
How to make it
- Begin by measuring the height and width of the wall or area where the trellis will live, ensuring you leave at least a 2-inch gap from the ground to prevent wood rot.
- Cut your vertical support beams to the desired height using a miter saw, then layout your horizontal cross-sections at even intervals, typically every 8 to 12 inches for a classic grid look.
- Apply a small bead of waterproof wood glue to each joint where the horizontal slats meet the vertical supports; this adds critical structural integrity against wind and heavy plant weight.
- Pre-drill pilot holes at every intersection to prevent the cedar from splitting, then drive your outdoor screws flush with the wood surface.
- Sand any rough edges to a smooth finish, focusing on the joints, and apply two coats of high-quality exterior stain to protect the wood from UV rays and moisture.
- Mount the trellis to your wall or fence using spacers (like small blocks of wood) to allow air to circulate behind the plants, which prevents mildew and encourages healthy growth.
How to Remodel a Ranch Exterior for Modern Curb Appeal

Why we love this
The transformation of a classic ranch-style home is a masterclass in the power of contrast and clean lines. We love the way modern matte black hardware pops against warm, natural wood accents, creating a look that feels both sophisticated and welcoming. Walking up to a home with updated curb appeal feels like a fresh start every single day; the crispness of a newly painted facade paired with architectural lighting creates a glow that radiates pride of ownership. It’s the architectural equivalent of a deep breath—calm, organized, and effortlessly stylish.
Essential Elements:
- High-quality exterior paint (Matte or Satin finish)
- Cedar slat siding for accent walls
- Modern black house numbers and mailbox
- Large-scale outdoor lanterns
- Professional-grade paint sprayer
- Pressure washer
How to make it
- Start with a thorough pressure wash of the entire exterior to remove decades of dust, chalking paint, and grime, allowing at least 48 hours for the surface to dry completely.
- Scrape away any peeling paint and patch holes with exterior-grade filler, followed by a coat of high-bond primer to ensure the new color stays vibrant for years.
- Using a professional paint sprayer, apply the main body color in long, overlapping strokes, keeping the nozzle about 12 inches from the wall to avoid drips and uneven coverage.
- Identify a focal point, such as the entryway or a bump-out, and install vertical or horizontal cedar slats over the existing siding using a brad nailer for a high-end, contemporary texture.
- Swap out dated, small-scale lighting for oversized, modern fixtures that provide a warm 2700K glow, ensuring the scale of the light matches the width of your door.
- Complete the look by installing sleek, sans-serif house numbers and a matching mailbox, then add a final touch of greenery with black planters to ground the design.
How to Design a Hot Tub Area for Ultimate Backyard Relaxation

Why we love this
Imagine stepping out into your backyard as the cool evening air settles, greeted by the soft, rhythmic hum of bubbling water and the ethereal glow of submerged LED lights. A well-designed hot tub area is the ultimate sanctuary, a place where the steam rises to meet the stars and the stress of the day simply evaporates. The combination of smooth stone pavers underfoot and the privacy of a surrounding screen creates an intimate, spa-like atmosphere that feels miles away from civilization. It is the perfect blend of luxury and comfort, inviting you to soak, reflect, and recharge in total tranquility.
Essential Elements:
- Leveled concrete pad or reinforced deck
- Privacy screening (wood slats or faux greenery)
- Nonslip stone or porcelain pavers
- Outdoor string lights or solar path lights
- All-weather side table and towel rack
- Low-maintenance landscaping (grasses or shrubs)
How to make it
- Verify that your site is perfectly level and can support the weight of a filled tub (often over 3,000 lbs), usually requiring a 4-inch reinforced concrete slab.
- Arrange nonslip pavers around the tub’s perimeter, leaving enough space for a 3-foot ‘splash zone’ where water can drain away without creating mud.
- Construct a privacy screen using horizontal cedar boards or a metal decorative panel to block the wind and neighborly views while still allowing for air circulation.
- Install a heavy-duty outdoor towel rack and a weather-proof side table within arm’s reach of the tub for drinks and mobile devices.
- String overhead Edison bulbs across the area to create a soft, ambient canopy, ensuring all electrical connections are GFCI-protected and away from water.
- Surround the base with hardy, ornamental grasses that sway in the breeze, providing a natural, softening effect to the structural elements of the spa.
How to Style a Teen Room for Nostalgic Dreamy Vibes

Why we love this
A dreamy teen room is all about layers—layers of soft textures, layers of personal history, and layers of warm, diffused light. We love how this style blends nostalgic elements like vinyl records and film photos with modern comforts like weighted blankets and smart LED strips. It feels like a cozy cocoon, a safe space for dreaming and creativity where every corner tells a story through curated chaos. The gentle glow of neon signs and the plush feel of a faux-fur rug create an environment that encourages relaxation and self-expression, making it the heart of the home for a growing mind.
Essential Elements:
- LED light strips with remote control
- Macramé wall hangings or woven tapestries
- Floor pillows and chunky knit throws
- Gallery wall supplies (clips, twine, frames)
- A full-length arched floor mirror
- Storage ottomans for clutter control
How to make it
- Define a color palette that focuses on muted tones like sage green, dusty rose, or cream to create a calming foundation before adding bolder decorative elements.
- Install LED light strips along the ceiling perimeter or behind the headboard, setting them to a soft amber or lavender hue to immediately change the room’s mood.
- Create a ‘texture wall’ using a mix of macramé, framed art, and polaroid photos clipped to twine, giving the room a lived-in, curated feel.
- Layer the bed with a mix of linen sheets, a heavy duvet, and at least three different types of throw pillows to maximize the ‘cloud-like’ aesthetic.
- Position a large floor mirror in a corner to bounce light around and make the space feel larger, then add a plush rug nearby for a designated lounging area.
- Organize smaller items like skincare and tech accessories into aesthetic acrylic bins or woven baskets to keep the space peaceful and free of visual clutter.
How to Create a Rock River Bed for Natural Landscape Beauty

Why we love this
There is a profound, meditative beauty in a dry creek bed that mimics the natural flow of water through a landscape. We love the tactile contrast between smooth, rounded river rocks and the jagged edges of larger boulders, which adds an organic, weathered character to any yard. When it rains, the stones darken and glisten, creating a dynamic feature that feels like it has been part of the earth for centuries. It’s a practical solution for drainage that looks like a piece of art, bringing the serene feeling of a mountain stream right to your back door.
Essential Elements:
- Assorted river rocks (small pebbles to large cobbles)
- 2-3 large ‘anchor’ boulders
- Heavy-duty landscape fabric
- Landscape staples
- Shovel and metal rake
- Edging material (optional)
How to make it
- Map out a natural, meandering path for your river bed, using a garden hose to visualize the curves and ensuring it flows away from your home’s foundation.
- Dig a shallow trench approximately 6-8 inches deep, sloping the sides gently toward the middle to create a concave shape that will naturally funnel water.
- Line the entire trench with professional-grade landscape fabric to prevent weeds, securing it tightly with metal staples every 12 inches.
- Place your largest ‘anchor’ boulders first at the bends of the river, burying the bottom third of the stone so they look naturally embedded in the earth.
- Fill the bottom of the trench with medium-sized river rocks, then use smaller pebbles to fill the gaps and cover the edges of the landscape fabric.
- Add a few ‘islands’ of drought-tolerant plants like blue fescue or creeping thyme along the edges to soften the stone and complete the natural look.
How to Achieve Realistic Pantry Organization for Stress Free Cooking

Why we love this
Walking into a perfectly organized pantry feels like a shot of pure dopamine for the home cook. We love the visual rhythm of uniform glass jars filled with colorful grains, pastas, and spices, all standing in neat rows like a gourmet boutique. The lack of cardboard clutter and plastic crinkling makes the act of preparing a meal feel calm and intentional rather than frantic. It’s about creating a system where you can see exactly what you have at a glance, reducing waste and inspiring you to try that new recipe you’ve been eyeing for weeks.
Essential Elements:
- Airtight glass or BPA-free plastic canisters
- Custom labels or a label maker
- Tiered shelf risers (for canned goods)
- Woven or wire baskets for bulk items
- Lazy Susans for oils and vinegars
- Uniform spice jars
How to make it
- Empty the entire pantry and check expiration dates, then wipe down all shelves with a microfiber cloth and a gentle all-purpose cleaner.
- Group your items into logical categories like ‘Baking,’ ‘Breakfast,’ ‘Snacks,’ and ‘Dinner Prep’ to determine how much space each category requires.
- Decant dry goods like flour, sugar, and pasta into airtight containers, which not only looks better but keeps food fresh for significantly longer.
- Apply clear, legible labels to every container, ensuring they are placed at the same height on each jar for a professional, cohesive look.
- Utilize tiered risers for canned goods so you can see the back row, and place heavy or bulk items in large baskets on the bottom shelves.
- Place a Lazy Susan in the corner or on a high shelf to store oils, sauces, and jars, allowing you to access items in the back with a simple spin.
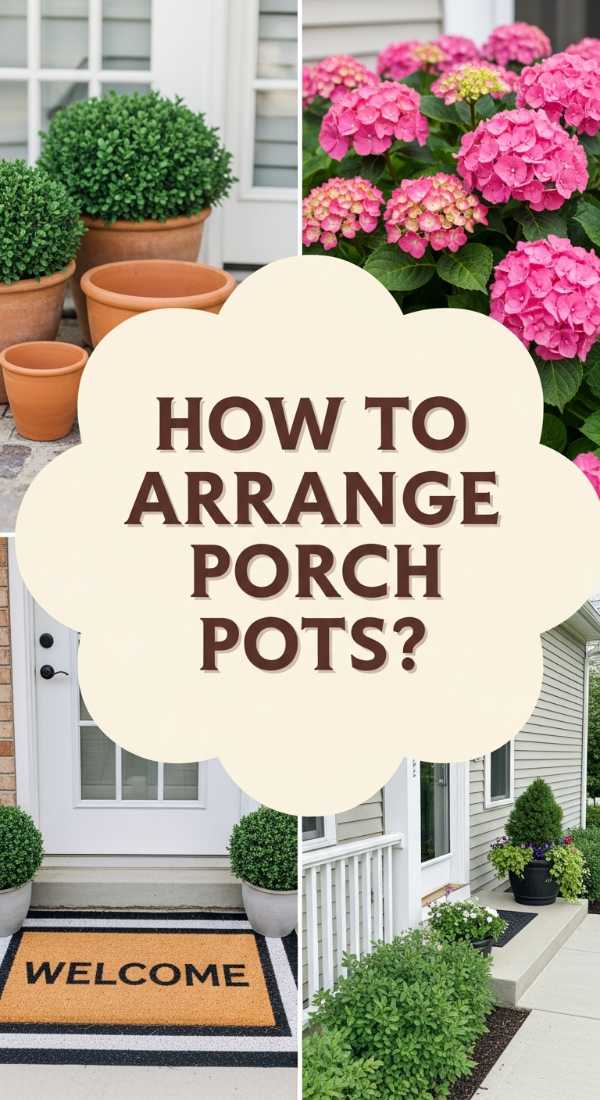
How to Arrange Front Porch Flower Pots for a Welcoming Entrance
Why we love this
Your front porch is the handshake of your home, and nothing says ‘welcome’ quite like a curated collection of vibrant, blooming pots. We love the way the scent of petunias and geraniums drifts through the air, greeting you the moment you step out of your car. The mix of heights, colors, and leaf textures creates a lush, layered look that frames your doorway with life and energy. It’s an instant mood-booster that transforms a simple entryway into a grand, botanical statement that changes beautifully with the passing seasons.
Essential Elements:
- Three varying sizes of weather-resistant pots
- High-quality potting mix with perlite
- ‘Thriller’ plants (Dracaena or Canna Lily)
- ‘Filler’ plants (Petunias or Lantana)
- ‘Spiller’ plants (Sweet Potato Vine or Ivy)
- Slow-release fertilizer
How to make it
- Select three pots of the same material but different heights to create a classic ‘stair-step’ visual hierarchy near your door.
- Ensure all pots have adequate drainage holes; if they don’t, carefully drill them into the bottom to prevent root rot.
- Fill the pots with a fresh potting mix, leaving about two inches of space at the top, and mix in a tablespoon of slow-release fertilizer.
- Plant your ‘Thriller’ (the tallest, most dramatic plant) in the center or back of the largest pot to provide height and a focal point.
- Surround the thriller with ‘Fillers’—mounding plants that add bulk and color—ensuring they are spaced about 4 inches apart to allow for growth.
- Place the ‘Spillers’ along the edges of the pot so they can gracefully drape over the sides, creating a soft, cascading effect that grounds the arrangement.
How to Construct a Water Table for Endless Summer Play

Why we love this
There is a pure, unadulterated joy in the sound of splashing water and giggles on a hot summer afternoon. We love the water table because it’s a sensory playground that keeps little hands busy while teaching them about gravity, flow, and physics through play. The cool touch of the water against the warm sun creates a refreshing oasis in the middle of the yard, and its sturdy wood frame ensures it can withstand years of imaginative adventures. It’s a simple addition that turns an ordinary backyard into a world of discovery and refreshing fun.
Essential Elements:
- Pressure-treated 2×4 lumber
- Large plastic storage bins (shallow)
- Galvanized wood screws
- Water-safe wood sealant
- PVC pipes and funnels for accessories
- Sandpaper (medium and fine grit)
How to make it
- Measure the height of your children to determine the ideal table height, then build a rectangular frame from 2x4s that is slightly smaller than the lip of your plastic bins.
- Attach sturdy legs to the frame using four screws per leg for maximum stability, ensuring the table doesn’t wobble on uneven grass.
- Insert the plastic bins into the frame; they should hang by their rims, making them easy to remove for cleaning or winter storage.
- Sand every inch of the wood frame thoroughly to remove any splinters or sharp edges, paying extra attention to the corners.
- Apply a non-toxic, water-resistant exterior sealer to the wood to prevent warping and rot from the inevitable splashes.
- Mount PVC pipe segments and funnels to the sides of the frame to create ‘water runs’ that allow kids to pour and track the water’s path.
How to Apply a Concrete Stencil for an Elegant Patio Upgrade

Why we love this
The transformation of a plain, grey concrete slab into a Mediterranean-inspired tiled patio is nothing short of magical. We love the intricate, interlocking patterns that add a sense of luxury and ‘old-world’ charm to an outdoor living space without the high cost of real stone. The texture of the paint adds a subtle grip underfoot, and the customized color palette allows you to perfectly match your home’s aesthetic. It’s an elegant, high-impact project that makes your patio feel like a destination, perfect for sunset dinners and morning coffees.
Essential Elements:
- Large-scale patio stencil
- Exterior concrete paint (two contrasting colors)
- Concrete sealer (slip-resistant)
- Long-handled paint roller and small detail brushes
- Painter’s tape and stencil adhesive
- Concrete cleaner and degreaser
How to make it
- Deep clean the concrete using a degreaser and a stiff brush, then rinse thoroughly and let dry for 24 hours to ensure the paint bonds properly.
- Apply two coats of your base color (the ‘grout’ color) across the entire patio and let it cure completely for at least 12 hours.
- Position your stencil in a corner, securing it with painter’s tape and a light mist of stencil adhesive to prevent the paint from bleeding underneath.
- Using a high-density foam roller with very little paint (the ‘dry roller’ technique), lightly roll over the stencil using your secondary color.
- Carefully lift the stencil and move it to the next section, lining up the registration marks precisely to maintain the continuity of the pattern.
- Once the entire patio is dry, apply two coats of clear, slip-resistant concrete sealer to protect your artwork from the elements and foot traffic.
How to Build an Above Ground Pool Bar for Summer Hosting Success

Why we love this
An above-ground pool bar is the ultimate summer flex, turning a standard swimming pool into a high-end resort experience. We love the social aspect it brings—friends leaning against the cool cedar countertop, cold drinks in hand, while the water ripples nearby. The smell of fresh wood and the sight of colorful towels hanging nearby create an atmosphere of permanent vacation. It’s more than just a piece of furniture; it’s a hub for laughter, storytelling, and those long, hazy summer afternoons that you never want to end.
Essential Elements:
- Cedar or redwood planks for the countertop
- Pressure-treated 4×4 posts for legs
- Heavy-duty L-brackets
- Waterproof wood stain
- Outdoor bar stools
- Stainless steel bottle opener (mounted)
How to make it
- Measure the height of your pool wall and subtract 12 inches for the bar stools to determine the height of your bar frame.
- Build a sturdy H-frame using 4×4 posts, sinking them into the ground or bolting them to a heavy base to ensure the bar doesn’t tip.
- Attach your cedar planks to the top of the frame using hidden fasteners or countersunk screws for a smooth, high-end countertop finish.
- Sand the countertop until it is buttery smooth, as people will be resting their arms and drinks on it frequently.
- Apply three coats of a marine-grade waterproof sealer to protect the bar from constant splashes, chlorine, and direct sun exposure.
- Mount a vintage-style bottle opener to the side post and add a small shelf underneath the counter for storing sunscreen and speakers.
Final Thoughts on Your DIY Journey
Embarking on a DIY project is about more than just the end result; it’s about the confidence you build with every screw driven and every brushstroke applied. While some of these projects require a bit more elbow grease than others, the payoff—a home that feels uniquely yours—is always worth the effort. Remember to take your time, enjoy the process, and don’t be afraid to make a few mistakes along the way. Your dream garden is just one weekend away!